

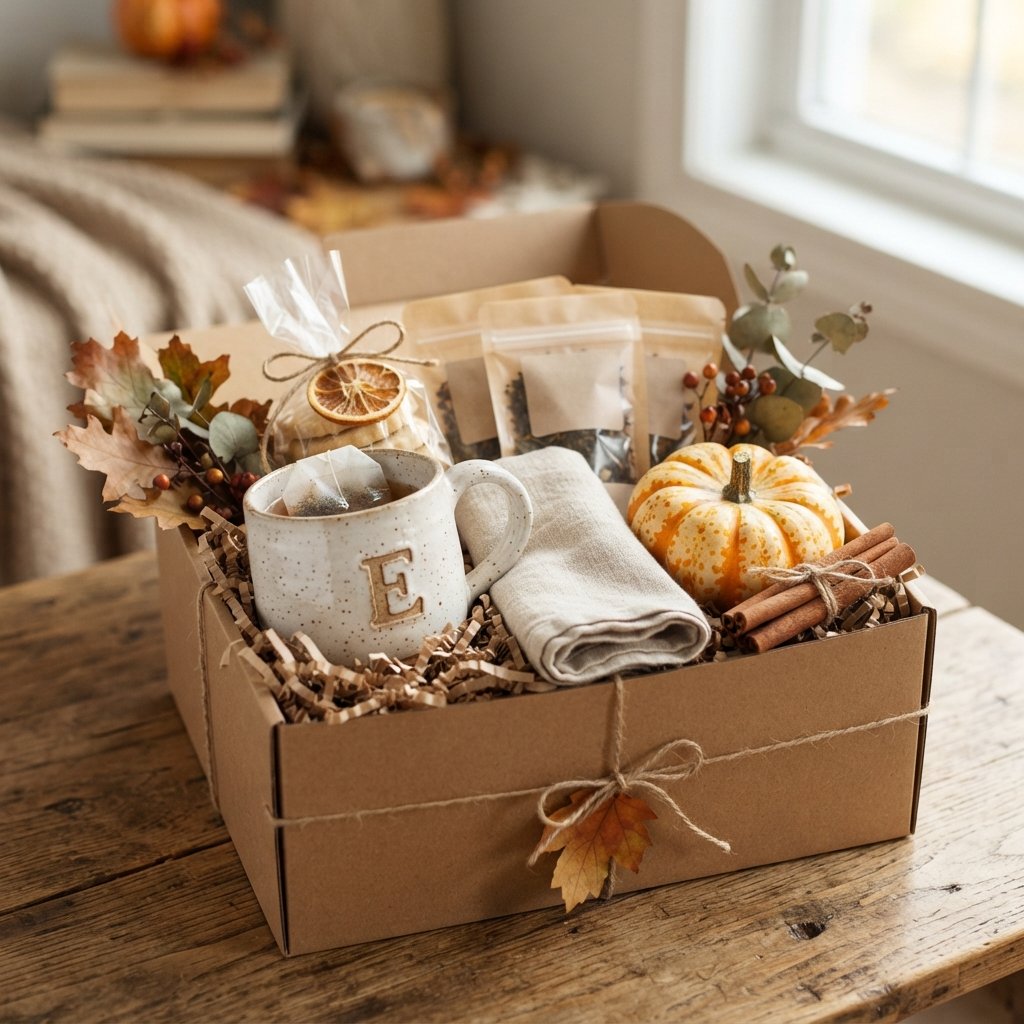
A DIY personalized fall mug is a simple seasonal craft that can be made for your own kitchen, a fall coffee bar, teacher gifts, hostess gifts, or cozy autumn care packages.
The project is especially appealing because it does not require complicated supplies. Start with a plain ceramic mug, choose a personalization idea, and add a design using a mug-safe paint pen, ceramic marker, or other product specifically intended for the surface.
The most important part is choosing materials carefully.
Not every craft marker or paint is suitable for drinkware, and instructions for curing, washing, microwave use, and food-contact areas vary by product. Always follow the directions for the exact marker, paint, or transfer material you use.
For the safest and most practical design, keep decorative paint away from the rim and inside of the mug unless the product is specifically approved for those areas.
Once you have the right supplies, the creative possibilities are nearly endless.
You can add a name, initials, leaves, pumpkins, acorns, a simple fall pattern, or a small seasonal phrase to create a mug that feels personal without being difficult to make.
Why Make a Personalized Fall Mug?
A handmade mug is useful as well as decorative.
You can use it for:
- Morning coffee
- Tea
- Hot chocolate
- Fall coffee bars
- Teacher gifts
- Hostess gifts
- Neighbor gifts
- Thanksgiving place settings
- Autumn gift baskets
Personalization makes even a simple inexpensive mug feel more thoughtful.
And unlike many seasonal crafts, a mug does not need to be covered in elaborate fall decorations to look festive.
A tiny leaf beside someone’s name may be enough.
What Kind of Mug Should You Use?
A smooth ceramic mug is usually the easiest surface to decorate.
Look for one with:
- Smooth exterior
- Simple shape
- Plenty of blank space
- Clean, undamaged glaze
- Comfortable handle
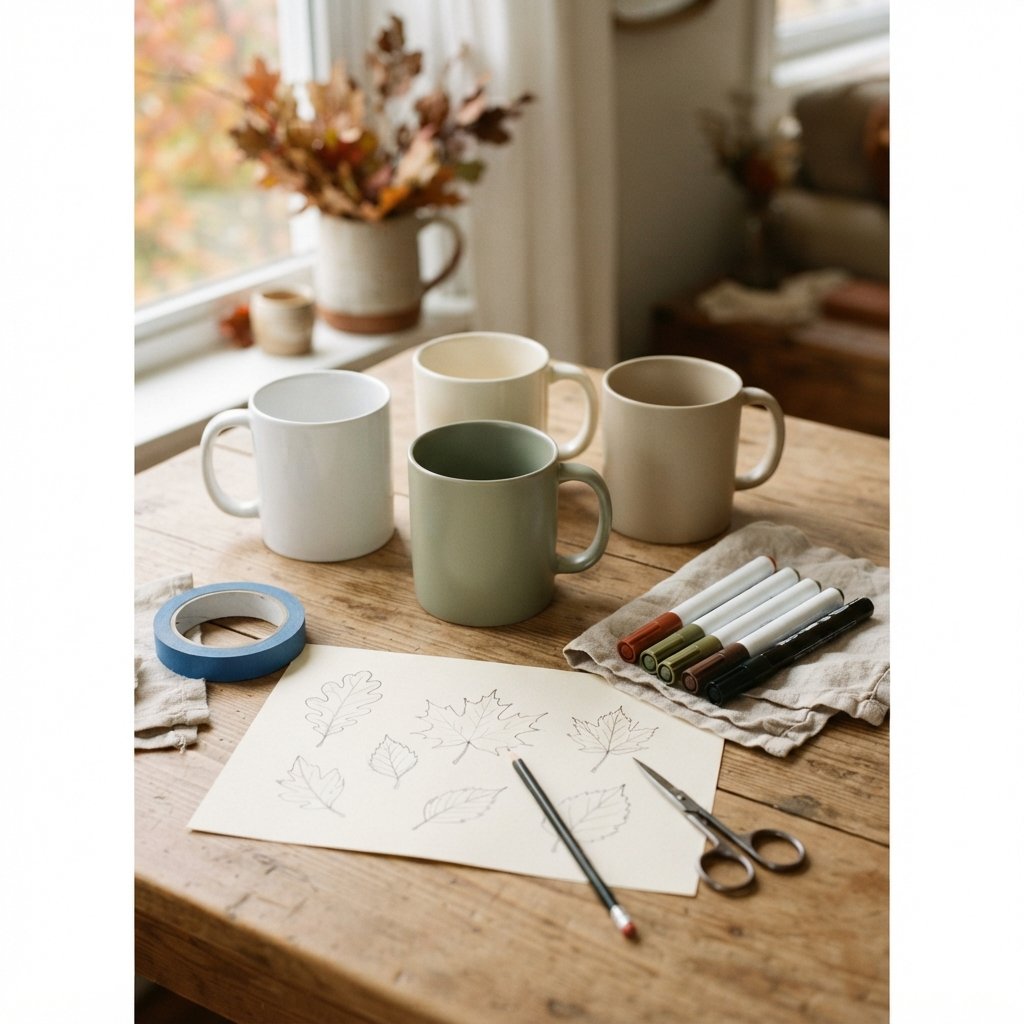
White, cream, tan, sage, rust, or muted green mugs can all work beautifully for fall.
White provides the strongest contrast for colored designs, while warmer neutral mugs create a softer, more modern look.
Check that your chosen decorating product is compatible with the mug’s finish.
Some markers or paints work best on glazed ceramic, while others have different surface requirements.
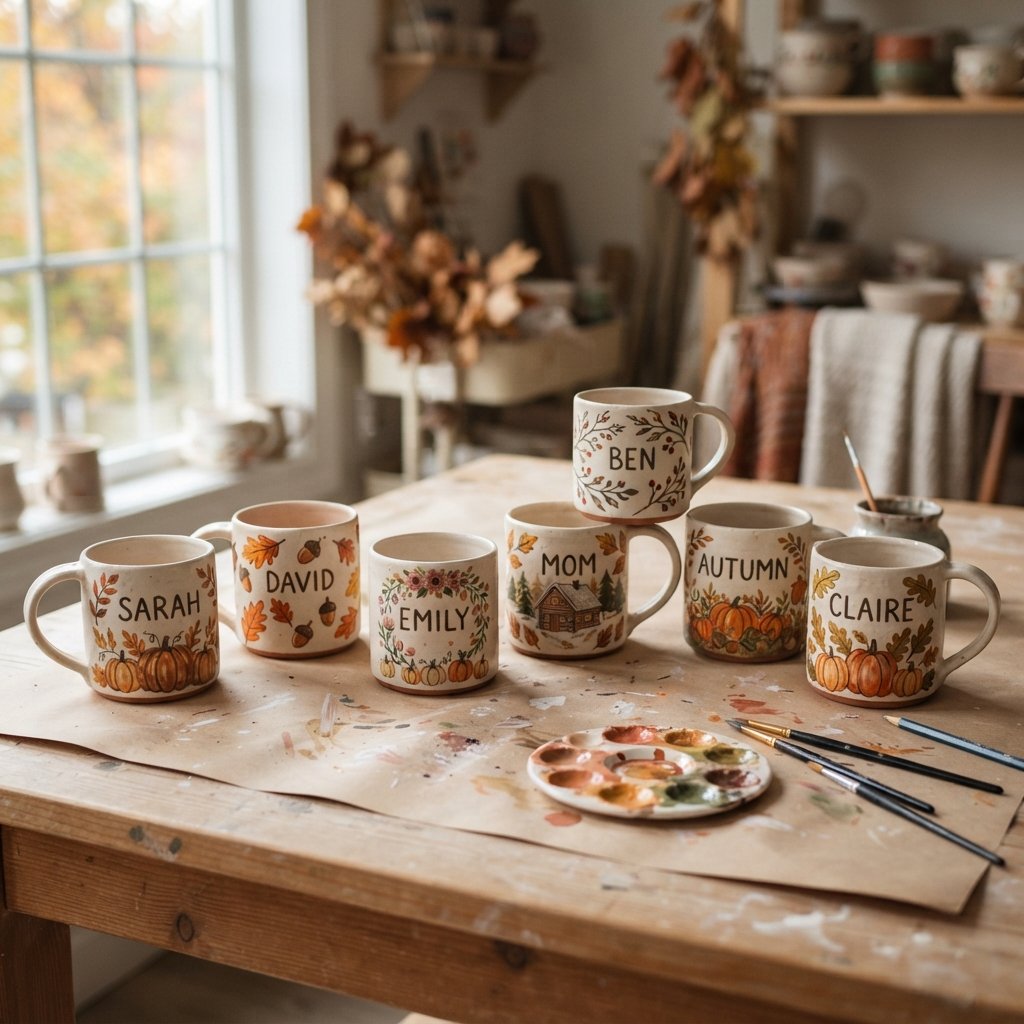
Supplies for a DIY Personalized Fall Mug
You may need:
- Plain ceramic mug
- Ceramic or porcelain paint marker suitable for drinkware
- Rubbing alcohol or cleaning method recommended by product manufacturer
- Lint-free cloth
- Pencil or removable guide method, if compatible
- Painter’s tape, optional
- Paper for practicing designs
- Stencils, optional
- Cotton swabs, optional for corrections before paint sets
- Protective work surface
Choose decorative products specifically intended for ceramic or porcelain.
Do not assume a permanent office marker or ordinary craft paint is suitable for a functional mug.
Step 1: Decide on Your Personalized Design
Keep the first design simple.
Easy personalization ideas include:
- First name
- Initial
- Monogram
- Family name
- Small pumpkin
- Acorn
- Falling leaves
- Simple branch
- Tiny hearts in fall colors
- Minimal plaid-style lines
You can also combine a name with one small seasonal element.
For example:
Emily + tiny leaf
or
M + small pumpkin
Simple designs are easier to control and tend to look more polished.
Fall Color Ideas
A restrained palette works especially well.
Try:
- Rust
- Burnt orange
- Mustard
- Olive
- Forest green
- Warm brown
- Cream
- Black
Two or three colors are usually enough.
Step 2: Practice the Design on Paper
Before drawing on the mug, practice.
Write the name several times until you find a style you like.
Try:
- Simple print
- Casual script
- Uppercase block letters
- Minimal monogram
Then practice the decorative element.
Leaves are especially beginner-friendly because they do not need to be perfectly identical.
The goal is to feel comfortable with the motion before working on the ceramic surface.
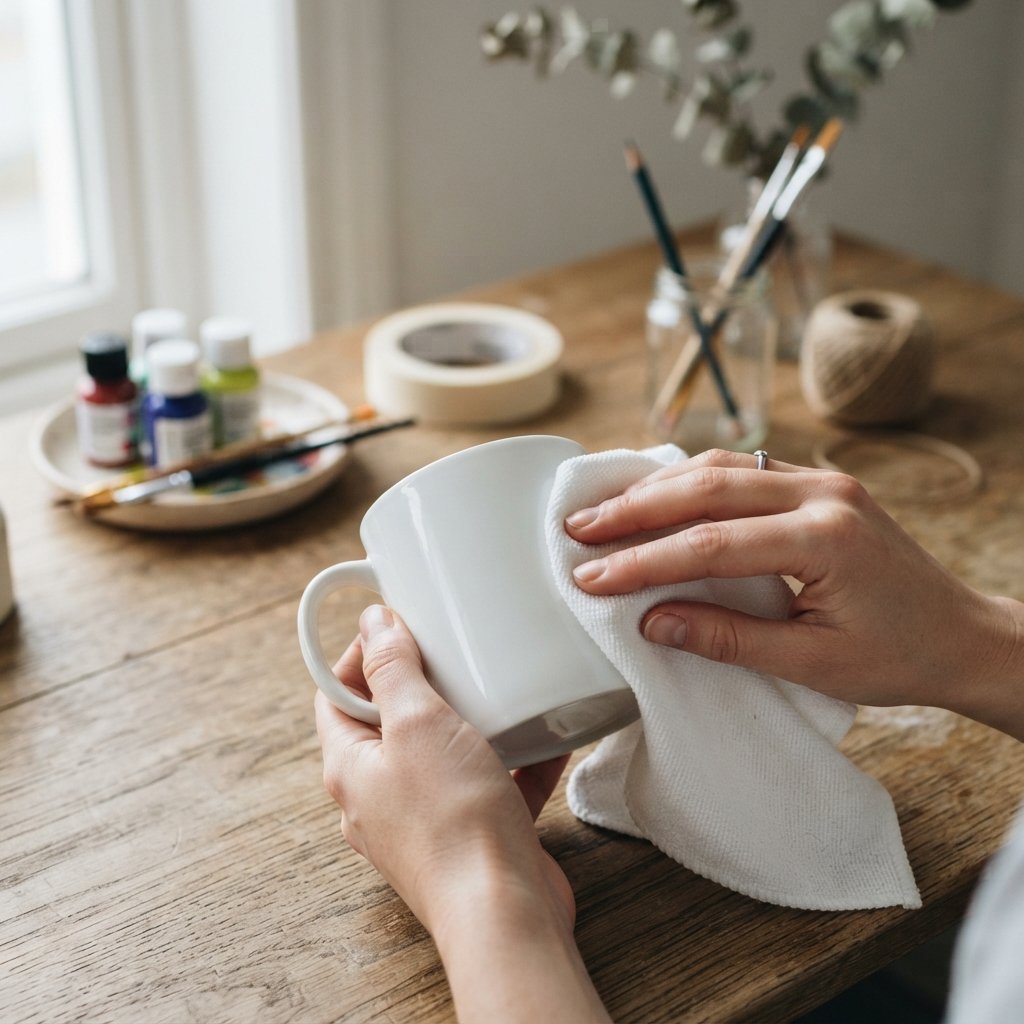
Step 3: Clean the Mug
Wash and dry the mug thoroughly.
Then prepare the exterior according to the decorating product instructions.
Some ceramic markers recommend removing oils and fingerprints with a suitable cleaner such as rubbing alcohol.
If so, use a lint-free cloth and allow the surface to dry completely.
Avoid touching the design area afterward.
Oils from your fingers can interfere with adhesion.
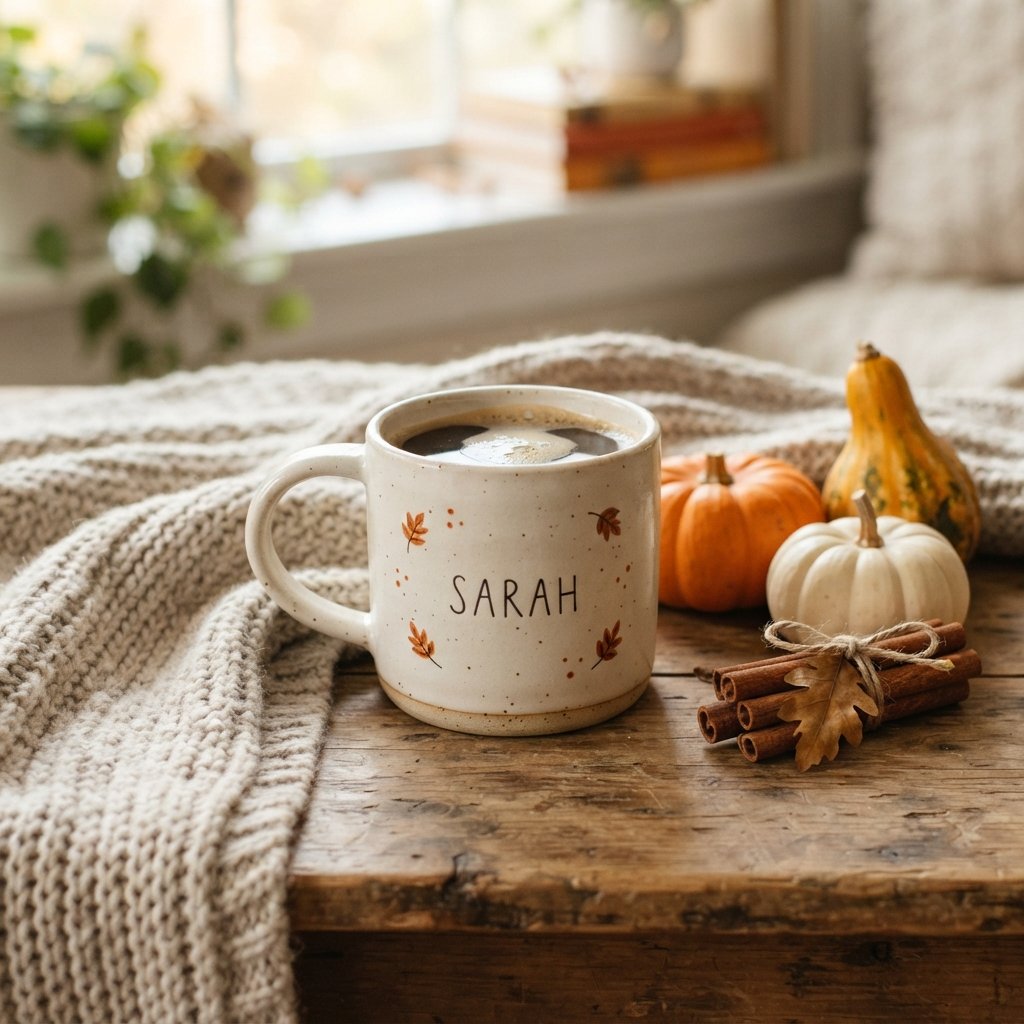
Step 4: Plan the Placement
Before drawing, decide where the personalization should go.
Popular placements include:
- Front center
- Opposite the handle
- Beside the handle
- Small design near the bottom
- Design wrapping partially around the mug
Think about whether the person is right- or left-handed if you want the design visible while they drink.
You can also create a mug that looks good from both sides by placing a small design on each.
Keep decorative material away from the drinking rim unless the product specifically states that it is safe for that location.
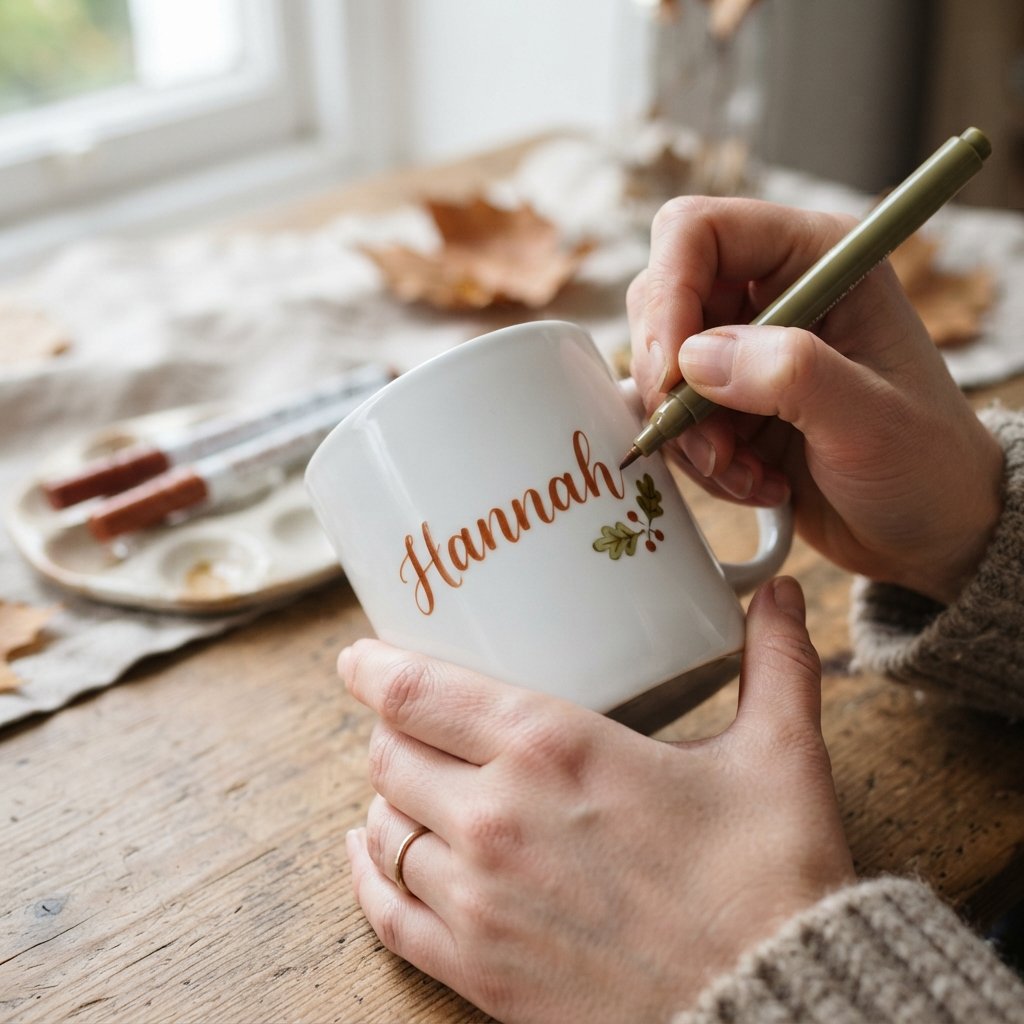
Step 5: Add the Name or Initial
Shake or prepare the marker according to its directions.
Test it on scrap material if recommended.
Then write slowly.
Do not rush.
If using script, it may be easier to draw each letter deliberately rather than writing at normal handwriting speed.
For block letters, lightly plan the spacing first.
Leave room for any fall details you plan to add afterward.
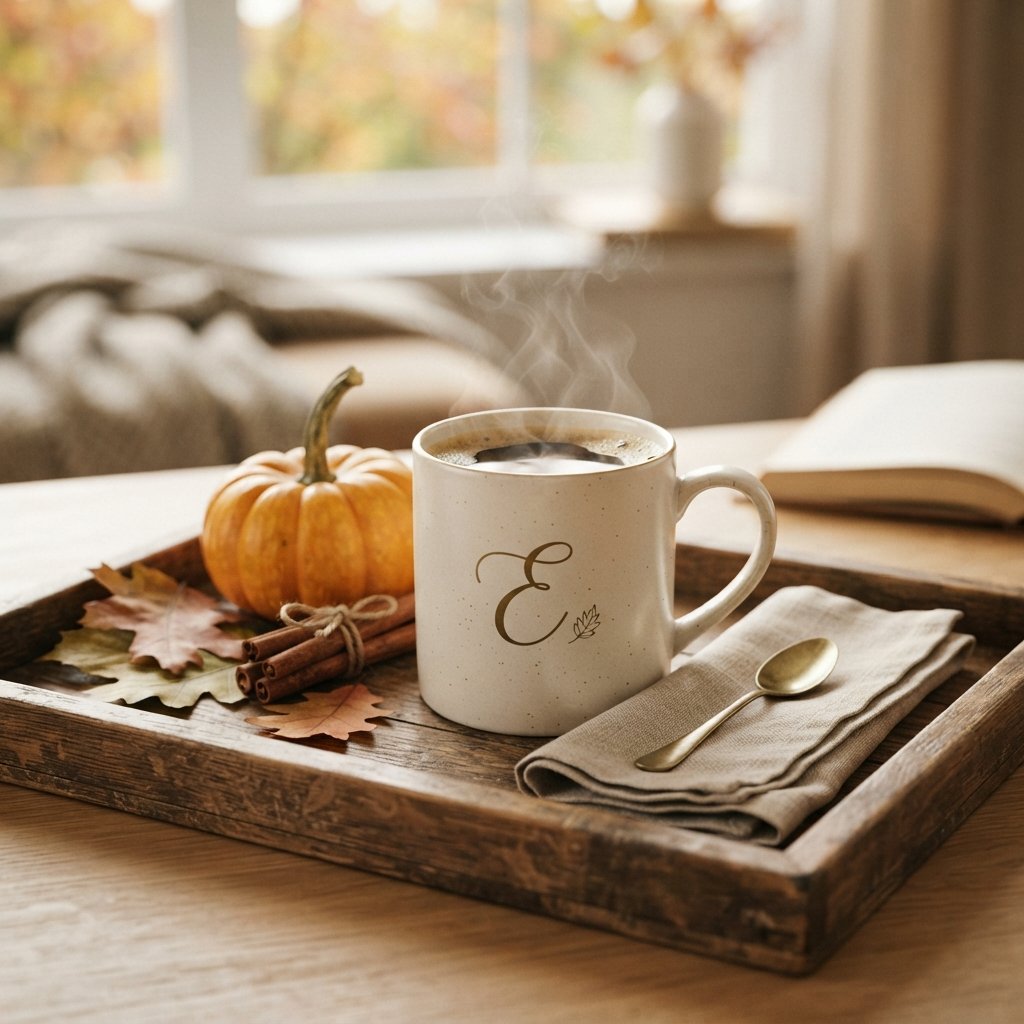
Step 6: Add Simple Fall Details
Once the personalization is in place, add small seasonal elements.
Try one of these easy ideas.
Tiny Leaves
Draw small leaf shapes around the name.
Use two or three fall colors for variation.
Mini Pumpkin
Create a simple rounded pumpkin using curved lines.
Add a tiny stem.
Acorn
Draw a small oval with a cap.
Keep it minimal rather than highly detailed.
Branch
Use a thin curved line with a few leaves.
Falling Leaf Pattern
Scatter several small leaves across one side of the mug.
Do not feel like you need to fill every empty area.
A little negative space makes the design look cleaner.
Step 7: Correct Mistakes Before the Design Sets
If the product allows correction while wet, fix mistakes before the paint or ink sets.
A cotton swab or suitable cleaner may help depending on the product.
Follow the manufacturer’s cleanup instructions.
Do not aggressively scrape the glazed surface.
If a small imperfection remains, consider incorporating it into the design rather than starting over.
A tiny dot can become a berry.
A thick line can become a leaf.
Handmade projects do not need to look machine-printed.
Step 8: Let the Design Dry
Once the mug is finished, place it somewhere safe.
Avoid touching the design.
Follow the product instructions for drying time.
Do not guess.
Some ceramic paints require air drying before another curing step, while others use a different process.
This is one of the most important stages for durability.
Step 9: Cure the Mug According to Product Instructions
Different ceramic paints and markers use different curing methods.
Some may require:
- Air curing
- Heat curing
- Oven curing
- Another manufacturer-specified method
Follow the exact instructions provided with your product.
Do not use a generic oven temperature or baking time from another craft tutorial unless it matches the manufacturer directions for your specific paint or marker.
Also confirm whether the mug itself is suitable for any heat-curing method required.
Allow the project to cool and fully cure before use.
Step 10: Check Washing and Use Instructions
Before giving the mug as a gift, find out how it should be cared for.
Depending on the product, the finished mug may be:
- Hand-wash only
- Dishwasher compatible
- Not microwave safe
- Microwave compatible under certain conditions
Do not assume.
If gifting the mug, include a small care note based on the actual product instructions.
That can help the design last longer.
Personalized Fall Mug With a Name
A simple name is one of the easiest designs.
Write the person’s first name across the front.
Then add:
- Tiny orange leaf
- Olive branch
- Small pumpkin
- Brown acorn
This works well for:
- Teachers
- Coworkers
- Friends
- Family members
- Neighbors
Keep the lettering large enough to read but not so large that it wraps awkwardly around the mug.
Fall Monogram Mug
If writing a full name feels intimidating, use one initial.
A large monogram can look surprisingly polished.
Try:
Large black initial + tiny rust leaves
or
Olive initial + small brown branch
You can also create matching mugs for a family using one initial on each.
Minimalist Fall Mug Idea
For a more modern style, keep the design very small.
Use a warm cream or white mug.
Add:
- Small black name
- One rust leaf
- Tiny olive branch
That is all.
This works especially well if your home decor leans neutral, modern farmhouse, Scandinavian, or organic modern.
Cute Pumpkin Mug
A pumpkin is one of the easiest fall motifs.
Draw a small pumpkin beneath the person’s name.
For a more subtle look, use:
- Terracotta
- Muted orange
- Brown
- Olive green
Avoid making the pumpkin too large unless you want it to become the main feature.
Personalized Leaf Mug
Instead of drawing one large fall image, create a scattered leaf pattern.
Write the name first.
Then add leaves in:
- Rust
- Mustard
- Olive
- Brown
Vary the direction slightly.
This creates movement without requiring complicated drawing skills.
DIY Fall Mug for Teachers
A personalized mug can make a practical teacher gift.
Keep the design simple and pair it with something small.
Ideas include:
- Individually packaged tea
- Coffee packet
- Hot chocolate packet
- Wrapped cookie
- Small gift card
If including food, keep allergen considerations in mind and use commercially packaged items when that makes labeling easier.
Avoid filling the mug with too many tiny novelty items.
A useful gift often feels more thoughtful than a heavily themed one.
Fall Mug Gift Basket Idea
A personalized mug can become the centerpiece of a small autumn gift basket.
Add:
- Coffee or tea
- Cocoa
- Wrapped treats
- Cozy socks
- Small napkin
- Mini pumpkin decoration
- Simple fall card
Use a small basket or gift box rather than an oversized container.
Keep the colors coordinated.
For example:
Cream + rust + olive + natural brown
This creates a warm seasonal look without needing lots of decorations.
Personalized Fall Mug for a Coffee Bar
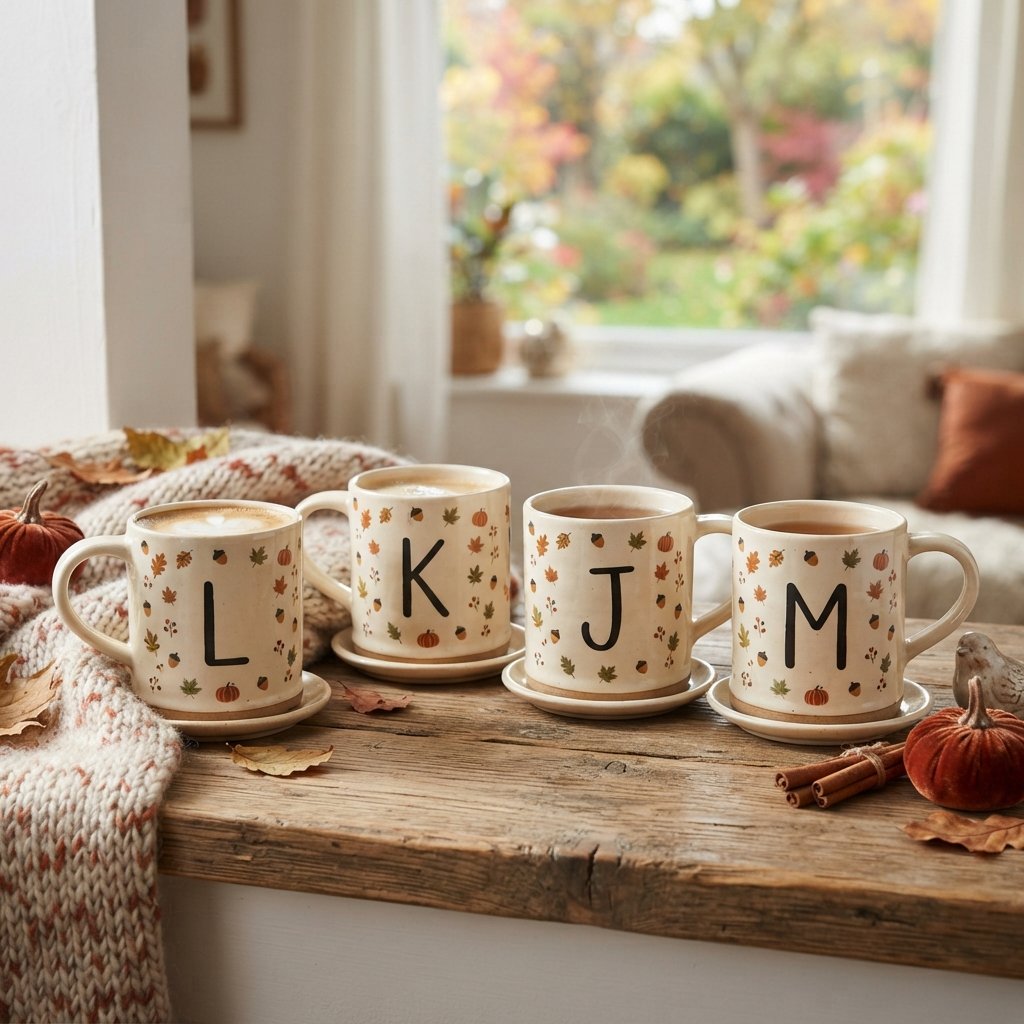
You can also make mugs for your own fall coffee station.
Try creating a coordinated set.
For example:
- One mug with a leaf
- One with an acorn
- One with a pumpkin
- One with a simple branch
Use the same color palette on each mug.
Display them near:
- Coffee maker
- Syrups
- Tea
- Cocoa
- Napkins
Keep the station functional rather than filling it with too many decorative objects.
Thanksgiving Personalized Mugs
Personalized mugs can also work for Thanksgiving.
Create one for each family member or guest.
You could use:
- First names
- Initials
- Tiny leaves
- Small branch designs
Place each mug at a breakfast table or beverage station.
Afterward, guests can take them home.
This turns the mug into both a place marker and a small gift.
How to Make a DIY Personalized Mug Look More Expensive
Small details make a big difference.
Keep the Design Simple
More decoration does not automatically look better.
Limit the Color Palette
Use two or three coordinated fall colors.
Center the Main Design Carefully
Uneven placement is more noticeable than imperfect handwriting.
Choose a Good Mug Shape
A simple, substantial mug creates a nicer base.
Use Thin, Controlled Lines
Thick uneven paint can make the design feel messy.
Leave Plenty of Blank Space
Negative space gives the design room to breathe.
Add Thoughtful Packaging
For gifts, use tissue paper, a kraft box, or simple ribbon.
Budget Tips for DIY Fall Mugs
This project can be inexpensive if you keep the supply list short.
Try:
- Plain mugs you already own
- Simple ceramic mugs from budget retailers
- One or two paint marker colors
- Shared supplies for several mugs
- Repurposed gift boxes
If making multiple mugs, use the same color palette and design style.
That lets you create a coordinated batch without buying lots of different craft supplies.
Common DIY Personalized Mug Mistakes
Using the Wrong Marker
Ordinary markers may not be suitable for functional drinkware.
Decorating the Drinking Rim
Keep decorative materials away from food-contact areas unless specifically approved.
Skipping Surface Preparation
Oil and residue can interfere with adhesion.
Making the Design Too Complicated
Simple is usually easier and more polished.
Not Practicing First
A few paper practice runs can make a big difference.
Guessing the Curing Method
Follow your specific product instructions.
Washing the Mug Too Soon
The design may need full curing before use.
Assuming It Is Dishwasher Safe
Check the actual product directions.
DIY Mug Safety and Practical Tips
Keep these considerations in mind:
- Use products specifically intended for ceramic or porcelain where applicable.
- Follow all manufacturer instructions for curing and use.
- Keep decorative paint away from the rim and inside of the mug unless specifically approved for food-contact areas.
- Confirm whether the finished mug is dishwasher and microwave compatible.
- Do not use a mug that is cracked or damaged.
- If heat curing is required, make sure both the mug and decorating product are suitable for that process.
- Supervise children when using paint markers, cleaners, or heat-curing methods.
- Work in a well-ventilated area if required by the product.
- Keep paints and markers away from food during crafting.
- Allow the design to cure completely before drinking from the mug.
FAQ About DIY Personalized Fall Mugs
What can I use to personalize a ceramic mug?
Use a ceramic or porcelain paint marker, paint, or decorating product specifically designed for the surface and intended use.
Can I use a permanent marker on a mug?
An ordinary permanent marker may not provide the durability or suitability needed for functional drinkware. Use a product designed for ceramic mugs instead.
Do I have to bake a personalized mug?
Not necessarily. Curing methods vary by product. Some require heat curing and others do not. Follow the instructions for your specific marker or paint.
Can personalized mugs go in the dishwasher?
It depends on the decorating product and curing method. Check the manufacturer’s care instructions before putting the mug in a dishwasher.
Can I decorate inside the mug?
For a functional drinking mug, it is safest to keep decorative materials away from the inside unless the product specifically states that it is approved for that use.
What is the easiest fall design for beginners?
A name paired with one or two simple leaves is easy to create and still looks seasonal.
What colors work best for a fall mug?
Rust, burnt orange, olive, mustard, brown, black, cream, and muted green all work well.
Final Thoughts
A DIY personalized fall mug is an easy way to create seasonal decor that is also useful.
Start with a plain ceramic mug and choose a simple design.
Add a name, initial, or small fall motif such as leaves, pumpkins, branches, or acorns using a decorating product designed for the mug’s surface.
The most important step is following the instructions for the exact product you use.
Pay attention to surface preparation, drying, curing, washing, microwave compatibility, and food-contact limitations rather than relying on a generic craft method.
Once finished, use your personalized mug at home, add it to a fall coffee bar, or turn it into a thoughtful seasonal gift.
With a simple design, warm autumn colors, and careful finishing, an inexpensive mug can become a cozy handmade piece that feels personal without being complicated.

