

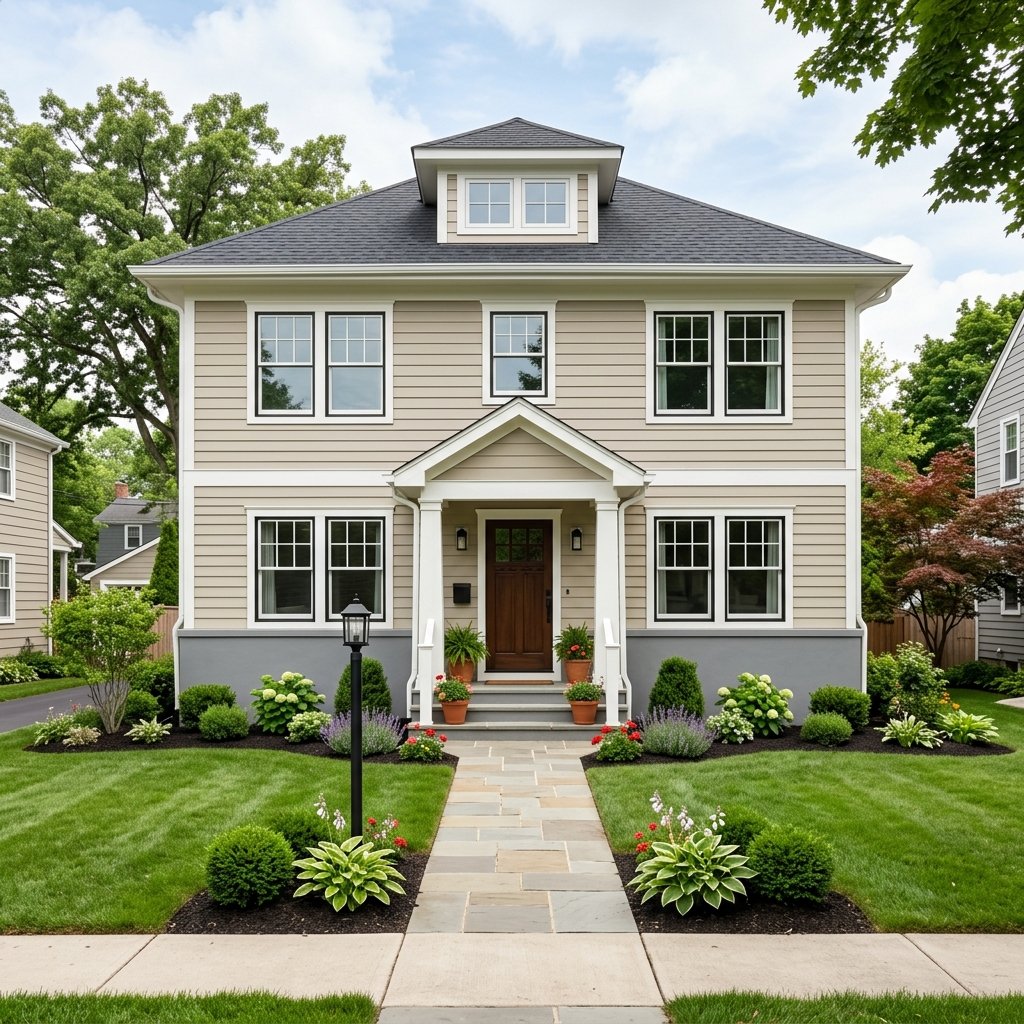
Painting a house foundation can make a surprisingly big difference in curb appeal.
A visible concrete or masonry foundation often stands out beneath siding or brick, especially if it is stained, patchy, discolored, or simply a different tone from the rest of the exterior. A fresh coat of the right masonry-compatible coating can help the foundation look cleaner and more intentional.
But foundation painting is not quite the same as painting an interior wall.
Concrete, block, stucco, and other masonry surfaces can hold moisture, develop efflorescence, crack, or have existing coatings that affect adhesion. Good preparation is the most important part of the project.
Before painting, make sure the foundation is sound, dry enough for the selected coating, and free from active water problems. Painting should improve the appearance of the foundation—not hide structural issues or ongoing moisture intrusion.
This guide explains how to paint a house foundation, from cleaning and repairs to choosing a color, applying the coating, and avoiding common mistakes.
1. Inspect the Foundation Before Painting
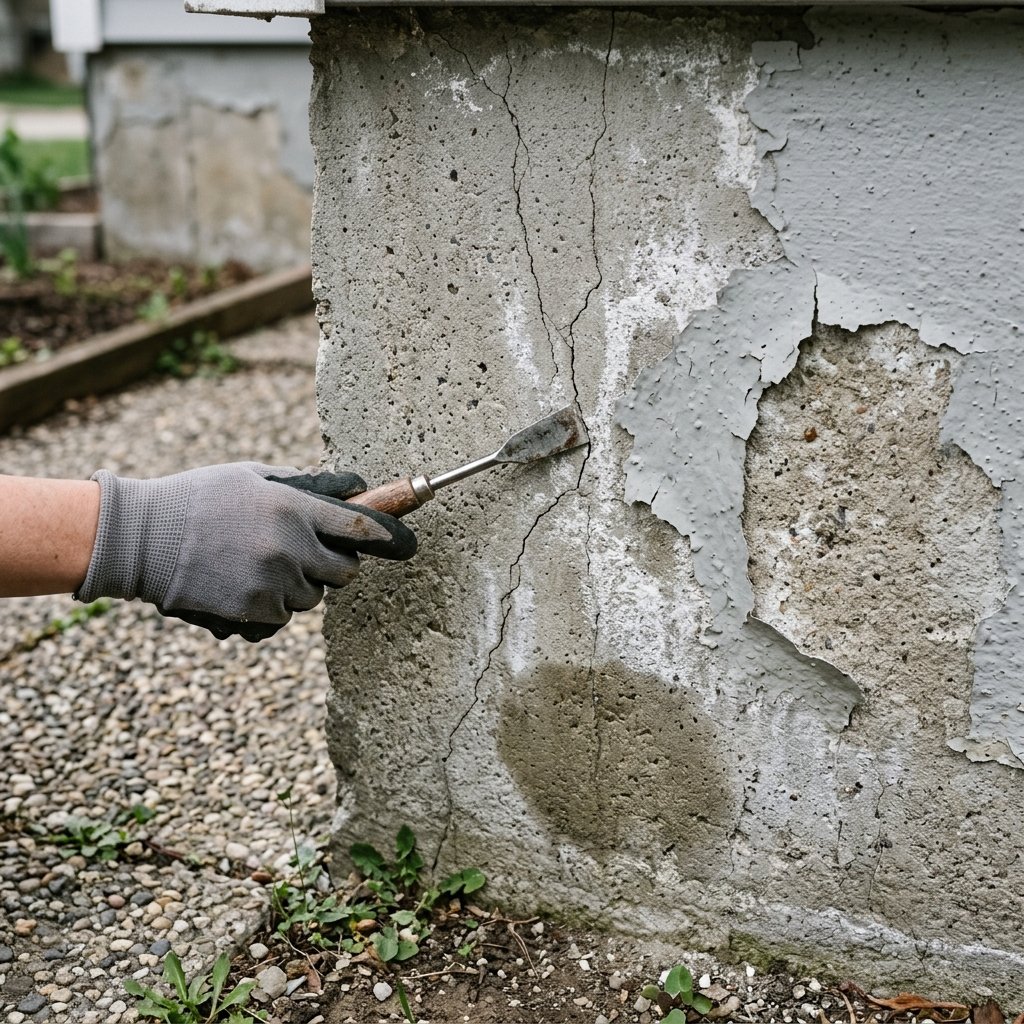
Start by walking around the entire house.
Look for:
- Cracks
- Crumbling masonry
- Peeling existing paint
- Damp areas
- White powdery deposits
- Mold or mildew
- Soil touching siding
- Water pooling near the foundation
Small cosmetic imperfections may simply need cleaning and repair.
However, large, widening, displaced, or repeatedly wet cracks can indicate a larger issue.
Painting should not be used to conceal a foundation problem.
If you see significant movement, persistent water intrusion, bowed walls, or other signs of structural trouble, consider having the condition evaluated before continuing.
2. Identify the Foundation Surface
The preparation and coating you need depend on the material.
Common exposed foundation surfaces include:
- Poured concrete
- Concrete block
- Stucco
- Cement render
- Previously painted masonry
Some homes may also have specialized waterproofing systems or coatings near grade.
Do not assume ordinary exterior wall paint is appropriate for every masonry surface.
Check the coating manufacturer’s instructions for compatibility with your specific substrate.
3. Check for Moisture Problems
Moisture is one of the biggest reasons foundation paint fails.
Before painting, investigate any area that repeatedly looks damp.
Possible contributors include:
- Poor drainage
- Clogged gutters
- Downspouts discharging near the house
- Irrigation spraying the wall
- Soil sloping toward the foundation
- Plumbing leaks
- Groundwater issues
A coating cannot reliably solve an underlying drainage problem.
Correct the water source first whenever possible.
4. Look for Efflorescence
That chalky white material sometimes found on masonry is often efflorescence.
It forms when moisture moves through masonry and leaves mineral salts behind as the water evaporates.
Painting directly over loose deposits can lead to poor adhesion.
Remove the deposits using a method appropriate for the masonry and investigate why excess moisture is reaching the area.
If efflorescence keeps returning, deal with the moisture problem before coating the surface.
5. Protect the Surrounding Area
Before cleaning or painting, protect nearby surfaces.
Cover or move:
- Plants
- Decorative stone
- Outdoor furniture
- Hose reels
- Air-conditioning equipment where appropriate
- Light fixtures
- Walkways
Use drop cloths or suitable exterior masking materials.
Do not completely wrap plants in plastic for long periods, especially in hot weather.
Also avoid blocking equipment ventilation or access.
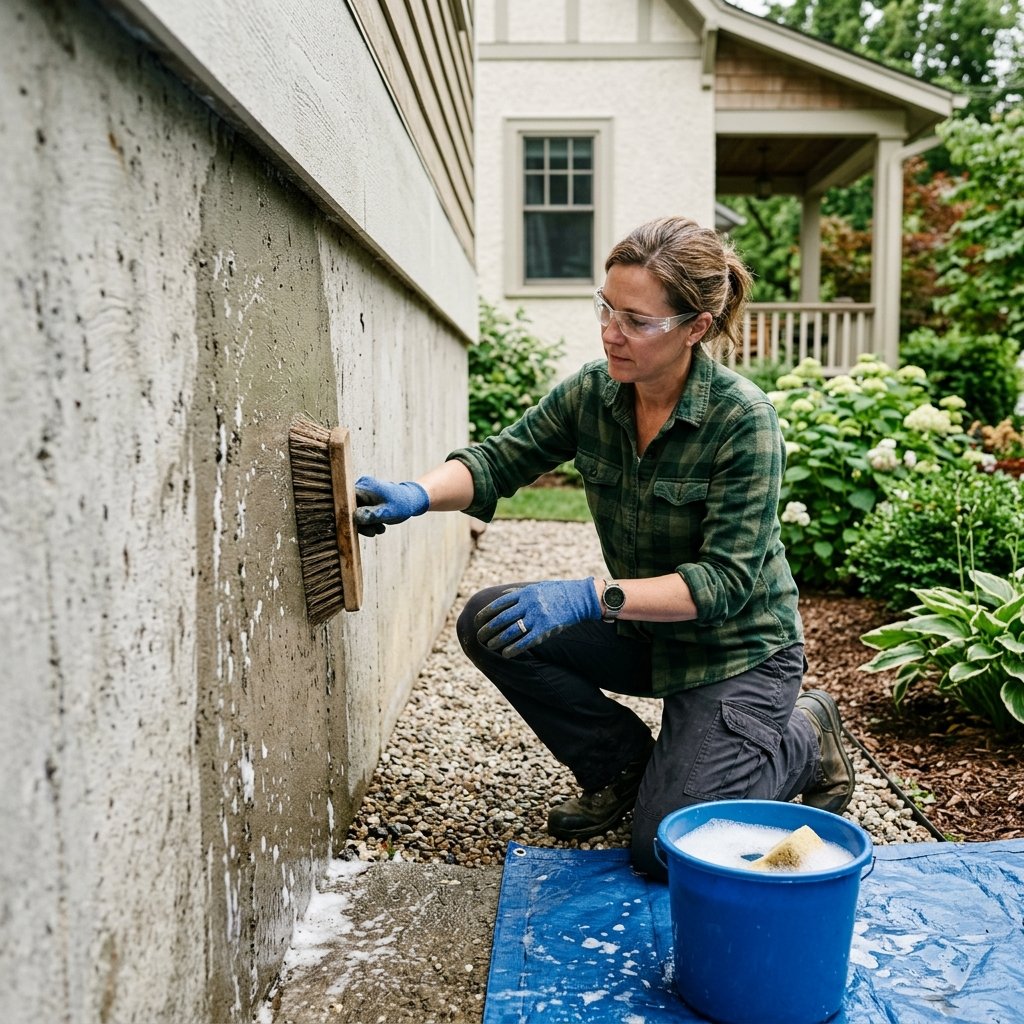
6. Clean the Foundation Thoroughly
Paint adheres best to a clean, stable surface.
Remove:
- Dirt
- Dust
- Mud
- Cobwebs
- Loose paint
- Organic growth
- Chalky residue
A stiff masonry brush and appropriate cleaner may be enough for lightly dirty foundations.
For heavier buildup, another cleaning method may be required.
If you use a pressure washer, use care. Excessive pressure can damage weak mortar, stucco, or deteriorated concrete and can force water into unwanted areas.
Allow the surface to dry according to the requirements of the repair and coating products you plan to use.
7. Remove Loose or Peeling Paint
If the foundation has been painted before, remove any coating that is no longer firmly attached.
Use tools appropriate for the surface, such as:
- Stiff scraper
- Wire brush where suitable
- Masonry brush
Feather rough edges when practical so the repaired area will not show as clearly after repainting.
If the home is older and existing coatings may contain hazardous materials, do not aggressively sand, scrape, or disturb them without understanding the risks and following applicable safety requirements.
Professional testing or remediation may be appropriate.
8. Repair Cracks and Surface Damage
Minor cracks and small defects can often be repaired before painting.
Use a repair material specifically suitable for the foundation surface and intended exposure.
Do not automatically fill every crack with ordinary household caulk.
Concrete, masonry, block, and stucco may require different repair products.
Follow the repair manufacturer’s directions for:
- Surface preparation
- Crack width or depth
- Application
- Drying or curing
- Paint compatibility
If cracks show signs of movement or structural significance, get appropriate professional advice instead of simply covering them.
9. Let Repairs Cure Properly
Do not rush from patching directly into painting.
Cementitious repair materials may need time to harden or cure before being coated.
The required time varies by product, weather, thickness, and surface.
Follow the repair product instructions rather than relying on a universal waiting period.
Painting too soon can trap moisture or interfere with adhesion.
10. Choose a Masonry-Compatible Coating
A foundation needs a coating intended for the surface and exposure conditions.
Look for products specifically described by their manufacturer as suitable for exterior concrete, masonry, stucco, or the material you are painting.
Depending on the situation, a system may involve:
- Masonry primer
- Exterior masonry coating
- Concrete coating
- Breathable masonry paint
The correct choice depends on the substrate, previous coating, moisture conditions, and manufacturer instructions.
Avoid assuming that leftover interior paint or ordinary wall paint will perform properly on a foundation.
11. Decide Whether You Need Primer
Primer is not always optional and not always necessary.
It depends on:
- Whether the masonry is bare
- How porous the surface is
- Whether repairs are present
- Whether stains remain
- What coating is already on the wall
- The finish product you selected
Some masonry coatings specify a particular primer.
Others may be designed for direct application to properly prepared masonry.
Follow the coating system instructions.
Mixing unrelated primers and topcoats can create compatibility problems.
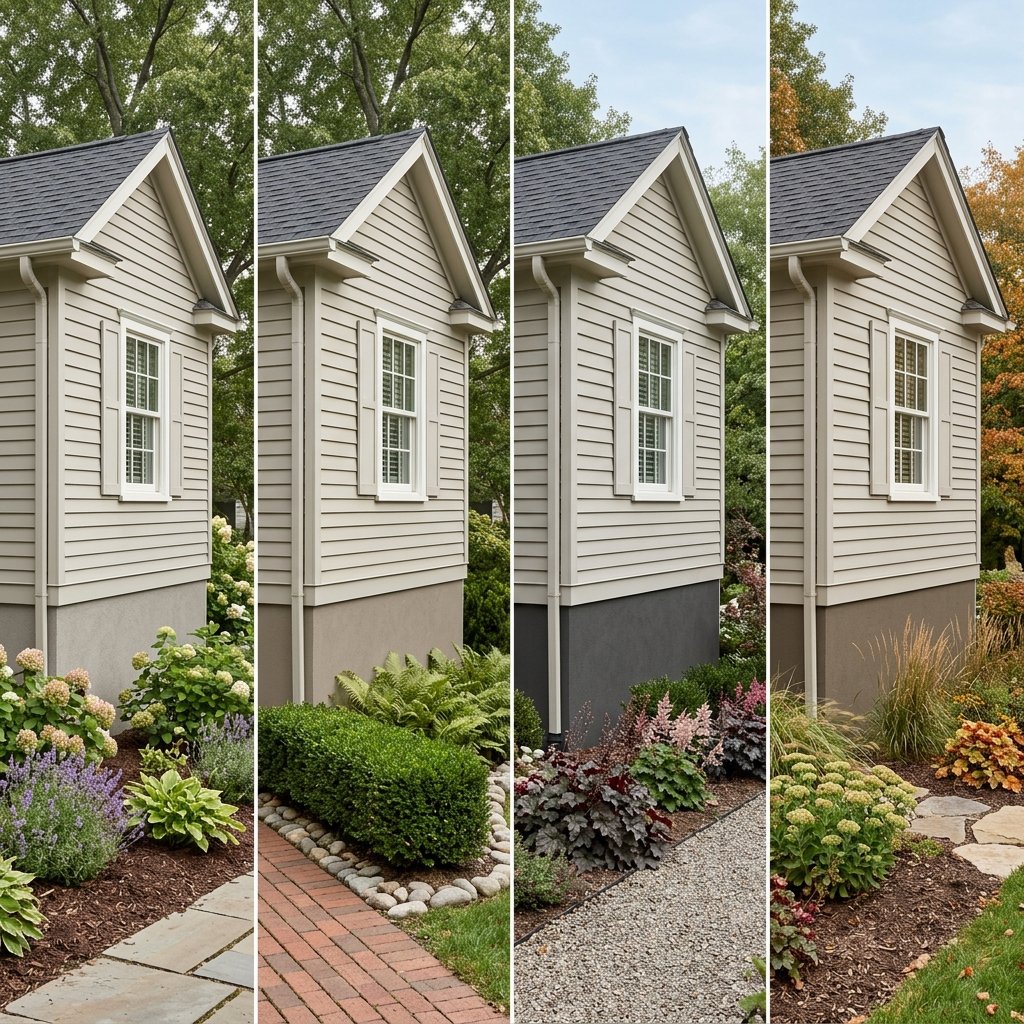
12. Choose the Right Foundation Color
Foundation color has a bigger visual impact than many homeowners expect.
The goal is usually to make the foundation relate to the house rather than stand out.
Good options often include:
- Warm gray
- Charcoal
- Taupe
- Greige
- Soft brown
- Muted stone
- Dark beige
A medium or darker neutral can help disguise dirt and splash marks near ground level.
13. Match the Color to the Exterior
Look at your home as a whole.
Consider:
- Siding color
- Brick
- Stone
- Roof
- Trim
- Front door
- Hardscaping
The foundation does not necessarily need to match the siding exactly.
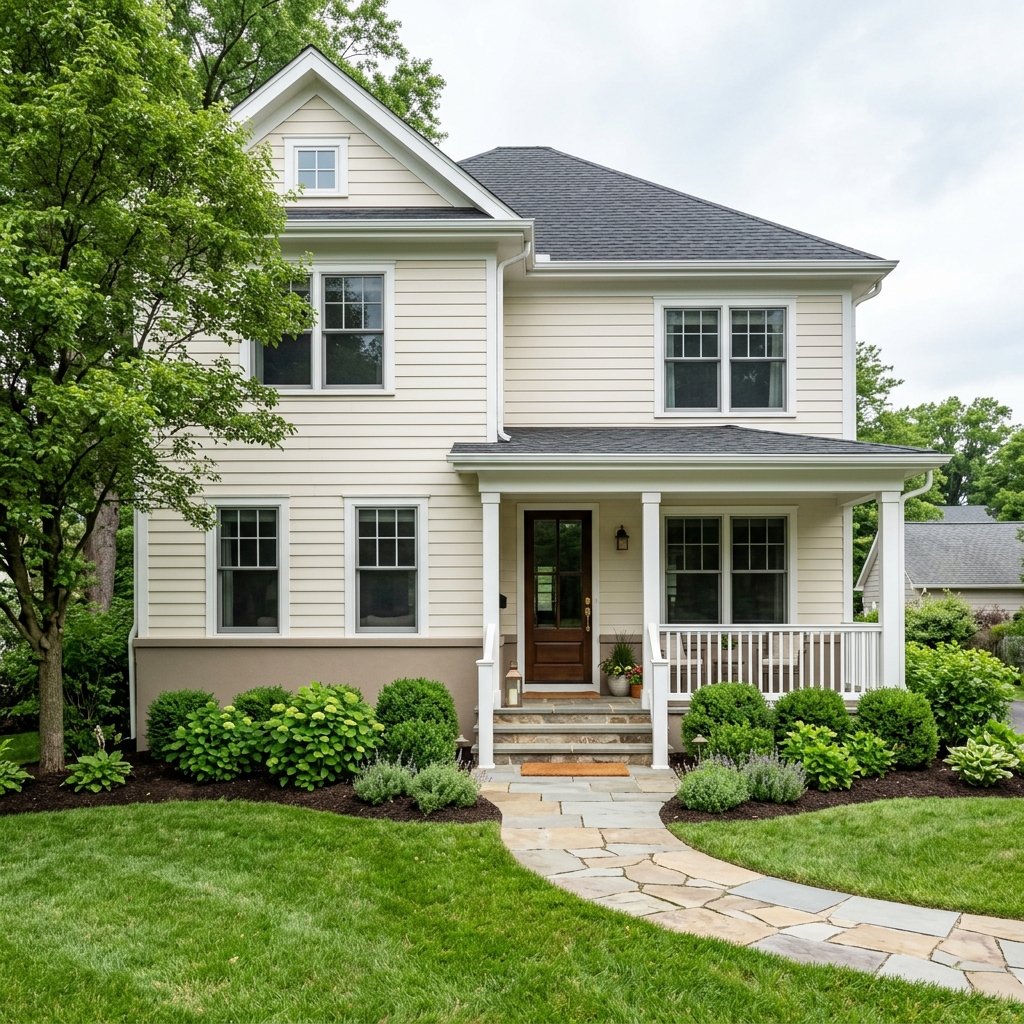
Often, a slightly darker related color provides a more grounded look.
For example:
Cream siding + warm greige foundation
Light gray siding + charcoal foundation
Tan brick + medium taupe foundation
White siding + muted stone-gray foundation
Test a sample first because outdoor light can make colors look very different from a small swatch.
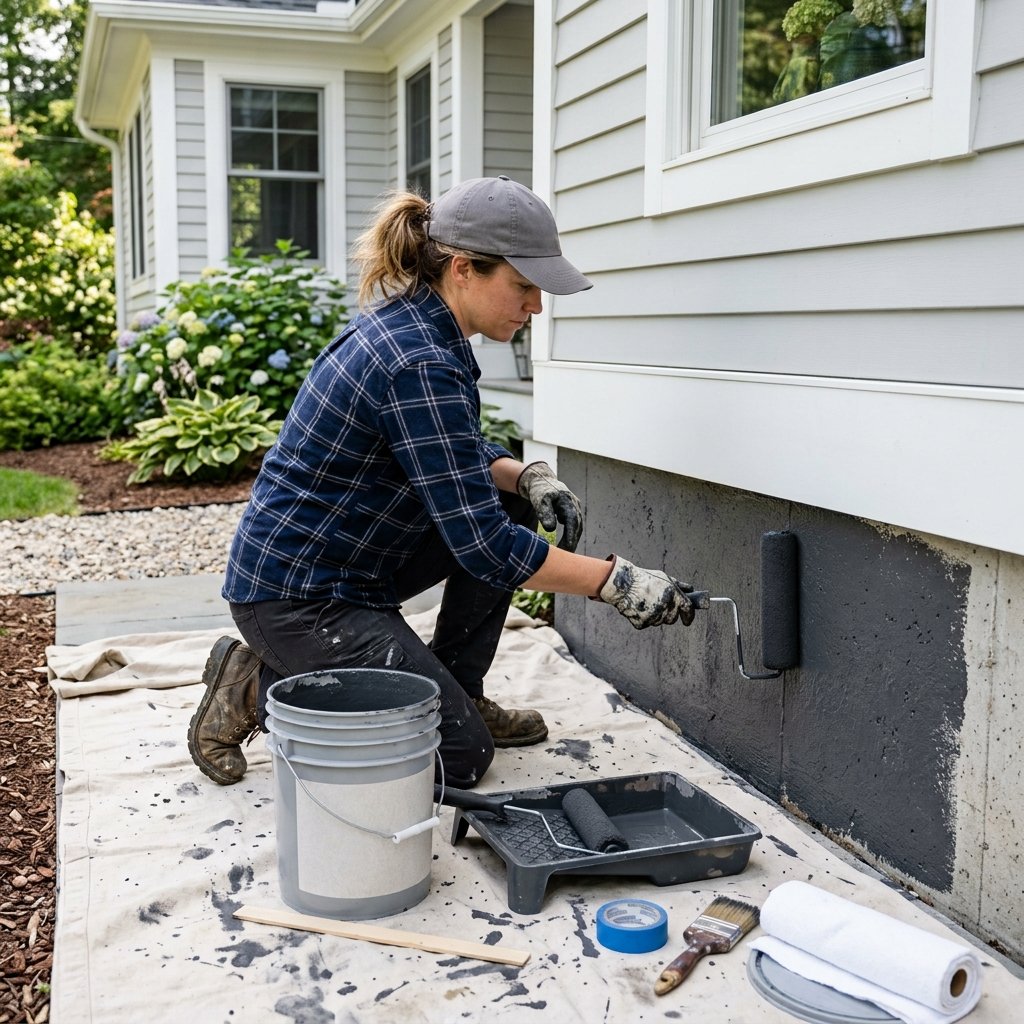
14. Prime the Foundation if Required
If your coating system requires primer, apply it only after the surface is properly prepared and dry enough for the product.
Use a brush to work primer into:
- Corners
- Textured areas
- Mortar joints
- Around pipes or penetrations
Then use an appropriate roller for larger surfaces.
Masonry is often textured and porous, so you may need a roller cover suited to rough surfaces.
Follow manufacturer guidance regarding:
- Temperature
- Weather
- Drying time
- Recoat time
15. Cut In Around Edges
Before rolling the main surface, use a brush around areas that need more control.
Cut in around:
- Siding
- Trim
- Pipes
- Vents
- Utility penetrations
- Corners
- Steps
Take your time along the upper edge where the foundation meets the exterior finish.
A neat line can make the entire project look more professional.
Do not paint over vents, drainage openings, labels, utility components, or other items that need to remain unobstructed.
16. Roll the Main Foundation Surface
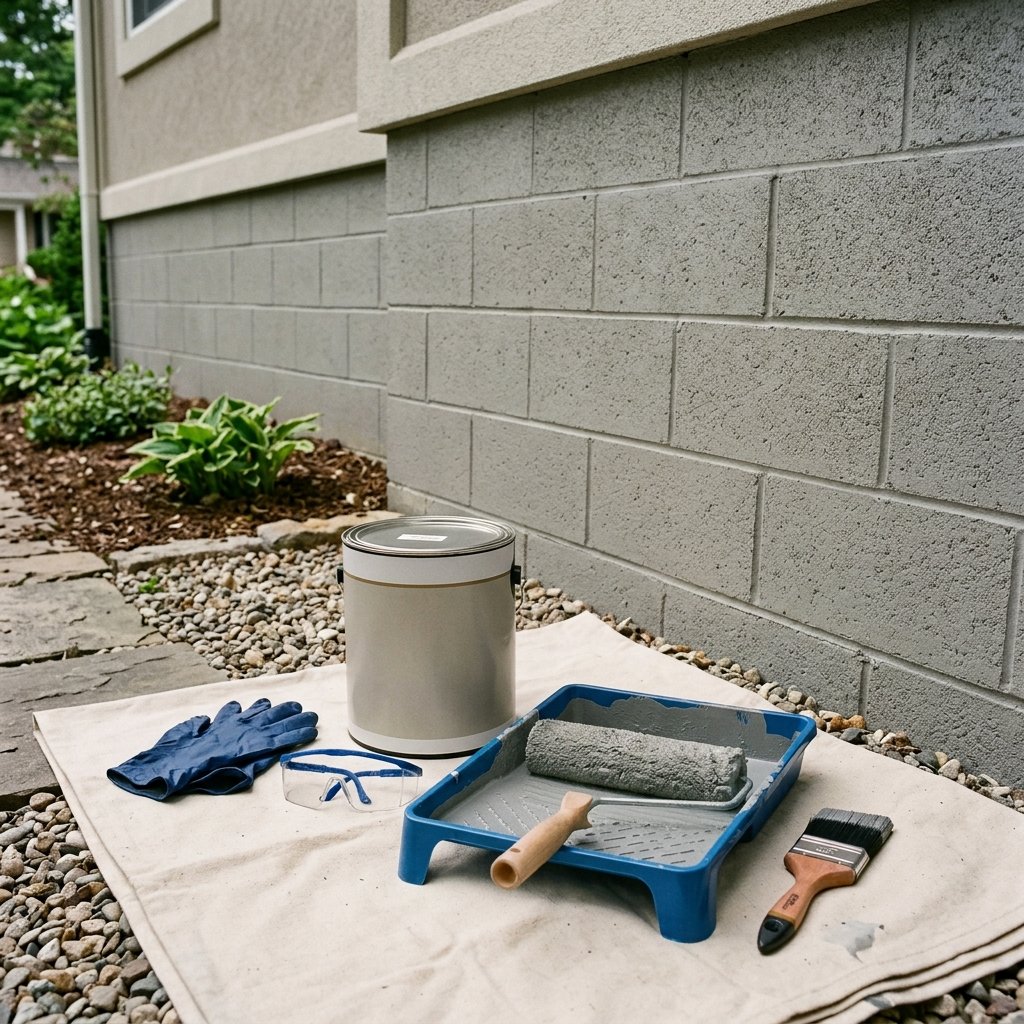
Apply the foundation coating with a roller suitable for the texture.
Work in manageable sections.
Push the coating into the masonry rather than only skimming the highest points.
For rough concrete or block, inspect the surface from different angles to make sure small recesses have been covered.
Avoid applying the coating excessively thick unless the manufacturer’s instructions specifically call for that application.
17. Apply Additional Coats as Directed
Many projects need more than one coat for consistent coverage, but the exact number depends on the product, color change, and substrate.
Follow the manufacturer’s instructions for recoating.
Do not apply another coat simply because the surface feels dry to the touch.
Required recoat times can be different from full cure times.
Weather conditions also affect drying.
Avoid painting when conditions fall outside the coating’s approved temperature, humidity, or weather range.
18. Remove Masking Carefully
Once the coating has reached the appropriate stage, remove masking materials carefully.
Do not leave exterior tape on longer than recommended.
Inspect areas around:
- Trim
- Siding
- Walkways
- Pipes
- Vents
Touch up any missed spots with a brush.
Then allow the foundation coating to dry and cure according to product instructions before washing or exposing it to unnecessary abrasion.
What Is the Best Color to Paint a House Foundation?
There is no single best color for every home.
The right choice should relate to the house and surrounding materials.
Warm Gray
A versatile option for white, cream, blue, and many brick exteriors.
Charcoal
Creates strong contrast and can visually ground a light house.
Taupe
Works especially well with warm siding, brick, wood, and stone.
Greige
A softer choice that bridges warm and cool exterior finishes.
Brown-Gray
Useful when the house includes tan stone, earth-toned brick, or warm landscaping.
Matching the Siding
This can make the foundation visually disappear, but an exact match is not always necessary.
Sometimes a slightly deeper version of the exterior color looks more intentional.
Should You Paint a Concrete Foundation?
A visible concrete foundation can be painted if the surface condition and coating system are appropriate.
Painting can help:
- Improve appearance
- Coordinate the foundation with the house
- Cover cosmetic discoloration
- Create a more finished exterior
However, paint should not be considered a substitute for repairing drainage, structural, or moisture issues.
Also remember that once masonry is painted, future maintenance usually includes repainting.
Should You Paint Foundation Block?
Concrete block foundations can also be painted when properly prepared.
Block can be especially porous and textured, so cleaning, repairs, and coating selection matter.
Mortar joints should be stable.
Loose masonry or deteriorating mortar should be addressed before painting.
A roller suited to rough surfaces can help reach the texture, but a brush may still be needed in deeper joints and corners.
Can You Paint a Previously Painted Foundation?
Yes, if the existing coating is still well bonded and compatible with the new system.
Preparation typically includes:
- Cleaning
- Removing peeling areas
- Repairing damage
- Addressing chalking
- Priming exposed or repaired areas as required
Do not paint over actively peeling paint.
The new coating will only be as secure as the layer underneath it.
Can You Paint a Foundation With Waterproof Paint?
Be careful with this assumption.
Products marketed for waterproofing or moisture resistance are designed for specific conditions and surfaces.
Some are intended for interior masonry, some for exterior applications, and others are parts of larger waterproofing systems.
Do not select a product solely because the label says “waterproof.”
Use a system approved by its manufacturer for your exact surface, location, and moisture conditions.
Persistent foundation water problems often require drainage or waterproofing work beyond decorative painting.
How to Paint the Foundation Without Getting Paint on Siding
Protect the bottom edge of the exterior finish with appropriate masking material.
Then use a quality brush to establish a clean line before rolling.
Do not push tape into fragile or dirty siding and assume it will protect everything.
Test masking materials where appropriate, especially on older painted finishes.
A small angled brush gives you more control around tight edges.
How to Paint Around Pipes and Utilities
Do not simply coat everything attached to the foundation.
Some components should remain unpainted or accessible.
Work carefully around:
- Gas equipment
- Electrical equipment
- Utility meters
- Vents
- Drainage components
- Service labels
If you are unsure whether a component can safely be painted, leave it alone and seek appropriate guidance.
Never block an air opening, drainage opening, or equipment clearance with paint or decorative materials.
How to Paint a Foundation Near the Ground
The lowest section of the foundation often gets the dirtiest.
Mud, irrigation water, soil, and splashback can stain it quickly.
Before painting:
- Pull loose soil or mulch away enough to clean the surface where appropriate
- Correct drainage problems
- Allow the wall to dry
- Protect nearby landscaping
Avoid burying siding or other exterior materials by raising soil or mulch simply to hide the foundation.
Maintain appropriate clearances for the home’s exterior system.
How to Make a Painted Foundation Look More Finished
Pick a Color That Connects to the House
The foundation should feel like part of the exterior palette.
Use Clean Paint Lines
Pay special attention where foundation meets siding.
Finish Visible Corners
Do not stop painting halfway around a prominent corner.
Coordinate With Landscaping
Greenery can soften the transition between the foundation and yard.
Keep the Surface Clean
Occasional gentle cleaning helps the color stay fresh.
Address Splashback
Gutters, downspouts, and drainage have a major impact on how clean the lower foundation stays.
Painting a House Foundation on a Budget
Foundation painting can be a relatively affordable exterior update because you may not need much decorative material beyond the coating itself.
To keep costs reasonable:
- Repair only what needs repair
- Clean thoroughly instead of trying to cover dirt
- Use tools you already own when appropriate
- Buy the correct product rather than a cheaper incompatible one
- Test the color before purchasing a large quantity
- Complete adjacent sections at the same time for consistent color
Do not cut costs by skipping repairs or surface preparation.
Poor preparation can turn an inexpensive project into one that needs to be redone.
Common Mistakes When Painting a Foundation
Painting Over Moisture Problems
This can lead to peeling or recurring stains.
Skipping Cleaning
Dust and chalky residue can interfere with adhesion.
Painting Over Loose Coatings
New paint cannot make failing old paint stable.
Using the Wrong Paint
Not every exterior coating is designed for masonry.
Painting Fresh Repairs Too Soon
Repair products may need to cure before coating.
Ignoring Efflorescence
White mineral deposits may indicate moisture movement.
Choosing a Color Without Testing It
Exterior light can significantly change how a color appears.
Painting Vents or Utility Components
Some features need to remain open, readable, accessible, or uncoated.
Applying Paint in Poor Weather
Temperature, rain, humidity, and direct sun can affect application and curing.
Foundation Painting Safety Tips
Exterior painting involves more than a brush and roller.
Keep these precautions in mind:
- Wear eye protection when scraping, brushing, or cleaning masonry.
- Use gloves appropriate for the cleaners, repair products, and coatings being used.
- Follow all manufacturer safety and ventilation instructions.
- Avoid mixing cleaning chemicals unless the manufacturers specifically state they are compatible.
- Use a stable ladder if needed and follow ladder safety practices.
- Be cautious around electrical, gas, and utility equipment.
- Do not disturb unknown older coatings without considering hazardous-material risks.
- Keep children and pets away from the work area.
- Protect plants according to the cleaning and coating product instructions.
- Keep pathways clear of tools, hoses, and drop cloths.
- Avoid painting during unsuitable weather or when rain is expected before the coating can withstand it.
FAQ About Painting a House Foundation
What kind of paint should I use on a house foundation?
Use a coating specifically approved by its manufacturer for the foundation material, such as exterior concrete or masonry. The exact product depends on the substrate, previous coatings, and moisture conditions.
Do I need to prime concrete before painting?
Sometimes. Bare or highly porous masonry, repairs, stains, and certain coating systems may require primer. Follow the instructions for the specific coating you choose.
Can I paint directly over concrete?
Only if the chosen coating permits direct application and the concrete is properly prepared, stable, and dry enough according to the product requirements.
What color should I paint my foundation?
Warm gray, charcoal, taupe, greige, and muted brown are versatile options. Choose a shade that coordinates with siding, brick, stone, roofing, and hardscaping.
Should the foundation be darker than the house?
It often looks good slightly darker because the darker base visually grounds the exterior, but it is not a requirement.
Why is my foundation paint peeling?
Possible causes include moisture, inadequate cleaning, unstable previous paint, poor surface preparation, incompatible coatings, or application outside recommended conditions.
Can I paint over foundation cracks?
Repair appropriate cosmetic cracks before painting. Do not use paint to conceal cracks that may indicate movement or structural problems.
How long should foundation paint dry?
Drying and curing times vary by product, surface, coat thickness, temperature, and humidity. Follow the specific manufacturer instructions rather than using a universal timeline.
Final Thoughts
Painting a house foundation can be a simple way to make an exterior look cleaner, more cohesive, and more finished.
But the quality of the result depends far more on preparation than on the final coat of paint.
Inspect the foundation first. Correct drainage or moisture problems, remove loose material, clean the masonry thoroughly, and repair appropriate cracks or damaged areas before opening the paint.
Then choose a coating specifically suited to the foundation material and follow the complete manufacturer system for priming, application, drying, and recoating.
Color matters too.
Warm gray, taupe, greige, charcoal, and other muted neutrals can help visually connect the foundation to the siding, brick, stone, and landscaping without drawing unnecessary attention to it.
With careful preparation and the right coating, a freshly painted foundation can give the entire house a cleaner, more polished appearance.

