

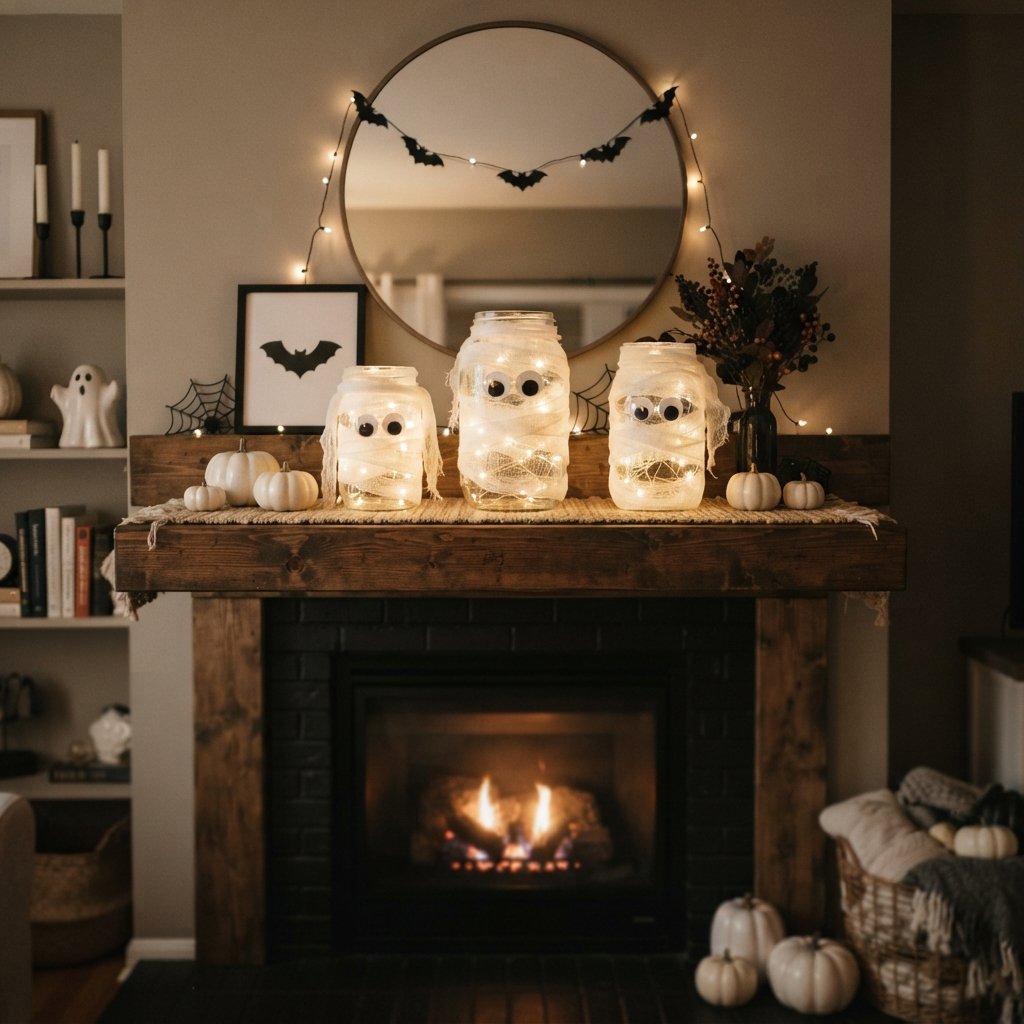
A DIY mummy luminary is an easy Halloween craft that adds a soft, spooky glow to a porch, mantel, entryway, party table, or windowsill.
The basic idea is simple: wrap a jar or other translucent container so it looks like a mummy, add a pair of eyes, and place a light inside.
The result is cute rather than scary, making this project especially fun for family-friendly Halloween decorating.
It is also easy to customize.
You can make one large mummy lantern or create a whole group in different sizes. Keep the wrapping neat for a cleaner look, or make it loose and uneven for a more playful mummy effect.
For the safest and easiest version, use battery-operated LED tea lights or small LED candles rather than open flames.
This guide walks through the materials, wrapping techniques, decorating ideas, troubleshooting tips, and different ways to style your finished mummy luminaries around the house.
Materials for a DIY Mummy Luminary
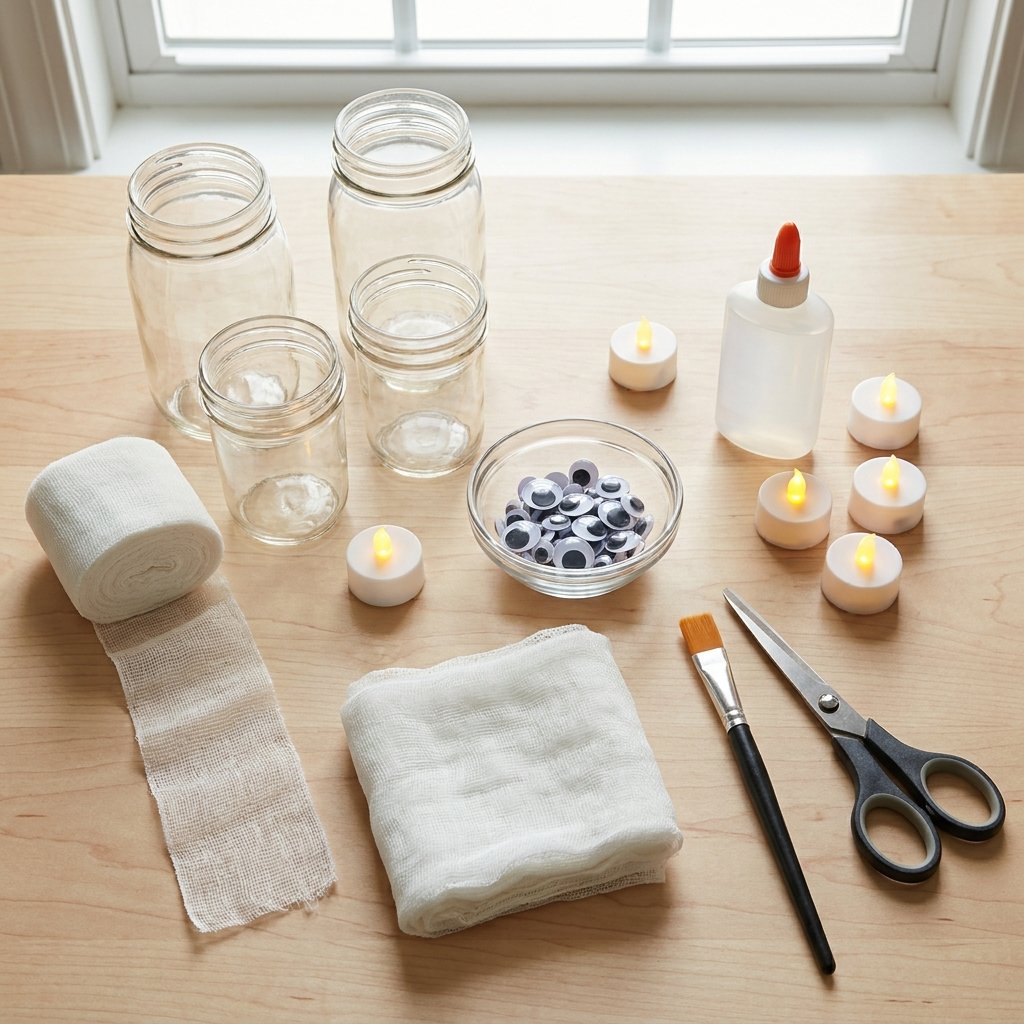
You only need a few basic supplies.
Materials
- Clean glass jar or translucent container
- White gauze, cheesecloth strips, or lightweight fabric strips
- Craft adhesive suitable for the container and wrapping material
- Googly eyes
- Scissors
- Battery-operated LED tea light or LED candle
Optional supplies:
- Paintbrush for applying glue
- Black cardstock
- White or cream ribbon
- Small decorative spiders
- Twine
- Additional jars in different sizes
Choose materials based on where you plan to display the luminary.
If it will be outdoors, use supplies that can tolerate the conditions and keep battery compartments protected from moisture.
How to Make a DIY Mummy Luminary
Step 1: Clean the Jar
Start with a clean, dry jar.
Remove:
- Labels
- Adhesive residue
- Dust
- Grease
The cleaner the surface, the easier it will be for the wrapping material and adhesive to stay in place.
If you wash the jar, allow it to dry completely before beginning.
Moisture beneath the gauze can interfere with the adhesive.
Step 2: Cut the Gauze Into Strips
Cut your gauze or fabric into long strips.
They do not need to be perfectly even.
In fact, slightly irregular strips often make the mummy look more realistic.
Try strips in different widths for more texture.
If you are using cheesecloth, allow some edges to fray naturally.
That roughness adds character.
Step 3: Add a Small Amount of Adhesive
Apply a thin amount of craft adhesive near the bottom or back of the jar.
Attach the beginning of your gauze strip.
Avoid coating the entire jar in thick glue.
Too much adhesive can soak through the fabric and make the finished lantern look stiff or messy.
A few strategic attachment points are usually enough.
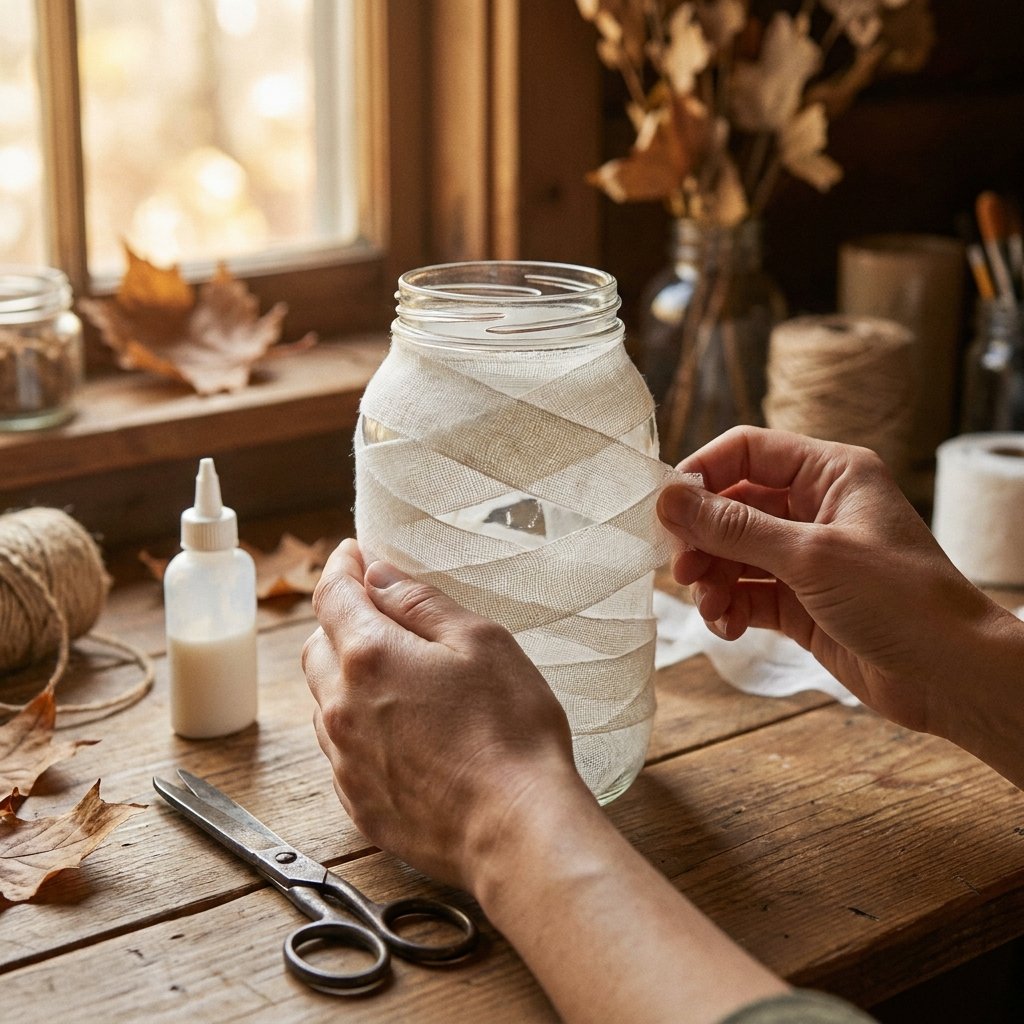
Step 4: Wrap the Jar
Begin wrapping the gauze around the jar.
Overlap the strips slightly as you work upward.
Leave small gaps between some layers so the light can shine through.
You want the jar to look covered, but not completely opaque.
Rotate the jar as you wrap rather than pulling the fabric too tightly.
Loose, slightly uneven wrapping usually gives the best mummy effect.
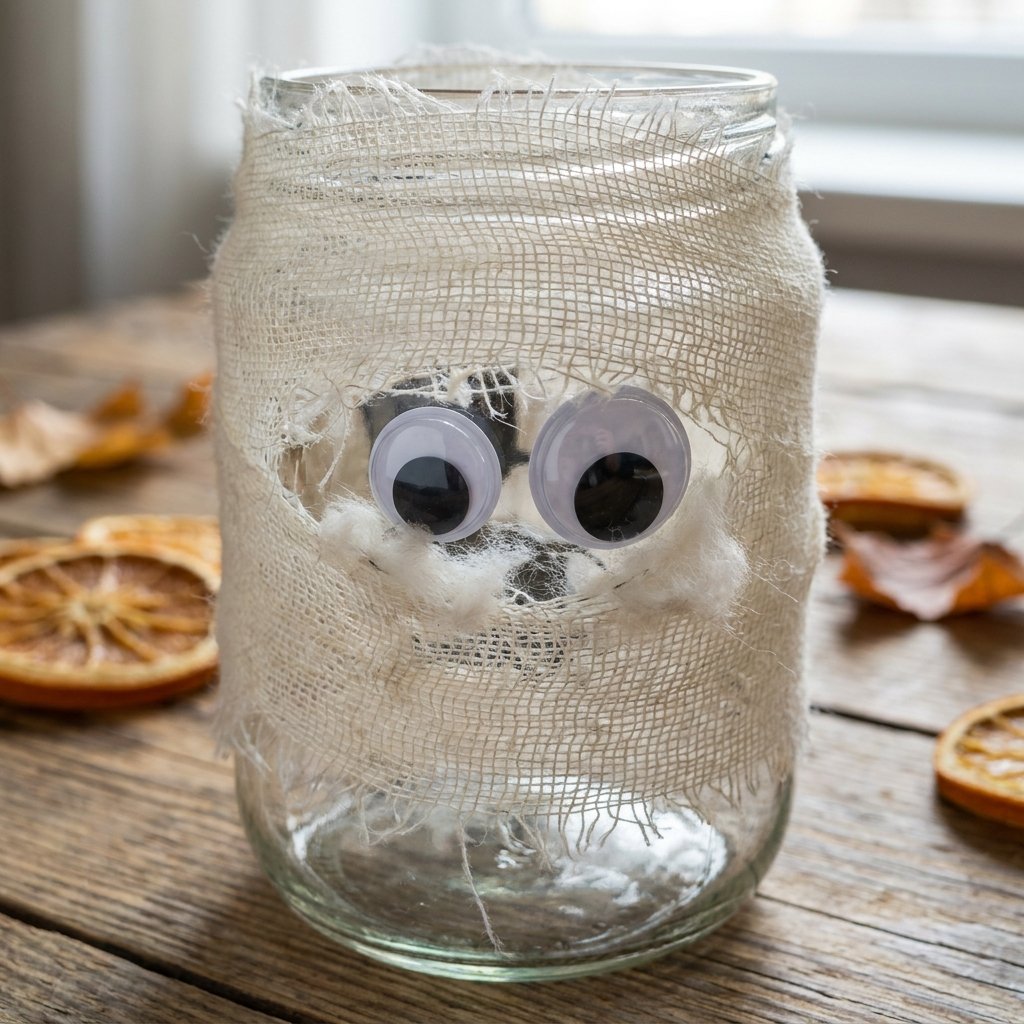
Step 5: Create an Opening for the Eyes
As you approach the upper half of the jar, leave a small open area for the mummy’s eyes.
You can make this space:
- Straight
- Slightly crooked
- Narrow
- Wide
The less perfect it looks, the more personality your mummy will have.
You can also wrap a strip partially over one eye later for an extra playful effect.
Step 6: Secure the End of the Gauze
When the jar is covered, trim away excess material.
Attach the end of the gauze with a small amount of glue.
Let the adhesive dry according to the manufacturer’s directions.
Avoid handling the wrap too much while it is drying.
Step 7: Add the Eyes
Glue two googly eyes into the opening.
Large eyes create a funny, cartoon-like mummy.
Smaller eyes create a slightly spookier effect.
You can also use mismatched eye sizes for a silly look.
Another option is to create eyes using small circles cut from white and black cardstock.
Step 8: Add the LED Light
Once everything is completely dry, place a battery-operated LED tea light or small LED candle inside.
Turn it on and dim the room.
The light should glow through the spaces between the gauze.
If the jar looks too dark, remove or loosen a few strips.
If it looks too bright, add another thin layer of gauze.
Why LED Lights Are Better for Mummy Luminaries
Battery-operated LED lights are the simplest choice for this craft.
They eliminate the risks associated with placing an open flame near:
- Gauze
- Fabric
- Adhesive
- Paper
- Decorations
They are also convenient because you can display mummy luminaries:
- On shelves
- On tables
- Around children
- In entryways
- Near other Halloween decorations
Choose LED lights that fit comfortably inside the container.
Follow the manufacturer’s battery and operating instructions.
How to Make Mummy Luminaries Without Gauze
You do not have to use traditional gauze.
Other options include:
Cheesecloth
Creates a loose, textured mummy effect.
White Cotton Fabric
Cut an old clean cotton fabric into narrow strips.
Lightweight Ribbon
Creates a cleaner, more polished version.
Crepe Paper
Works for temporary indoor decorations, although it is less durable and should be kept away from moisture.
The goal is to use something thin enough for light to glow through.
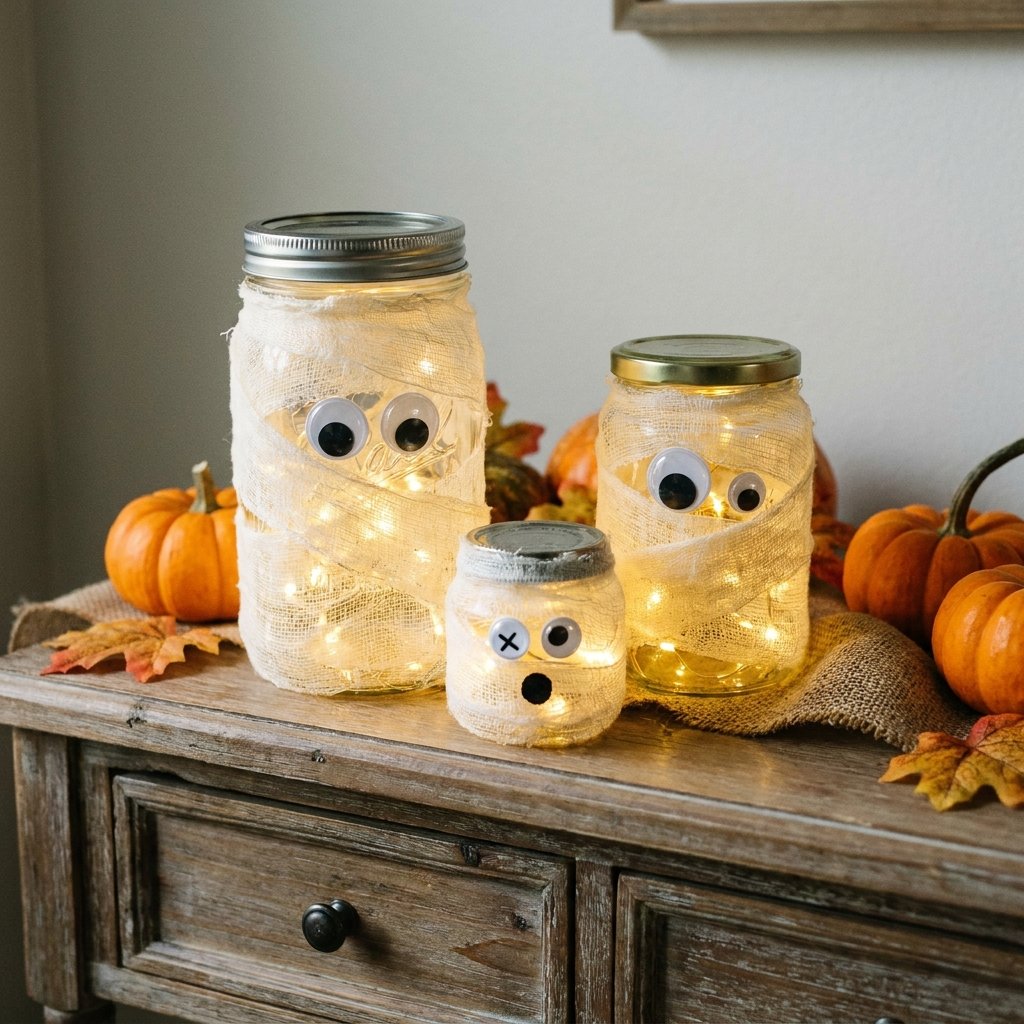
DIY Mummy Luminary With Mason Jars
Mason-style jars work especially well for this project.
Their simple shape makes wrapping easy, and the glass diffuses LED light nicely.
Use jars in several heights to create a group.
You could make:
- One tall mummy
- One medium mummy
- One short mummy
Different eye sizes can give each one its own expression.
Remove lids when necessary for ventilation and access to the LED light unless your chosen lighting product is specifically designed for an enclosed setup.
DIY Mummy Luminary With Plastic Containers
If you are making this project with younger children, translucent plastic containers may be easier to handle than glass.
Choose sturdy containers with smooth surfaces.
Make sure the container is compatible with the adhesive you plan to use.
Plastic versions are especially useful for:
- Classroom crafts
- Kids’ Halloween parties
- Outdoor displays where breakage is a concern
Still use LED lights rather than open flames.
How to Make Mummy Luminaries Look Old and Creepy
If you want a less cute and more aged look, add subtle discoloration.
Try lightly brushing the gauze with:
- Diluted beige craft paint
- Very pale gray
- Soft brown
Use only a small amount.
The goal is to create slightly aged bandages, not completely recolor the fabric.
Let everything dry fully before adding the light.
Cute Mummy Luminary Ideas for Kids
For a child-friendly version, exaggerate the eyes.
Try:
- Huge googly eyes
- Crossed eyes
- One large and one small eye
- Colorful eyes
You can also make different facial expressions by changing how the gauze crosses the eye area.
Avoid small loose craft parts with very young children where they could present a choking hazard.
Adult supervision is appropriate for cutting and adhesive use.
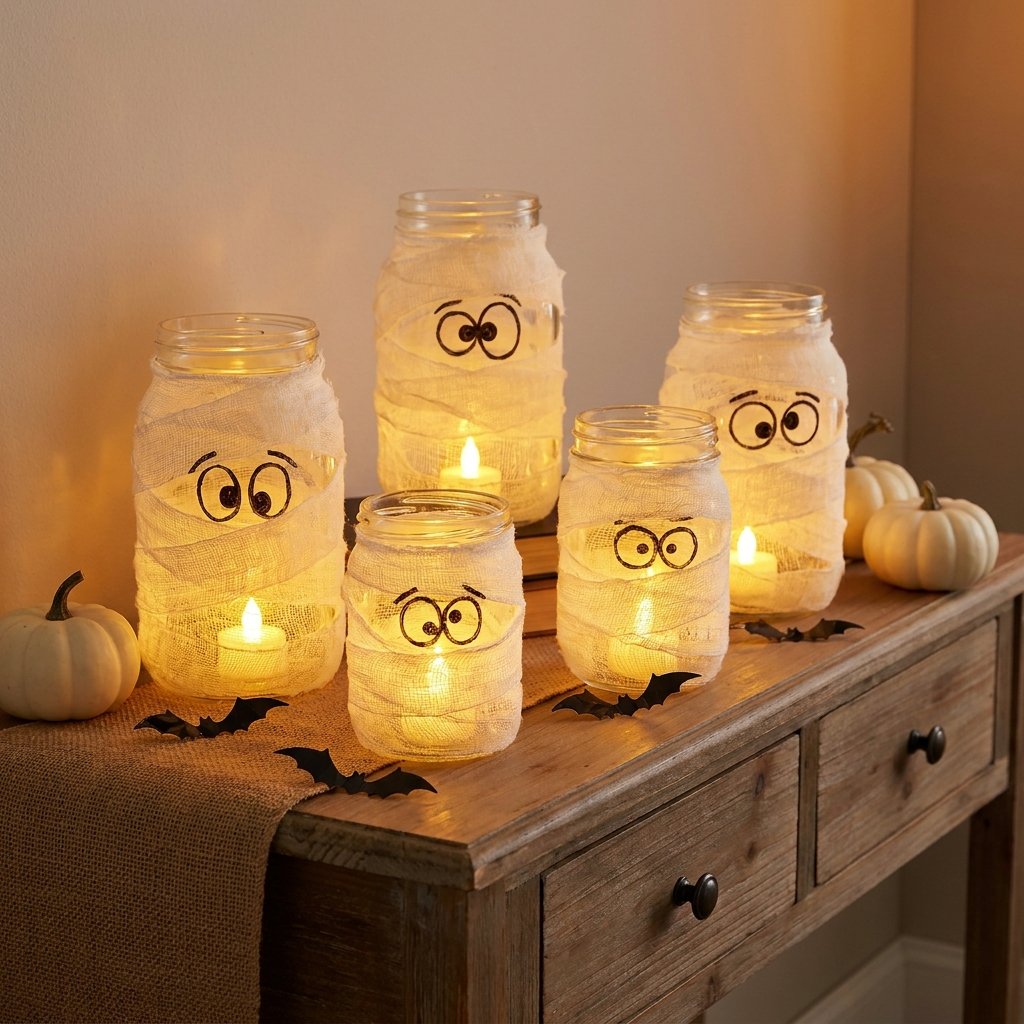
How to Make a Family of Mummy Luminaries
One mummy lantern is cute.
A whole group can create a stronger display.
Use:
- Different jar sizes
- Different eye styles
- Different wrapping patterns
Arrange them together so they look like a little mummy family.
You can place the tallest jar in the back and smaller ones in front.
Where to Display DIY Mummy Luminaries
Halloween Mantel
Place several mummy jars among:
- Mini pumpkins
- Black candlesticks
- Faux spiderwebs
- Autumn branches
Keep the styling simple so the glowing jars remain the focus.
Entryway Table
Use a pair of mummy luminaries beside a bowl for Halloween treats.
Add a small pumpkin or black vase nearby.
Front Porch
Place them in a protected area away from rain.
Use weather-appropriate LED lighting and bring indoor craft materials inside during bad weather.
Halloween Party Table
Line several luminaries down the center of a table.
They provide decorative light without taking up much room.
Windowsill
Place a few glowing mummies where they can be seen from outside.
Make sure the jars are stable and away from curtains or cords.
Mummy Luminary Porch Ideas
If you want to use mummy luminaries outdoors, group them with other simple decorations.
Try:
- White pumpkins
- Black lanterns
- Dried cornstalks
- Potted mums
- Faux bats
A cluster of three glowing mummy jars can look especially fun near the front door.
Protect paper, fabric, batteries, and adhesives from rain and heavy moisture.
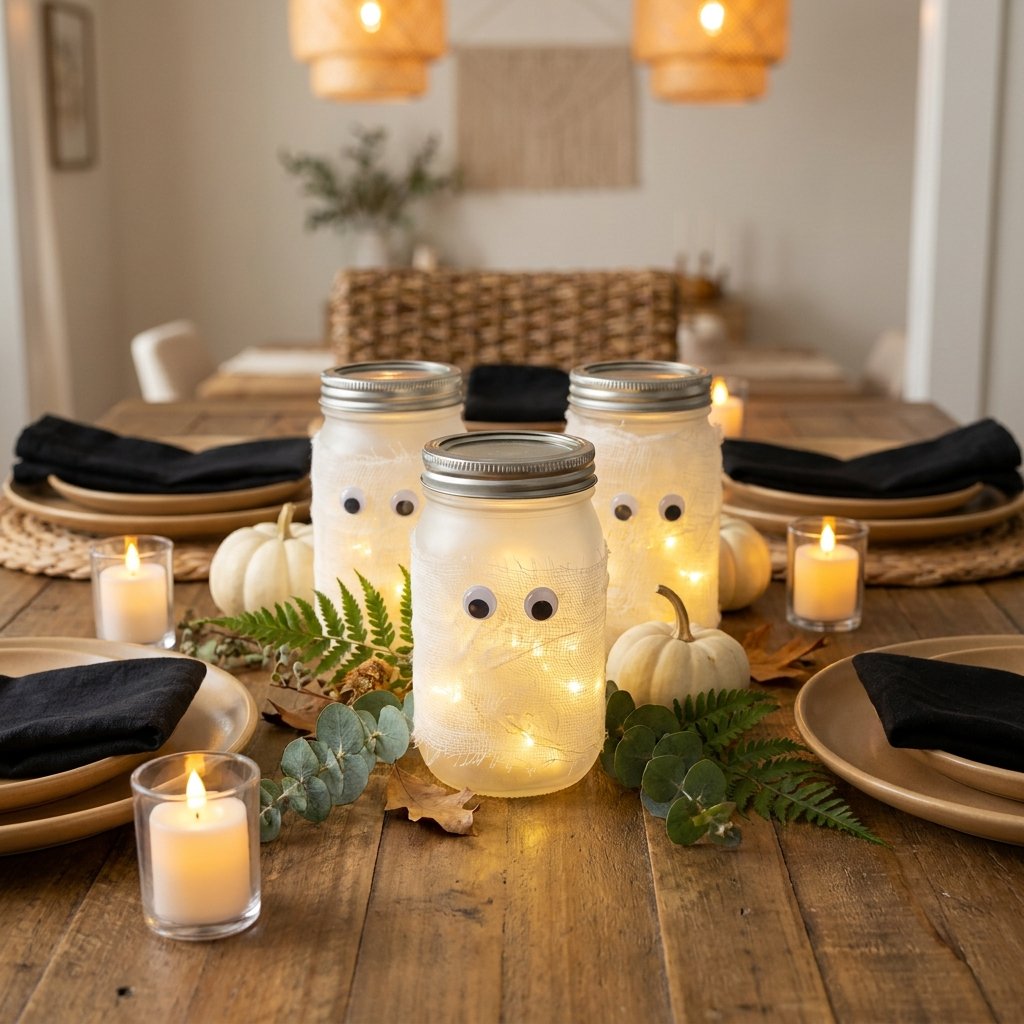
Mummy Luminary Table Centerpiece
A row of small mummy jars makes an easy Halloween centerpiece.
Place them along the middle of the table with:
- Mini pumpkins
- Greenery
- Black napkins
- Small faux spiders
Because the lights are battery-operated, you do not need to worry about dripping wax.
Keep the centerpiece low enough that guests can see across the table.
Black and White Mummy Luminary Ideas
A black-and-white color scheme can make this craft feel slightly more modern.
Use:
- White gauze
- Black-and-white eyes
- Matte black accessories
Display the jars next to:
- Black pumpkins
- Black candlesticks
- White ceramics
This keeps the decoration playful while fitting into a more neutral home.
Rustic Mummy Luminary Ideas
For a rustic look, use loosely frayed cheesecloth.
Pair the finished mummy jars with:
- Wood
- Mini pumpkins
- Dried leaves
- Natural twine
Avoid adding too many embellishments.
The rough fabric texture already provides plenty of character.
How to Make Mummy Luminaries Glow Brighter
If your finished jar is not glowing enough, check the wrapping.
Too many overlapping layers can block the light.
Try:
- Removing one outer layer.
- Creating slightly larger gaps.
- Using thinner fabric.
- Choosing a brighter LED light suitable for the container.
Do not replace the LED with an open flame simply to increase brightness.
How to Keep Gauze From Slipping
If the wrapping keeps sliding:
- Start with a small glue point.
- Wrap more loosely.
- Add tiny adhesive points between a few layers.
- Secure the final end carefully.
Avoid coating every layer in glue.
You still want the gauze to look soft and slightly uneven.
How to Make a Mummy Luminary Without Glue Showing
Use small amounts of clear-drying craft adhesive.
Place most glue points:
- On the back
- Under overlapping strips
- Near the bottom
Let the adhesive become slightly tacky if the product instructions allow before pressing the fabric into place.
Do not use more glue than necessary.
Can You Reuse Mummy Luminaries?
Yes.
If stored carefully, mummy luminaries can often be reused for several Halloween seasons.
After Halloween:
- Remove the LED lights.
- Make sure the jars are completely dry.
- Dust them gently.
- Place them in a storage box.
- Avoid crushing the gauze.
Store them somewhere dry.
Moisture can damage the wrapping and adhesive.
Common DIY Mummy Luminary Mistakes
Wrapping the Jar Too Thickly
Too much fabric blocks the glow.
Pulling the Gauze Too Tight
Loose wrapping creates a more convincing mummy effect.
Using Too Much Glue
Heavy adhesive can soak through the fabric.
Covering the Eye Area
Leave an intentional opening.
Using Open Flames
Fabric, gauze, paper, and adhesive should not be placed near a candle flame.
Forgetting to Test the Light
Turn on the LED before finishing the entire project so you know whether enough light shines through.
Not Letting Glue Dry
Moving the jar too soon can shift the wrapping.
DIY Mummy Luminary Safety Tips
This project is simple, but a few precautions make it safer.
- Use battery-operated LED lights instead of real candles.
- Keep craft adhesives away from children unless supervised.
- Follow adhesive manufacturer instructions.
- Use scissors appropriately.
- Keep small googly eyes away from very young children.
- Make sure glass jars are placed on stable surfaces.
- Check glass for chips or cracks before use.
- Keep outdoor versions protected from rain unless all materials are designed for outdoor exposure.
- Do not place luminaries where they can be knocked into walkways.
- Keep batteries away from children and pets.
- Remove batteries before long-term storage when recommended by the light manufacturer.
FAQ About DIY Mummy Luminaries
What can I use to wrap a mummy luminary?
Gauze, cheesecloth, lightweight white fabric, ribbon, or temporary paper strips can all work.
Can I use a real candle inside a mummy jar?
An LED tea light is the safer choice because gauze, adhesive, and decorative materials can be flammable.
What kind of jar works best?
Simple glass jars or sturdy translucent plastic containers work well.
How do you make a mummy jar glow?
Place a battery-operated LED light inside after the wrapping and adhesive are completely dry.
Can kids make mummy luminaries?
Yes, with age-appropriate materials and adult supervision for scissors, adhesives, glass, and small craft pieces.
Can mummy luminaries go outside?
They can be used in a protected outdoor area, but most craft fabrics and adhesives should be kept dry unless specifically rated for outdoor use.
How do you keep gauze on a jar?
Use small amounts of adhesive at the beginning, between a few strategic layers, and at the end.
How long does a DIY mummy luminary take to make?
The hands-on craft is simple, but total time depends largely on the adhesive’s drying requirements.
Final Thoughts
A DIY mummy luminary is one of those Halloween projects that is simple enough for beginners but still looks great once the lights come on.
Start with a clean jar, loosely wrap it with white gauze, leave a small opening for the eyes, and add a battery-operated LED light inside.
The imperfect wrapping is part of the charm.
Make one for a small accent, or create a whole family of mummy lanterns in different sizes for a porch, mantel, entryway, or Halloween party.
Because the design is inexpensive and easy to customize, it is also a fun way to use jars and craft supplies you may already have at home.
Keep the lighting flameless, let all adhesives dry fully, and enjoy the soft, spooky glow.

