

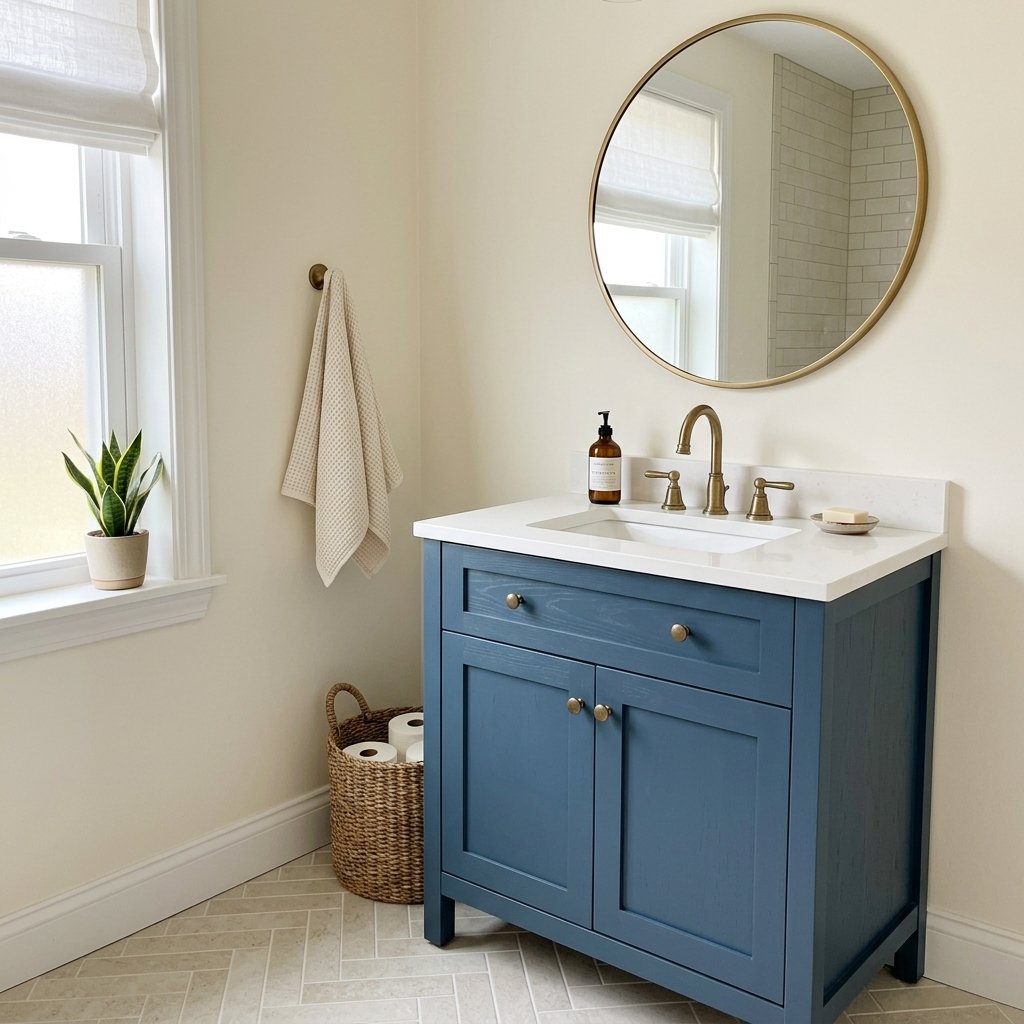
An outdated bathroom vanity can make the entire bathroom feel older, even when the rest of the room is in good condition.
The good news is that replacing it is not always necessary.
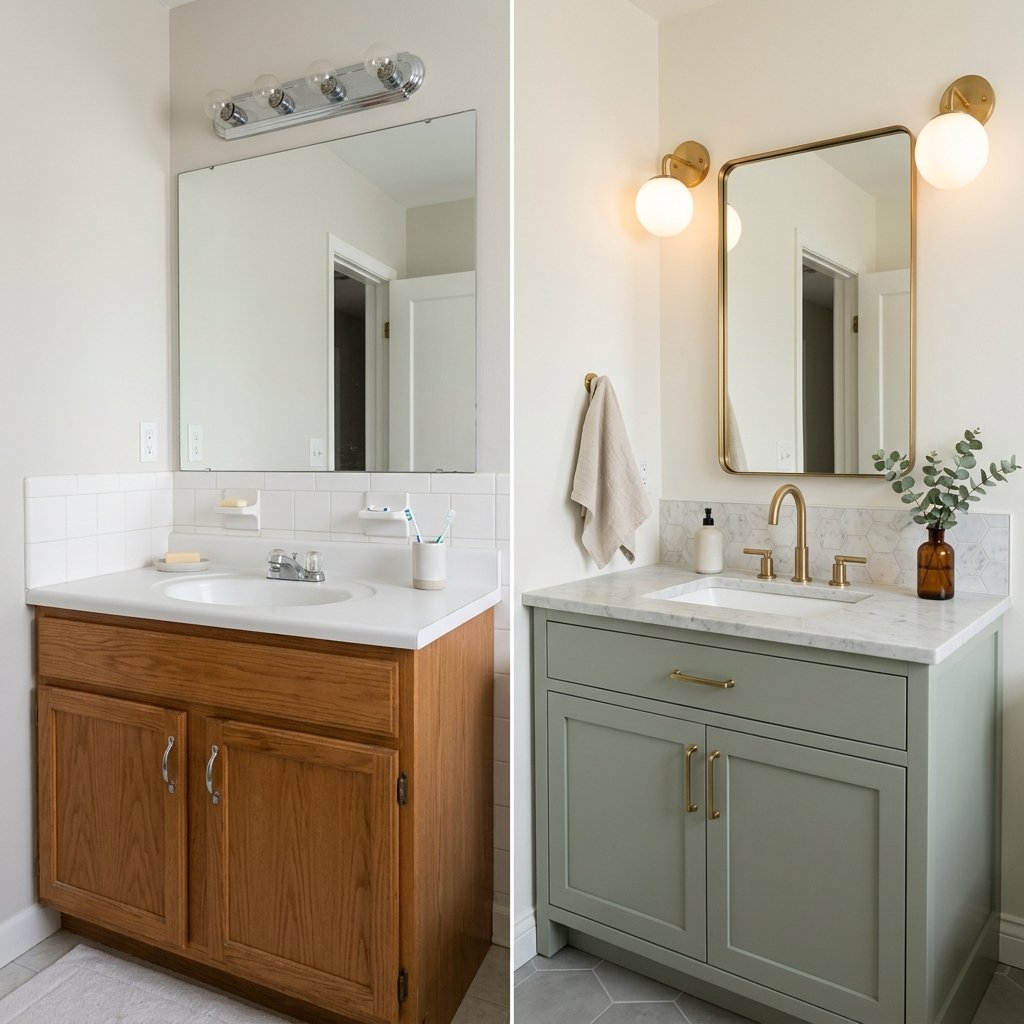
If the vanity cabinet is sturdy and the layout works, a bathroom vanity makeover can give it a completely different look for much less than a full replacement. Paint, new hardware, an updated mirror, better lighting, fresh caulk, or a new faucet can all make a surprisingly big difference.
You can also choose how far you want to take the project.
A simple makeover might involve cleaning, painting, and replacing the knobs. A larger update could include a new countertop, sink, faucet, backsplash, and lighting while keeping the original cabinet.
Before starting, inspect the vanity carefully for water damage, swelling, mold, loose components, or plumbing problems. Cosmetic improvements are worthwhile when the underlying cabinet is sound; serious moisture or structural damage should be addressed rather than covered up.
Here are 17 practical ways to transform an outdated vanity into a bathroom feature you actually like.
1. Decide Whether the Vanity Is Worth Saving
Before buying paint, determine whether the cabinet is a good candidate for a makeover.
Look inside, underneath, and around the sink.
Check for:
- Swollen cabinet material
- Soft or deteriorated areas
- Persistent leaks
- Loose cabinet construction
- Mold or mildew concerns
- Significant countertop damage
Also make sure you still like the basic layout.
If the vanity is structurally sound and provides enough storage, updating it can make sense.
If water has severely damaged the cabinet or the configuration no longer works, replacement may be more practical.
2. Deep Clean Before Doing Anything Else
Bathroom cabinets collect residue that can interfere with paint and finishes.
Clean the vanity thoroughly before sanding, priming, or painting.
Pay particular attention to:
- Areas around handles
- Drawer fronts
- Cabinet-door edges
- Areas near the sink
- Lower sections near the floor
Use a cleaner appropriate for the cabinet material and remove any residue as directed.
Allow surfaces to dry thoroughly before moving to the next preparation step.
3. Paint the Vanity a New Color
Paint can create the biggest visual transformation without replacing the cabinet.
Popular directions include:
- Warm white
- Soft greige
- Sage green
- Muted blue
- Navy
- Charcoal
- Soft black
Choose the color based on the fixed finishes in the bathroom.
Look at the flooring, countertop, shower tile, bathtub, and wall color before deciding.
A beautiful paint color in isolation can look wrong when placed beside an existing countertop with a conflicting undertone.
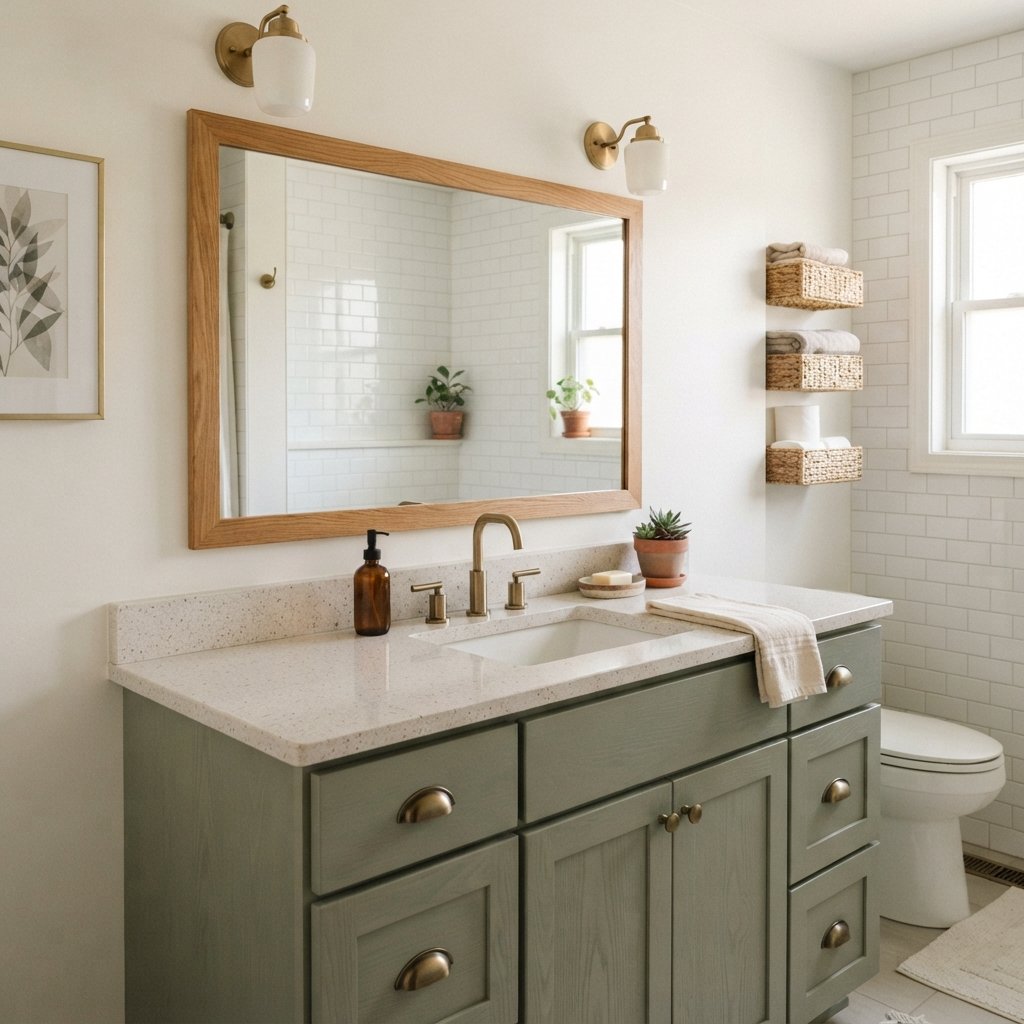
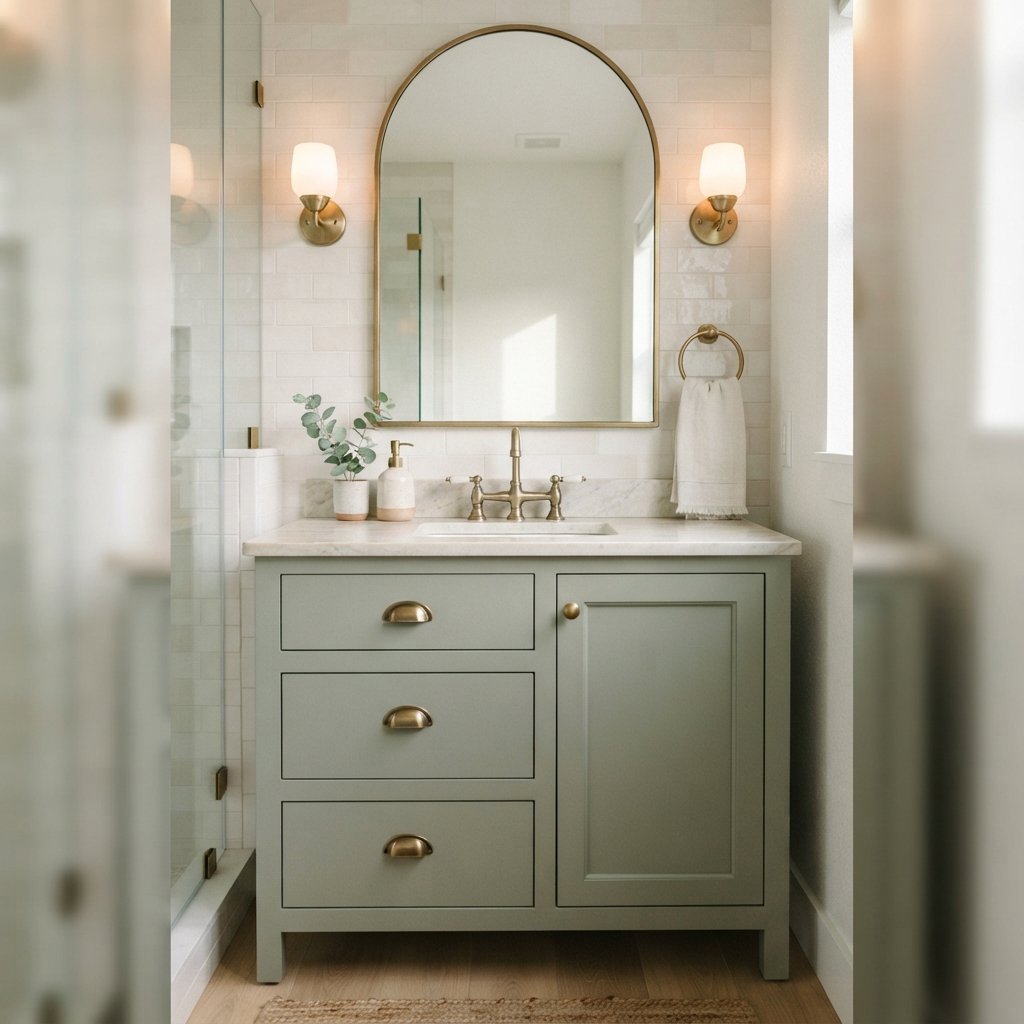
4. Try a Sage Green Vanity
Sage is a particularly versatile bathroom vanity color.
It adds color without feeling overwhelming and works beautifully with many natural materials.
Pair sage with:
- Warm white
- Cream
- Light wood
- Brass
- Black
- Pale stone
If the existing countertop has warm beige or cream tones, choose a green that works with those undertones rather than an extremely cool green.
Always test the paint beside the countertop and flooring.
5. Paint the Vanity Black
A black or soft-black vanity can turn a basic cabinet into a strong focal point.
This works especially well with:
- White countertop
- Light tile
- Warm white walls
- Brass hardware
- Chrome or nickel fixtures
- Wood-framed mirror
In a small bathroom, dark paint can still work.
Balance it with lighter walls and good lighting.
6. Keep It Classic With Warm White
If you want the vanity to visually recede, white is a practical direction.
A warmer white can soften a bathroom with beige, cream, or warm stone finishes.
A crisper white may coordinate better with cooler tile and countertops.
Compare your cabinet paint directly with any existing white sink, countertop, toilet, tub, or trim.
Whites that look identical on paint chips can appear surprisingly different beside one another.
7. Replace the Vanity Hardware
Hardware is one of the fastest changes you can make.
Consider:
- Simple knobs
- Bar pulls
- Cup pulls
- Mixed knobs and pulls
Finishes might include:
- Brass
- Black
- Nickel
- Chrome
- Bronze
If possible, choose hardware that works with the existing holes.
Changing the spacing may require filling old holes, sanding, priming, and repainting before installing the new hardware.
You do not necessarily have to match the faucet finish exactly. Coordinated mixed metals can work when they look intentional.
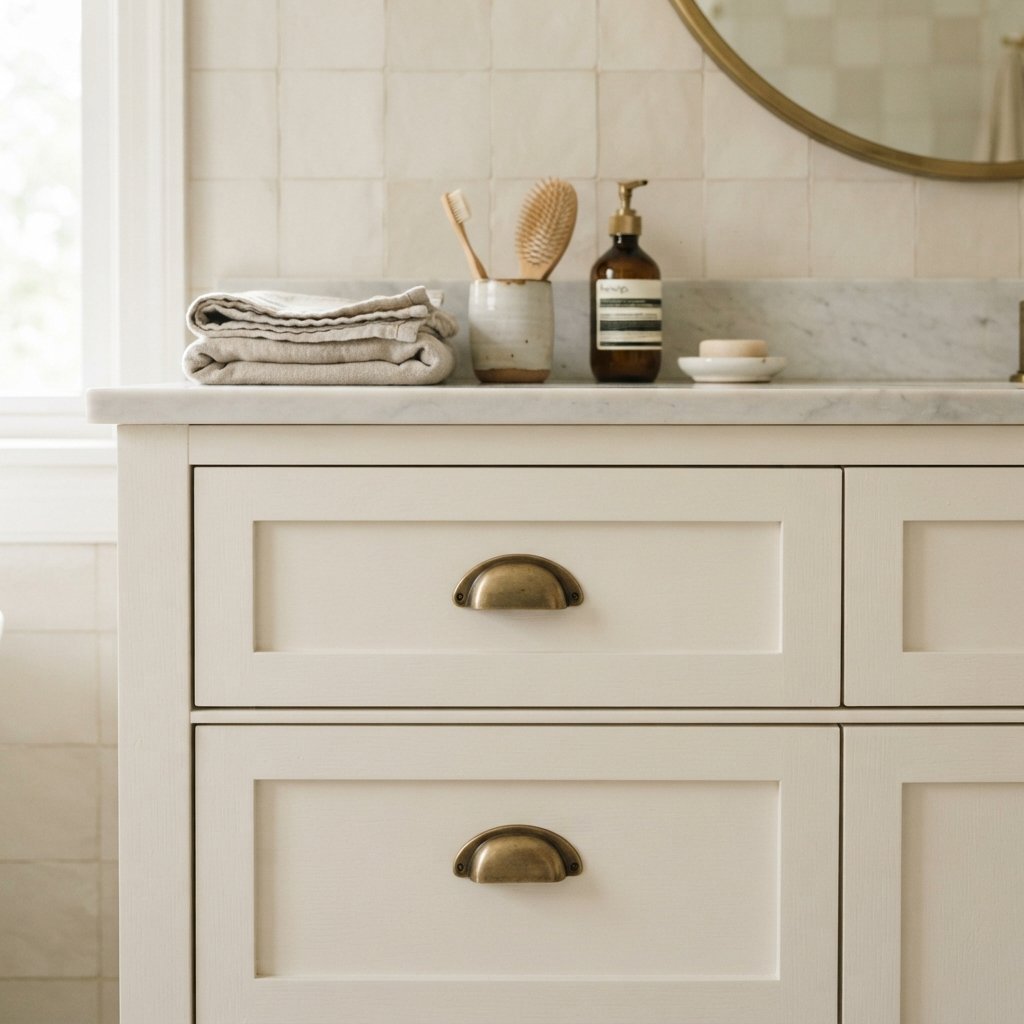
8. Add New Feet or a Furniture-Look Base
Some basic vanities can be made to look more like furniture by modifying the base.
Depending on the construction, decorative feet or trim may give the cabinet a more custom appearance.
This is not appropriate for every vanity.
Do not remove structural components or alter support without understanding how the cabinet is constructed.
Any new wood or trim used near a bathroom floor should also be finished appropriately for a moisture-prone environment.
9. Add Simple Trim to Flat Cabinet Doors
If the doors are extremely plain, carefully added trim can create a paneled appearance.
Keep the profile simple.
Overly elaborate molding can make a small vanity feel busy.
Before adding trim, consider:
- Door thickness
- Hinge clearance
- Drawer clearance
- Existing door construction
- Added weight
- Moisture exposure
Make sure doors and drawers can still open properly after the modification.
10. Update the Countertop
If the cabinet looks good but the countertop dates the room, replacing only the top can create a major transformation.
Possible countertop materials vary widely in cost, maintenance, weight, and installation requirements.
Before ordering anything, verify:
- Vanity dimensions
- Sink configuration
- Faucet-hole configuration
- Wall conditions
- Plumbing layout
- Backsplash needs
Some tops are designed specifically for standard vanity sizes, while custom configurations may require professional fabrication.
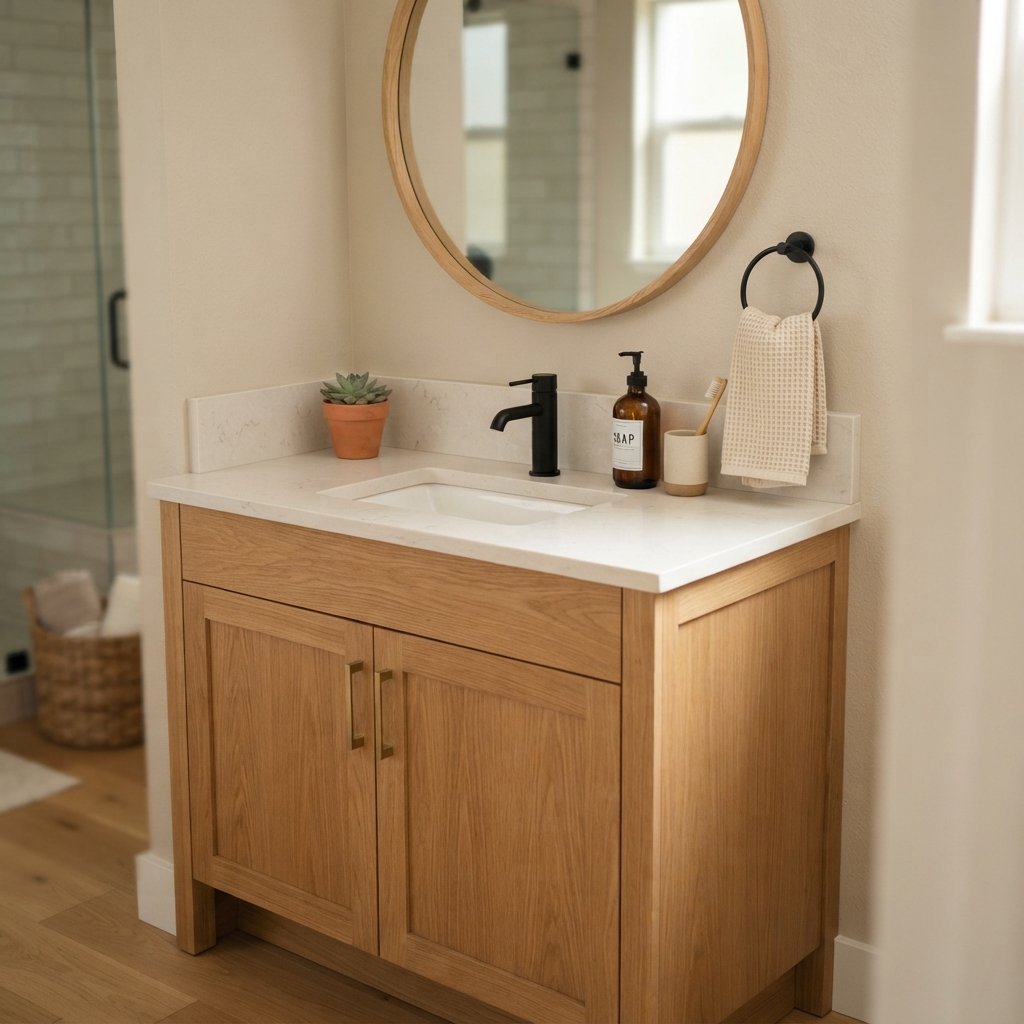
11. Replace the Faucet
A faucet update can modernize the sink area even if the countertop stays.
Before buying, check the existing sink or countertop configuration.
Faucets are not universally interchangeable.
Verify:
- Number of holes
- Hole spacing
- Sink compatibility
- Available space
- Supply connections
Turn off the appropriate water supply before plumbing work and check carefully for leaks afterward.
If connections are corroded, inaccessible, damaged, or outside your comfort level, hire a qualified plumber.
12. Update the Mirror
Sometimes the vanity cabinet is not the main reason the area feels dated.
The mirror may be the culprit.
Replacing a basic mirror with a framed version can add character.
Depending on your style, try:
- Thin black frame
- Warm wood
- Brass-tone frame
- Simple white frame
- Arched mirror
- Round mirror
Scale matters.
Choose a mirror that relates comfortably to the vanity and does not interfere with lighting, outlets, or nearby fixtures.
13. Frame the Existing Mirror
If the existing mirror is in good condition, adding an appropriate frame may be more affordable than replacing it.
A simple wood or painted frame can make a large builder-style mirror look more intentional.
Before attaching anything, consider the mirror installation, wall conditions, moisture, existing clips, edge clearance, and suitable attachment method.
Do not cover or compromise hardware required to hold the mirror safely.
14. Update the Vanity Lighting
New lighting can change how the entire vanity area feels.
A dated fixture above a newly painted cabinet may keep the bathroom looking unfinished.
Choose lighting that provides useful illumination around the mirror while fitting the room’s style.
Electrical work in bathrooms requires particular care because water and electricity are in close proximity.
Use fixtures suitable for the intended location and follow applicable electrical requirements. If wiring needs modification or you are unsure about safe installation, use a qualified electrician.
15. Add or Update the Backsplash
A backsplash can visually connect the countertop and wall.
You might use:
- A matching countertop backsplash
- Simple tile
- Stone
- Another bathroom-appropriate surface
Keep the scale proportional to the vanity.
A small powder-room vanity may need only a restrained backsplash rather than an elaborate wall of tile.
Make sure the installation is appropriate for moisture exposure and properly finished around the sink area.
16. Replace Old Caulk
Fresh caulk is not glamorous, but it can make an enormous difference.
Old, discolored, cracked, or failing caulk can make an otherwise clean vanity look unfinished.
Remove failed material appropriately, clean and dry the area, and use a product suitable for the specific bathroom application.
Follow the manufacturer’s instructions for application and cure time.
Do not simply cover persistent moisture or mold problems with new caulk; identify and address the source first.
17. Style the Vanity Simply
Once the makeover is complete, resist covering the countertop with accessories.
A few useful items are enough.
Try:
- Soap dispenser
- Small tray
- Hand towel
- Simple vase or greenery
- Attractive container for frequently used items
Store everyday clutter inside drawers or cabinets when possible.
The cleaner countertop allows the newly updated vanity to remain the focal point.
How to Paint a Bathroom Vanity
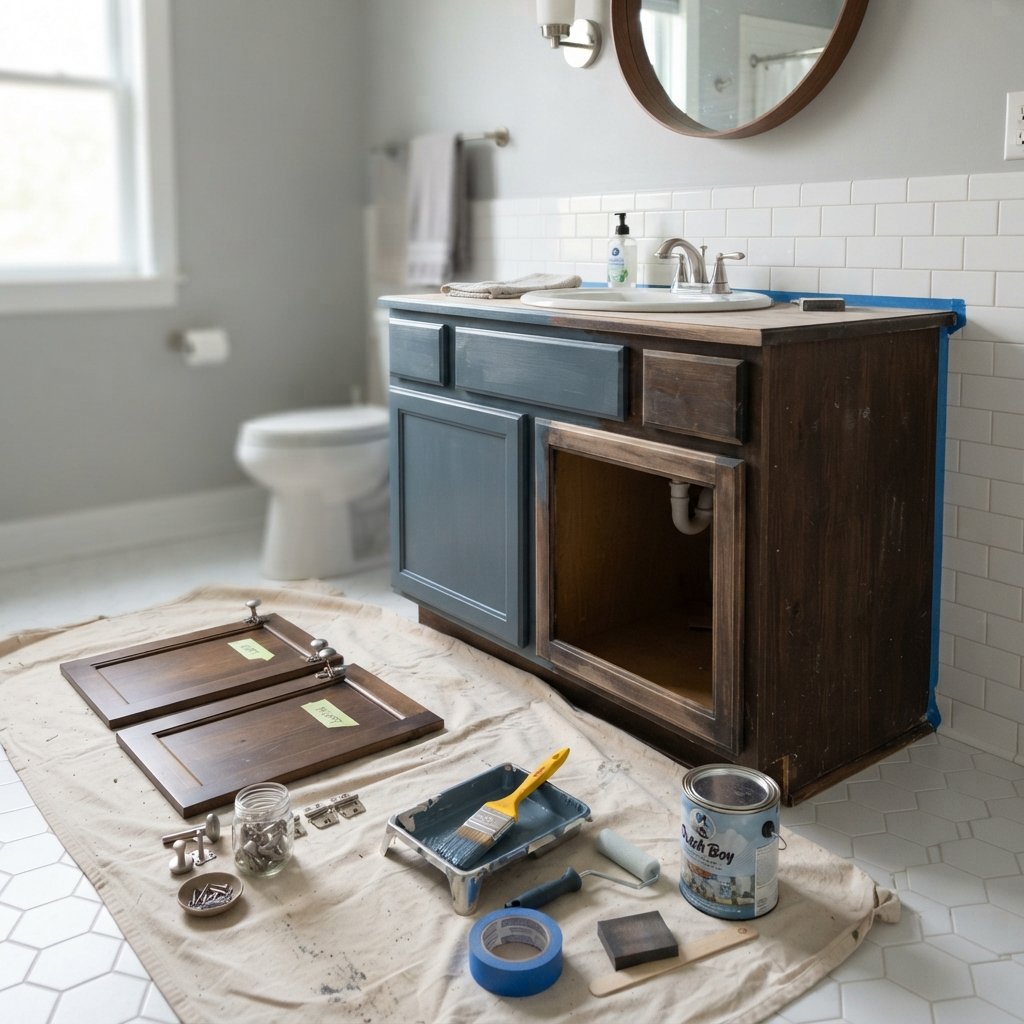
Painting is one of the most popular vanity makeover projects, but preparation determines how well the finish holds up.
The exact products and steps depend on the cabinet material and coating you are starting with, so follow the instructions for your chosen paint and primer.
A typical process looks like this:
- Remove doors, drawers, and hardware as appropriate.
- Label pieces so they return to the correct locations.
- Clean the cabinet thoroughly.
- Repair minor damage.
- Sand or degloss if required for the coating system.
- Remove dust.
- Apply an appropriate primer when needed.
- Allow it to dry as directed.
- Apply the selected cabinet-appropriate paint.
- Apply additional coats according to product directions.
- Allow adequate drying and curing.
- Reassemble carefully.
- Install hardware.
- Avoid harsh use until the finish has developed sufficient durability.
Do not assume all paints require the same preparation, primer, recoat time, or cure time.
Follow the manufacturer’s current directions.
Should You Paint or Replace a Bathroom Vanity?
A makeover may make sense when:
- Cabinet is structurally sound
- Layout works
- Storage is adequate
- You mainly dislike the finish or style
- Countertop can stay or be replaced separately
Replacement may make more sense when:
- Cabinet has serious water damage
- Material is badly swollen
- Layout is inconvenient
- Storage does not meet your needs
- Plumbing configuration needs major changes
- Cabinet structure is failing
Do not spend significant time refinishing a cabinet that is already deteriorating from moisture.
Cheap Bathroom Vanity Makeover Ideas
If the budget is small, prioritize the highest-impact improvements.
Start with:
Paint
One new cabinet color can completely change the vanity.
Hardware
New pulls or knobs can modernize the cabinet.
Caulk
Refreshing failing or discolored caulk improves the finished appearance.
Mirror
Frame an existing mirror if appropriate rather than automatically replacing it.
Styling
Remove clutter and use accessories you already own.
You do not have to replace the countertop, sink, faucet, mirror, and lighting all at once.
Bathroom Vanity Makeover Without Replacing the Countertop
An existing countertop may look much better once everything around it changes.
Before removing it, try updating:
- Cabinet color
- Hardware
- Faucet
- Mirror
- Lighting
- Wall color
For example, an older beige countertop that looks dated with dark brown cabinetry may feel much more intentional with a muted green or warm cream vanity.
Work with the countertop’s undertones rather than trying to pretend they are not there.
Bathroom Vanity Makeover With a Beige Countertop
Beige countertops can work beautifully in a warm palette.
Try cabinet colors such as:
- Warm white
- Cream
- Mushroom
- Taupe
- Muted sage
- Deep olive
Avoid choosing the cabinet color in isolation.
Compare samples directly against the countertop because beige surfaces can have yellow, pink, peach, gray, or green undertones.
Bathroom Vanity Makeover With a White Countertop
White countertops provide more flexibility.
Try:
- Sage
- Navy
- Black
- Muted blue
- Warm greige
- Natural wood
Also compare the countertop white with wall and trim whites.
A cool bright-white top may behave differently beside a very creamy wall color.
Small Bathroom Vanity Makeover
A small vanity can handle color.
Do not assume it must be white.
A dark blue, green, charcoal, or black cabinet can become a focal point without making the entire bathroom dark because the vanity occupies a relatively limited area.
Balance deeper cabinetry with lighter walls, mirror reflection, and useful lighting.
Keep countertop styling minimal to avoid making a small vanity feel crowded.
Powder Room Vanity Makeover
Powder rooms are excellent places to make stronger design choices.
Because the room is small, you can experiment with:
- Dark vanity
- Bold wall color
- Wallpaper
- Statement mirror
- Interesting lighting
- Brass or black hardware
Keep the individual elements coordinated.
A dramatic wallpaper, ornate mirror, statement light, patterned floor, and highly detailed vanity all competing at once can overwhelm a small room.
Builder-Grade Bathroom Vanity Makeover
A basic builder vanity can often be transformed without changing its footprint.
Try this combination:
Painted cabinet + new hardware + framed mirror + updated lighting.
If the budget allows, add a new faucet.
Those changes address several of the most visually prominent parts of the vanity without requiring the cabinet box to be removed.
Bathroom Vanity Color Ideas
Sage Green
Soft, natural, and versatile.
Deep Green
Rich and dramatic.
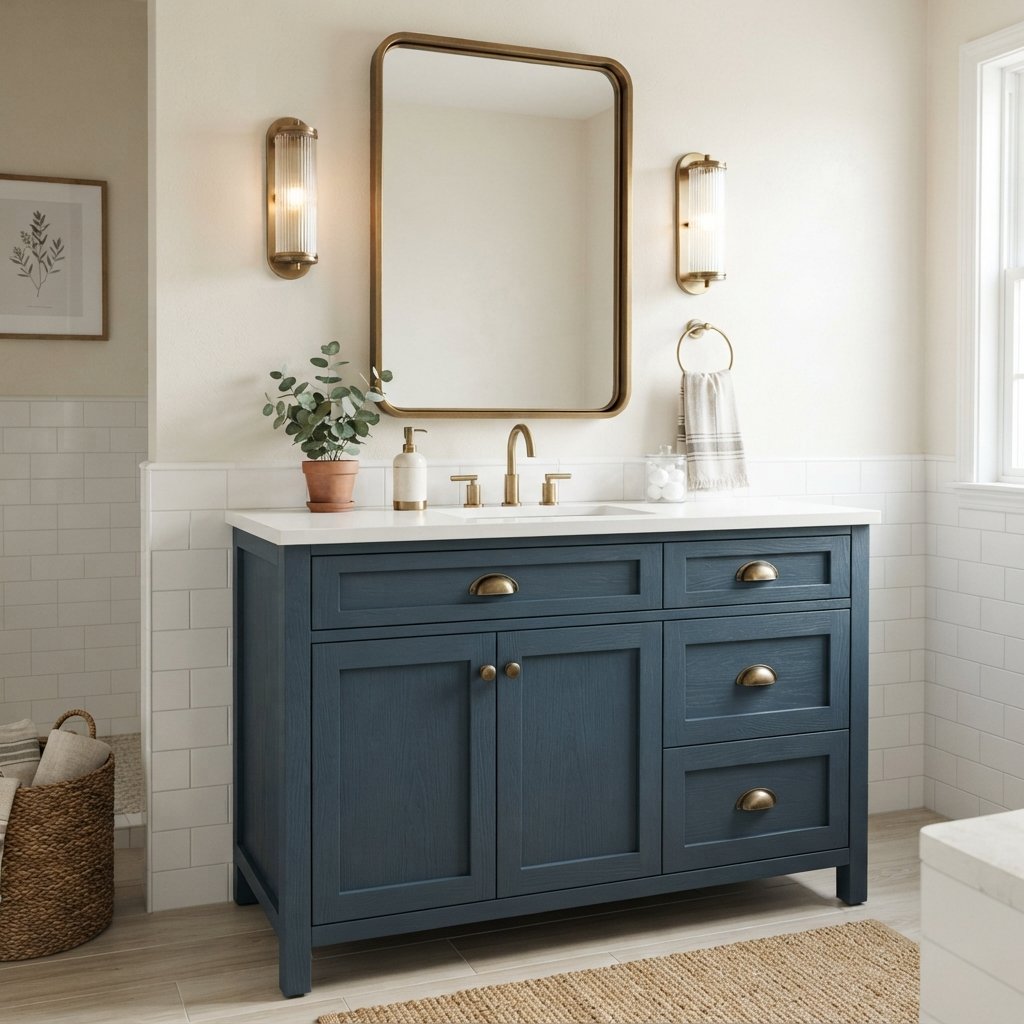
Navy
Classic and strong.
Muted Blue
Calm and softer than navy.
Warm White
Bright without feeling stark.
Mushroom
Warm and sophisticated.
Charcoal
Modern but softer than black.
Black
High contrast and dramatic.
Choose the final color based on the room’s actual finishes and lighting rather than the color name alone.
How to Make a Bathroom Vanity Look More Expensive
Use Simple Hardware
Clean, well-proportioned hardware can make a basic cabinet feel more refined.
Choose a Cohesive Finish Palette
You do not need everything to match, but the finishes should feel intentional.
Upgrade the Mirror
The mirror occupies a large amount of visual space.
Improve the Lighting
Good lighting makes every other finish look better.
Keep the Countertop Clear
Clutter can hide even a beautiful makeover.
Pay Attention to Small Details
Fresh caulk, aligned hardware, smooth paint, and clean edges matter.
Work With Existing Finishes
A thoughtful makeover that coordinates with the flooring and countertop often looks more polished than an expensive update that clashes with them.
Common Bathroom Vanity Makeover Mistakes
Painting Without Proper Cleaning
Residue can interfere with adhesion.
Skipping Product-Specific Preparation
Different surfaces and coatings require different preparation.
Rushing Drying and Curing
A surface may feel dry before it has developed full durability.
Ignoring Water Damage
Paint cannot repair a deteriorating cabinet.
Choosing Color Without Looking at the Countertop
Fixed finishes should guide the palette.
Ordering a Faucet Without Checking the Sink
Verify the existing configuration.
Drilling New Hardware Holes Without Measuring
Small errors become very visible across a row of drawers.
Overdecorating the Counter
Leave usable space.
Ignoring Bathroom Moisture
Choose materials and finishes appropriate for the environment.
Bathroom Vanity Makeover Safety Tips
Turn off the appropriate water supply before disconnecting plumbing.
For electrical work, shut off power appropriately and verify safe working conditions. Bathroom electrical installations have additional requirements because of their proximity to water; hire a qualified electrician when needed.
Use appropriate ventilation and protective equipment when cleaning, sanding, priming, painting, or using adhesives and caulks.
If an older painted surface may contain hazardous materials, do not aggressively sand or disturb it without determining the appropriate safe procedure.
Address active leaks, persistent moisture, and suspected mold before cosmetic work.
Secure heavy mirrors using mounting methods appropriate for their weight and the wall construction.
Follow manufacturer instructions for paint, primer, caulk, faucets, lighting, hardware, and other products rather than relying on universal drying times or installation assumptions.
FAQ About Bathroom Vanity Makeovers
What is the cheapest way to update a bathroom vanity?
Painting the cabinet and replacing or refreshing the hardware can create a significant visual change without replacing the vanity.
Can you paint an old bathroom vanity?
Often, yes, if the cabinet is structurally sound and the surface can be prepared appropriately. The correct preparation, primer, and paint depend on the cabinet material and existing finish.
Do I need special paint for a bathroom vanity?
Choose a coating suitable for cabinetry and the conditions in which it will be used. Follow the paint manufacturer’s guidance for compatible surfaces, primer, application, drying, and curing.
Can I update a vanity without replacing the countertop?
Absolutely. Paint, hardware, a faucet, mirror, lighting, wall color, and fresh caulk can significantly change how an existing countertop looks.
What color should I paint my bathroom vanity?
Warm white, sage, deep green, muted blue, navy, charcoal, mushroom, and black are all possibilities. The best choice depends on your countertop, flooring, tile, walls, and lighting.
Can I paint a bathroom vanity without sanding?
That depends on the existing surface and the specific coating system. Some products may require sanding or deglossing for proper adhesion. Follow the manufacturer’s surface-preparation instructions.
How long should vanity paint cure before use?
There is no universal answer. Dry and cure times vary by product and environmental conditions. Follow the manufacturer’s instructions and treat the newly painted surface gently until it has adequately cured.
Is it worth updating a builder-grade vanity?
If the cabinet is structurally sound and the layout works, a cosmetic makeover can be a practical way to improve the bathroom without replacing the entire vanity.
Final Thoughts
A bathroom vanity makeover can have an outsized impact because the vanity is one of the largest visual features in most bathrooms.
And you do not have to replace everything.
Start by evaluating what is actually wrong.
If the cabinet is sturdy, the countertop works, and the plumbing layout is functional, a coat of paint and new hardware may be enough.
If you want a bigger transformation, update the mirror, faucet, lighting, backsplash, or countertop one piece at a time.
The key is making those choices together.
Coordinate the vanity color with the countertop and flooring. Choose hardware that suits the cabinet style. Make sure the mirror is proportional. Use lighting that is both attractive and functional.
And pay attention to preparation.
Careful cleaning, surface preparation, smooth paint application, aligned hardware, fresh caulk, and simple styling can make an inexpensive vanity makeover look far more polished.
Instead of automatically tearing out an outdated vanity, consider what you can keep—and how a few strategic updates could make it feel completely different.

