

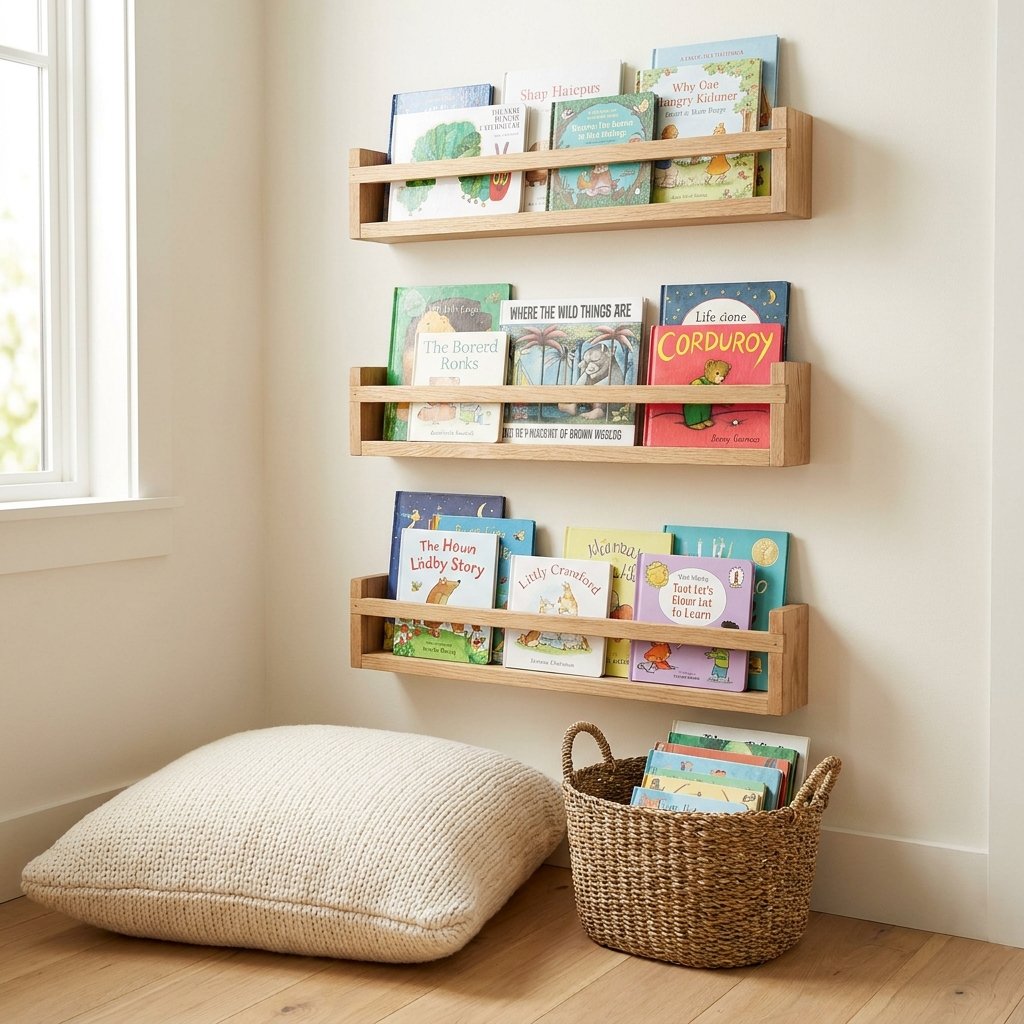
Books are much more inviting when you can actually see their covers.
That is what makes DIY book ledges such a useful storage project. Instead of lining books up with only their spines visible, a shallow ledge displays them face-forward so favorite titles are easier to spot and grab.
Book ledges work especially well in nurseries, kids’ bedrooms, playrooms, reading nooks, classrooms, hallways, and other small spaces where a full bookcase might take up too much floor space.
They can also be a fairly approachable woodworking project.
A basic ledge usually consists of a bottom, a back, and a small front rail that prevents books from sliding forward. You can adjust the length and depth to suit your wall, finish the wood with paint or stain, and install several ledges vertically to take advantage of unused wall space.
The most important part is secure installation.
Books become heavy quickly, and children may pull on wall-mounted storage. The ledges and their fasteners need to be suitable for the expected load and your wall construction.
Here is how to plan, build, finish, and safely install simple DIY book ledges.
Why Build DIY Book Ledges?
Traditional bookcases are useful, but they are not always the best solution.
Book ledges offer several advantages.
They can:
- Use vertical wall space
- Keep book covers visible
- Fit into narrow rooms
- Create an attractive display
- Make children’s books easier to browse
- Add storage without a large piece of furniture
They are also customizable.
You can build one long ledge above a desk, several short shelves beside a bed, or an entire face-forward library wall.
1. Decide Where the Book Ledges Will Go
Choose the location before deciding on dimensions.
Possible locations include:
- Nursery
- Kids’ bedroom
- Playroom
- Reading nook
- Hallway
- Home office
- Living room
Look for unused wall space that does not interfere with doors, windows, switches, outlets, vents, or walkways.
For children’s spaces, think carefully about placement around beds, cribs, climbing furniture, and play areas.
Avoid positioning heavy wall-mounted objects where a failure could cause them to fall into a crib or sleep space.
2. Decide How Many Ledges You Need
You may need only one.
Or you may want several arranged vertically.
The right number depends on:
- Wall size
- Book collection
- Book sizes
- Desired appearance
- Who needs to reach them
For a child’s room, accessible lower shelves can hold current favorites.
Higher shelves may be better suited to display or adult-access books depending on the child’s age and room setup.
Do not automatically fill an entire wall.
A little empty space helps the books stand out.
3. Measure the Wall
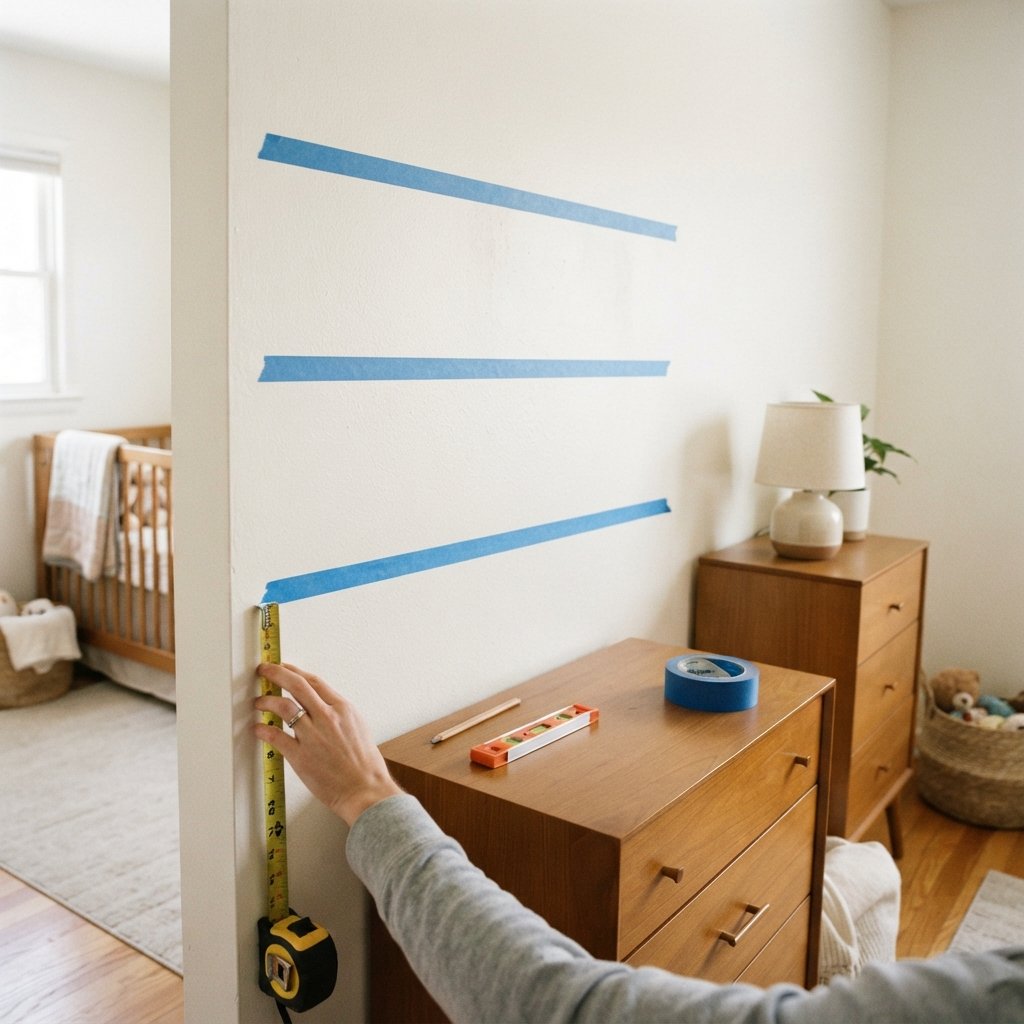
Measure the usable wall width carefully.
Account for:
- Door trim
- Window trim
- Furniture
- Electrical devices
- Corners
- Curtains
Use painter’s tape to mock up the proposed ledge length.
Then stand back.
A shelf that looks appropriately sized on paper may feel too short or too long once you see it on the wall.
4. Choose the Ledge Depth
Book ledges are typically much shallower than standard bookshelves.
However, there is no single ideal depth for every project.
Consider the books you plan to store.
Small picture books require different support than oversized children’s books or large hardcover volumes.
The bottom needs enough usable depth to support the books, while the front rail needs to prevent them from sliding forward.
Build around your actual book collection rather than copying dimensions from another room.
5. Choose Your Lumber or Board Material
Material choice affects appearance, cost, finishing, and construction.
Depending on your design, suitable materials may include appropriate dimensional lumber or sheet goods cut into components.
Consider:
- Straightness
- Smoothness
- Thickness
- Intended load
- Desired finish
If you plan to stain the ledges, choose wood with a grain you like.
If you plan to paint them, appearance of the raw grain may matter less, but the material still needs to be appropriate for the construction and finish.
Inspect boards before buying when possible.
Warped pieces make assembly and installation more difficult.
6. Plan the Three Main Parts
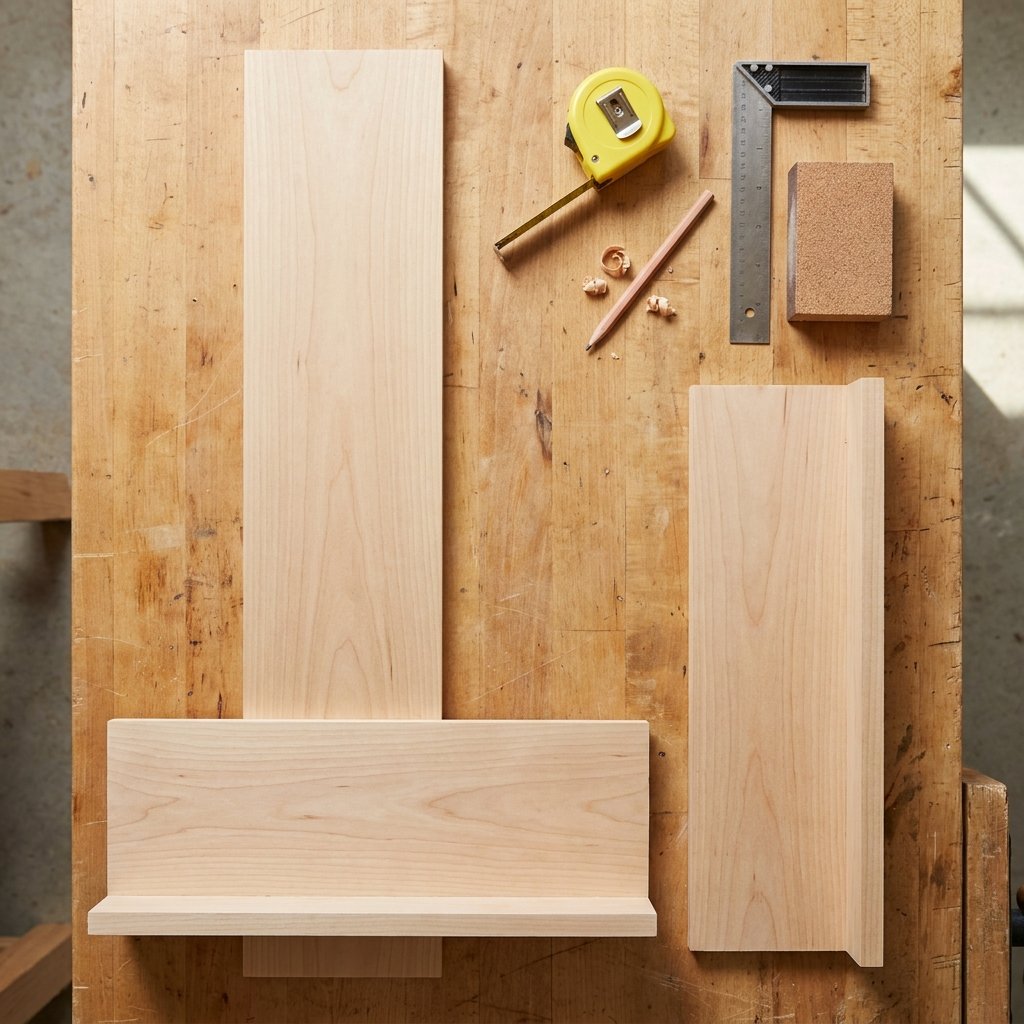
A simple book ledge can be built from three components:
Back
Provides a mounting surface and supports the books.
Bottom
Creates the shallow shelf the books sit on.
Front Rail
Keeps books from sliding off the front.
The exact dimensions and joinery depend on the material and design.
Make a simple sketch before cutting anything.
Label each piece and write down the final dimensions.
7. Cut the Pieces to Length
Once the design is confirmed, cut the components carefully.
Use a suitable saw according to its manufacturer’s instructions.
Measure each piece before cutting and verify the dimensions.
Wear appropriate eye and hearing protection and follow safe cutting practices.
If you do not own suitable woodworking tools, many home-improvement or lumber suppliers may offer cutting services depending on location and material.
8. Sand the Wood
Book ledges—especially those used by children—should have smooth, comfortable surfaces.
Sand rough areas and sharp edges appropriately.
Pay particular attention to:
- Front rail
- Corners
- Cut ends
- Upper edges
Remove sanding dust before assembly or finishing.
If working with engineered wood products, follow appropriate dust-control and respiratory-protection guidance for the material.
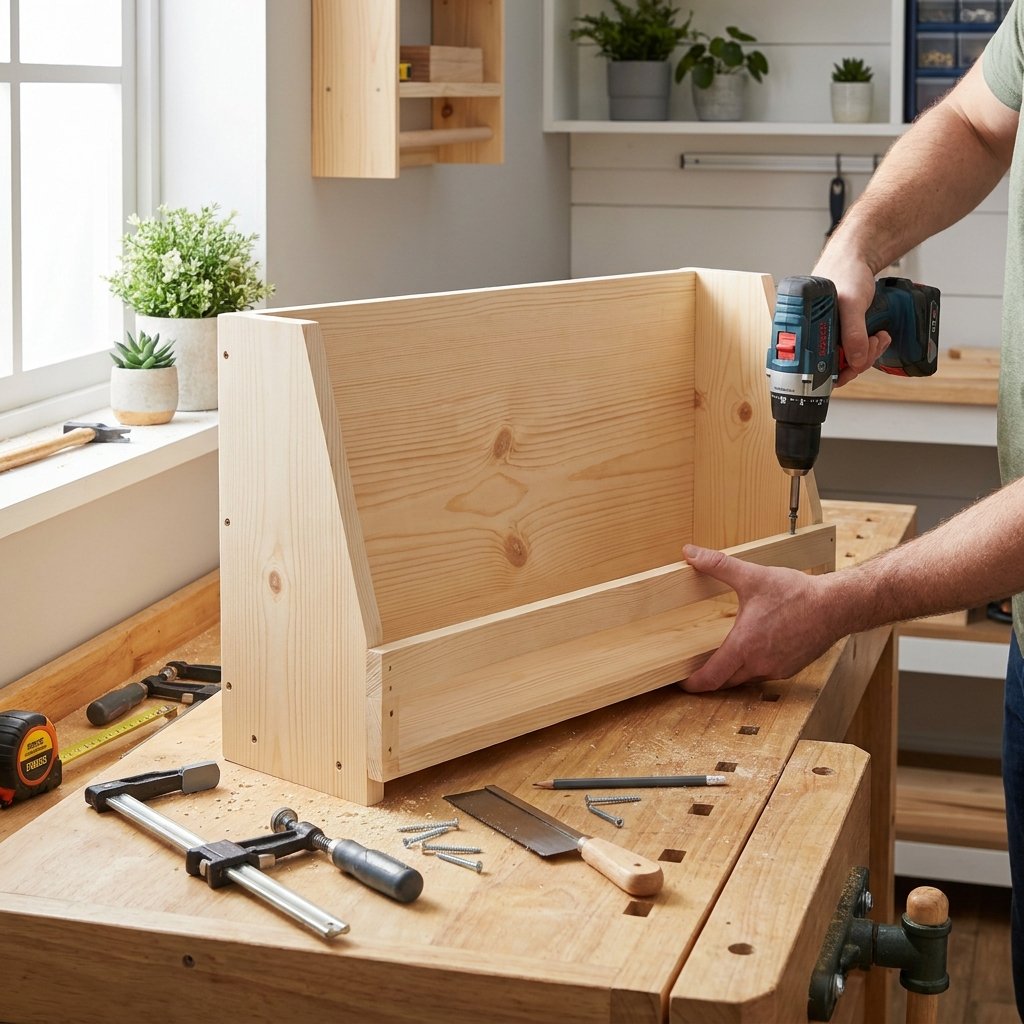
9. Assemble the Book Ledge
Dry-fit the pieces first.
Make sure:
- Bottom sits correctly
- Back is aligned
- Front rail is straight
- Books will have enough usable space
Then assemble using joinery and fasteners suitable for the chosen material and expected load.
Wood glue may be part of the assembly, but do not assume glue alone is appropriate for every construction method.
Follow adhesive and fastener manufacturer instructions.
Check for square and alignment as you work.
10. Fill Fastener Holes If Desired
If the ledges will be painted, you may want to fill visible fastener holes.
Use a filler appropriate for the material and finish.
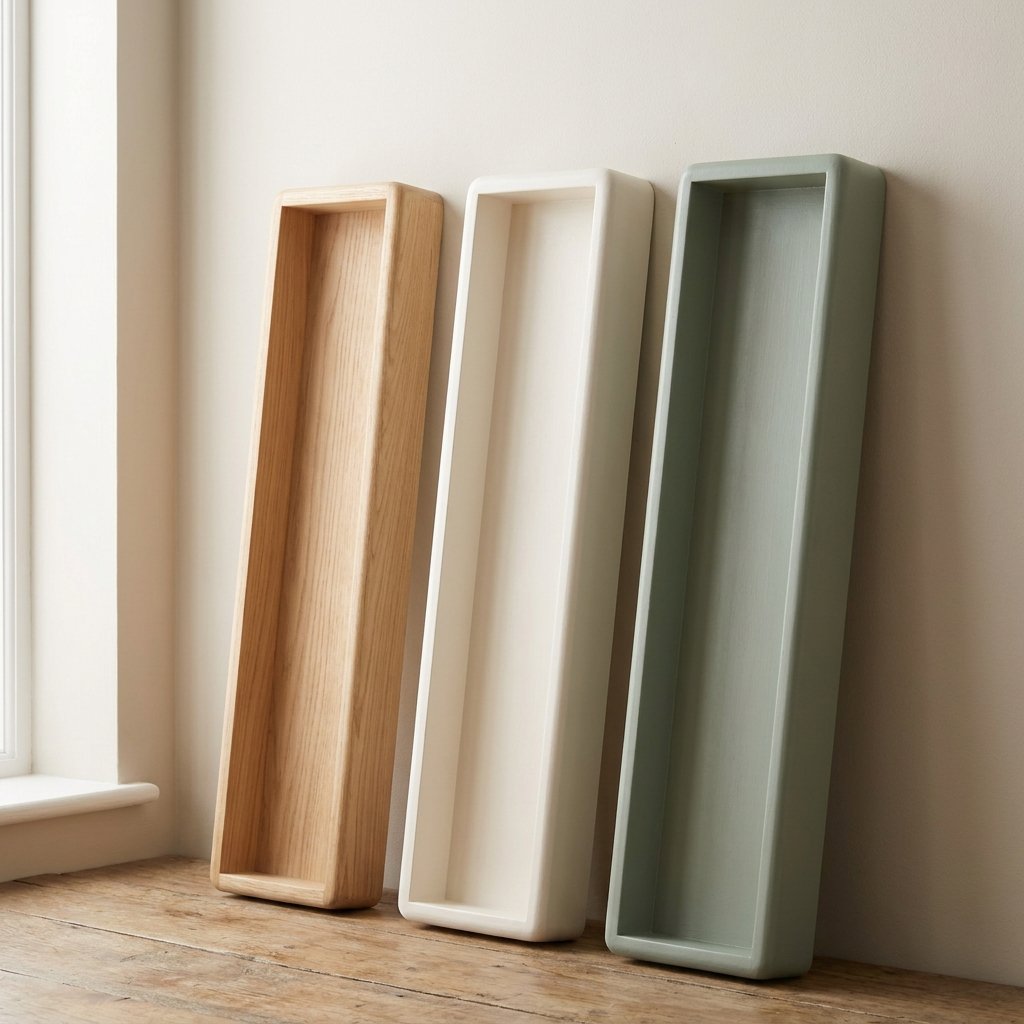
Allow it to dry as directed, then sand it smooth.
For stained ledges, consider how filler will accept stain before applying it.
A filler that looks invisible under paint may remain noticeable under a transparent finish.
11. Prime and Paint the Book Ledges
Painted book ledges can blend into the wall or become an accent.
Popular choices include:
- Warm white
- Sage
- Muted blue
- Navy
- Black
- Greige
Prepare and prime the material as recommended for your chosen coating system.
Apply paint according to the manufacturer’s instructions for application, recoat time, and curing.
Remember that books will rub against the surface, so allow the finish adequate time to develop durability before loading the shelves.
12. Stain the Book Ledges
Natural or stained wood can add warmth to a nursery or kids’ room.
Before staining, test the finish on a scrap from the same material.
Wood species, grain, sanding, and stain formulation all affect the final color.
Follow the stain manufacturer’s preparation, application, drying, and topcoat instructions.
Allow the finished ledges to cure appropriately before bringing them into regular use.
13. Find the Wall Studs
Secure installation is especially important for book storage.
Locate framing where possible and mark it before positioning the shelves.
Wall construction varies, so the appropriate fastener depends on:
- Wall material
- Shelf construction
- Expected book weight
- Fastener type
Whenever practical, structural attachment to framing can provide a strong mounting point.
Where that is not possible, use appropriately rated hardware specifically suited to the wall construction and load.
Do not guess at load capacity.
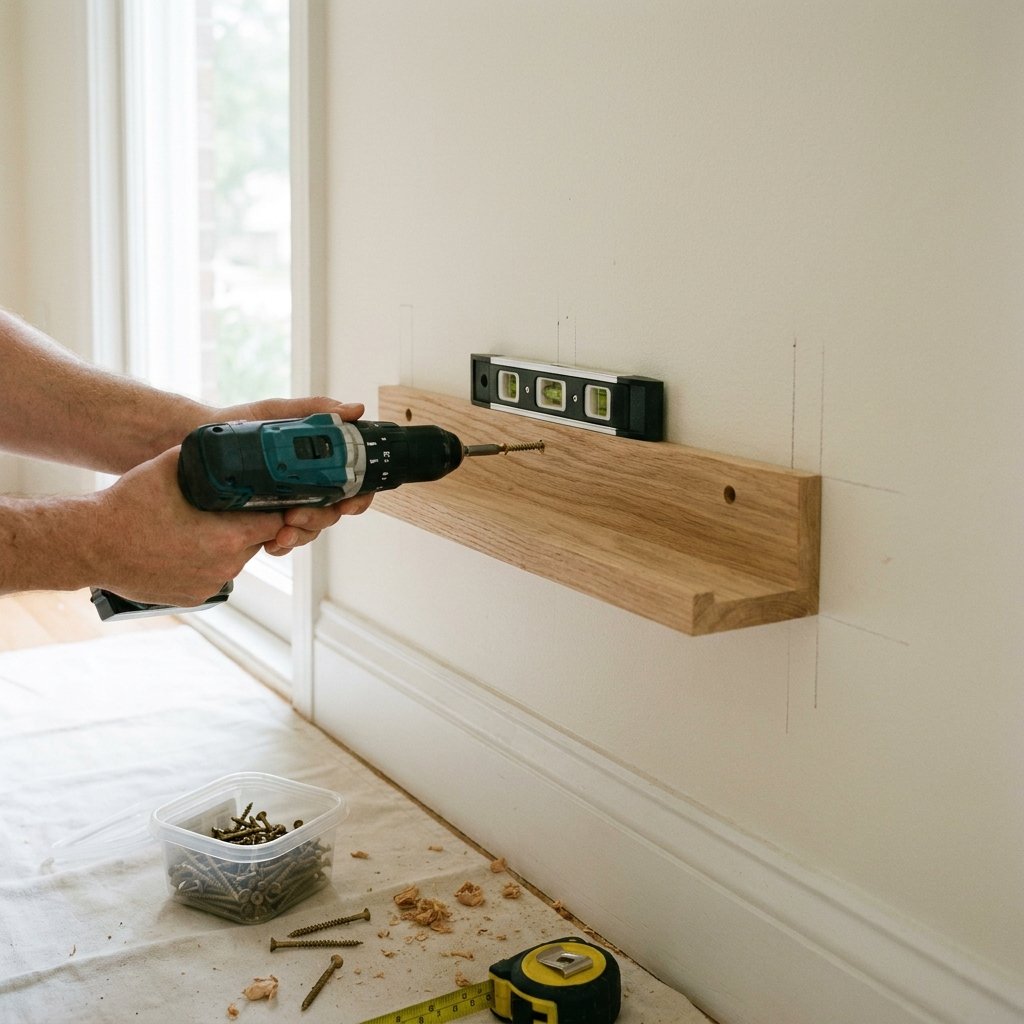
14. Mark a Level Installation Line
Do not rely on the floor or ceiling as your reference.
They may not be perfectly level.
Use an appropriate level to establish the shelf position.
Mark lightly with pencil or painter’s tape.
For multiple ledges, check both horizontal level and visual spacing before drilling.
This is another point where a full painter’s-tape mockup can prevent mistakes.
15. Secure the Book Ledges to the Wall
Fasten each ledge using a method appropriate for its construction, the wall, and the expected load.
Check that it is secure before adding books.
Do not rely on lightweight picture-hanging hardware or unverified adhesive strips for a shelf carrying books.
For children’s rooms, remember that the ledge may experience forces beyond the static weight of the books.
A child could pull on the shelf or books.
Install accordingly and supervise the space based on the child’s age and abilities.
16. Space Multiple Ledges for the Books
Do not choose vertical spacing only for appearance.
Look at the actual books.
Large picture books may need considerably more height than small board books.
Arrange several books on the floor and measure the tallest ones.
Then plan enough space between ledges for easy removal and replacement.
If the collection contains many sizes, vary the spacing or designate different ledges for different books.
17. Add the Books Without Overloading the Shelves
Once the shelves are securely installed and the finish has cured, add books gradually.
Face the covers outward.
Overlap them slightly if necessary, but avoid stacking so many books on each ledge that the shelf becomes overloaded or difficult to use.
A smaller rotating selection can work especially well for children.
Keep the rest of the collection elsewhere and change the display occasionally.
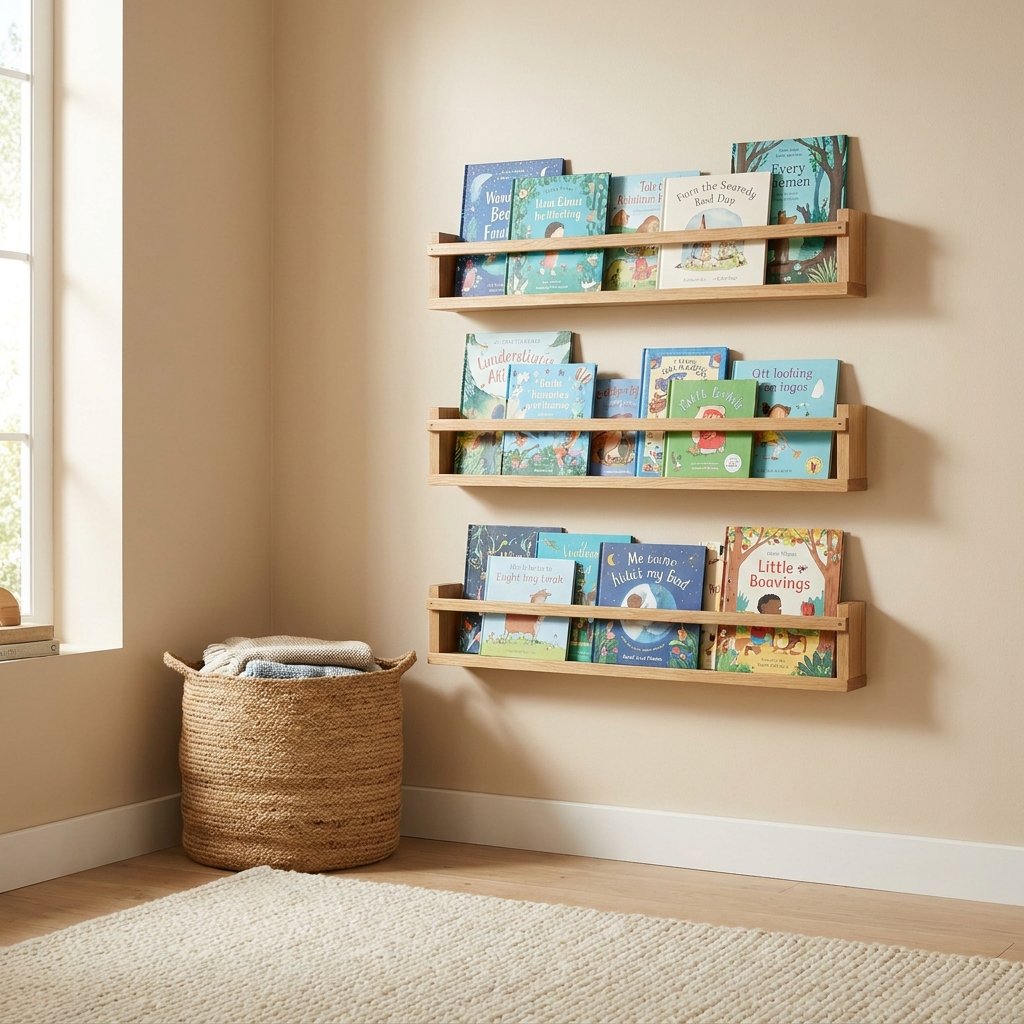
DIY Book Ledges for a Nursery
Book ledges can add storage without taking up nursery floor space.
Use them for a curated collection of picture books and board books.
However, placement is especially important around a crib.
Avoid installing shelves, heavy books, framed objects, or other potentially falling items where they could fall into the crib or become reachable as the child grows.
Follow current crib-placement and safe-sleep guidance as well as the crib manufacturer’s instructions.
A reading corner away from the crib may be a better location.
DIY Book Ledges for a Kids’ Bedroom
In a child’s bedroom, place frequently used books at an accessible level when appropriate.
This encourages independent browsing and cleanup.
You might use:
Lower ledge: current favorites.
Middle ledge: storybooks.
Higher ledge: rotating display or adult-access books.
Adjust the arrangement as the child grows.
DIY Book Ledges for a Playroom
A playroom book wall can help separate reading materials from toys.
Try placing several ledges above a low reading area.
Add a washable rug or comfortable floor cushion nearby where appropriate.
Keep the setup visually simple.
The colorful book covers already provide plenty of decoration.
DIY Book Ledges for a Reading Nook
A small empty corner can become a reading nook with surprisingly little.
You may need only:
- Two or three book ledges
- Small rug
- Floor cushion or child-appropriate chair
- Good lighting
This works especially well in bedrooms and playrooms where a full bookcase would consume valuable floor space.
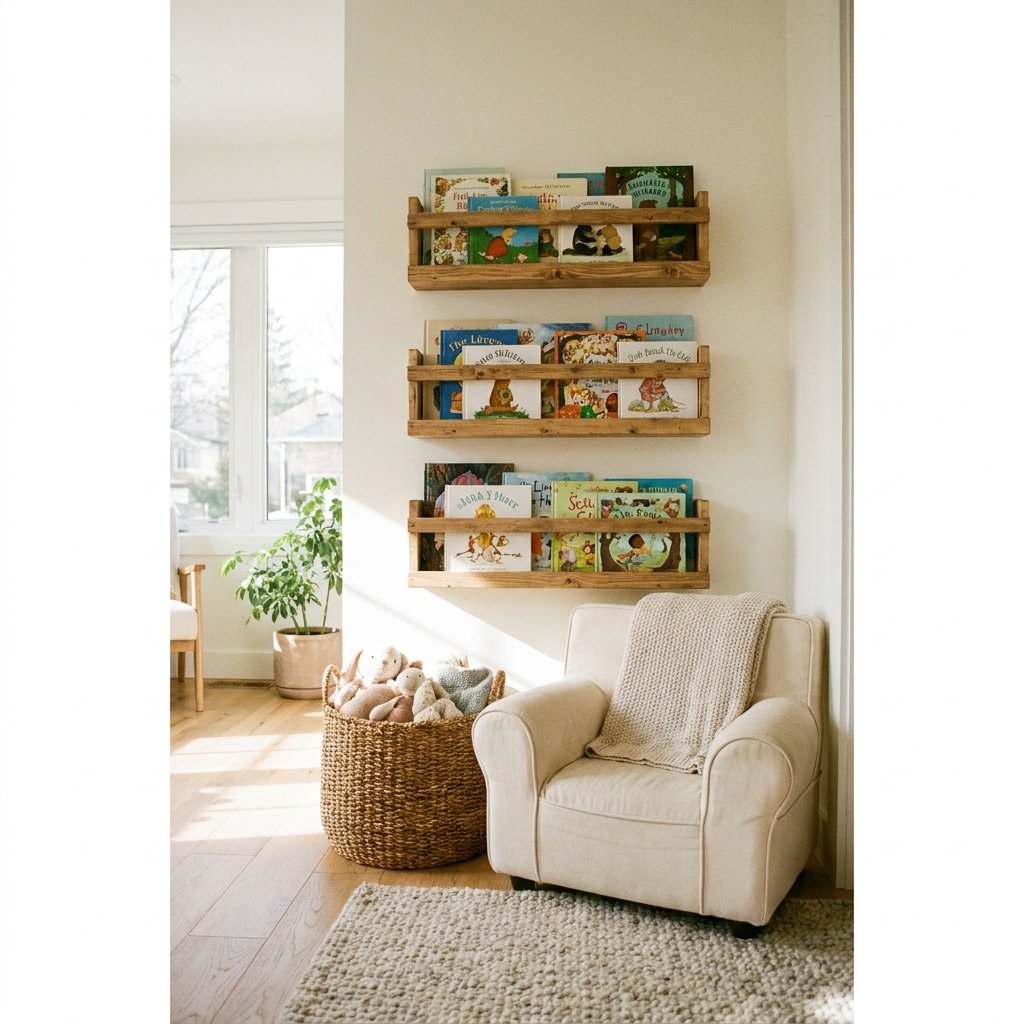
DIY Book Ledges Above a Dresser
Book ledges can also use the wall space above a dresser.
This can work in a nursery or child’s bedroom, provided the shelves are securely mounted and the placement is appropriate for the room.
Consider whether the dresser could be climbed and whether the shelves or books would then become reachable.
Secure furniture that could tip according to manufacturer instructions and current furniture-safety guidance.
DIY Book Ledges Without a Front Rail
A traditional shelf can hold books without a front rail, but it functions differently.
For face-forward books on a shallow shelf, a front retaining edge helps keep them in place.
If you omit the rail, make sure the shelf depth and design adequately support the books.
Do not assume a very shallow flat board will safely hold face-forward books without some form of restraint.
Painted DIY Book Ledge Ideas
Paint allows the shelves to coordinate with the room.
Warm White
Blends into light walls.
Sage
Works beautifully in nature-inspired rooms.
Muted Blue
Adds soft color.
Navy
Creates contrast.
Black
Provides a modern graphic look.
Same Color as the Wall
Creates a subtle built-in effect.
If painting the ledges the wall color, remember that the wall and woodwork may require different paint products or sheens even when the color is the same.
Natural Wood Book Ledges
Natural wood is especially versatile.
It pairs well with:
- Warm white
- Sage
- Blue
- Cream
- Beige
- Wallpaper
Light wood can create a Scandinavian or modern feel.
Medium wood can make the room feel warmer and more traditional.
You do not have to match the ledges exactly to the crib, dresser, or floor.
Related wood tones can look intentional when repeated elsewhere.
DIY Book Ledges With Wallpaper
Book ledges can look beautiful against wallpaper.
Try:
- Botanical wallpaper + natural wood ledges
- Floral wallpaper + warm white ledges
- Woodland wallpaper + oak ledges
- Striped wallpaper + painted ledges
Keep the book ledges relatively simple when the wallpaper is busy.
The combination of patterned wallpaper and colorful book covers already creates significant visual interest.
How to Style Book Ledges
Books should remain the priority.
A few ledges filled with colorful covers often need no additional styling.
If the shelves are in an adult space, you might mix in a small lightweight decorative object where appropriate.
In children’s spaces, avoid adding heavy, breakable, sharp, or choking-hazard decor simply to fill gaps.
Empty space is fine.
How Many Books Should Go on a Ledge?
There is no universal number.
It depends on:
- Shelf length
- Book size
- Book weight
- Ledge construction
- Mounting system
Follow any applicable load guidance for the shelf and fasteners.
From a practical standpoint, do not pack the ledge so tightly that children cannot easily remove a book without pulling several others down.
How to Make DIY Book Ledges Look Built-In
Keep the Installation Level
Small errors become obvious across multiple shelves.
Plan the Spacing First
Use painter’s tape.
Finish the Wood Carefully
Sand rough edges and prepare the surface properly.
Coordinate the Color
Match the wall for subtlety or repeat another room color.
Align Multiple Ledges
Consistent edges create visual order.
Hide Fasteners Where Appropriate
Use a construction and finishing method that creates a clean result without compromising secure attachment.
Leave Breathing Room
Do not overcrowd every shelf.
Common DIY Book Ledge Mistakes
Building Before Measuring the Books
Design around what you plan to store.
Making the Ledge Too Shallow
Books need adequate support.
Making the Front Rail Too Low for the Intended Books
Test the design before building multiples.
Cutting Everything Before Testing One Shelf
Build and test a prototype when possible.
Ignoring Wall Stud Locations
Plan secure attachment early.
Using Inadequate Wall Fasteners
Books can become heavy quickly.
Spacing Shelves Too Closely
Measure taller books.
Installing Shelves Only for Appearance
Think about who needs to reach them.
Loading Shelves Before Paint Has Cured
Follow the coating manufacturer’s instructions.
Overfilling the Shelves
Leave enough room to use them easily.
DIY Book Ledge Safety Tips
Secure installation is essential.
Books have substantial cumulative weight, so choose shelf materials, joinery, fasteners, and wall anchors appropriate for the expected load.
Attach to structural framing where appropriate or use properly rated hardware designed for the specific wall construction and load.
Do not rely on decorative adhesive strips or unverified mounting methods for loaded shelves.
Before drilling into a wall, consider the possible location of electrical wiring, plumbing, and other utilities.
Use suitable detection methods and extra caution around outlets, switches, plumbing fixtures, and walls likely to contain services.
In children’s rooms, consider climbing, pulling, and changing reach as the child grows.
Do not position shelves or heavy books where they could fall into a crib, bed, or other vulnerable area.
Secure nearby dressers and other tip-prone furniture according to manufacturer instructions.
Sand ledges carefully to reduce sharp edges and splinters.
Use appropriate personal protective equipment while cutting, sanding, drilling, finishing, and painting.
Follow all tool, adhesive, fastener, stain, primer, paint, and topcoat manufacturer instructions.
FAQ About DIY Book Ledges
Are book ledges easy to build?
A simple three-piece ledge can be an approachable woodworking project if you are comfortable measuring, cutting, assembling, finishing, and securely mounting wood.
How deep should DIY book ledges be?
There is no universal depth. Measure the books you want to display and design the bottom so they have adequate support while keeping the shelf appropriately shallow for the room.
What are the three parts of a basic book ledge?
A simple design usually has a back, bottom shelf, and front retaining rail.
How far apart should book ledges be?
Base the spacing on your book heights rather than using one universal measurement. Leave enough room to remove and replace the tallest books comfortably.
How do you attach book ledges to a wall?
Use a mounting method appropriate for the shelf design, wall construction, and expected load. Structural framing or appropriately rated wall fasteners may be needed.
Can book ledges go in a nursery?
Yes, but place them carefully. Avoid positioning shelves and heavy books where they could fall into or become reachable from a crib, and follow current safe-sleep and crib-placement guidance.
Should I paint or stain book ledges?
Either works. Paint can coordinate with the walls or decor, while stain or a suitable clear finish can highlight natural wood grain.
Can book ledges hold heavy books?
That depends on their construction, materials, length, mounting method, wall construction, and fastener ratings. Design and install the shelves for the actual load rather than assuming all ledges have the same capacity.
Final Thoughts
DIY book ledges are a simple way to turn unused wall space into practical book storage.
They work especially well for children’s books because the covers remain visible, making it easier for kids to recognize and choose what they want to read.
Start with the books rather than the lumber.
Measure the sizes you plan to display. Decide where the shelves will go. Mock up the length and spacing with painter’s tape, and think about who needs to reach each shelf.
Then build the ledges around those needs.
A simple back, bottom, and front rail can create an attractive face-forward shelf. Careful sanding and a painted, stained, or natural finish can make basic materials look polished.
Most importantly, take the mounting seriously.
Books become heavy quickly, and children’s spaces introduce additional pulling and climbing considerations. Use appropriate materials and fasteners, secure the ledges properly, and place them thoughtfully.
Once installed, add a small selection of favorite books and leave a little room between them.
The result is functional wall storage that doubles as colorful room decor—and may even make choosing the next bedtime story a little easier.

