

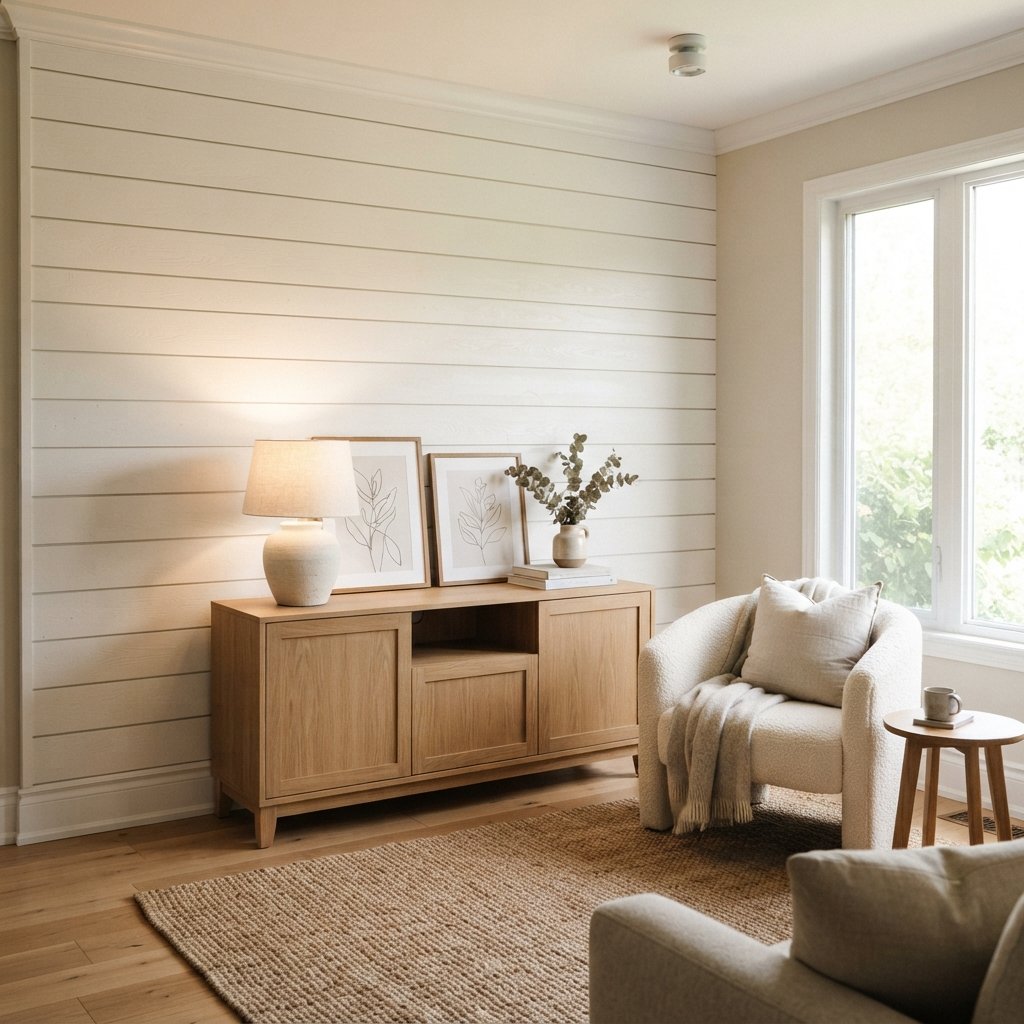
Shiplap can add instant character to a plain room, but covering an entire wall with individual prefinished boards can get expensive.
A more budget-friendly option is to create the look using plywood cut into strips.
This easy shiplap tutorial from plywood gives you the horizontal lines and architectural detail of a planked wall while allowing you to customize the board width, paint color, and overall style.
Plywood shiplap can work beautifully in:
- Living rooms
- Bedrooms
- Entryways
- Dining rooms
- Laundry rooms
- Mudrooms
- Hallways
- Home offices
The basic process is straightforward: measure the wall, prepare the plywood, cut it into consistent strips, plan the layout, locate the studs, install the strips with even gaps, fill and finish appropriate areas, then paint the wall.
The details are what make the difference.
Plywood thickness affects how the new wall treatment meets existing baseboards and trim. Uneven strips create inconsistent gaps. Poor planning around outlets can create electrical problems. And attaching boards without knowing what is inside the wall can be unsafe.
So before cutting the first sheet, plan the entire installation.
What Is Plywood Shiplap?
Traditional shiplap refers to boards with overlapping rabbeted edges that create distinctive horizontal joints.
Many modern DIY “shiplap” walls are actually a decorative treatment designed to create a similar visual appearance.
Plywood shiplap generally involves cutting sheet plywood into long strips and installing those strips horizontally with a small, consistent reveal between them.
It does not create the same interlocking joint as traditional shiplap.
But once painted, it can provide a similar horizontal-plank look at a potentially lower material cost.
Materials for a DIY Plywood Shiplap Wall
Your exact materials will depend on the wall, plywood, installation method, and finish.
A typical project may require:
- Plywood suitable for the project
- Appropriate wall fasteners
- Construction adhesive if suitable and desired
- Wood filler or patching compound
- Paintable caulk
- Primer
- Paint
- Spacers
- Sandpaper or sanding supplies
- Painter’s tape
- Drop cloths
Do not buy plywood based on price alone.
Look at its surface quality, flatness, edge condition, thickness, and suitability for the finish you want.
Tools You May Need
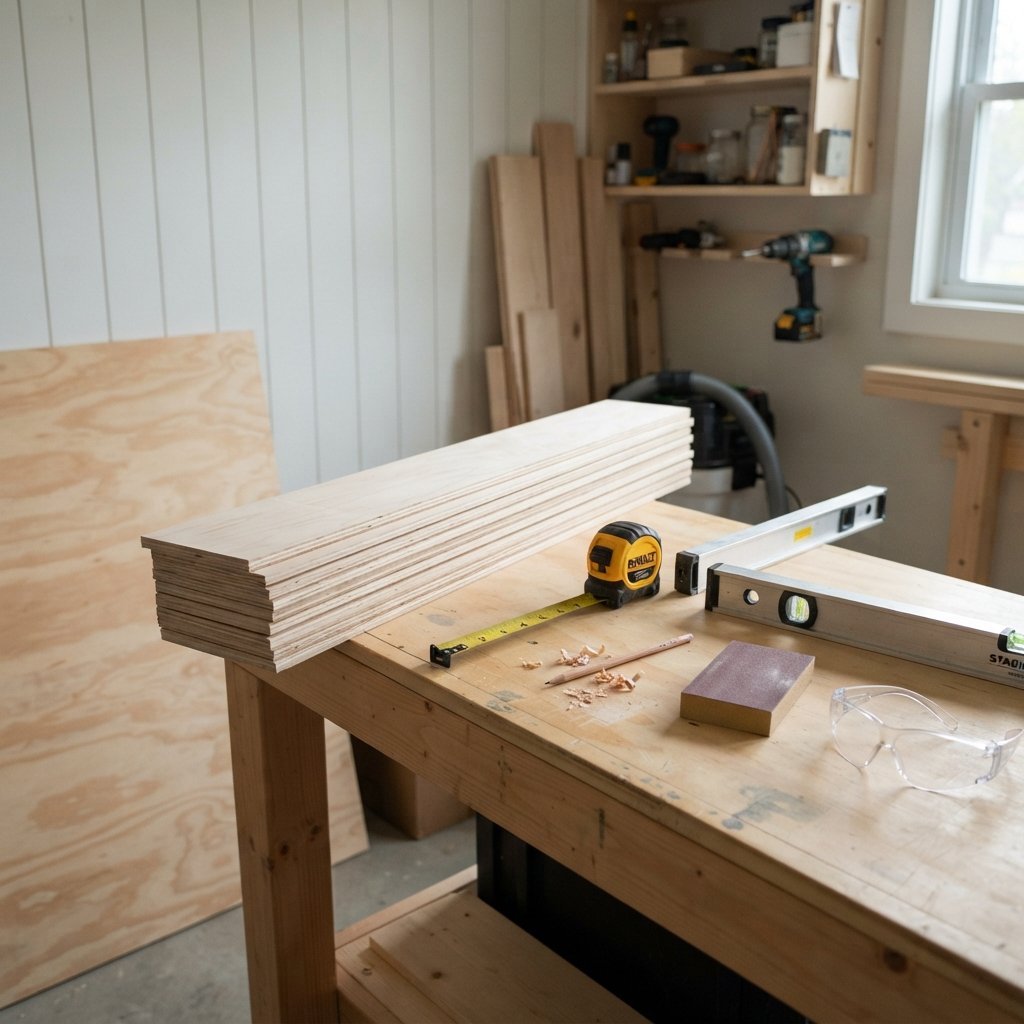
Depending on how you prepare and install the plywood, useful tools may include:
- Tape measure
- Pencil
- Level
- Stud finder
- Table saw or circular saw with an appropriate cutting setup
- Miter saw or suitable crosscutting tool
- Sander
- Drill/driver
- Appropriate fastening tool
- Caulk gun
- Painting supplies
- Suitable personal protective equipment
Cutting full plywood sheets can be awkward and potentially dangerous.
If you are not equipped to cut sheet goods safely and accurately, consider having a lumber supplier or home-improvement store cut the plywood into strips where that service is available.
Follow all tool manufacturer instructions.
How to Make Shiplap From Plywood
1. Choose the Wall
Start with a wall where the horizontal lines will add architectural interest.
Good candidates include:
- Fireplace wall
- Wall behind a bed
- Dining room wall
- Entryway
- Mudroom wall
- Living room focal wall
Look carefully at what is already there.
Note:
- Baseboards
- Crown molding
- Door casing
- Window trim
- Outlets
- Switches
- Vents
- Thermostats
These details affect the installation.
2. Measure the Wall
Measure the total width and height.
Do not assume opposite ends of the wall are identical.
Older houses—and plenty of newer ones—can have slightly uneven floors, ceilings, and corners.
Measure in several locations.
Then sketch the wall, including doors, windows, outlets, and other obstacles.
This will help you estimate materials and plan the board layout.
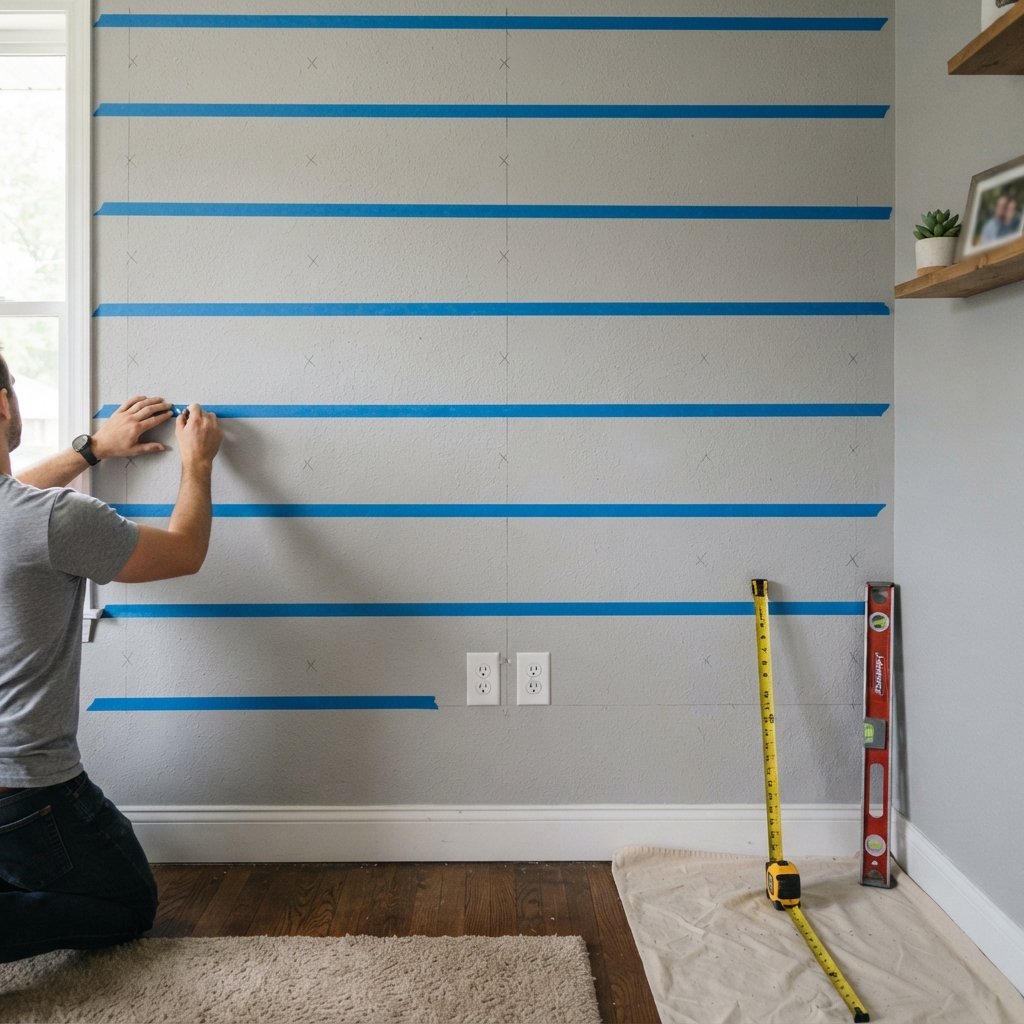
3. Decide on the Plywood Strip Width
One advantage of making shiplap from plywood is that you can choose the visual scale.
Narrower strips create more horizontal lines.
Wider strips create a simpler look with fewer seams.
Instead of choosing a width because another tutorial used it, think about:
- Ceiling height
- Wall width
- Room size
- Existing trim
- Desired style
Use painter’s tape to mock up several horizontal lines if you are unsure.
4. Plan the Top and Bottom Boards
Do not begin installation until you know what will happen at both the ceiling and baseboard.
If you install full-width strips from the bottom upward, you may end up with an awkwardly narrow piece at the ceiling.
Calculate the layout first.
You may choose to adjust the starting board or overall strip width so the top and bottom look intentional.
Also check how the plywood thickness will meet your existing baseboard.
If the plywood projects beyond the trim profile, you may need to modify the trim plan.
5. Cut the Plywood Into Strips
Consistent strips are essential.
If one strip is slightly wider than another, the difference can become noticeable as the installation moves up the wall.
Use an appropriate cutting method and properly supported work surface.
Sheet goods need to be controlled and supported during cutting.
Never attempt an unsafe freehand setup simply because you want to save time.
Wear appropriate eye, hearing, and respiratory protection.
If you cannot safely produce long, straight, consistent cuts, have the plywood ripped professionally.
6. Sand the Plywood
Cut plywood can have rough edges and splinters.
Sand the visible surfaces and edges as appropriate for the chosen plywood.
Pay special attention to freshly cut edges.
You do not necessarily need furniture-grade perfection for a painted wall, but rough fibers can become much more noticeable after paint.
Remove sanding dust before finishing or installation.
7. Decide Whether to Prime Before Installation
There are two basic approaches.
You can prime the boards before installing them, or prime the wall after installation.
Pre-priming can make it easier to cover the edges that form the dark lines between boards.
On the other hand, you will probably still need touch-ups after cutting, fastening, filling, and installation.
The right process depends on the plywood and coating system.
Follow the primer and paint manufacturer’s instructions.
8. Paint the Wall Behind the Gaps
If the finished shiplap will have visible gaps, the original wall color may show through.
If the existing wall is a dramatically different color, consider painting the wall behind the plywood before installation.
For example, dark blue showing through the gaps of white shiplap may create much stronger lines than you intended.
Painting the background a coordinating color can produce a cleaner result.

9. Locate and Mark the Studs
Before covering the wall, identify structural framing where possible.
Mark the stud locations somewhere they will remain visible as you install the boards.
You might extend small reference marks above the project area or use another reliable system.
Fastening requirements depend on:
- Plywood thickness
- Wall construction
- Board length
- Installation method
Where appropriate, fastening into framing provides a reliable attachment point.
If using construction adhesive, follow the adhesive manufacturer’s instructions and understand that removing the wall treatment later may damage the drywall.
10. Establish a Level Starting Line
Do not assume the floor or baseboard is level.
Use a level to establish your reference.
This is especially important because every board after the first will visually follow the previous one.
A small error at the beginning can become much more obvious across an entire wall.
Decide whether you are working from the bottom upward or using another planned reference point.
11. Install the First Plywood Strip
Position the first strip according to your layout.
Check:
- Level
- End position
- Relationship to trim
- Gap placement
- Stud locations
Then fasten it using a method appropriate for your materials and wall.
Check it again before moving to the next strip.
The first board establishes the visual rhythm for the wall.
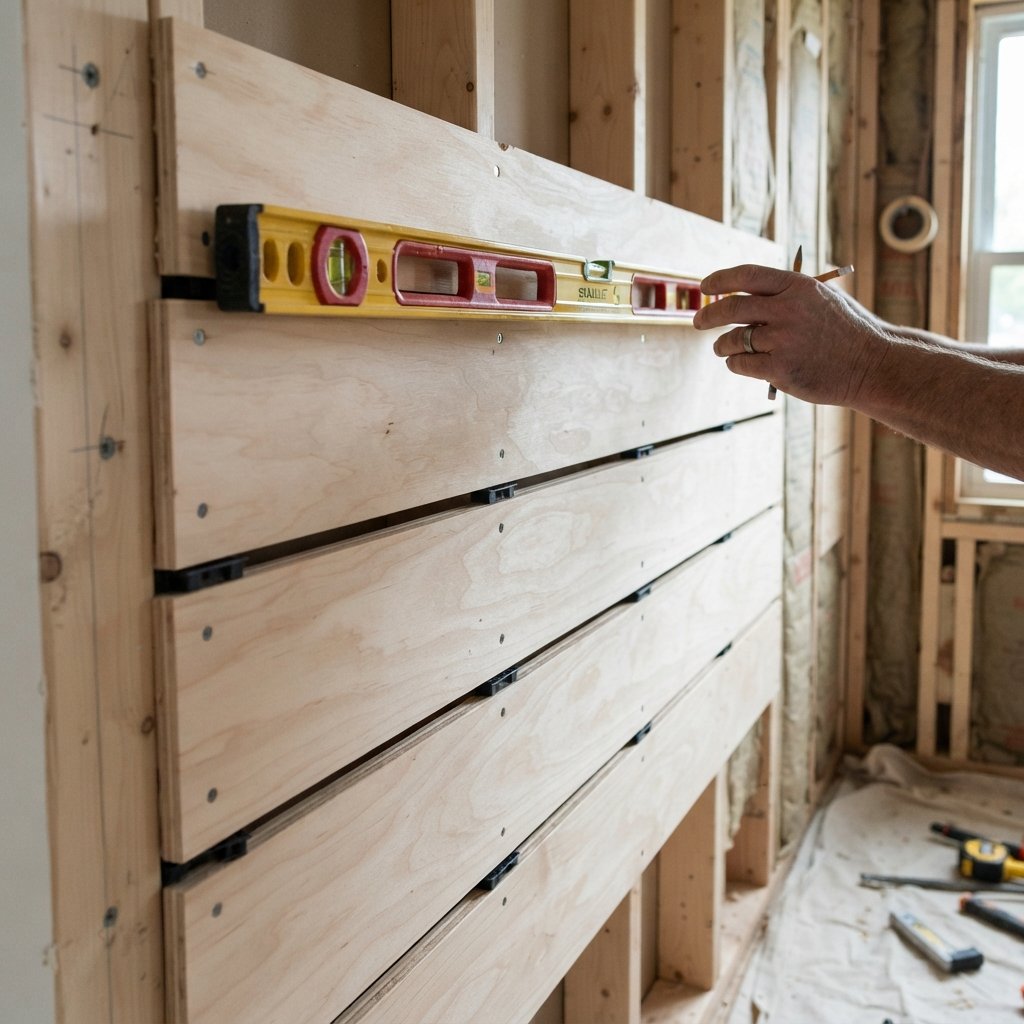
12. Use Consistent Spacers
Consistent gaps are what create the recognizable plank effect.
Use uniform temporary spacers between boards rather than estimating each gap by eye.
The exact reveal is a design choice.
What matters most visually is consistency.
Place spacers at several points along longer boards so the gap does not gradually narrow or widen.
Remove temporary spacers as you progress.
13. Continue Up the Wall
Install one strip at a time.
Keep checking:
- Level
- Gap consistency
- End joints
- Trim alignment
Do not assume that because the first few boards are level, the rest automatically will be.
Periodically measure your remaining wall height.
This gives you time to notice any accumulating layout problem before reaching the ceiling.
14. Stagger Seams on Long Walls
If a wall is longer than your available plywood strips, you may need end joints.
You can create a more intentional look by planning these seams rather than allowing them to land randomly.
Depending on the style, you may:
- Stagger joints
- Align them with framing where appropriate
- Use a deliberate repeating pattern
Avoid creating several obvious seams directly above one another unless that is part of the design.
15. Cut Around Outlets and Switches Carefully
Electrical work deserves particular attention.
Turn off power at the appropriate circuit before working around electrical devices and verify safe conditions.
Do not bury electrical boxes behind plywood.
Adding wall material changes the finished wall thickness, which may affect how switches, outlets, and their boxes need to be positioned or extended.
Electrical devices and boxes must remain properly installed and accessible.
Use approved methods that comply with applicable requirements.
If you are unsure how the added plywood affects an electrical box, have a qualified electrician handle that portion of the project.
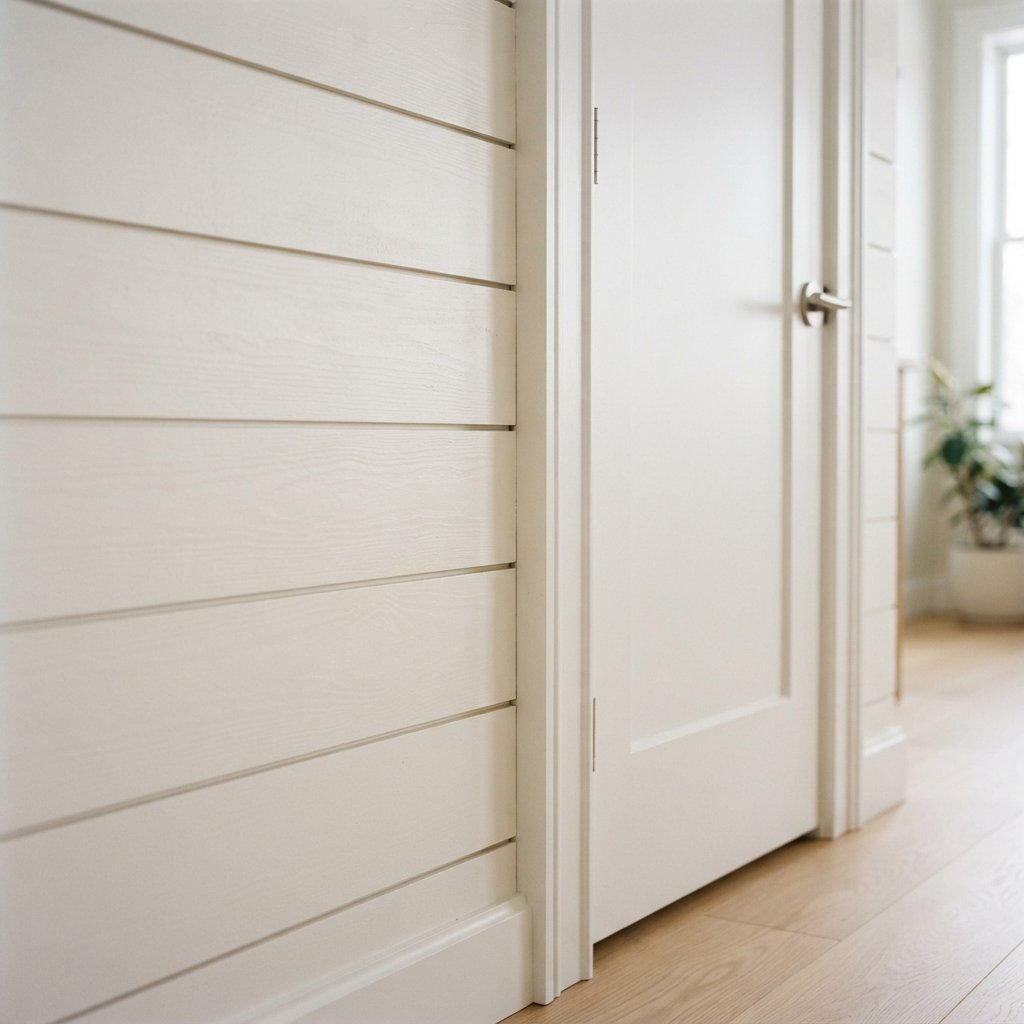
16. Finish Around Windows and Doors
The added plywood thickness can also affect window and door casing.
Plan these transitions before installing the boards.
You may need to adjust how the shiplap terminates against:
- Door casing
- Window casing
- Inside corners
- Outside corners
The goal is for the wall treatment to look intentional rather than simply stopping wherever it meets another piece of trim.
17. Install the Final Strip
The top board may need to be ripped narrower to fit.
Measure at multiple points because the ceiling may not be perfectly level.
A small difference can often be handled through thoughtful trim and finishing, depending on the design.
Do not force an oversized strip into place.
Make the final piece fit the actual opening.
Filling Nail Holes and Seams
Once the boards are installed, decide which marks should disappear and which should remain visible.
Fill appropriate fastener holes using a product suitable for the plywood and finish.
Sand the repairs when dry according to product instructions.
End joints may also need attention depending on the look you want.
However, do not automatically fill the horizontal gaps between the boards.
Those reveals are what create the shiplap effect.
Should You Caulk Plywood Shiplap?
Caulk can help create clean transitions where the wall treatment meets certain trim or corners.
But do not caulk every line automatically.
The horizontal spaces between the plywood strips are usually intended to remain visible.
Use paintable caulk only in appropriate joints where movement and the material combination allow it.
Follow the caulk manufacturer’s recommendations.
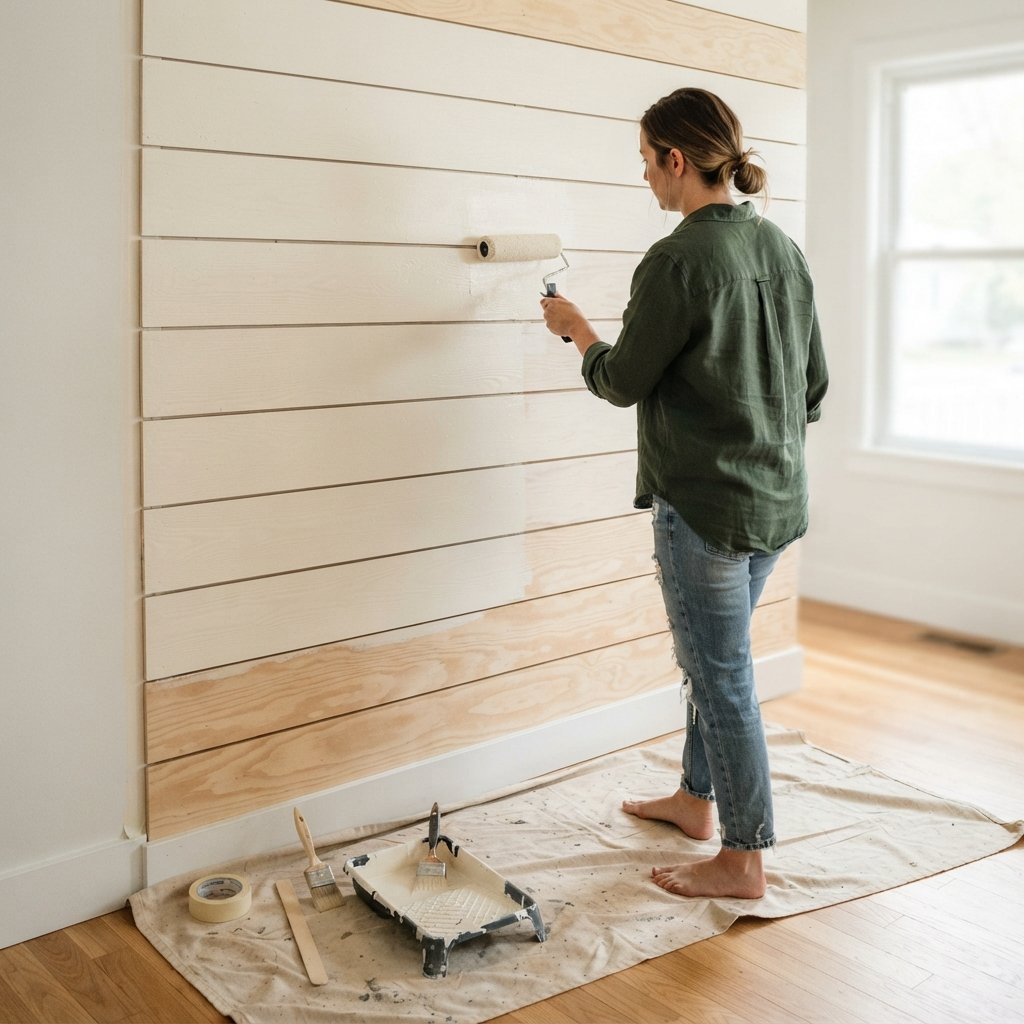
Painting DIY Plywood Shiplap
Once repairs are smooth and dust has been removed, finish the wall with the appropriate primer and paint system.
Depending on the plywood, bare edges may absorb coatings differently from the face.
Additional preparation may be needed to achieve a uniform finish.
Apply paint according to the manufacturer’s instructions.
Pay attention to the gaps.
Heavy paint buildup can partially fill narrow reveals and make them look uneven.
Use controlled application rather than flooding the joints with paint.
Best Paint Colors for a Plywood Shiplap Wall
Warm White
A classic choice that adds texture without dominating the room.
Cream
Creates a softer traditional look.
Greige
Adds subtle contrast.
Sage Green
Perfect for a mudroom, bedroom, or entryway.
Muted Blue
Adds color while staying relaxed.
Charcoal
Creates a dramatic modern feature wall.
Black
Bold and graphic, especially behind lighter furniture.
Test the color in the actual room before painting the entire wall.
Horizontal shadows can affect how the finished color appears.
White Plywood Shiplap
White is popular because it emphasizes the texture while keeping the room bright.
For a warmer home, consider a softer white rather than automatically choosing the brightest option.
White shiplap works especially well with:
- Natural wood
- Black accents
- Woven textures
- Neutral upholstery
- Vintage furniture
It can fit farmhouse interiors, but it does not have to look farmhouse.
The furniture and styling determine much of the final character.
Modern Plywood Shiplap
For a more modern appearance, keep the details simple.
Try:
- Wider-looking horizontal boards
- Minimal decor
- Clean trim transitions
- Warm white or dark paint
- Contemporary furniture
Avoid adding too many rustic accessories if you want the wall to feel current.
A simple horizontal plank wall can work beautifully in modern, transitional, coastal, Scandinavian-inspired, and organic interiors.
DIY Plywood Shiplap Bedroom Wall
The wall behind a bed is a natural location for shiplap.
It creates a focal point without requiring artwork across the entire wall.
Try:
Warm white shiplap + wood bed
or:
Muted green shiplap + cream upholstered bed
or:
Charcoal shiplap + light bedding.
If attaching lighting, artwork, or other objects to the finished wall, use mounting methods suitable for the combined wall assembly and expected load.
DIY Plywood Shiplap Living Room
A living room shiplap wall can add subtle architecture behind:
- Sofa
- Console
- Television
- Fireplace area
If the wall contains a fireplace, additional requirements apply.
Do not install combustible plywood within areas where the fireplace manufacturer, applicable building requirements, or installation instructions require noncombustible materials or specific clearances.
Fireplace installations vary significantly.
Verify the requirements for the exact fireplace before adding plywood or wood trim nearby.
DIY Shiplap Entryway
An entryway is a good place to experiment with a smaller shiplap project.
You might cover:
- One full wall
- Wall behind a console
- Lower portion of a wall
- Small nook
Because entries experience bumps, bags, shoes, and frequent contact, choose a finish appropriate for the level of wear.
DIY Shiplap Mudroom
Plywood shiplap can also provide a backdrop for a mudroom bench and hooks.
However, decorative plywood should not automatically be treated as structural support.
Heavy coat hooks, backpack hooks, shelves, or benches need mounting appropriate for their loads and wall construction.
Plan those attachment points before covering the wall.
DIY Half-Wall Shiplap
You do not have to cover the entire wall.
Horizontal plywood strips can stop partway up and finish with an appropriate top trim.
This works well in:
- Entryways
- Dining rooms
- Powder rooms
- Hallways
- Mudrooms
Half-wall shiplap can add character while using less material.
In moisture-prone spaces, make sure the plywood, coatings, and installation are suitable for the conditions.
How to Make Plywood Shiplap Look Expensive
Cut Consistent Strips
Uneven boards immediately affect the finished appearance.
Sand the Edges
Rough plywood edges become noticeable after painting.
Plan the Layout
Avoid an accidental sliver at the ceiling.
Keep the Gaps Consistent
Use spacers instead of guessing.
Check Level Frequently
Do not let small errors accumulate.
Handle Trim Transitions Carefully
Baseboards, doors, windows, and corners matter.
Prep Before Painting
Fill appropriate holes and sand repairs smoothly.
Avoid Excess Paint in the Gaps
Keep the horizontal lines crisp.
Keep Styling Simple
Let the wall texture be the feature.

How to Handle Baseboards With Plywood Shiplap
This detail should be planned before installation.
If the plywood is thicker than the top profile of the existing baseboard, the wall boards may project awkwardly.
Possible solutions depend on your trim and design.
You might:
- Replace the baseboard
- Choose thinner material
- Modify the trim detail
- Add an intentional transition piece
There is no universal solution because baseboard profiles vary.
Mock up a small section before covering the wall.
How to Handle Inside Corners
Inside corners can be finished in different ways depending on the desired look.
The most important thing is consistency.
Plan whether boards will:
- Butt into the adjacent wall
- Meet another shiplap wall
- Terminate against trim
Measure each row carefully because walls may not be perfectly plumb.
How to Handle Outside Corners
Outside corners usually need a deliberate trim solution.
Raw plywood edges can look unfinished and may be vulnerable to damage.
Choose an appropriate corner detail before installation rather than trying to hide the edge afterward.
Common Plywood Shiplap Mistakes
Cutting Strips Inconsistently
Uniformity matters.
Not Planning the Final Row
Calculate the full wall first.
Assuming the Floor Is Level
Establish your own level reference.
Forgetting the Baseboard Thickness
Mock up the transition.
Skipping Sanding
Cut plywood edges can be rough.
Losing Stud Locations
Mark them before covering the wall.
Ignoring Electrical Boxes
Added wall thickness affects electrical details.
Filling the Horizontal Gaps
Those lines create the shiplap appearance.
Using Too Much Paint in the Gaps
Heavy buildup can make spacing look inconsistent.
Installing Around a Fireplace Without Checking Requirements
Combustible-material clearances vary by fireplace and installation.
Plywood Shiplap Safety Tips
Wear appropriate eye, hearing, and respiratory protection when cutting and sanding plywood.
Use cutting tools according to manufacturer instructions and properly support sheet goods during cuts.
Do not attempt to rip full plywood sheets with an unstable or improvised setup.
Before fastening into walls, consider the possible location of electrical wiring, plumbing, and other utilities. Use suitable detection methods and use particular caution around outlets, switches, plumbing fixtures, and walls likely to contain services.
Turn off power and verify safe conditions before appropriate work around electrical devices.
Do not cover electrical boxes. Added wall thickness may require properly approved box-extension or adjustment methods; consult a qualified electrician when necessary.
Follow adhesive, filler, caulk, primer, and paint manufacturer requirements, including ventilation and drying or curing times.
If working on an older home, use appropriate precautions before disturbing unknown existing paint or building materials that could contain hazardous substances.
For fireplace walls, verify the exact fireplace manufacturer’s clearance and noncombustible-material requirements before installing plywood or other combustible materials.
FAQ About DIY Plywood Shiplap
Can you make shiplap from plywood?
Yes. Plywood can be cut into horizontal strips and installed with consistent gaps to create a decorative wall treatment that resembles the appearance of shiplap.
Is plywood shiplap real shiplap?
Usually not in the traditional construction sense. Traditional shiplap uses boards with overlapping rabbeted edges. DIY plywood shiplap typically creates a similar visual effect using separated strips.
What plywood should I use for shiplap?
Choose plywood appropriate for the location, finish, and installation. Surface quality, thickness, flatness, edge condition, and intended use all matter.
How wide should plywood shiplap strips be?
There is no universal width. Choose the visual scale based on the wall dimensions, ceiling height, room style, and existing trim.
How much space should I leave between plywood shiplap boards?
The reveal is a design choice. Use consistent spacers to maintain whatever gap you select throughout the installation.
Do I need to paint behind plywood shiplap?
If the wall color will be visible through the gaps and does not coordinate with the final shiplap color, painting the wall beforehand can produce a cleaner look.
Do you need to find studs for plywood shiplap?
Knowing the framing locations helps you plan secure attachment. The exact fastening method depends on the plywood, wall construction, board dimensions, and installation system.
Can I install plywood shiplap around a fireplace?
Possibly, but only where the fireplace manufacturer and applicable requirements permit combustible materials. Clearances and noncombustible zones vary, so verify the exact fireplace requirements first.
Final Thoughts
An easy shiplap tutorial from plywood can turn a plain wall into an architectural feature without requiring expensive prefinished planks.
The construction itself is relatively simple.
Cut plywood into consistent strips, prepare the surfaces, plan the layout, locate framing, establish a level reference, and install the boards with uniform gaps.
But do not rush the planning.
Think through the baseboards, ceiling, corners, outlets, switches, doors, windows, and final board before you begin.
Those details determine whether the finished wall looks like a carefully planned feature or a collection of plywood strips attached to drywall.
Take extra time with cutting and sanding.
Use consistent spacers.
Check level frequently.
And finish the wall carefully so the horizontal gaps remain crisp.
Paint it warm white for a classic look, sage or blue for subtle color, or charcoal for something more dramatic.
With thoughtful preparation and safe installation, plywood shiplap can be an approachable way to add texture, character, and custom-looking detail to an otherwise ordinary room.

