

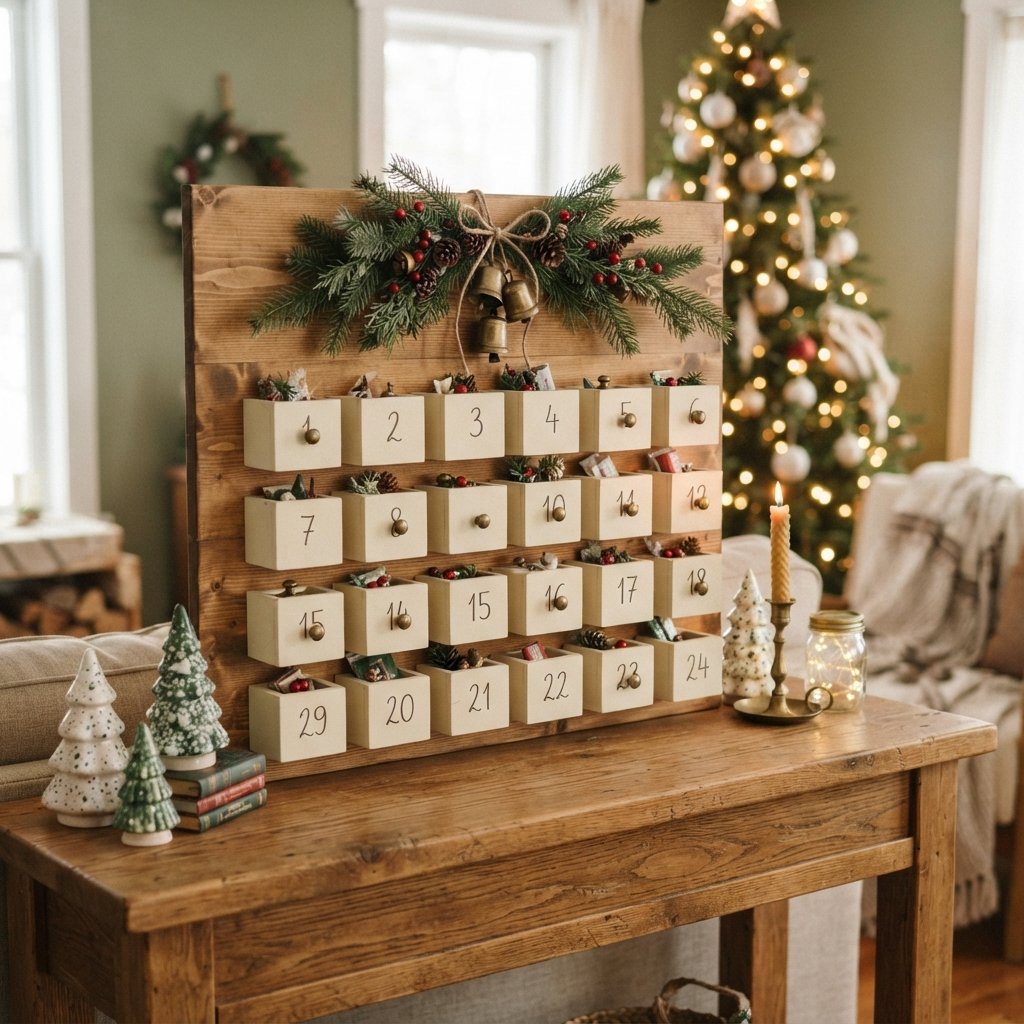
A DIY wooden advent calendar is a Christmas decoration you can bring out year after year.
Unlike a disposable calendar, a handmade wooden version can become part of your holiday decor while giving your family a fun way to count down the days until Christmas. Depending on the design, you can fill it with treats, notes, activities, small toys, or little surprises.
And it does not need to be complicated.
A simple wooden advent calendar can be made with a plywood back, small wooden containers or another suitable compartment system, paint or stain, and numbers for the countdown. You can keep the design minimal and modern, make it colorful for kids, or give it a traditional Christmas look with red, green, and natural wood.
The most important part is planning the layout before assembling anything.
Twenty-four compartments take up more room than you might expect, and consistent spacing will make the finished calendar look much more polished.
Below, we’ll walk through the planning and building process, along with ideas for decorating and filling your calendar.
Choose Your Wooden Advent Calendar Design
Before buying materials, decide how you want the calendar to function.
Some advent calendars use:
- Small wooden boxes
- Tiny drawers
- Small buckets attached to a wood board
- Wooden pockets or cubbies
- Pegs with hanging bags
- Hooks with small ornaments
- A movable marker that counts down the days
For this tutorial, the easiest concept is a flat wooden backboard with 24 individual containers or compartments attached to the front.
This gives you enough room for a small surprise each day while still creating a decorative piece.
If you prefer to count through December 25, simply adjust the design to include 25 compartments.
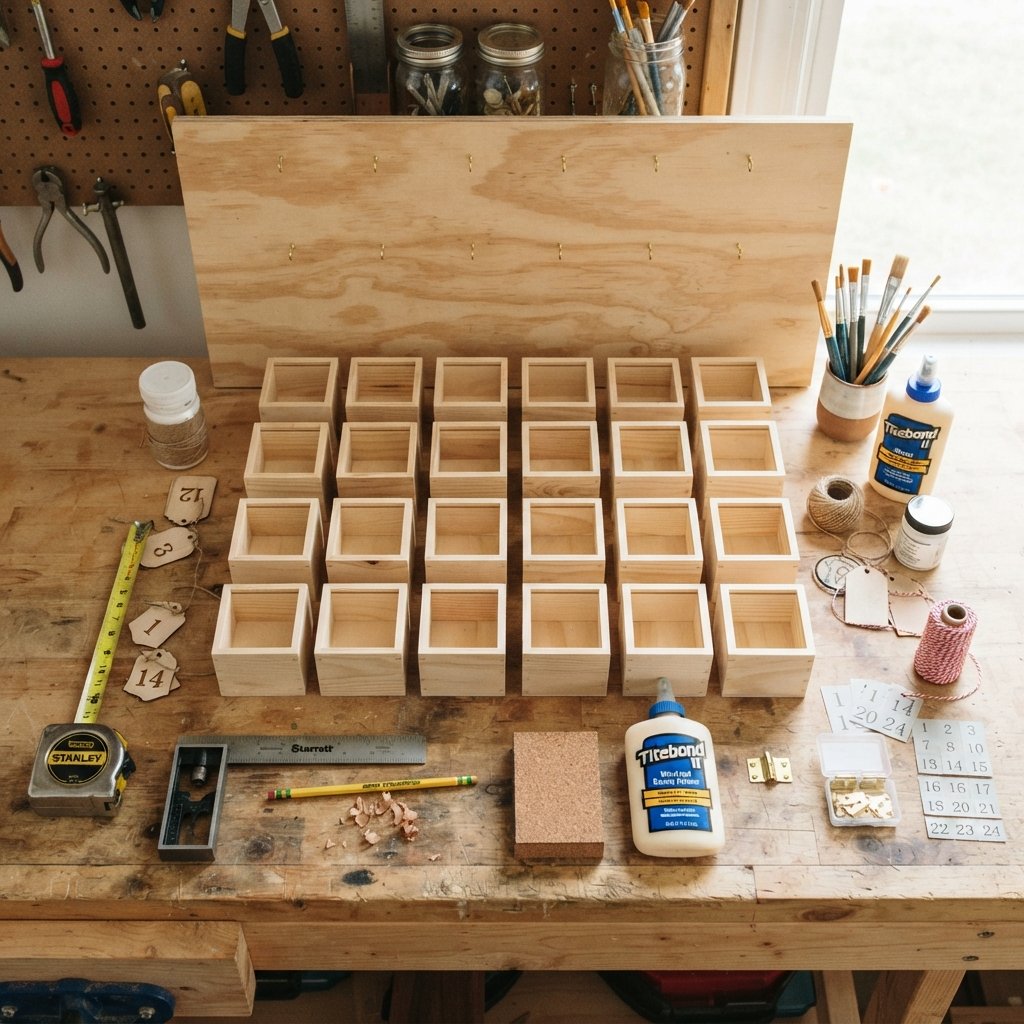
Materials for a DIY Wooden Advent Calendar
Exact materials depend on the design and dimensions you choose, but you may need:
- Plywood or another suitable wood panel for the back
- 24 small unfinished wooden boxes or containers
- Wood trim, if desired
- Wood glue or another appropriate attachment method
- Suitable fasteners if required
- Sandpaper
- Wood filler
- Primer if painting
- Paint or wood stain
- Clear finish if appropriate
- Numbers 1 through 24
- Hanging hardware or support system
Optional decorative supplies:
- Small ribbon
- Miniature greenery
- Bells
- Stars
- Small wooden trees
- Decorative knobs
Always make sure the attachment method is appropriate for the materials and the weight the calendar will hold.
Tools You May Need
Depending on your design, useful tools can include:
- Tape measure
- Pencil
- Combination square
- Saw appropriate for the wood being cut
- Drill/driver
- Clamps
- Sander or sanding block
- Paintbrush
- Level
Wear appropriate eye, hearing, and respiratory protection when cutting, drilling, or sanding wood.
Follow all tool manufacturer instructions and secure workpieces properly before cutting or drilling.
Step 1: Decide How Big the Advent Calendar Should Be
Do not cut the backboard before laying out the compartments.
Start by arranging all 24 boxes on a large flat surface.
Experiment with several configurations.
You might create:
- 4 rows of 6
- 6 rows of 4
- A Christmas tree shape
- A staggered arrangement
- A grid with space for a title or decoration
A simple grid is easiest for a beginner because spacing and alignment are more straightforward.
Leave enough room between compartments so they are easy to open or access.
Also consider what you plan to put inside.
Tiny candy requires much less space than small toys or folded activity cards.
Step 2: Plan the Layout
Once you like the arrangement, measure the entire layout.
Account for:
- Compartment width
- Space between compartments
- Outer border
- Decorative area at the top
- Optional trim
Sketch the design before cutting anything.
This is also the time to decide whether the numbers will run in order or be mixed randomly across the board.
Sequential numbers create a cleaner visual pattern.
Random numbers turn finding each day’s compartment into part of the activity.
Step 3: Cut the Wood Backing
Cut your plywood or wood panel to the planned dimensions using a tool appropriate for the material.
Support the wood properly while cutting.
If you are uncomfortable cutting sheet goods, many lumber or home-improvement retailers offer cutting services.
Check that the panel is square before continuing.
A crooked backing makes it much harder to create straight rows of boxes.
Step 4: Sand the Wood
Sand the backboard and any rough wooden components.
Pay particular attention to:
- Cut edges
- Corners
- Splinters
- Rough faces
The goal is a surface that feels smooth enough for handling and finishing.
Remove sanding dust before applying paint, stain, or adhesive.
If children will interact with the calendar, take extra care to eliminate splinters and sharp edges.
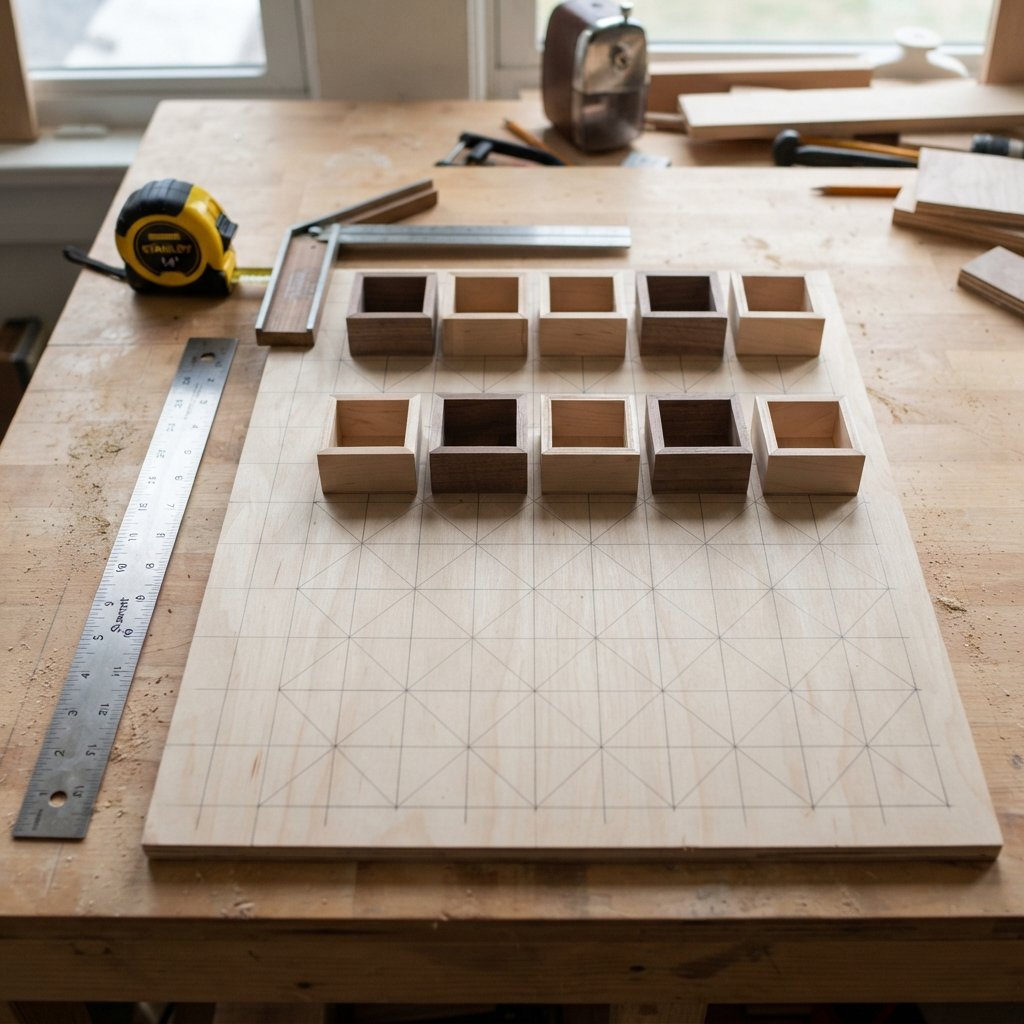
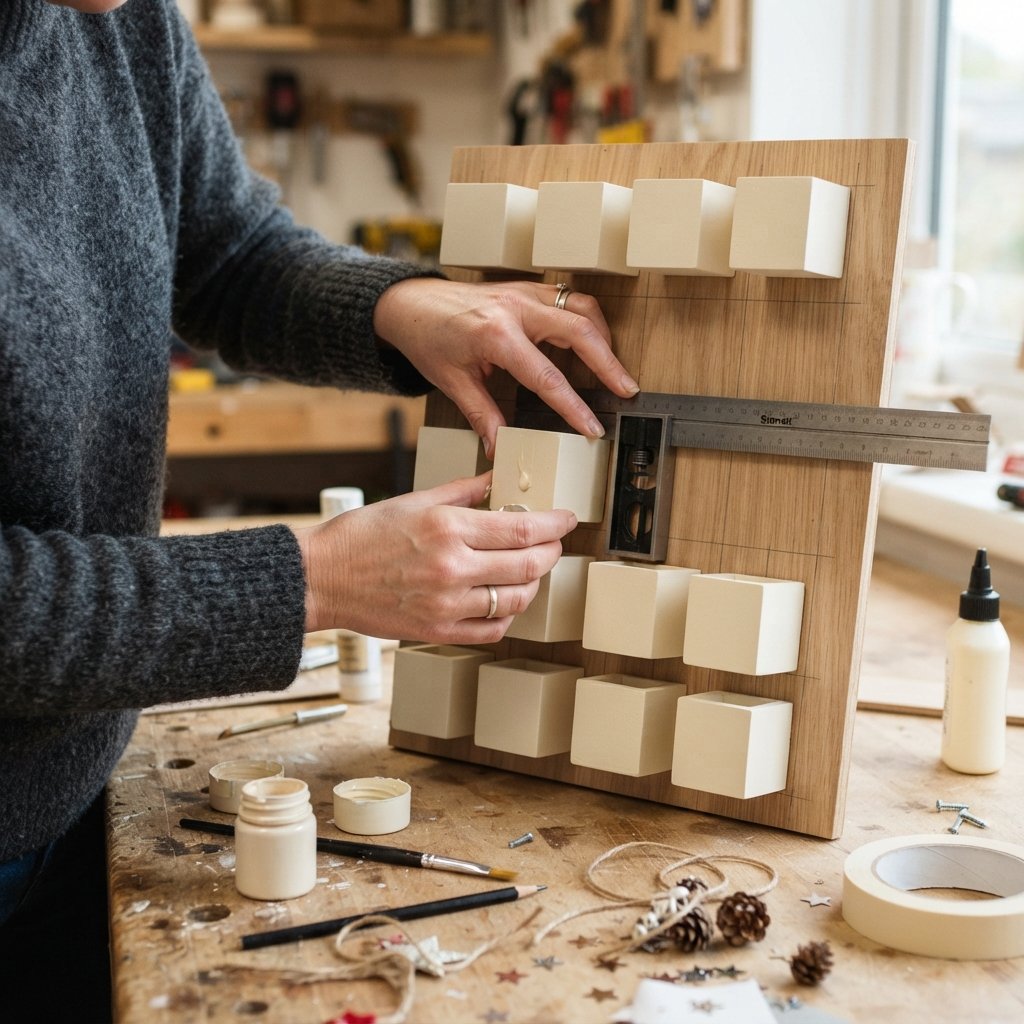
Step 5: Dry-Fit All 24 Compartments
This step is worth the extra time.
Place every box on the backboard before attaching anything.
Use your square and measuring tools to establish consistent rows.
Check the spacing from:
- Left edge
- Right edge
- Top
- Bottom
Small spacing errors can become much more obvious by the final row.
Take a photo or lightly mark positions so you can reproduce the arrangement.
Step 6: Decide on the Finish
You can finish the calendar several different ways.
Natural Wood
Keep the wood visible for a warm, simple look.
Stained Wood
Use an appropriate wood stain to deepen the color while preserving the grain.
Painted Wood
Cream, white, green, red, black, and muted blue can all work.
Two-Tone
Keep the backing natural and paint the boxes.
Or paint the backboard and leave the compartments wood.
Whatever finish you choose, follow the coating manufacturer’s preparation, ventilation, application, drying, and curing instructions.
If the calendar will be handled by children, choose finishes appropriate for the intended use once fully cured.
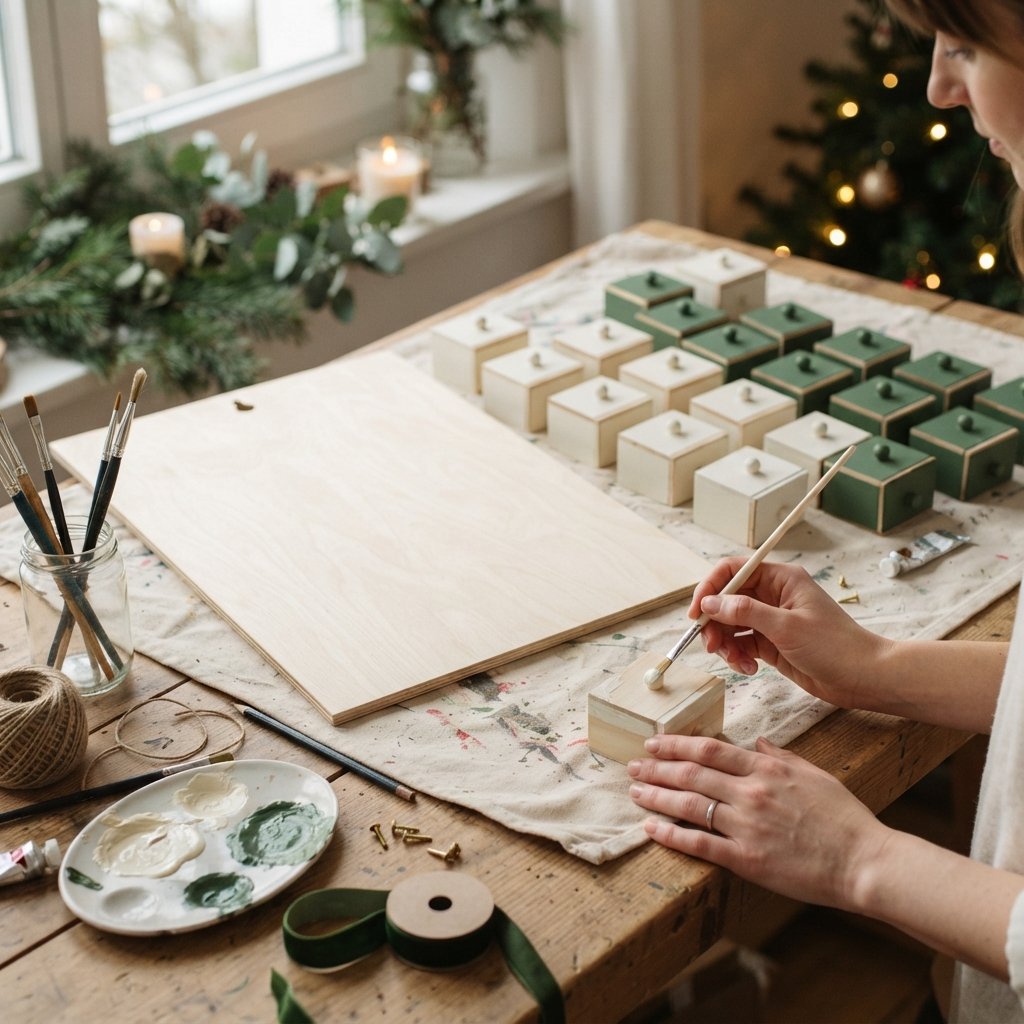
Step 7: Paint or Stain Before Assembly
In many designs, finishing individual pieces before attaching them makes painting easier.
It can be difficult to get a brush neatly between closely spaced compartments after assembly.
If you pre-finish the pieces, allow them to dry and cure as required before attaching them.
You may need to keep adhesive areas free of certain finishes depending on the attachment method.
Follow the adhesive and finish manufacturers’ compatibility recommendations.
Step 8: Add Numbers 1 Through 24
The numbers are one of the most important decorative elements.
Options include:
- Painted numbers
- Number stamps
- Stencils
- Wooden numbers
- Vinyl numbers
- Hand-lettered numbers
Choose a style that is easy to read.
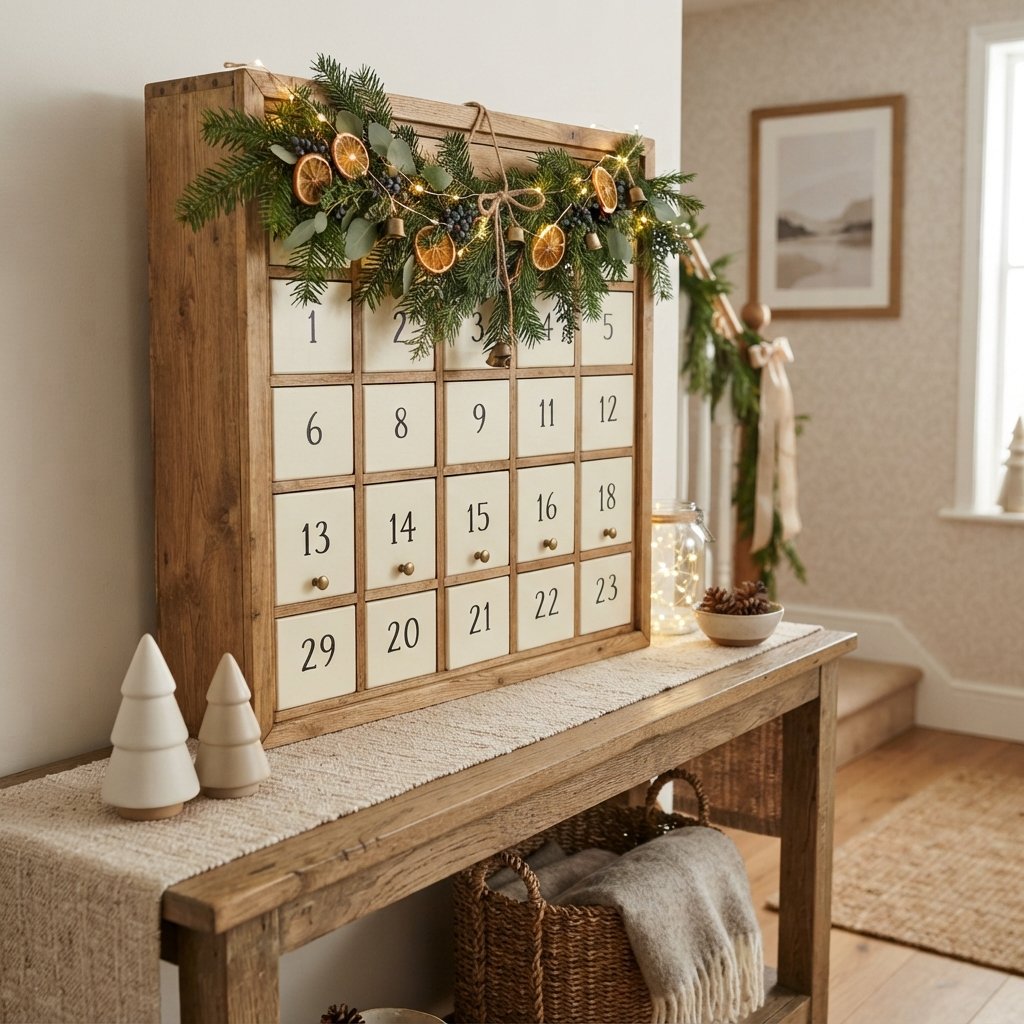
For a modern calendar, simple black numbers on cream boxes can look beautiful.
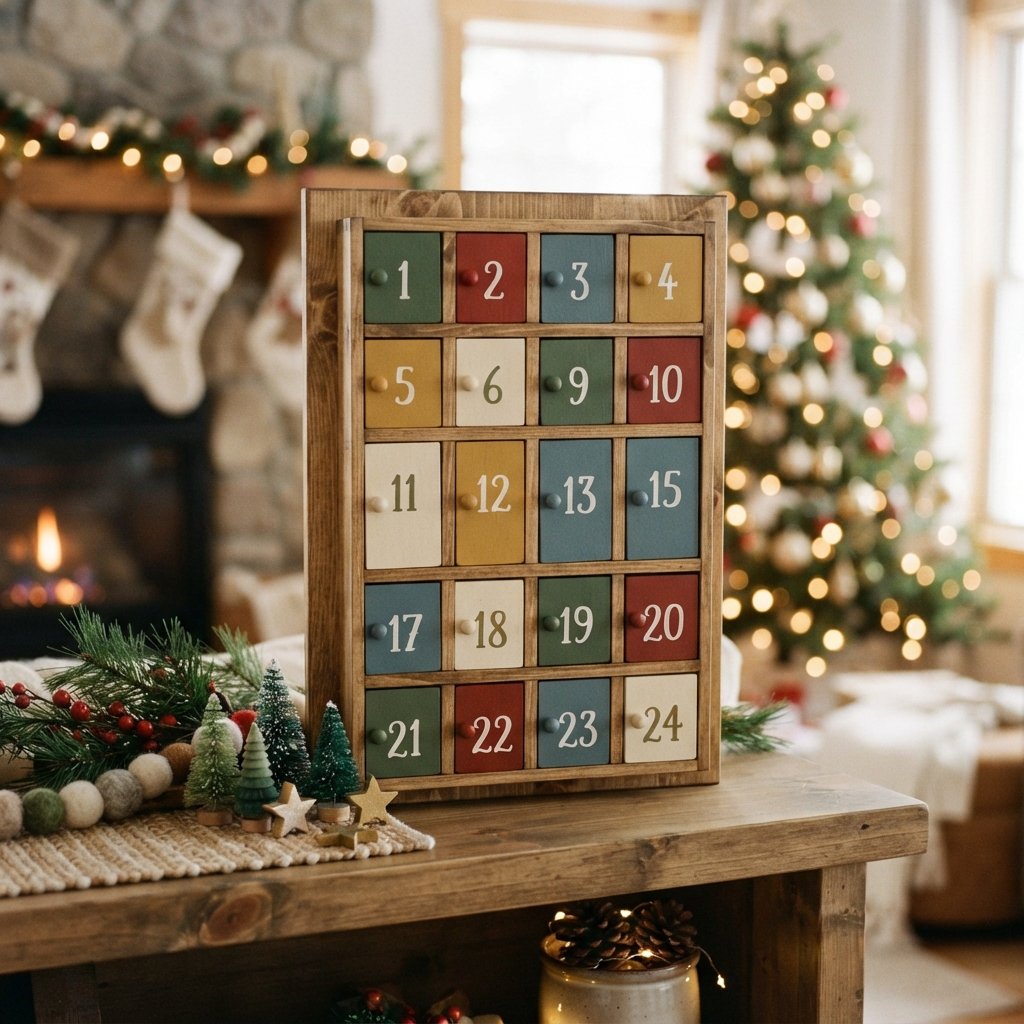
For something more traditional, try cream numbers on red or green.
If using small decorative pieces, consider whether they could create a choking hazard for young children.
Step 9: Attach the Compartments
Once the finish is ready, return all the compartments to their planned positions.
Check the layout again.
Then attach them using a method appropriate for:
- Backboard material
- Compartment material
- Expected contents
- Calendar orientation
Wood glue may work for compatible unfinished wood surfaces, while some designs may benefit from mechanical fasteners or another appropriate method.
Do not assume craft glue is strong enough to hold wooden compartments filled with objects.
Follow the adhesive manufacturer’s instructions, including clamping and curing requirements.
Step 10: Check Every Compartment
Before decorating, make sure each compartment works correctly.
Check that:
- Drawers slide
- Lids open
- Doors swing
- Bags can be removed
- Boxes are secure
You do not want to discover after decorating that one compartment is blocked by the one beside it.
Step 11: Add Optional Trim
Trim can give the calendar a more finished appearance.
You might frame the outside edge with simple wood strips.
This can create a substantial, furniture-like look.
If adding trim, carefully plan how corners will meet and how the added pieces affect the final dimensions.
Sand and finish trim to coordinate with the rest of the calendar.
Step 12: Add Simple Christmas Decorations
The calendar can be decorative without becoming cluttered.
Consider adding:
- Small greenery swag
- Mini bells
- Wooden star
- Small bow
- Tiny bottle-brush trees
Keep decorative pieces away from moving compartments.
If the numbers and boxes already create plenty of visual interest, skip extra embellishments.
Step 13: Decide How to Display the Calendar
A wooden advent calendar can be:
- Hung on a wall
- Leaned on a console
- Placed on a mantel if dimensions, stability, and heat conditions allow
- Displayed on a sturdy shelf
A heavy wooden calendar needs secure support.
If hanging it, choose hardware rated for the completed weight and appropriate for the wall construction.
If leaning it, make sure it cannot easily tip or slide—especially around children or pets.
Step 14: Fill the Advent Calendar
Once everything is fully assembled and any finishes or adhesives have cured, fill each compartment.
Keep the contents lightweight and appropriately sized.
Possible fillers include:
- Wrapped candy
- Stickers
- Small toys
- Hair accessories
- Notes
- Activity cards
- Ornaments
- Puzzle pieces
Make sure everything is age-appropriate for whoever will use the calendar.
Wooden Advent Calendar Ideas
The basic design can be adapted to almost any Christmas decorating style.
Traditional Christmas Advent Calendar
Use:
- Deep red
- Forest green
- Cream
- Natural wood
Add a small plaid ribbon or brass bells.
Neutral Wooden Advent Calendar
Use:
- Natural wood
- Cream
- Beige
- Warm white
This style blends easily into neutral Christmas decor.
Modern Wooden Advent Calendar
Try:
- Light wood
- White
- Black numbers
- Simple typography
Skip most decorative embellishments.
Scandinavian-Inspired Advent Calendar
Combine pale natural wood with cream, muted green, and simple shapes.
Keep the overall design minimal.
Colorful Kids’ Advent Calendar
Paint the compartments in several coordinated colors.
Try muted:
- Red
- Green
- Blue
- Pink
- Mustard
Repeating the colors in a pattern keeps the calendar playful without looking chaotic.
What to Put in a Wooden Advent Calendar
The compartments do not have to contain candy every day.
Mix several types of surprises.
Treats
Use individually wrapped treats appropriate for the recipient.
Activities
Write small cards with ideas such as:
- Watch a Christmas movie
- Make hot chocolate
- Decorate cookies
- Drive around to see Christmas lights
- Read a Christmas story
- Make paper snowflakes
Small Gifts
Depending on compartment size:
- Stickers
- Mini figures
- Small craft supplies
- Hair clips
- Erasers
Christmas Ornaments
Add one small ornament on selected days.
By Christmas, you have added several new decorations to the tree.
Kindness Activities
Include simple ideas such as:
- Make a card for someone
- Donate an unused toy
- Help with a household task
- Compliment someone
- Leave a kind note
This gives the countdown a purpose beyond treats.
DIY Advent Calendar for Adults
Adults can have an advent calendar too.
Fill it with:
- Tea bags
- Coffee samples
- Wrapped chocolates
- Small notes
- Date-night ideas
- Mini puzzles
- Small self-care items
Choose fillers that safely fit the compartment and do not require storage conditions the calendar cannot provide.
DIY Advent Calendar for Kids
For children, the anticipation is often more exciting than the item itself.
You do not need 24 substantial gifts.
Mix inexpensive surprises with experiences.
For example:
Day 1: Sticker
Day 2: Christmas movie night
Day 3: Small treat
Day 4: Make an ornament
Day 5: Read a Christmas book
Alternating objects and activities can keep costs under control.
Advent Calendar Activity Ideas
Need more ideas for the little cards?
Try:
- Wear Christmas pajamas
- Make popcorn and watch a holiday movie
- Bake cookies
- Make Christmas cards
- Wrap presents together
- Have a Christmas music dance party
- Build a gingerbread house
- Make a paper garland
- Read a holiday story
- Make hot chocolate
- Look at Christmas lights
- Make an ornament
- Have a family game night
- Donate to a local cause
- Call a family member
- Make a holiday breakfast
Choose activities that realistically fit your schedule.
An advent calendar should be fun, not create 24 additional obligations during an already busy month.
How to Make a Wooden Advent Calendar Look Expensive
Keep the Layout Precise
Straight rows and consistent spacing make a big difference.
Sand Thoroughly
Rough edges can make even beautiful wood look unfinished.
Limit the Color Palette
Two or three colors often look more cohesive than many unrelated shades.
Choose Simple Numbers
Clean typography can elevate the design.
Use Consistent Hardware
If the boxes have knobs or pulls, keep them coordinated.
Add One Decorative Detail
A greenery swag or a few bells may be enough.
Hide Attachment Points
Use a construction method that leaves the visible surface as clean as practical.
Let Natural Wood Add Texture
You do not have to paint every surface.
Budget-Friendly Wooden Advent Calendar Tips
A reusable calendar can become expensive if you purchase 24 elaborate miniature drawers.
To reduce costs:
- Use a simple plywood backing
- Choose basic unfinished wood components
- Paint inexpensive boxes
- Use printed or stenciled numbers
- Skip unnecessary trim
- Use leftover paint where appropriate
- Decorate with ribbon or greenery you already own
The layout and finish matter more than elaborate components.
Alternative: Wooden Advent Calendar With Bags
If building 24 wooden compartments feels like too much work, simplify the project.
Attach 24 suitable hooks or pegs to a wooden board and hang small fabric or paper bags.
Number each bag.
This design still gives you a reusable wooden foundation but requires less woodworking.
If using hooks, make sure their points and placement are safe and appropriate, particularly around children.
Alternative: Wooden Advent Calendar With Clothespins
Another simple option is to attach wooden clothespins to a board.
Each clothespin can hold:
- Small paper bag
- Envelope
- Activity card
- Lightweight ornament
This is a great design when you want a shallow calendar that is easier to store.
Alternative: Christmas Tree-Shaped Wooden Advent Calendar
Instead of a rectangular grid, arrange the compartments in a triangular Christmas-tree shape.
Add a wooden star at the top.
This creates more of a decorative statement, although planning the spacing can be trickier.
Lay out the entire tree before cutting the backing.
How to Hang a Wooden Advent Calendar Safely
Wooden calendars can be heavier than they look.
The final weight includes:
- Backboard
- 24 compartments
- Trim
- Hardware
- Decorations
- Contents
Choose hanging hardware based on the completed weight and wall construction.
When possible, attach appropriately to framing or use a wall-anchor system suitable for the load and wall type.
Do not rely on decorative ribbon alone unless it is actually designed and secured to support the full weight.
If you are unsure about wall mounting, display the calendar on a stable piece of furniture and secure it against tipping.
DIY Wooden Advent Calendar Safety Tips
Woodworking projects require appropriate precautions.
Wear suitable eye and hearing protection when cutting or drilling and respiratory protection when sanding or when product instructions call for it.
Secure wood properly before cutting.
Sand exposed edges and corners thoroughly to reduce splinters.
Follow all manufacturer instructions for:
- Tools
- Adhesives
- Paint
- Stain
- Clear finishes
Provide adequate ventilation when using products that require it.
Allow paints, adhesives, stains, and finishes to fully dry or cure according to their instructions before bringing the calendar into use.
If children will use the calendar, avoid accessible small parts that could present a choking hazard.
Keep candy and other foods in appropriate packaging rather than allowing them to directly contact surfaces that are not intended for food contact.
If hanging the calendar, use a mounting system appropriate for the total weight and wall construction.
Keep the calendar away from candles, fireplaces, heaters, and other heat or flame sources.
Common DIY Wooden Advent Calendar Mistakes
Cutting the Backboard Before Planning the Layout
Arrange all 24 compartments first.
Making the Compartments Too Small
Decide what you want to put inside before choosing them.
Skipping the Dry Fit
Small spacing errors become obvious across multiple rows.
Attaching Boxes Before Painting
This can make finishing between compartments unnecessarily difficult.
Using Weak Adhesive
Choose an attachment method appropriate for wood and the expected load.
Not Allowing Finishes to Cure
Follow product instructions before assembly and use.
Adding Too Many Decorations
The 24 numbered compartments already create a lot of detail.
Forgetting the Finished Weight
Plan the display or hanging method early.
Making Every Day a Big Gift
Mix treats with activities and notes.
Ignoring Storage
Think about where the calendar will live for the other eleven months of the year.
How to Store a Wooden Advent Calendar
Before storing it after Christmas:
- Empty every compartment.
- Remove food and candy.
- Clean surfaces appropriately.
- Check for loose pieces.
- Repair anything necessary.
- Wrap delicate decorative elements.
- Store in a dry location.
Do not stack heavy holiday bins on top of delicate compartments.
If decorations are removable, consider storing them separately.
FAQ About DIY Wooden Advent Calendars
How many compartments should a wooden advent calendar have?
Traditional countdown calendars commonly use 24 compartments for December 1 through Christmas Eve. You can use 25 if you want to include Christmas Day.
What kind of wood should I use for an advent calendar?
Plywood or another stable wood panel can work well for the backing. The appropriate thickness and material depend on the calendar size, attachment method, and intended load.
What can I put inside a wooden advent calendar?
Try wrapped treats, stickers, small toys, notes, activity cards, ornaments, or other appropriately sized surprises.
Do I need woodworking experience?
Not necessarily. A simple rectangular backboard with pre-made unfinished wooden boxes can be a beginner-friendly approach if you are comfortable using the required tools safely.
Can I make an advent calendar without 24 wooden boxes?
Yes. Attach bags, envelopes, ornaments, or cards to a wooden backing using an appropriate hook, peg, or clip system.
Should advent calendar numbers be in order?
Either approach works. Sequential numbers look neat and organized, while randomized numbers add a searching game to each day.
How do I attach wooden boxes to the backing?
The appropriate method depends on the materials, box design, expected weight, and finish. Use an adhesive or mechanical fastening method rated for the application and follow its manufacturer instructions.
Can I hang a wooden advent calendar?
Yes, provided you use mounting hardware suitable for the calendar’s total loaded weight and the wall construction.
Final Thoughts
A DIY wooden advent calendar is more than a one-season Christmas craft.
Made carefully, it can become a reusable part of your family’s holiday traditions.
Start by deciding what you want the calendar to hold.
Then arrange all 24 compartments before cutting the backboard. Take your time with the measurements, keep the spacing consistent, and dry-fit everything before attaching it permanently.
From there, make the design your own.
Keep natural wood and cream for a simple neutral Christmas look. Add forest green and deep red for something traditional. Use black numbers and pale wood for a modern calendar, or introduce several muted colors for a playful kids’ version.
Then fill it with a combination of small surprises and experiences.
A piece of candy is fun, but so is a note announcing Christmas movie night, cookie baking, a drive to see holiday lights, or a family game.
That is what makes a handmade advent calendar worth storing and bringing out again next December.
It is Christmas decor, a countdown, and a tradition all in one.

