

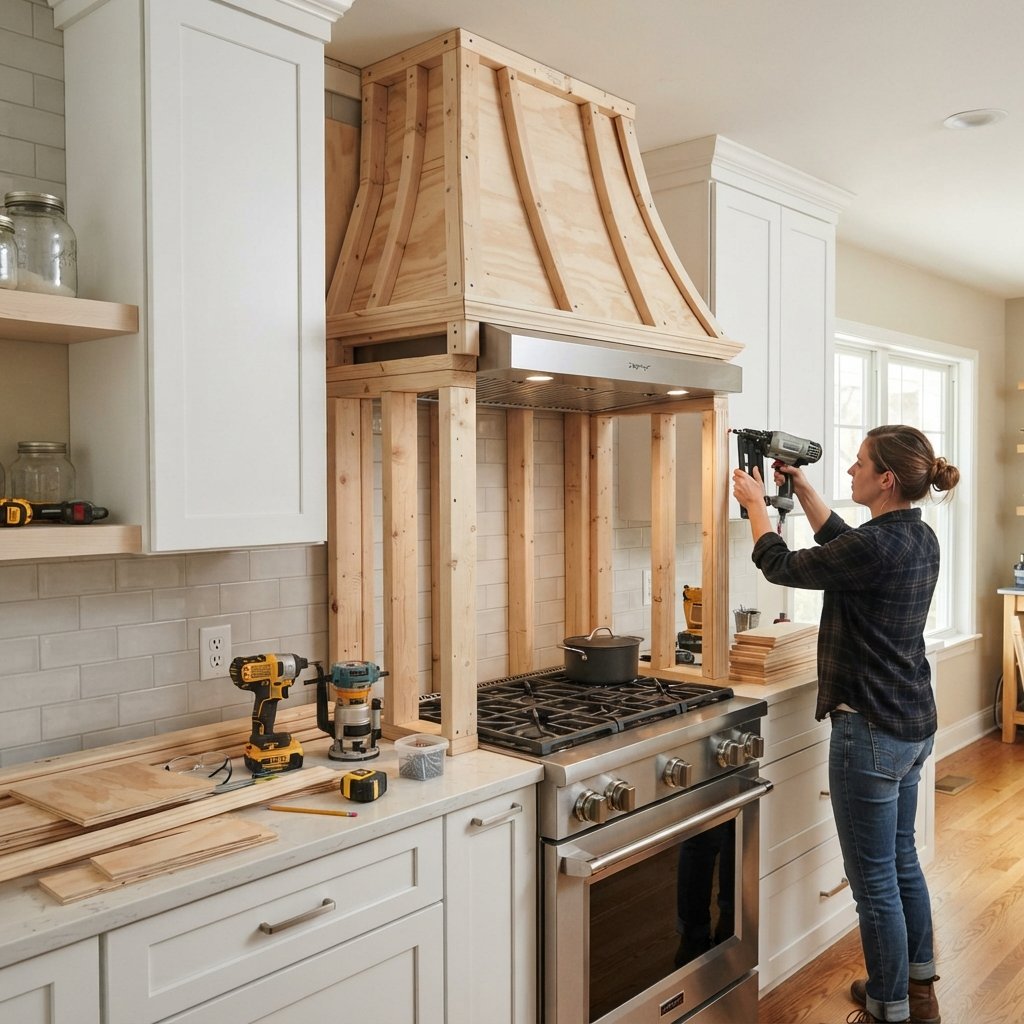
A custom range hood and a new backsplash can completely change the look of a kitchen.
They are also two projects where the details matter.
A DIY vent hood cover and tiling project brings together carpentry, ventilation, electrical considerations, careful measuring, tile layout, cutting, adhesive, grout, and finishing work. When everything comes together, the vent hood can become a beautiful focal point while the backsplash gives the kitchen a polished, finished appearance.
For week five of a kitchen renovation, these projects can create one of those satisfying moments when the room finally begins to look like the design you imagined.
But this is also a stage where it pays to slow down.
A decorative range hood cover cannot interfere with the hood manufacturer’s required installation, clearances, ventilation, service access, or electrical components. Likewise, backsplash tile looks much better when you spend time planning the layout before the first piece goes on the wall.
This guide walks through the major considerations for building a DIY vent hood cover and installing a kitchen backsplash, including planning, tile layout, tricky cuts, finishing details, and common mistakes to avoid.
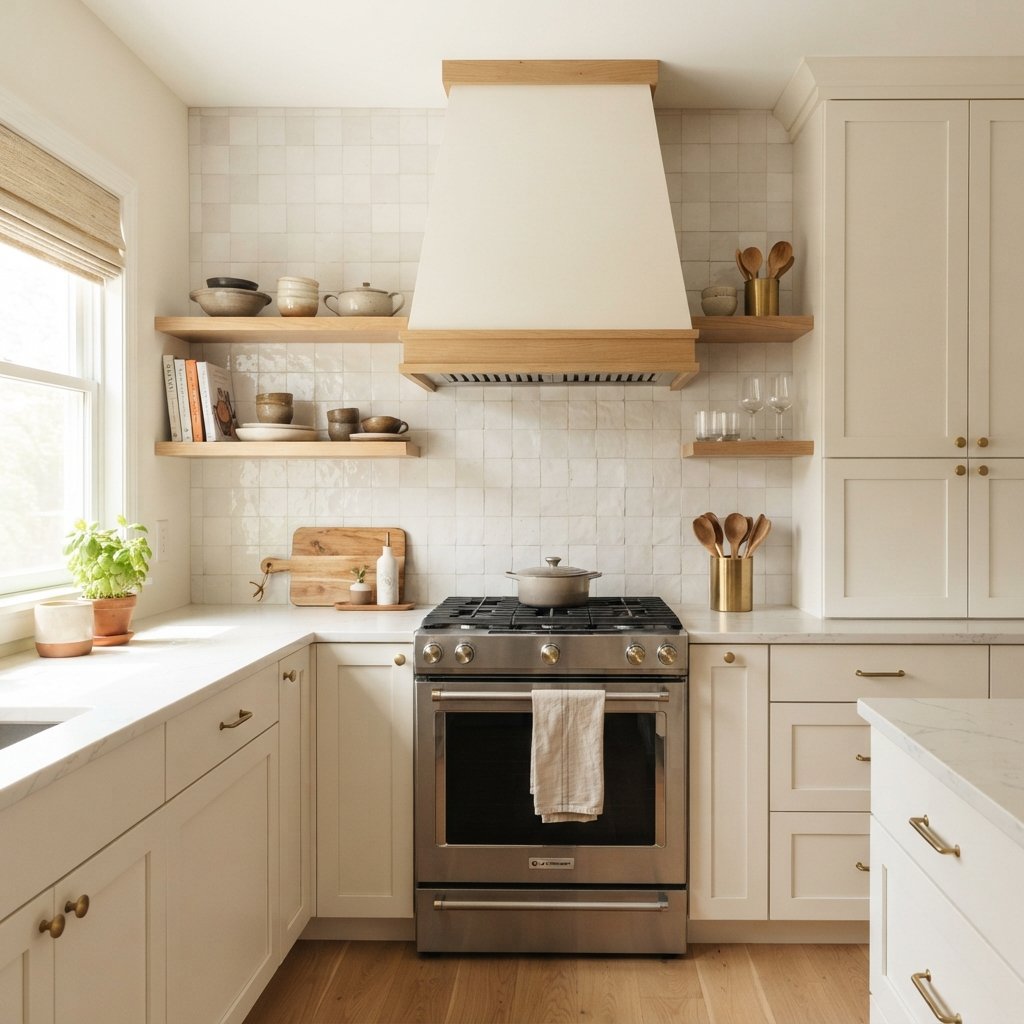
Why the Vent Hood and Backsplash Make Such a Difference
A range naturally creates a focal point in many kitchens.
Adding a custom hood surround gives that area more architectural presence.
The backsplash then connects the hood visually to the countertops and cabinetry.
Together, they can turn a plain cooking wall into one of the strongest design moments in the kitchen.
A decorative hood cover can also help the ventilation insert look integrated into the cabinetry rather than appearing like an appliance added afterward.
However, the decorative surround should be designed around the actual ventilation appliance requirements, not the other way around.
Plan the Range Hood Before Building the Cover
Before building anything, choose the range hood or insert you intend to use.
This is critical because manufacturers specify requirements that can vary between models.
Follow the manufacturer’s instructions for:
- Installation height
- Clearances
- Duct size and configuration
- Electrical connections
- Ventilation requirements
- Service access
- Combustible materials
- Mounting
- Compatible enclosure construction
Local building, mechanical, fire, and electrical requirements may also apply.
Do not choose dimensions for the decorative cover based solely on inspiration photos.
The ventilation appliance and applicable requirements should determine what is possible.
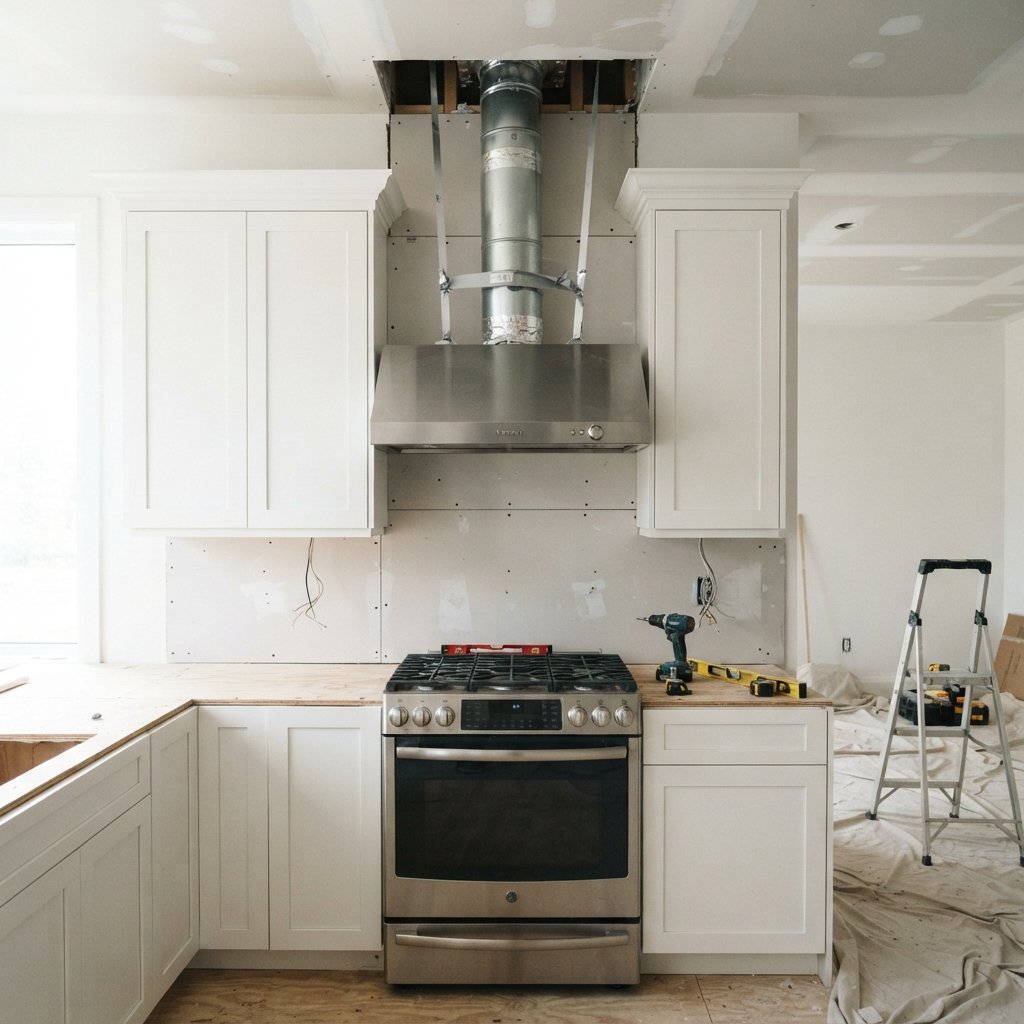
Vent Outside When Required
Range hoods may be ducted or recirculating depending on the specific product and installation.
If you are using a ducted hood, the ducting needs to follow the manufacturer’s requirements and applicable local codes.
Avoid improvising duct sizes, reducing ducts simply to make them fit inside a decorative cover, or obstructing airflow.
Poor duct design can reduce hood performance and increase noise.
If the project requires altering electrical wiring, cutting new exterior penetrations, modifying gas connections, or making changes you are not qualified to perform, bring in an appropriate licensed professional where required.
Decide What You Want the Hood Cover to Look Like
Once the functional hood installation has been planned, think about the decorative surround.
Common styles include:
- Straight box hood
- Tapered hood
- Plaster-look hood
- Shiplap-style hood
- Paneled hood
- Wood-stained hood
- Painted hood with wood trim
Consider the rest of your cabinetry.
A highly detailed hood can look beautiful in a traditional kitchen, while a simple tapered cover often works well in transitional or modern spaces.
The hood does not have to match the cabinets exactly, but it should feel intentional.
Consider the Scale of the Vent Hood Cover
The hood is usually a prominent feature, so scale matters.
Too small and it can look visually weak above the range.
Too large and it may overwhelm the surrounding cabinetry.
Evaluate the hood in relation to:
- Range width
- Ceiling height
- Upper cabinets
- Countertop
- Nearby windows
- Overall wall width
Do not determine hood width or clearances based only on appearance. Follow the appliance manufacturer’s specifications and applicable requirements first.
Once those functional dimensions are established, you can refine the decorative proportions.
Materials for a DIY Vent Hood Cover
Materials vary significantly depending on your design.
A decorative cover might use:
- Appropriate lumber for framing
- Plywood
- MDF where appropriate for the application
- Finish-grade wood
- Trim or molding
- Wood glue
- Appropriate screws or fasteners
- Wood filler
- Caulk
- Primer
- Paint
Your material choices must be compatible with the range hood manufacturer’s clearance and enclosure requirements.
Do not assume that a material is acceptable near a cooking appliance simply because it is commonly used elsewhere in a kitchen.
Tools You May Need
Depending on the hood design, tools may include:
- Tape measure
- Pencil
- Level
- Square
- Stud finder
- Drill/driver
- Appropriate saws
- Sander
- Clamps
- Caulk gun
- Paint supplies
For tiling, you may also need:
- Tile cutter or wet saw appropriate for the tile
- Notched trowel recommended for the installation
- Tile spacers or leveling aids where appropriate
- Grout float
- Sponge
- Buckets
- Mixing tools
- Measuring tools
Wear appropriate eye, hearing, and respiratory protection when cutting or sanding.
Tile cutting can create sharp edges and potentially hazardous dust depending on the material and cutting method. Use equipment and dust-control methods appropriate for the tile, and follow tool and material manufacturer safety instructions.
Building the DIY Vent Hood Cover
The exact construction depends on your hood insert and design, so this should be treated as a general workflow rather than universal dimensions.
Step 1: Locate the Structure
Determine where framing or other suitable structural attachment points are located.
A decorative hood surround needs to be securely supported.
Do not rely on drywall alone for substantial loads unless an attachment system specifically designed and rated for the application is being used.
Step 2: Establish the Hood Shape
Use the approved dimensions to determine the finished shape.
Mark reference lines with a level.
Check:
- Centerline of range
- Hood position
- Cabinet alignment
- Finished width
- Finished height
Small alignment errors become very noticeable because the range and hood naturally draw the eye.
Step 3: Build the Supporting Framework
Build the decorative framework according to your planned shape without interfering with the ventilation system.
Keep required access areas accessible.
The framing should not compress, damage, or obstruct ductwork or wiring.
Step 4: Check Everything Before Covering It
Before enclosing the frame, verify the hood installation and access requirements.
This is the moment to catch problems—not after everything has been paneled, filled, caulked, and painted.
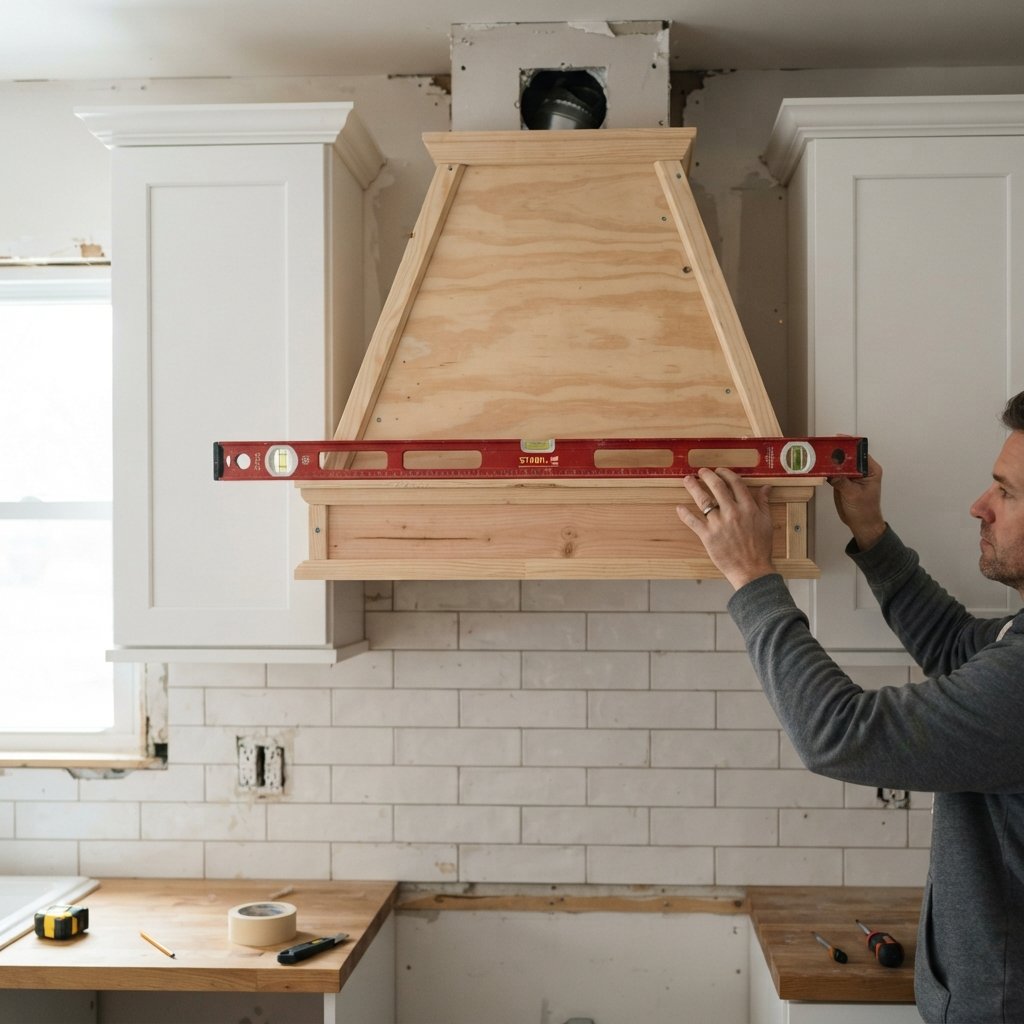
Covering the Vent Hood Frame
Once the frame is correct, add the finish material appropriate for your design.
For a painted wood hood, this may involve plywood or another approved sheet material followed by trim.
Measure each section individually.
Walls, ceilings, and cabinets are not always perfectly square, so relying on one measurement can cause frustrating gaps.
Dry-fit pieces before fastening them.
Add Trim for a Built-In Look
Trim can make a relatively simple hood cover look much more finished.
You might add:
- Bottom trim
- Side trim
- Crown molding
- Simple face-frame detail
Repeat details already used in the kitchen where appropriate.
For example, if the cabinetry is simple, a heavily ornate hood may feel disconnected.
A few clean trim pieces may be enough.
Fill, Sand, Caulk, and Paint
Once the decorative woodwork is complete:
- Fill appropriate nail or fastener holes.
- Allow filler to dry.
- Sand smooth.
- Remove dust.
- Caulk suitable seams where appropriate.
- Prime.
- Paint.
Follow the paint, primer, filler, and caulk manufacturers’ instructions for application, ventilation, dry time, and cure time.
Use coatings appropriate for the kitchen environment and the substrate.
Keep coatings away from appliance components where prohibited by the hood manufacturer.
Choosing Backsplash Tile
Once the hood starts taking shape, backsplash tile becomes the next major visual decision.
A backsplash should coordinate with the:
- Countertop
- Cabinets
- Flooring
- Hardware
- Hood
- Wall color
It does not have to match every finish.
In fact, a simple tile can be a great choice when the kitchen already has several strong elements.
Classic backsplash options include:
- Subway tile
- Handmade-look rectangular tile
- Square tile
- Zellige-style tile
- Marble
- Other natural stone
- Porcelain
- Ceramic
Consider maintenance as well as appearance.
Some materials require more care or sealing than others, and installation recommendations vary by product.
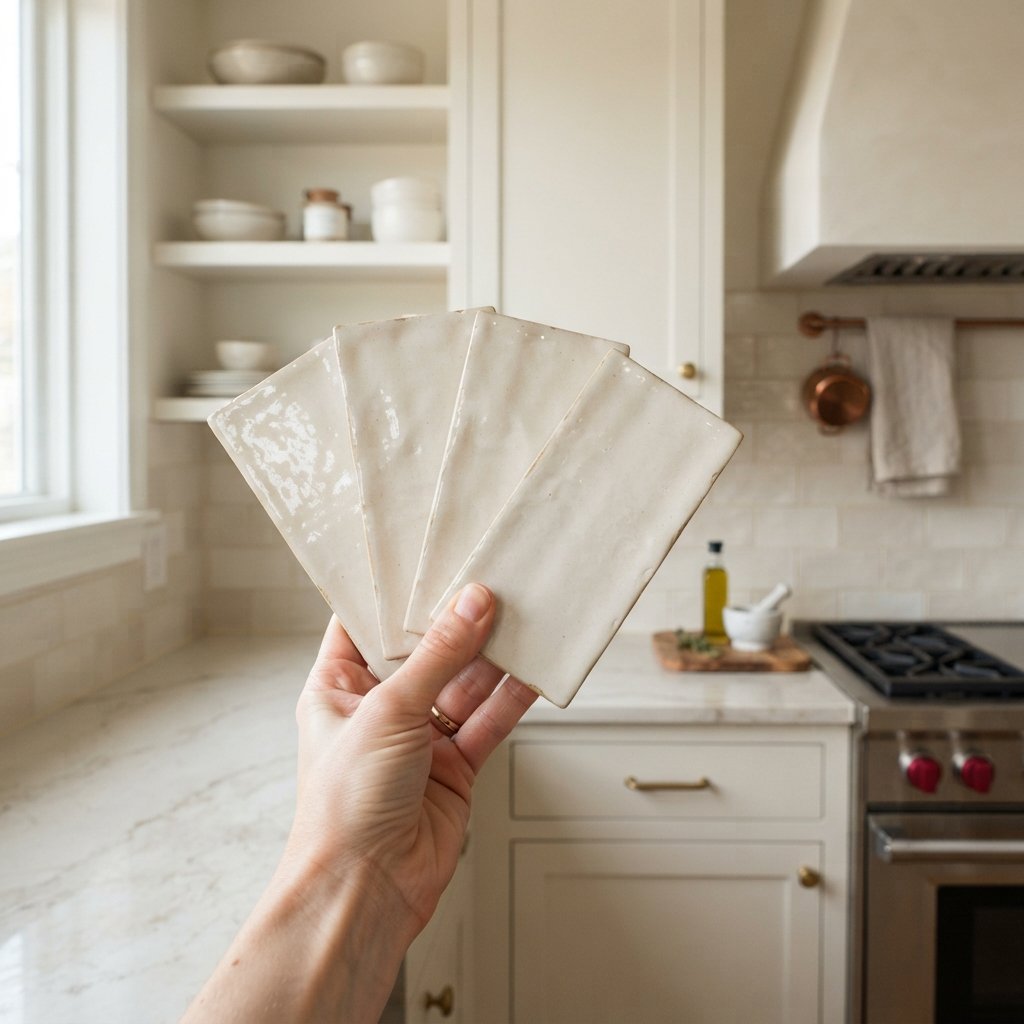
Pay Attention to Tile Undertones
“White tile” covers an enormous range.
One white may look:
- Creamy
- Gray
- Blue
- Green
- Pink
Compare the tile directly against your countertop and cabinetry.
A warm-white tile next to a very cool white cabinet can suddenly appear yellow.
A blue-white tile beside a creamy countertop may look icy.
Bring samples into the actual kitchen and look at them throughout the day.
Decide Where the Backsplash Will End
Before installing tile, determine its boundaries.
Questions to answer include:
- Does tile stop at the upper cabinets?
- Does it extend to the ceiling around the hood?
- What happens at an exposed wall edge?
- How will outside corners be finished?
- Does the tile continue behind open shelving?
- How does it meet a window?
Do not wait until you reach the edge to decide.
Planning termination points early prevents awkward tiny pieces and unfinished-looking edges.
Should You Tile Behind the Vent Hood?
This depends on the hood design, tile layout, appliance requirements, and installation sequence.
In some kitchens, tile extends behind and around a decorative hood.
In others, tile runs up to the hood surround.
Some designs carry tile all the way to the ceiling around the hood.
Before deciding, account for:
- Hood installation instructions
- Service access
- Finished edges
- Thickness of tile and setting material
- Hood trim
- Desired visual effect
Plan the layers before either project is permanently finished.
Dry-Lay the Tile Before Installation
This is one of the most valuable backsplash steps.
Lay out a row of tile with the intended grout joints.
Measure the total length.
Then compare that measurement to the wall.
You are looking for problematic areas such as:
- Tiny slivers at corners
- Very narrow pieces beside the hood
- Awkward cuts at windows
- Unbalanced ends
Shifting the starting point by a small amount can sometimes dramatically improve the final layout.
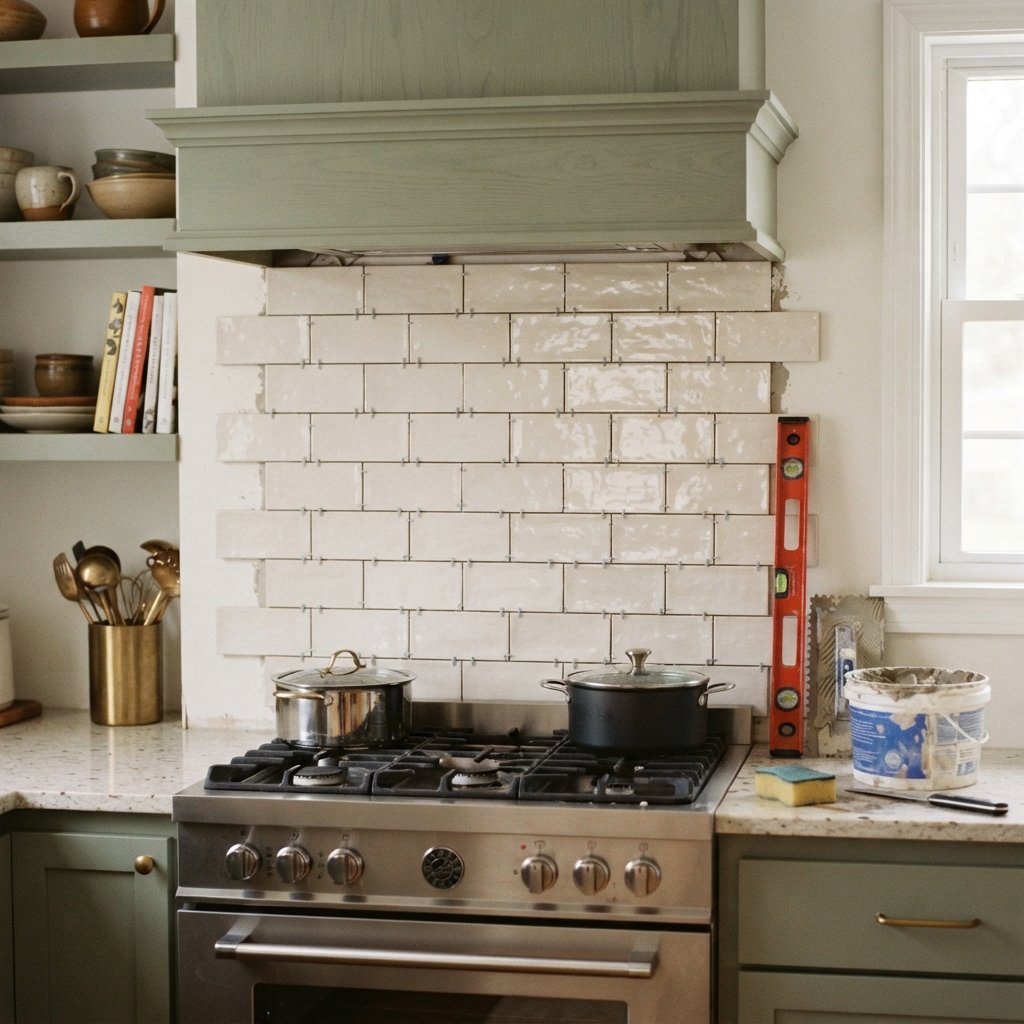
Find a Level Starting Point
Countertops and cabinets may not be perfectly level.
Do not blindly follow an uneven surface.
Establish reliable reference lines and continuously check your work.
The first rows matter because errors can compound as you move upward.
Choose the Correct Tile Setting Material
Use a setting material appropriate for:
- Tile type
- Tile size
- Substrate
- Installation location
Follow the tile and setting-material manufacturers’ recommendations.
Do not assume one adhesive is suitable for every backsplash tile.
Natural stone, glass, ceramic, and porcelain may have different requirements.
Prepare the Wall Properly
Tile performs best over a suitable, sound substrate.
Before installation, the wall should generally be:
- Clean
- Dry
- Stable
- Free of loose material
- Appropriate for the tile system
Remove grease or contaminants that could interfere with bonding.
If the wall has damage, unsuitable coatings, significant irregularities, or moisture problems, address those before tiling.
Turn Off Power Before Working Around Outlets
Backsplash installation frequently involves electrical outlets.
Turn off power at the appropriate circuit before removing outlet or switch covers or working around electrical devices.
Verify the circuit is de-energized using an appropriate tester.
Electrical devices may need adjustments so they sit correctly relative to the finished tile surface. Electrical requirements vary by location, so use a qualified electrician for work beyond your skills or where required.
Never bury electrical boxes behind tile or make inaccessible electrical connections.
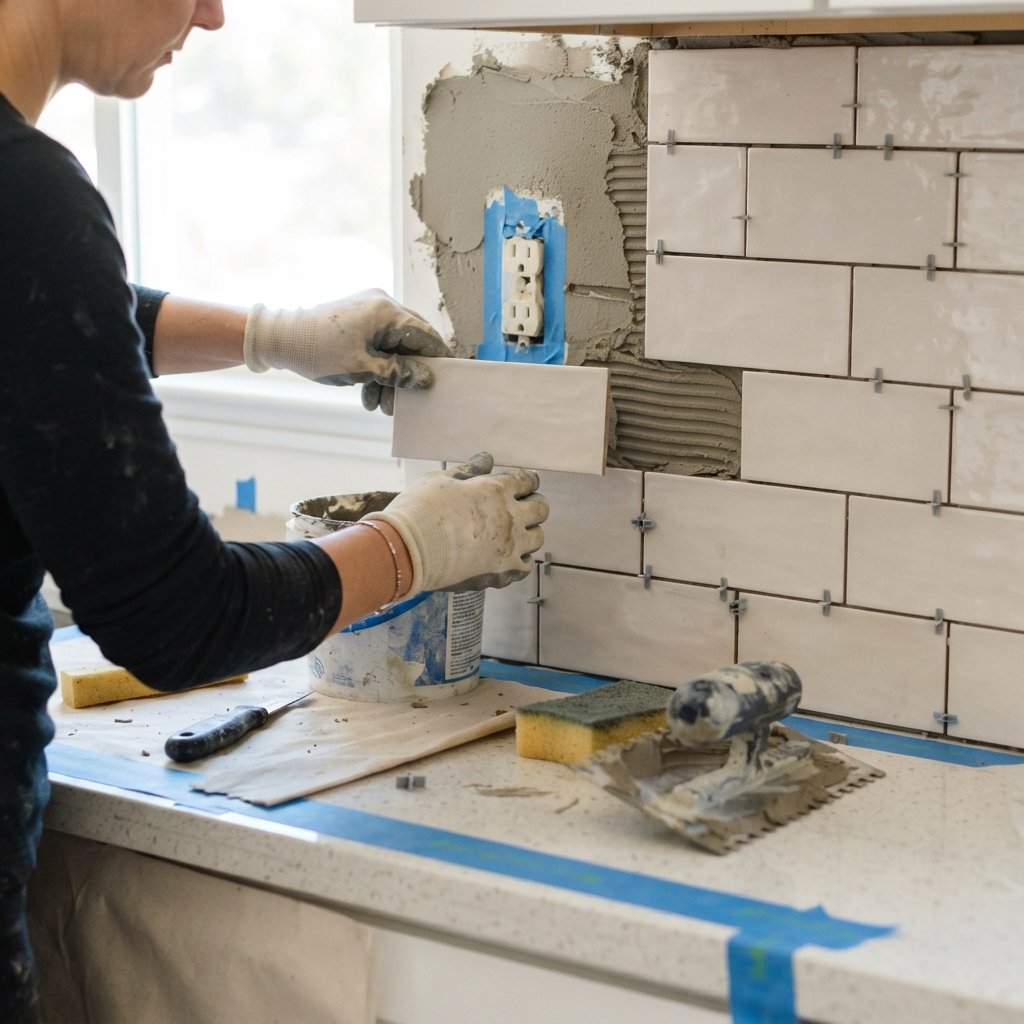
Plan Tile Around Outlets
Outlet cuts are often the most tedious part of backsplash installation.
Measure carefully.
The cover plate may conceal a small portion of the cut, but do not rely on it to hide inaccurate work.
The electrical box and device still need to meet applicable installation requirements.
Take your time with these cuts.
Cutting Backsplash Tile
The right cutting tool depends on the tile material and cut.
Possible tools include:
- Manual tile cutter
- Wet saw
- Appropriate tile nippers
- Diamond cutting tools intended for the material
Follow the tool manufacturer’s instructions.
Wear eye protection.
Be mindful of silica exposure when cutting materials that can generate respirable crystalline silica. Use appropriate wet-cutting or dust-control methods and respiratory protection when required.
Do not dry-cut materials in a way that creates uncontrolled hazardous dust.
Install Tile in Manageable Sections
Avoid spreading more setting material than you can cover within its working time.
Work in manageable sections.
Apply setting material according to manufacturer instructions using the recommended trowel and technique.
Press tiles into place appropriately and check frequently for:
- Level
- Alignment
- Consistent joints
- Adequate coverage
Clean excess material from joints before it hardens.
Pay Extra Attention Around the Hood
The area around the vent hood is visually prominent.
Try to create balanced tile cuts on both sides where the layout allows.
Keep horizontal lines consistent.
If tile meets wood trim, plan the joint carefully.
You may need an appropriate flexible sealant at changes of plane or where different materials meet rather than rigid grout, depending on the tile system and manufacturer recommendations.
Let the Tile Set Before Grouting
Do not rush from installation directly into grouting.
Allow the setting material to cure for the time specified by its manufacturer.
Cure time varies based on the product, tile, substrate, temperature, and other conditions.
Follow the actual product instructions rather than assuming a universal waiting period.
Choosing a Grout Color
Grout can dramatically change the appearance of the backsplash.
Matching Grout
A grout close to the tile color creates a quieter, more seamless appearance.
Contrasting Grout
Darker grout emphasizes the pattern and individual tile shapes.
Warm Neutral Grout
A soft warm gray or beige can provide subtle definition without creating a strong grid.
Test grout samples with the tile whenever possible.
Grout can look different once installed over a large area.
Grouting the Backsplash
Follow the grout manufacturer’s instructions carefully.
In general, the process involves:
- Mixing or preparing grout as directed.
- Working it into the joints.
- Removing excess with the float.
- Cleaning the surface appropriately.
- Allowing it to cure.
Avoid using excessive water during cleanup, which can negatively affect some grout products.
Different grout types have different requirements.
Some require sealing and others do not.
Follow the product instructions rather than assuming.
Caulk Changes of Plane Where Appropriate
Corners and transitions may require flexible sealant rather than grout.
Common areas include:
- Countertop-to-backsplash joint
- Inside corners
- Tile-to-cabinet transitions
- Tile-to-trim transitions
Use a sealant suitable for the application and compatible with the materials.
This allows for normal movement between different surfaces.
Finishing the Vent Hood
Once the tile is installed and the decorative hood is ready for finishing, step back and inspect everything.
Look for:
- Visible nail holes
- Rough seams
- Caulk gaps
- Paint imperfections
- Uneven trim
- Tile adhesive residue
- Grout haze
Small finishing details can make a major difference.
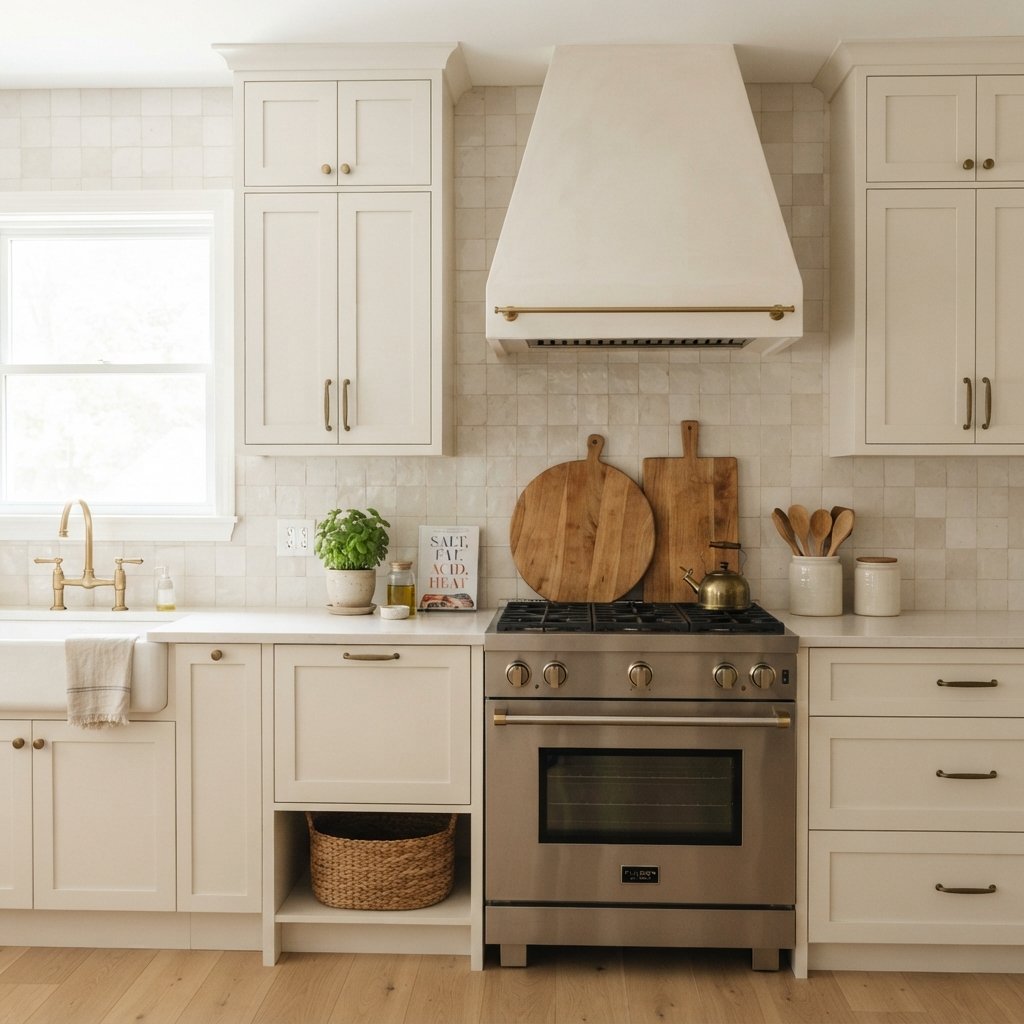
Styling Around a Custom Vent Hood
Once the construction dust is gone, keep styling simple.
The hood and backsplash already create a strong focal point.
Try:
- Wood cutting board
- Small crock
- Olive-oil bottle
- Small plant
- Simple tray
Avoid filling every inch of counter space.
A little breathing room allows the tile and hood details to stand out.
DIY Vent Hood Cover Design Ideas
White Painted Hood
A painted hood that coordinates with cabinetry creates a clean built-in look.
Wood Vent Hood
Natural wood can add warmth and contrast.
White Hood With Wood Trim
This combines the brightness of painted cabinetry with a small amount of natural texture.
Tapered Vent Hood
A tapered shape creates a classic focal point without requiring elaborate molding.
Box-Style Hood
A straight-sided box design can feel more contemporary.
Paneled Hood
Simple applied trim can give the hood architectural character.
Whatever design you choose, decorative elements must remain compatible with the actual hood installation and clearance requirements.
Tiling Around a Range: Practical Considerations
The backsplash behind a range needs to be easy to clean.
Cooking can expose it to:
- Grease
- Steam
- Food splatter
Consider maintenance when selecting both tile and grout.
Textured, porous, or heavily irregular surfaces may require more cleaning than smooth glazed tile.
Natural stone may have specific sealing and maintenance requirements.
Always follow the material manufacturer’s care recommendations.
Common DIY Vent Hood Cover Mistakes
Designing the Cover Before Choosing the Hood
Start with the actual ventilation appliance.
Ignoring Manufacturer Clearances
A decorative design never overrides safety requirements.
Blocking Service Access
Plan for future maintenance.
Making the Hood Too Small Visually
Once functional requirements are met, consider its scale relative to the range and cabinetry.
Making the Hood Too Large
A massive surround can overwhelm the kitchen.
Skipping the Level
The hood sits in a highly visible location.
Forgetting About Ductwork
The cover needs to accommodate the actual ventilation system.
Using Materials Without Checking Suitability
Confirm material and clearance requirements for the appliance and installation.
Common Backsplash Tiling Mistakes
Starting Without Planning the Layout
This can leave tiny slivers at prominent edges.
Assuming the Countertop Is Perfectly Level
Use reference lines.
Choosing Tile Under Store Lighting Only
View samples in the actual kitchen.
Ignoring Outlets Until You Reach Them
Plan cuts ahead.
Spreading Too Much Setting Material
Work within the product’s working time.
Letting Adhesive Harden in the Joints
Clean as you work.
Grouting Too Soon
Respect cure times.
Using Grout Where Flexible Sealant Is Required
Follow the tile system recommendations for changes of plane.
Rushing the Final Cleanup
Grout haze and adhesive residue can diminish an otherwise beautiful installation.
DIY Vent Hood and Tiling Safety
A range hood is part of a ventilation system associated with a cooking appliance, so safety comes before aesthetics.
Follow all range, hood, duct, tile, adhesive, and finish manufacturer instructions.
Pay particular attention to:
- Required clearances
- Ventilation
- Ducting
- Combustible materials
- Electrical requirements
- Service access
- Mounting
Local building and mechanical codes may establish additional requirements.
For electrical work, gas connections, exterior duct penetrations, or any aspect beyond your experience, use qualified professionals as appropriate or required.
When tiling:
- Wear eye protection.
- Control dust when cutting tile.
- Use appropriate respiratory protection when required.
- Handle sharp tile edges carefully.
- Keep the work area clear.
- Turn off electrical circuits before working around exposed devices.
- Follow setting-material and grout safety instructions.
- Provide ventilation when products require it.
Never compromise appliance safety simply to achieve a particular hood shape or tile layout.
FAQ About DIY Vent Hood Covers and Tiling
Can you build your own range hood cover?
A decorative range hood surround can be a DIY woodworking project, but it must be designed around a properly installed ventilation appliance and comply with the manufacturer’s instructions and applicable local requirements.
What should you build the hood cover from?
Materials depend on the appliance, design, clearances, and manufacturer requirements. Do not assume a particular wood product or sheet material is acceptable without checking those requirements.
Should backsplash tile go behind a range hood?
It can, depending on the hood design and installation. Plan the hood, tile thickness, finished edges, clearances, and service access before deciding where the tile terminates.
Should I install the hood or backsplash first?
The ideal sequence depends on the hood design and tile layout. Plan both together before permanently installing either so the finished layers and edges work correctly.
What backsplash tile is easiest to keep clean?
Smooth glazed surfaces are generally easier to wipe than highly textured or porous materials. Always check the tile manufacturer’s maintenance instructions.
How do you choose backsplash grout color?
Choose matching grout for a quieter look or contrasting grout to emphasize the pattern. A soft neutral can provide subtle definition.
Should I grout between the backsplash and countertop?
Changes of plane commonly use an appropriate flexible sealant rather than rigid grout. Follow the recommendations for your tile system and materials.
Can I tile around electrical outlets myself?
Tile can be cut around electrical boxes, but electrical devices must remain safely and correctly installed. Turn off and verify power before working near electrical devices, and use a qualified electrician for electrical modifications or where required.
Final Thoughts
Week five of a kitchen renovation can be a big one.
A DIY vent hood cover and tiling project takes a wall that may still feel unfinished and turns it into a real focal point.
The biggest lesson with both projects is the same: plan before you build.
Choose the ventilation appliance first and follow its installation, ducting, clearance, and service requirements. Then design the decorative hood surround around those limitations.
For the backsplash, resist the urge to start sticking tile to the wall immediately.
Lay it out first.
Think about the range, hood, outlets, cabinets, windows, corners, and exposed edges. A few minutes—or even a few hours—spent adjusting the layout can prevent awkward cuts you’ll notice for years.
Then take your time with the finishing details.
Straight lines, balanced cuts, smooth trim, careful caulk, clean grout joints, and a good paint finish are what make a DIY project look intentional.
When the hood and backsplash are finished, the kitchen begins to feel dramatically different.
Cabinets may establish the layout, and countertops provide the work surface, but the vent hood and backsplash can give the room its personality.
And that makes week five a pretty exciting point in a kitchen renovation.

