

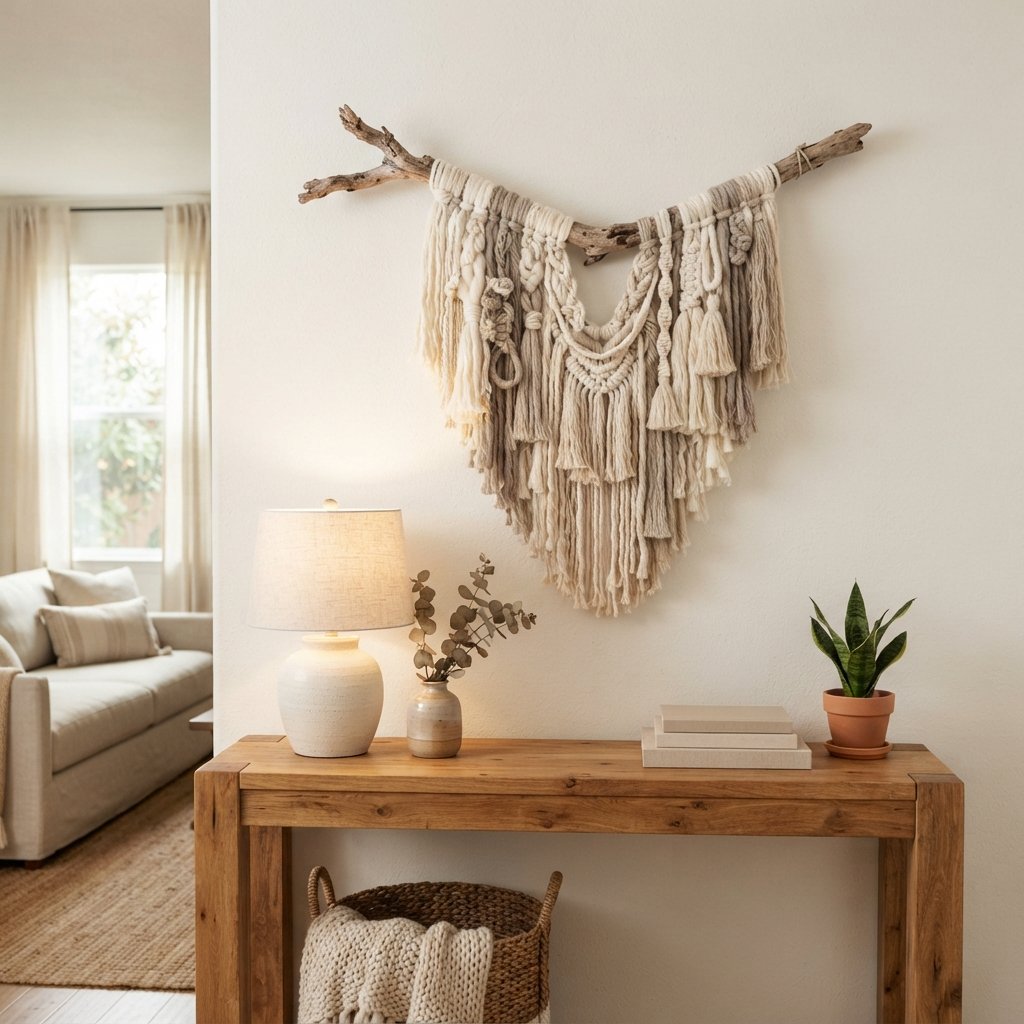
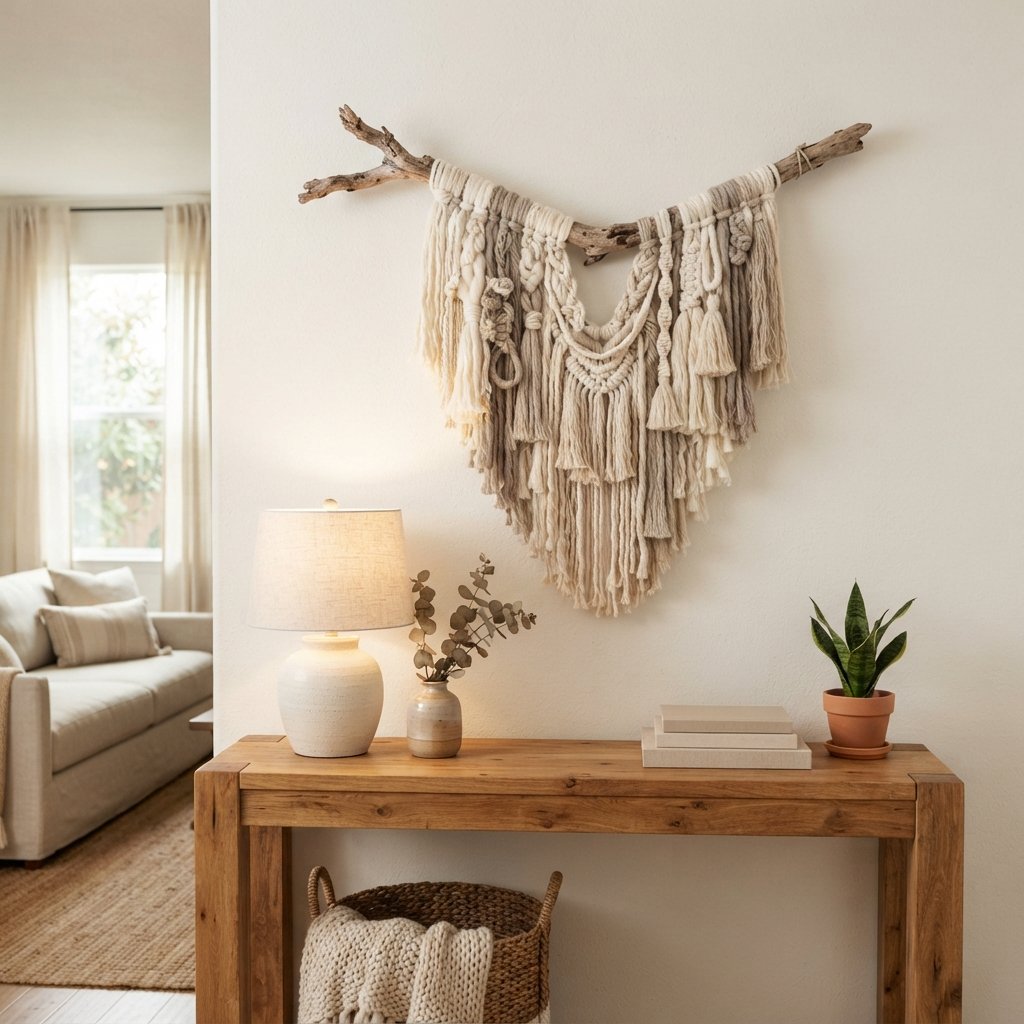
Sometimes the best DIY wall decor starts with something incredibly simple.
A beautiful branch can become the base for an interesting piece of wall art with just a few inexpensive materials. Add yarn, macramé cord, wooden beads, dried or artificial greenery, or simple hanging ornaments, and you can create a DIY branch wall hanging that adds texture and warmth to an empty wall.
This project is especially useful when you need something larger than a framed print but don’t want to spend much on oversized artwork.
It can work above a dresser, over a console table, in an entryway, or as part of a bedroom wall. Depending on the materials you choose, a branch wall hanging can feel rustic, boho, Scandinavian, organic modern, or even seasonal.
The basic project is beginner-friendly, but a little planning makes a big difference. You’ll want to choose a clean, completely dry branch, think about the finished size before attaching anything, and use hanging hardware appropriate for the total weight.
Here’s how to make a simple branch wall hanging, plus plenty of ideas for customizing it to fit your home.
Why Make a Branch Wall Hanging?
One of the biggest advantages is scale.
Large wall decor can get expensive quickly. A branch gives you a wide horizontal base, allowing you to create something substantial without needing a large canvas or frame.
It’s also easy to customize.
You control:
- Width
- Length
- Color
- Texture
- Amount of decoration
- Overall style
Want something minimal? Use a sculptural branch with just a few strands of neutral cord.
Want a fuller boho wall hanging? Add lots of yarn and knots.
Want seasonal decor? Attach lightweight ornaments that can be changed throughout the year.
The project can be as simple or detailed as you want.
Where to Hang a DIY Branch Wall Hanging
Before choosing a branch, decide where the finished piece will go.
Good locations include:
- Above a console table
- Over a dresser
- In an entryway
- On a large living room wall
- In a bedroom
- In a home office
- In a covered location where the materials and hanging method are appropriate
Measure the wall before starting.
A tiny branch can look lost on a large wall, while an oversized branch may overwhelm narrow furniture.
If the wall hanging will go above furniture, consider the width of the furniture when deciding how wide the finished piece should be.
What Kind of Branch Should You Use?
Look for a branch with an interesting natural shape.
It doesn’t have to be perfectly straight.
In fact, slight curves and smaller offshoots often make the finished wall hanging more interesting.
Choose a branch that is:
- Solid
- Completely dry
- Free of visible rot
- Free of active insects
- Not excessively brittle
- Appropriate in weight for your wall and hardware
Avoid bringing damp or decaying wood indoors.
Also be mindful of where the branch comes from. Don’t cut living branches or collect natural materials where doing so is prohibited. A fallen branch from your own property, where appropriate, is often the simplest option.
Should You Clean a Branch Before Bringing It Inside?
Yes.
Natural branches can contain dirt, loose bark, insects, or moisture.
Inspect the branch outdoors first.
Brush away dirt and loose debris.
If the bark is flaking heavily, remove loose material rather than allowing it to fall inside later.
How you clean or treat natural wood depends on the species, condition, and intended finish. Avoid introducing unnecessary moisture if the branch is already dry, and don’t apply random chemical treatments without knowing whether they’re appropriate for indoor use.
Most importantly, don’t use a branch showing signs of active infestation, mold, significant decay, or persistent dampness.
Allow any cleaned wood to become thoroughly dry before crafting with it.
Supplies for a DIY Branch Wall Hanging
Your exact supplies will depend on the design.
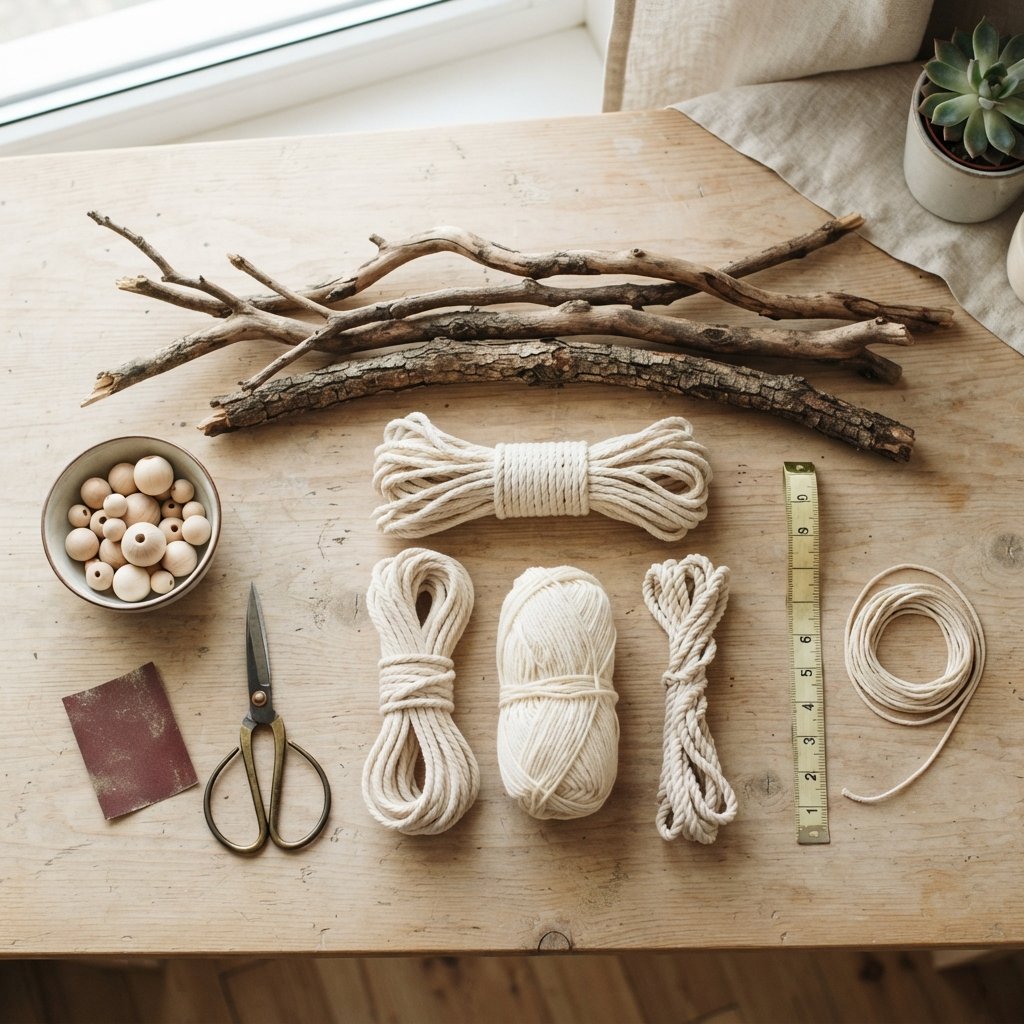
For a simple yarn version, gather:
- Clean, dry branch
- Yarn, cotton cord, or macramé cord
- Sharp scissors
- Tape measure
- Hanging cord if needed
- Appropriate wall hardware
Optional decorative materials include:
- Wooden beads
- Fabric strips
- Tassels
- Dried botanicals
- Artificial greenery
- Lightweight ornaments
- Small bells
- Feathers
- Natural twine
Optional tools:
- Sandpaper
- Small hand saw
- Drill
- Pliers
Use tools appropriate for the material and wear suitable eye protection when cutting or drilling.
Step 1: Decide on the Finished Size
Start by measuring your wall.
Then decide how wide and tall you want the wall hanging to be.
Remember that the fibers hanging from the branch add substantial visual height.
A branch that looks small by itself may feel much larger after you add long strands underneath.
Use painter’s tape on the wall to outline the approximate finished dimensions.
This lets you test the scale before doing any work.
Step 2: Prepare the Branch
Once your branch is clean and fully dry, decide whether to leave it natural.
You can:
- Leave the bark intact if it’s stable
- Remove loose bark
- Lightly sand rough areas
- Cut away unwanted small twigs
- Shorten the branch
If sawing or sanding, secure the branch so it doesn’t roll or shift.
Wear appropriate eye protection, and use dust protection if the material or amount of sanding warrants it.
Don’t sand away every natural imperfection. The irregular texture is part of what makes branch decor interesting.
Step 3: Decide on a Natural or Finished Look
You can leave the wood unfinished for a rustic or organic appearance.
Or you can alter the look with a compatible finish.
Possible effects include:
- Natural raw wood
- Dark stained appearance
- Whitewashed effect
- Painted black
- Painted white
If applying any coating, verify that it’s compatible with the wood and suitable for indoor use. Follow the product’s ventilation, application, drying, and curing instructions.
For the simplest project, leave the branch natural.
Step 4: Choose Your Hanging Material
The material hanging from the branch determines the overall style.
Yarn
Soft and cozy.
Great for bedrooms and casual living spaces.
Cotton Cord
Clean and neutral.
Works well for Scandinavian, organic, and boho decor.
Macramé Cord
Ideal if you want to add knots or more elaborate patterns.
Natural Twine
More rustic.
Fabric Strips
A good way to add color or use fabric scraps.
You can also combine materials, but limit the palette so the finished piece doesn’t become visually chaotic.
Step 5: Choose a Color Palette
Neutral wall hangings are easy to incorporate into existing rooms.
Try:
- Cream
- Ivory
- Beige
- Taupe
- Brown
For more color, consider:
- Sage green
- Terracotta
- Dusty blue
- Muted blush
- Burgundy
- Mustard
You can use one color or several closely related tones.
A simple ombré effect is another option.
Step 6: Cut the Strands
Decide approximately how long you want the fibers to hang.
Cut the first few strands longer than necessary.
You can always trim them later.
If you’re folding strands in half to attach them, remember the finished hanging length will be approximately half the cut length, depending on the knot and material.
Instead of cutting every piece individually, use the first strand as a guide for the next few.
Don’t worry about getting the bottom edge perfect yet.
Final trimming comes later.
Step 7: Attach the Yarn to the Branch
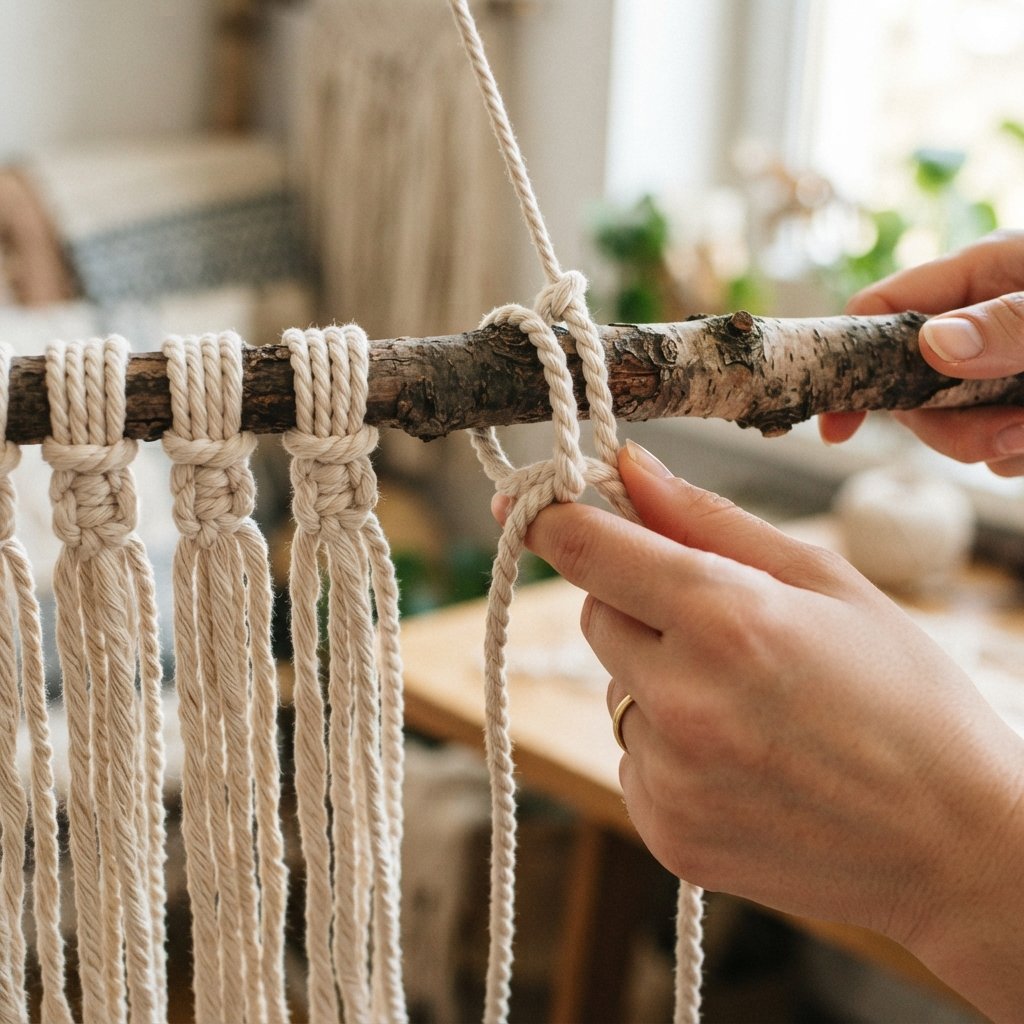
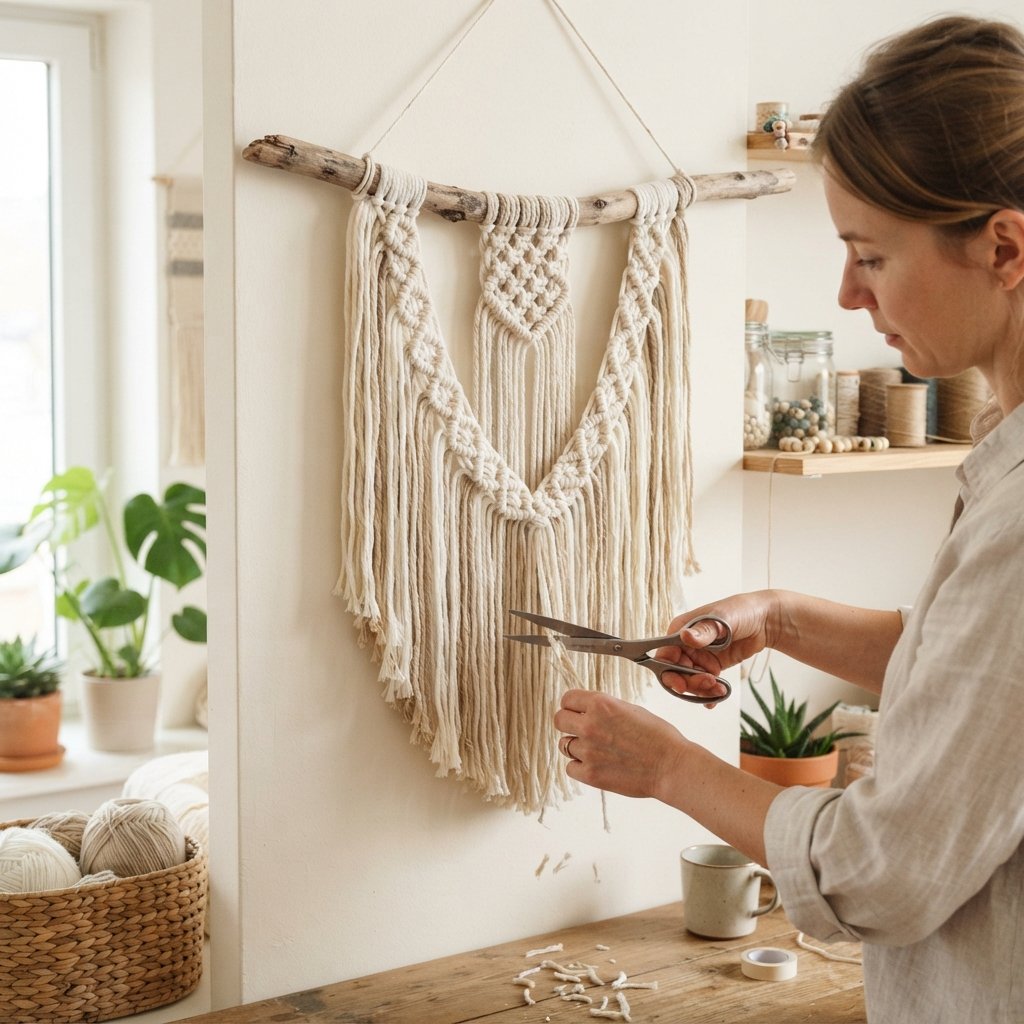
One of the simplest attachment methods is a lark’s head knot.
To make one:
- Fold a strand of yarn or cord in half.
- Place the folded loop behind or over the branch.
- Bring the loose ends through the loop.
- Pull gently until secure.
Repeat across the branch.
The exact orientation can be adjusted depending on which side of the knot you want visible.
Keep the knots close together for a fuller wall hanging.
Space them farther apart for a minimal look.

Step 8: Create a Shape With Different Lengths
Once you’ve added enough strands, decide what shape you want at the bottom.
You could trim the fibers into:
- Straight line
- Gentle curve
- V shape
- Inverted V
- Asymmetrical shape
- Stepped pattern
A V shape is particularly easy and creates a strong focal point.
For something more organic, leave the lengths intentionally uneven.
Step back frequently before cutting.
It’s easy to remove more fiber, but you can’t put length back once it’s trimmed.
Step 9: Add Texture
A wall hanging becomes much more interesting when it includes several textures.
Try mixing:
- Thin cotton cord
- Chunky yarn
- Twisted rope
- Soft fibers
- Wooden beads
Keep the colors similar if you’re using many textures.
This prevents the project from becoming too busy.
Step 10: Add Wooden Beads
Wood beads can reinforce the natural look.
Thread them onto selected strands before tying or finishing the ends.
Use them sparingly.
A few beads mixed among plain strands usually look more intentional than placing one on every piece.
Make sure beads and other small components are secured and kept out of reach of young children where they could present a choking hazard.
Step 11: Add Tassels
Tassels can create a fuller boho look.
Make simple tassels from leftover yarn and attach them to:
- Fiber ends
- Small branch offshoots
- Selected cords
Again, you don’t need many.
A few strategically placed tassels can add texture without overwhelming the branch.
Step 12: Trim the Bottom
Once the wall hanging is assembled, hang it temporarily somewhere safe so the fibers fall naturally.
Then trim.
Use sharp scissors and work gradually.
For a V shape, begin near the middle and create a gentle angle upward on both sides.
For a straight bottom, use a long straightedge as a visual guide.
Natural fibers may shift slightly after hanging, so don’t obsess over absolute perfection.
Step 13: Decide How to Hang the Branch
The correct method depends on:
- Branch weight
- Added decorations
- Wall material
- Hardware
- Desired appearance
One simple method is to attach strong cord near each end of the branch and hang the cord from appropriate wall hardware.
Another option is to support the branch directly on two properly installed hooks.
Do not rely on decorative adhesive hooks unless the manufacturer specifically rates them for the wall surface and total load involved.
For heavier pieces, attach to studs or use properly rated anchors appropriate for the wall construction.
Weigh the finished wall hanging if you’re uncertain.
Step 14: Attach the Hanging Cord
If using cord:
- Choose cord strong enough for the finished weight.
- Tie it securely around one side.
- Repeat on the other.
- Test the knots.
- Lift the branch a short distance over a soft surface to confirm everything holds.
You can create a visible triangle of cord above the branch or keep the cord less noticeable depending on the look you want.
Step 15: Hang and Level the Wall Art
Install the wall hardware according to its instructions.
Hang the branch.
Then step back.
Because natural branches are irregular, “level” can be tricky.
You don’t necessarily need the branch itself to be perfectly horizontal.
Instead, adjust it until the overall wall hanging looks balanced.
That visual balance matters more than forcing a naturally curved branch to sit unnaturally straight.
1. Minimal DIY Branch Wall Hanging
For a simple version, use:
- One branch
- Cream cotton cord
- Widely spaced knots
- Uneven strand lengths
Skip beads, tassels, and extra decorations.
This works beautifully in a neutral living room or bedroom.
2. Boho Branch Wall Hanging
For a fuller bohemian look, layer several materials.
Try:
- Macramé cord
- Chunky yarn
- Wooden beads
- Tassels
Keep the color palette fairly restrained.
Cream, tan, and warm brown create plenty of visual texture without needing bold color.
3. Scandinavian Branch Wall Hanging
Keep everything minimal.
Use a pale natural branch with:
- White cord
- Cream yarn
- Simple geometric spacing
Leave plenty of empty space.
The branch itself should remain visible.
4. Rustic Branch Wall Hanging
Use a more textured branch and natural materials.
Try:
- Jute twine
- Cream yarn
- Wood beads
- Dried natural-looking elements
This can work well with warm wood furniture, stone, and other rustic finishes.
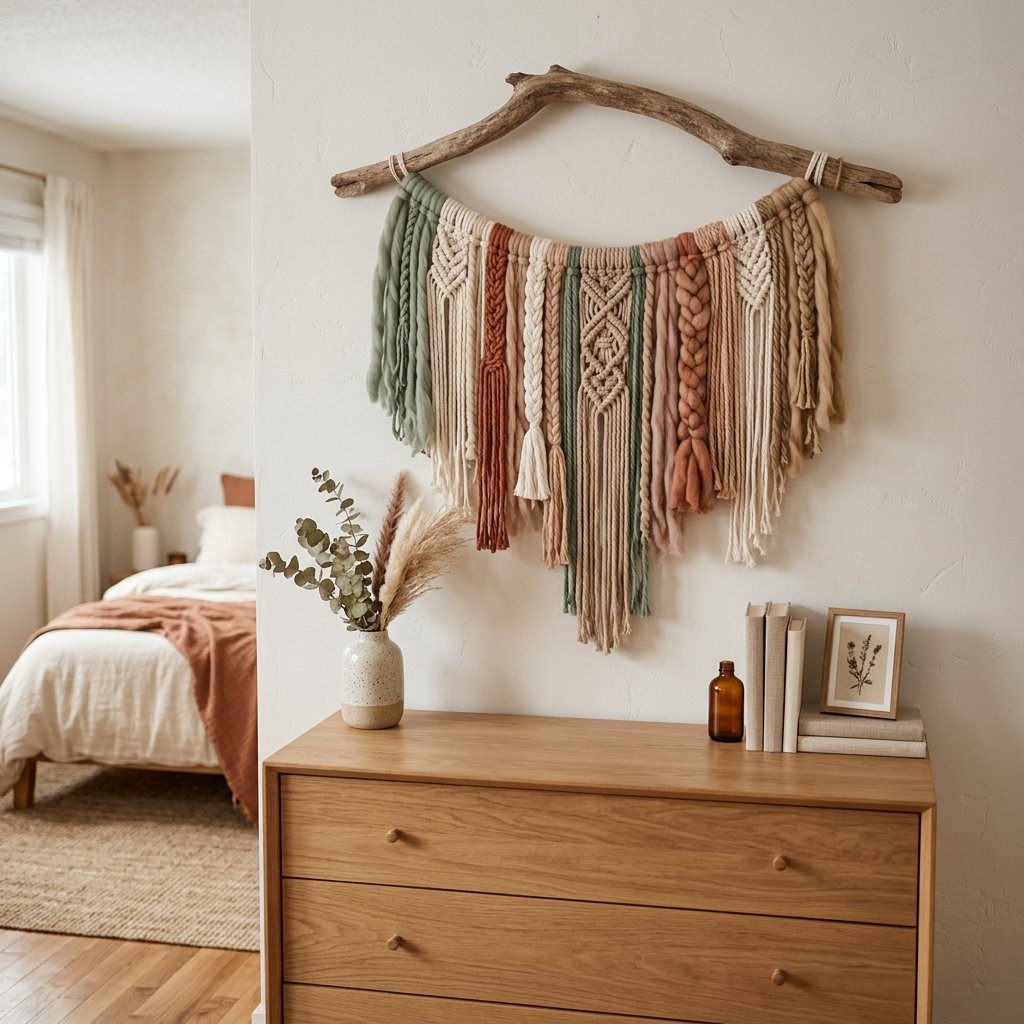
5. Colorful Yarn Branch Wall Hanging
For a playful version, use multiple yarn colors.
Choose three to five shades that coordinate.
For example:
Sage + cream + tan
Dusty blue + ivory + gray
Terracotta + blush + cream
Burgundy + dusty rose + beige
Arrange the colors randomly or in blocks.
6. Ombré Branch Wall Hanging
Choose several shades of one color family.
Arrange them from light to dark.
For example:
- Ivory
- Beige
- Camel
- Brown
Or:
- Pale blush
- Dusty rose
- Mauve
- Burgundy
This creates color variation while keeping the wall hanging cohesive.
7. Branch Wall Hanging With Greenery
Add a small amount of artificial or appropriately dried greenery.
Wrap or secure it near one side of the branch for an asymmetrical look.
Avoid covering the entire branch.
You want the natural shape to remain visible.
If using real dried plant materials, remember that they may shed, fade, or become brittle over time.
8. Branch Wall Hanging With Dried Flowers
Dried flowers can create a softer decorative piece.
Use a few stems rather than a full arrangement.
Possible looks include:
- Neutral grasses
- Small dried flowers
- Seed heads
- Preserved-looking botanicals
Make sure any natural material you bring indoors is clean, fully dry, and appropriate for the household.
9. Branch Wall Hanging With Photos
A branch can also become a casual photo display.
Suspend lightweight photo prints from thin cord.
Vary the lengths.
For a clean look, keep the clips and cords consistent.
Be careful about hanging loose cords where young children could access them.
10. Branch Wall Hanging With Small Frames
For a more finished photo display, hang a few very lightweight frames.
Before doing this, calculate the total weight and make sure:
- Branch is strong enough
- Hanging cord is strong enough
- Wall hardware is rated appropriately
Heavy frames are better mounted directly to the wall.
11. Branch Wall Hanging for a Bedroom
Above a dresser is one of the best places for this project.
The furniture visually anchors the wall hanging.
Choose colors from the room’s existing:
- Bedding
- Rug
- Curtains
- Pillows
You don’t need to match exactly.
Repeating one or two colors is enough.
12. Branch Wall Hanging for an Entryway
A branch wall hanging can fill the wall above an entry console without adding another framed piece.
Pair it with:
- Table lamp
- Small bowl
- Stack of books
- Vase
Keep the console styling fairly simple because the wall hanging already provides plenty of texture.
13. Seasonal Branch Wall Hanging
The branch can become a reusable base for seasonal decorations.
Spring
Add lightweight artificial greenery or flowers.
Fall
Use rust, brown, burgundy, or mustard yarn.
Christmas
Add lightweight stars, bells, ribbon, or ornaments.
Remove seasonal elements afterward and return to the neutral version.
Christmas Branch Wall Hanging
A branch wall hanging can make simple holiday decor.
Try:
- Velvet ribbon
- Small lightweight bells
- Paper stars
- Wooden ornaments
- Greenery
Avoid adding heavy glass ornaments to a branch that isn’t designed to support them.
Make sure all components are securely attached.
DIY Branch Wall Hanging Without Macramé
You don’t need to know macramé.
The easiest version uses only lark’s head knots.
Attach simple strands across the branch.
Trim them.
Hang the piece.
That’s it.
If you’ve avoided wall hangings because intricate macramé looks intimidating, this is a much easier alternative.
DIY Branch Wall Hanging Without Yarn
The branch itself can become wall decor.
Try hanging:
- Paper stars
- Lightweight wood ornaments
- Dried botanicals
- Fabric strips
- Small decorative shapes
You can also mount an especially sculptural branch by itself if you use appropriate hardware.
How to Make a Branch Wall Hanging Look More Expensive
The difference is usually editing.
Use Fewer Colors
Two or three tones can feel more cohesive.
Vary Texture
Combine smooth and chunky fibers.
Choose an Interesting Branch
The branch is part of the design.
Hide Messy Knots
Keep attachment methods consistent.
Trim Carefully
The bottom shape should look intentional.
Use Quality-Looking Hardware
Avoid visible hardware that distracts from the design.
Leave Some Branch Exposed
Don’t cover every inch.
How Big Should a Branch Wall Hanging Be?
The right size depends on the wall and nearby furniture.
Rather than following one rigid formula, look for visual balance.
Above a wide console, a very narrow wall hanging may look undersized.
Above a small dresser, an enormous branch may dominate the furniture.
Use painter’s tape to mark:
- Branch width
- Overall hanging width
- Lowest point of fibers
Then view it from across the room.
How High Should You Hang It?
Treat the wall hanging similarly to artwork.
It should relate visually to the furniture below it rather than floating high on the wall.
Leave enough clearance so accessories on a console or dresser don’t collide with the fibers.
If it’s in a walkway, make sure no branches or strands project where people could catch clothing or bump into them.
Branch Wall Hanging Safety
Natural materials and wall-mounted decor require a little extra attention.
- Use only solid, dry wood without obvious decay or infestation.
- Wear appropriate protection when sawing, drilling, or sanding.
- Secure the branch while working on it.
- Consider the finished weight before choosing hardware.
- Use wall anchors or fasteners appropriate for the wall material and load.
- Follow hardware manufacturers’ weight ratings and installation instructions.
- Don’t hang heavy branch decor directly above a bed, crib, changing table, or another location where a failure could cause injury.
- Keep long cords, loops, beads, and small decorative parts away from babies and young children.
- Keep flammable fibers and dried botanicals away from candles, fireplaces, heaters, and other heat or flame sources.
- Test knots and connections before mounting the piece.
When in doubt, choose a lighter branch and simpler decorations.
Common DIY Branch Wall Hanging Mistakes
Using Damp Wood
Let natural wood dry completely before bringing it into the finished space.
Ignoring Signs of Insects or Rot
Choose another branch.
Making the Wall Hanging Too Small
Measure the wall first.
Cutting Yarn Too Short
Start longer and trim later.
Using Too Many Colors
A limited palette usually looks more intentional.
Overdecorating the Branch
Leave some natural wood visible.
Cutting the Bottom Too Early
Hang the fibers first and let them settle.
Using Weak Hanging Cord
Choose cord appropriate for the load.
Ignoring Wall Hardware Ratings
The fastener needs to support the entire finished piece.
Hanging Heavy Decor Over a Bed
Choose a safer location or use lighter wall decor.
FAQ About DIY Branch Wall Hangings
How do you make a branch wall hanging?
Clean and fully dry a sturdy branch, attach yarn or cotton cord using simple knots, trim the strands into your desired shape, attach strong hanging cord or another suitable mounting method, and secure it to properly rated wall hardware.
What kind of branch is best for wall decor?
Choose a solid, dry branch with no obvious rot, mold, active insects, or excessive brittleness. An interesting natural shape can add character.
How do you clean branches for indoor decor?
Inspect them outdoors, brush away loose dirt and debris, remove unstable bark if necessary, and make sure the branch is thoroughly dry. Avoid bringing wood indoors if it shows signs of infestation, decay, or mold.
What cord should I use for a branch wall hanging?
Cotton cord, macramé cord, yarn, or suitable decorative twine can work depending on the desired style and whether the material needs to support additional decorations.
How do you attach yarn to a branch?
A lark’s head knot is one of the easiest methods. Fold the yarn in half, create a loop around the branch, pull the loose ends through, and tighten gently.
Can you make a branch wall hanging without macramé?
Yes. A simple design can be made entirely with basic lark’s head knots, so no advanced macramé skills are necessary.
Can I hang a branch wall hanging over a bed?
It’s generally safer to avoid hanging heavy branch decor directly over a bed or another area where someone could be injured if it fell. Choose a lighter decorative option or another wall location.
Can you paint a branch for wall decor?
Yes, if the wood is clean and fully dry and you use a coating suitable for the material and indoor environment. Follow all product instructions for preparation, ventilation, drying, and curing.
Final Thoughts
A DIY branch wall hanging is a simple way to turn natural materials and inexpensive fibers into large-scale wall decor.
And the project doesn’t have to involve complicated macramé.
Start with one clean, completely dry branch.
Add cream yarn or cotton cord with basic knots.
Trim the strands into a simple shape.
Then hang the finished piece securely.
From there, you can make the design as simple or decorative as you want.
Add wooden beads for a natural look, mix yarn textures for a cozy boho style, introduce muted colors for a child’s room, or change a few lightweight decorations seasonally.
The best versions don’t hide the branch completely.
Let the curves, knots, texture, and imperfections in the wood become part of the finished design.
With a thoughtful color palette and secure hanging method, a branch that might otherwise have been overlooked can become an inexpensive piece of wall art with plenty of warmth and character.

