

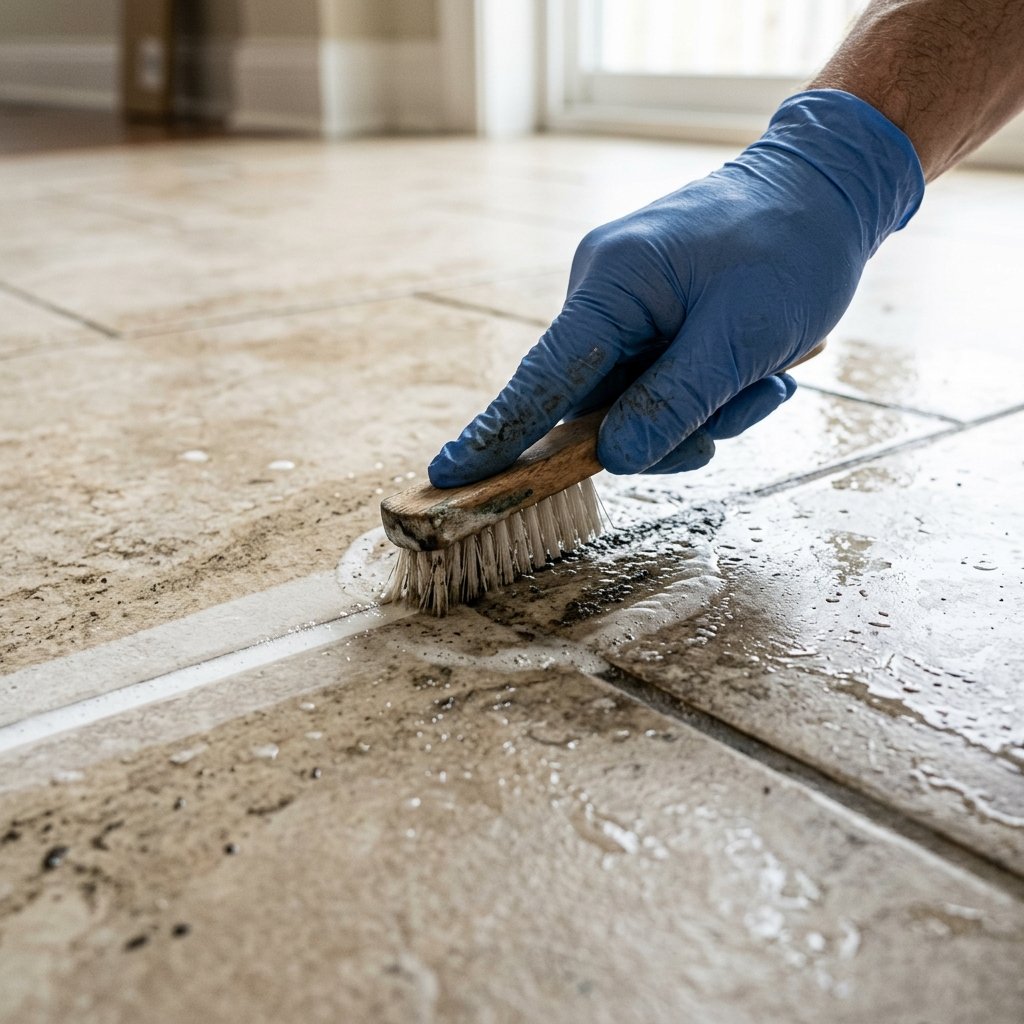
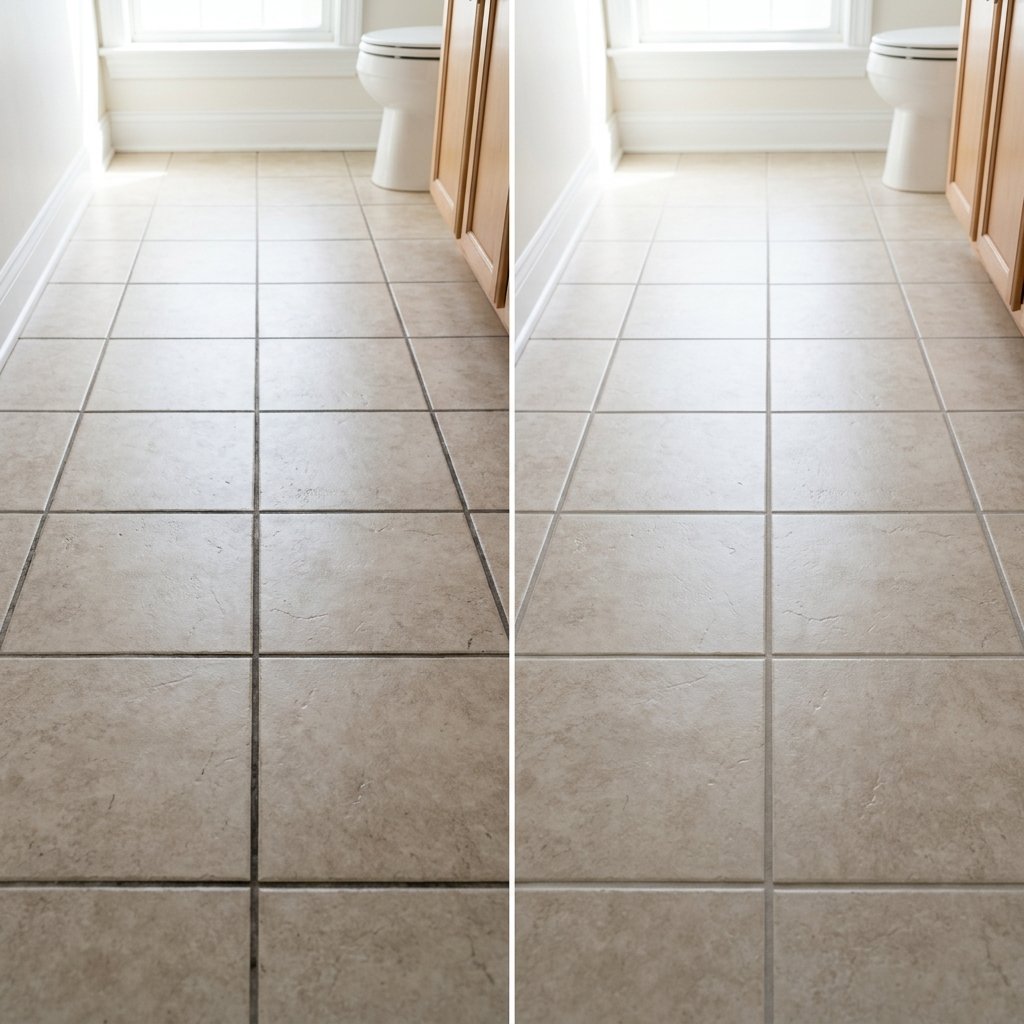
Grout has a way of changing so gradually that you may not notice how dingy it has become until you look at an older photo—or move something that reveals a section of the original color.
Suddenly, the difference is obvious.
Grout that once looked clean and crisp can become darker, stained, discolored, or uneven from everyday dirt, spills, soap residue, moisture, and years of cleaning.
The good news is that tired-looking grout doesn’t automatically mean you need to remove it all and start over.
Depending on its condition, you may be able to restore grout to its former glory with a thorough cleaning, targeted stain treatment, small repairs, and, if necessary, a grout colorant designed to refresh its appearance.
The important part is figuring out what you’re dealing with first.
Dirty grout needs cleaning. Cracked or missing grout needs repair. Persistent discoloration may need a different solution. And recurring mold or moisture problems need to be addressed at their source rather than simply scrubbed or covered.
Here’s how to evaluate old grout and decide what it needs to look clean and refreshed again.
Why Does Grout Get So Dirty?
Grout lines sit slightly below or between the surfaces of the tile, making them natural collection points for dirt and residue.
Depending on the location, grout can be exposed to:
- Dust
- Soil from shoes
- Cooking residue
- Soap residue
- Hard-water deposits
- Spills
- Cleaning-product buildup
- Moisture
Some grout is also relatively porous unless protected by the appropriate system.
Floor grout tends to collect soil from foot traffic.
Bathroom grout has to contend with humidity, water, and personal-care products.
Kitchen grout may encounter food and grease.
Over time, the original grout color can become difficult to recognize.
First: Is the Grout Dirty, Stained, or Damaged?
Before grabbing a scrub brush, inspect the grout closely.
Dirty Grout
If the grout is intact but darker than it used to be, cleaning may be all it needs.
Stained Grout
If cleaning improves the surface but the color remains uneven, staining or embedded discoloration may be the problem.
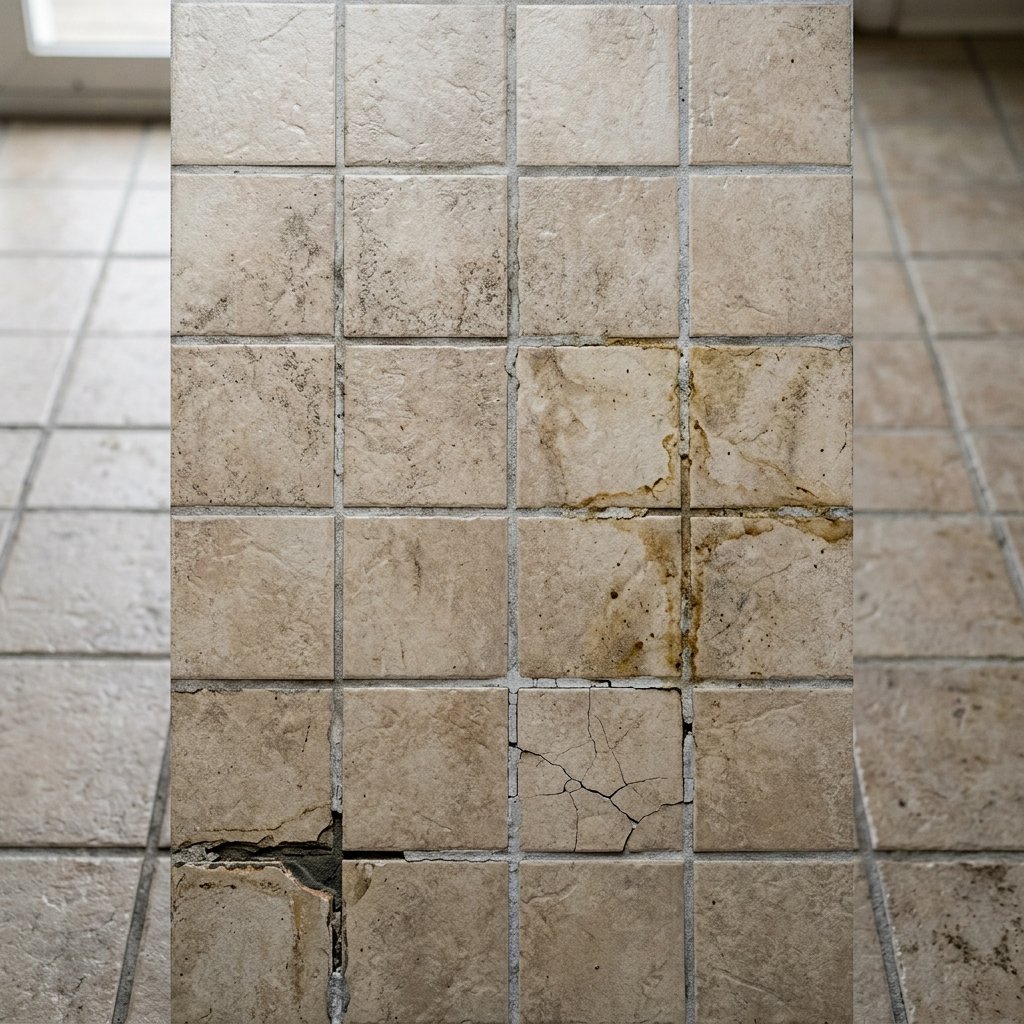
Cracked Grout
Cracks need more than cleaning.
They can result from movement, installation problems, age, or other issues that should be evaluated before cosmetic repairs.
Missing or Crumbling Grout
Loose material should not simply be painted over with grout colorant.
Damaged areas may need to be removed and repaired.
Mold or Mildew
Surface growth may be cleanable, but recurring mold can indicate ongoing moisture or ventilation problems.
Failed Caulk
Corners and changes of plane may use flexible sealant rather than grout. If caulk has failed, replacing it correctly is different from repairing grout.
Step 1: Identify Your Tile and Grout
Before choosing a cleaner, determine what you’re cleaning.
Different tile materials have different chemical sensitivities.
For example, products that may be appropriate for some glazed ceramic or porcelain surfaces can damage certain natural stones.
Also consider the grout type.
Depending on the installation, you may have:
- Cementitious grout
- Epoxy grout
- Other specialty grout products
If you know the manufacturer or original product, check its care recommendations.
When you don’t know what you have, begin with the least aggressive reasonable cleaning method and test it in an inconspicuous location.
Step 2: Vacuum or Sweep First
Don’t start by soaking a dirty tile floor.
Loose dust, hair, and grit are easier to remove while dry.
Vacuum or sweep the area thoroughly.
Pay attention to:
- Corners
- Baseboards
- Grout intersections
- Areas beneath movable furniture
Removing loose debris prevents you from turning dry dirt into muddy residue once cleaning solution is introduced.
Step 3: Start With a Mild Cleaner
It’s tempting to jump immediately to the strongest grout cleaner available.
Don’t.
Start with a mild cleaning solution that’s compatible with both the tile and grout.
A pH-neutral tile cleaner is often a useful starting point when recommended for your surfaces.
Follow the product directions carefully.
Using more concentrated cleaner than directed doesn’t necessarily improve the result and can leave residue or damage some materials.
Step 4: Give the Cleaner Time to Work
Cleaning products often need some contact time to loosen grime.
Apply the product according to its label and allow the recommended dwell time.
Don’t let a cleaner dry on the surface unless the manufacturer specifically instructs you to do so.
Work in manageable sections so you can:
- Apply.
- Wait.
- Agitate.
- Rinse or remove as directed.
Trying to clean an entire floor at once can make the process harder.
Step 5: Scrub the Grout
Use a grout brush or another brush appropriate for the surface.
Scrub along the grout line rather than randomly across the entire tile.
You may be surprised by how much grime comes out.
For stubborn areas, make another pass rather than immediately switching to a harsher chemical.
Avoid overly aggressive wire brushes unless specifically recommended for the surface. Metal bristles can scratch tile or damage grout.
Step 6: Remove the Dirty Cleaning Solution
This step matters more than people realize.
Once the cleaner loosens dirt, that dirty solution needs to come off the floor.
Depending on the cleaning product, you may need to:
- Wipe with clean microfiber cloths
- Rinse according to directions
- Mop with clean water where appropriate
- Use a wet vacuum suitable for the application
Change rinse water frequently.
Otherwise, you can redistribute dirty water across the grout and wonder why it still looks dull after drying.
Step 7: Let the Grout Dry Before Judging It
Wet grout often looks much darker than dry grout.
Don’t decide whether the cleaning worked while everything is still wet.
Allow the area to dry thoroughly.
Then inspect the grout in good light.
You may discover that one basic cleaning dramatically restored the original color.
If not, move on to targeted treatment.
What About Baking Soda?
Baking soda is frequently recommended as a DIY grout cleaner.
It is mildly abrasive, so it can help with some soil. However, abrasive cleaning isn’t suitable for every tile or grout surface.
If you’re considering it, first check the care instructions for your tile and grout and test a hidden area.
Avoid assuming that a homemade cleaner is automatically safer than a commercial product.
“Natural” and “non-damaging” are not the same thing.
Should You Clean Grout With Vinegar?
Vinegar appears in countless grout-cleaning tips, but it isn’t appropriate for every surface.
Its acidity can damage acid-sensitive natural stone and may be unsuitable for some grout or installation materials.
Rather than using vinegar as a universal grout cleaner, follow the tile and grout manufacturers’ care recommendations.
If you don’t know what material you have, a compatible pH-neutral cleaner is generally a more cautious starting point.
Can You Use Bleach on Grout?
Bleach-containing cleaners may be appropriate for certain applications, but they are not a universal solution.
Check whether the product is compatible with:
- Your tile
- Your grout
- Nearby finishes
Provide appropriate ventilation, wear the protective equipment specified on the label, and follow all dilution and application instructions.
Most importantly, never mix bleach with ammonia, acids, vinegar, or other household cleaners. Dangerous gases can be produced.
If you have already applied another cleaner, rinse and handle the surface according to product directions rather than layering chemicals.
What About Hydrogen Peroxide?
Hydrogen peroxide also appears in many DIY grout-cleaning recipes.
Whether it’s appropriate depends on the surface, concentration, and other materials involved.
Check manufacturer recommendations and test first.
Don’t mix cleaning chemicals simply because two separate internet tips recommend them.
More ingredients do not necessarily produce a better cleaner.
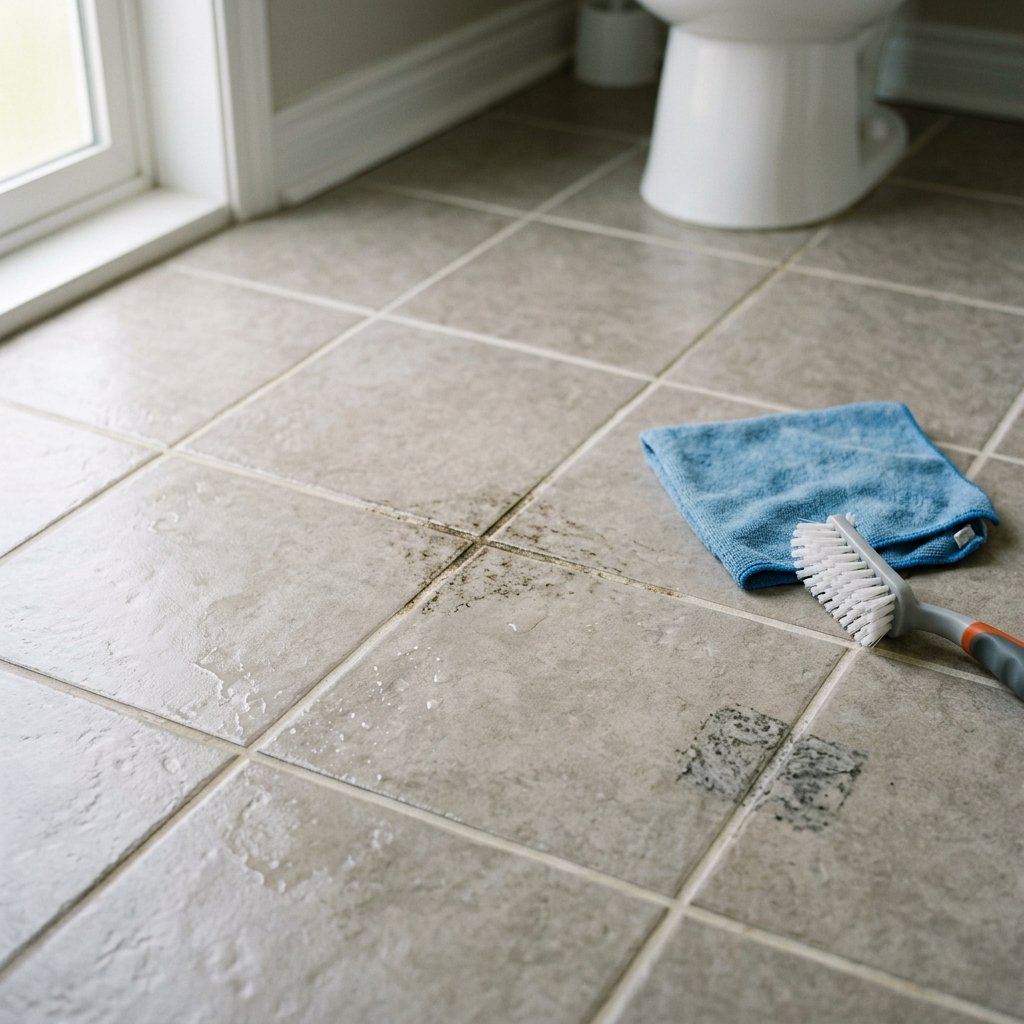
Step 8: Target Remaining Stains
After general cleaning, you’ll have a much better idea of which areas are genuinely stained.
Treat only those areas rather than subjecting the entire floor to aggressive cleaning.
Choose a stain-removal product specifically compatible with the tile and grout.
Follow its instructions for:
- Dilution
- Dwell time
- Ventilation
- Protective equipment
- Rinsing
Repeat treatment only if permitted.
If the grout remains uneven after appropriate cleaning, the discoloration may be permanent enough that a colorant becomes the more practical solution.
Step 9: Inspect for Cracks and Missing Grout
Cleaning can reveal damage that wasn’t obvious when the grout was dirty.
Look for:
- Hairline cracks
- Loose sections
- Holes
- Crumbling
- Separation from tile edges
Small localized repairs may be possible.
However, widespread cracking can signal movement or an installation issue.
Repeatedly patching grout without addressing the underlying cause may only provide a temporary cosmetic improvement.
If cracks keep returning, consider having the installation evaluated.
Step 10: Remove Loose Grout Before Repairing
Don’t apply fresh grout over material that’s already loose or crumbling.
Damaged grout typically needs to be carefully removed to an appropriate depth so the repair material can bond correctly.
Use tools suitable for the joint and tile.
Protect tile edges.
Wear eye protection and appropriate dust protection.
Be particularly cautious with powered grout-removal tools. They can damage tile edges very quickly.
If the area is extensive or the tile is valuable, professional repair may be worthwhile.
Step 11: Match New Grout Carefully
Grout color can be surprisingly difficult to match.
Even if you know the original color name, existing grout may have changed due to:
- Age
- Cleaning
- Sealing
- Wear
- Staining
A new patch can therefore look different.
For a small hidden repair, that may not matter.
For highly visible repairs, consider how the new and old sections will look together after everything has dried and cured.
Follow the grout manufacturer’s instructions for mixing, installation, cleanup, cure time, and exposure to water.
Step 12: Consider Grout Colorant for Permanently Discolored Grout
Sometimes grout is structurally sound but simply won’t return to an even color.
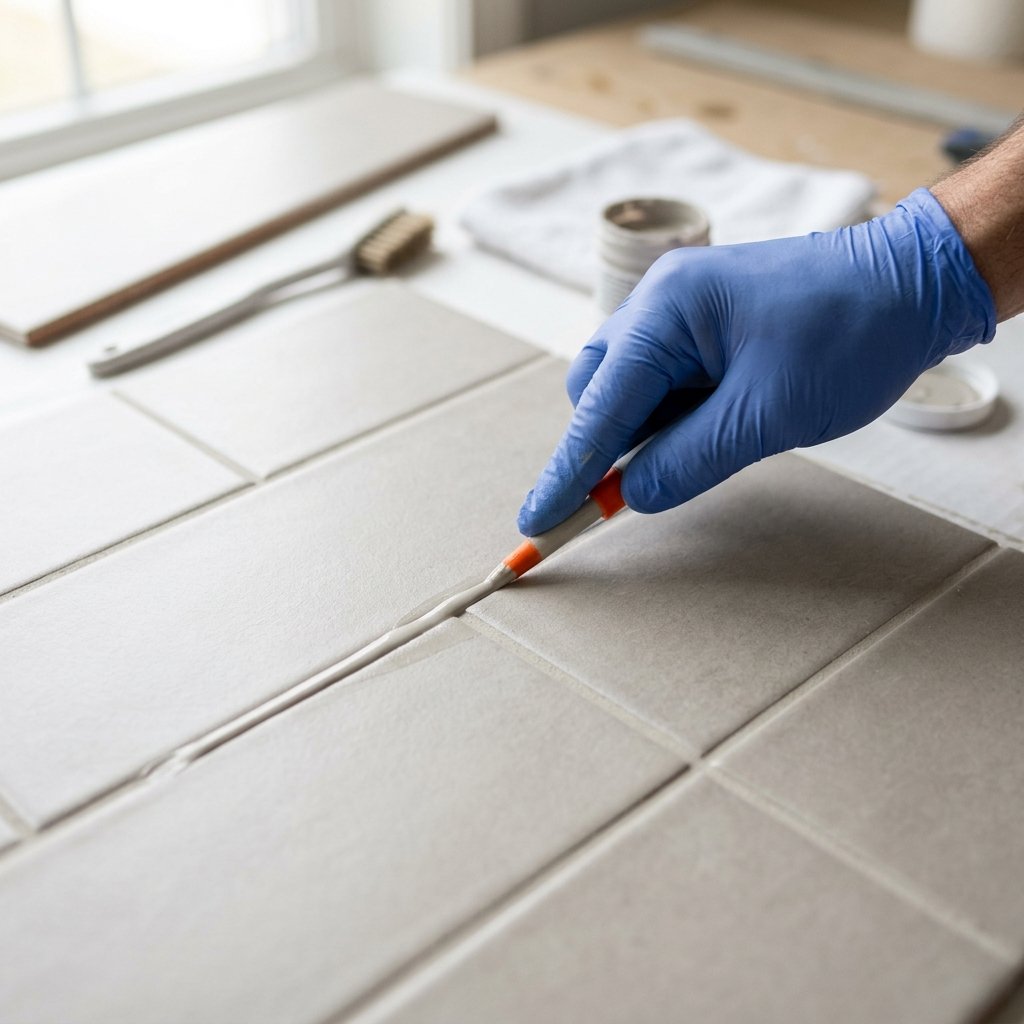
This is where a grout colorant may help.
These products are designed to create a more uniform grout appearance.
Depending on the system, a colorant may also provide additional surface protection.
But it isn’t a shortcut around cleaning or repair.
The grout generally needs to be:
- Sound
- Properly cleaned
- Free from incompatible sealers or residues
- Completely prepared according to product instructions
Do not use colorant to hide crumbling grout, unresolved mold, or moisture damage.
How to Apply Grout Colorant
Exact instructions vary by product, but the general process may include:
- Deep-clean the grout.
- Remove residues that could interfere with adhesion.
- Allow the grout to dry as required.
- Test the color in an inconspicuous area.
- Apply the colorant carefully along the grout line.
- Remove excess from the tile according to instructions.
- Allow it to dry and cure fully.
Some products require specific preparation or application tools.
Follow the manufacturer’s directions rather than treating all grout colorants as interchangeable.
Choosing a Grout Color
If you’re recoloring grout, you don’t necessarily have to recreate the original color.
This can be an opportunity to improve the overall tile design.
Grout Close to the Tile Color
Creates a quieter, more seamless appearance.
Contrasting Grout
Emphasizes the tile shape and pattern.
Warm Gray Grout
Can work beautifully with beige, cream, warm white, and greige tile.
Dark Grout
Can create dramatic definition, but it may also highlight inconsistent grout-line widths.
White or Very Light Grout
Looks crisp but can show soil more readily in high-traffic areas.
Before recoloring the whole room, test a small area and view it in both daylight and artificial light.
Should You Seal Grout?
That depends on the grout product.
Some cementitious grouts may benefit from an appropriate penetrating sealer, while some other grout types may not require or accept the same treatment.
Check the grout manufacturer’s recommendations.
If you apply a grout colorant, determine whether it already provides the protection intended by that system before applying anything over it.
Adding an incompatible sealer can cause problems.
How to Seal Grout
If sealing is recommended for your grout:
- Make sure the grout is properly cleaned.
- Allow it to dry for the required period.
- Apply a compatible sealer according to its instructions.
- Remove excess from tile surfaces as directed.
- Allow the sealer to cure before exposing the area to water or traffic.
Good ventilation may be required depending on the product.
Do not assume that sealing makes a tile installation waterproof. Grout sealer and a properly constructed waterproofing system are not the same thing.
Restoring Bathroom Floor Grout
Bathroom floors often accumulate:
- Hair
- Dust
- Soap residue
- Moisture-related grime
- Product residue
Start with a thorough dry cleaning.
Then use a cleaner appropriate for the tile and grout.
Pay special attention around:
- Toilet
- Vanity
- Tub
- Doorway
If grout near a tub or shower repeatedly darkens and remains damp, investigate the moisture source rather than continually recoloring it.
Restoring Shower Grout
Shower grout deserves extra caution because persistent staining can be related to ongoing moisture.
If you notice:
- Repeated mold growth
- Loose tiles
- Crumbling grout
- Persistent dampness
- Soft wall materials
- Musty odors
don’t treat the problem as purely cosmetic.
A shower’s waterproofing system is behind the visible tile surface. Grout itself is not the primary waterproofing layer.
If you suspect water is getting where it shouldn’t, professional evaluation may be appropriate.
Grout or Caulk in Shower Corners?
Changes of plane—such as wall-to-wall and wall-to-floor transitions—often require a flexible sealant rather than rigid grout, depending on the installation requirements.
If material in a corner is cracking repeatedly, don’t automatically fill it with more grout.
Determine what joint treatment is appropriate for the installation.
When replacing bathroom caulk, remove failed material thoroughly and use a sealant designed for the location.
How to Restore Kitchen Grout
Kitchen grout may accumulate different types of soil than bathroom grout.
Common issues include:
- Cooking grease
- Food spills
- Dust
- Mopping residue
Degreasing may therefore be more important.
Choose a cleaner compatible with the tile and grout and specifically suitable for the type of soil.
Near food-preparation surfaces, follow label directions for rinsing and safe use.
Restoring Grout on a Tile Backsplash
Backsplash grout often becomes discolored near:
- Stove
- Sink
- Coffee station
Start with the mildest appropriate cleaning method.
Grease may require a compatible degreasing cleaner.
Be particularly careful if the backsplash is made from natural stone, handmade tile, metallic tile, or another specialty material.
Always test first.
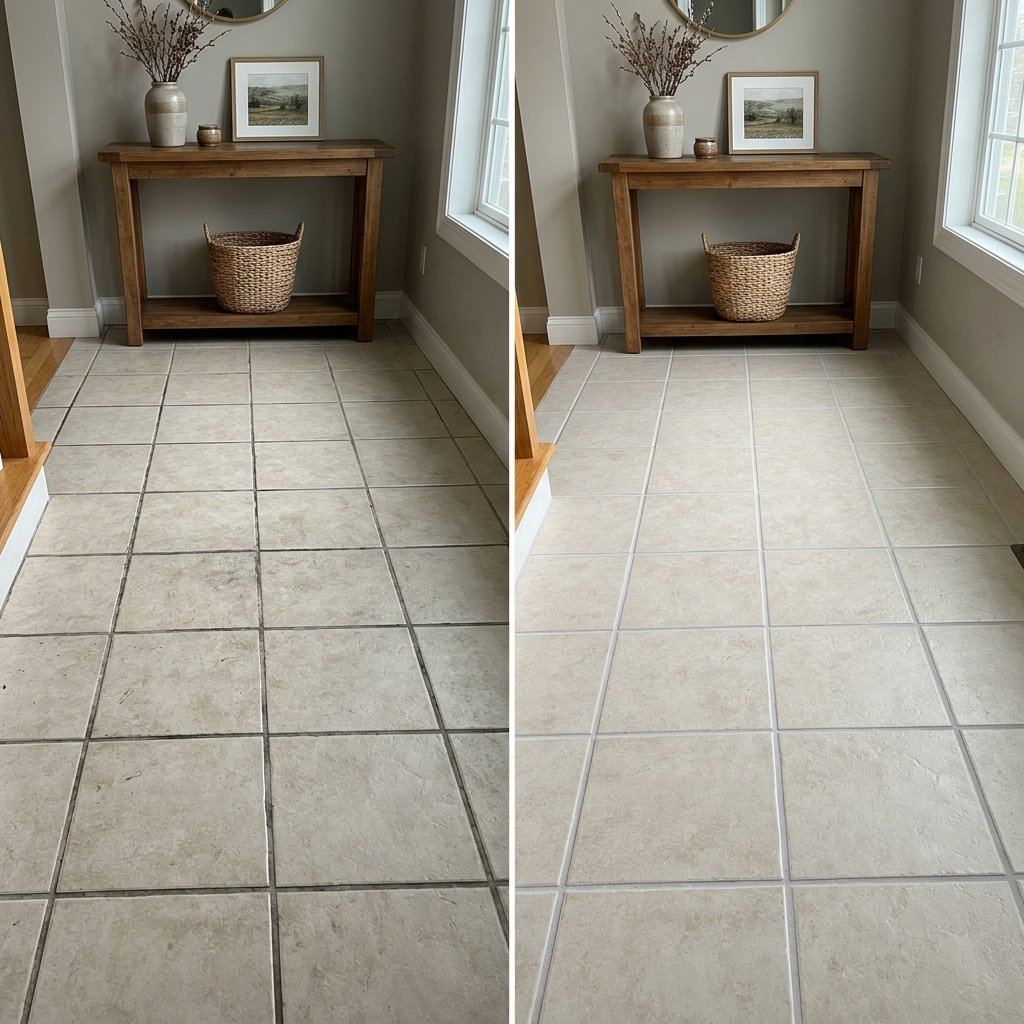
Restoring Floor Grout
Floor grout is often the most dramatic restoration because dirt accumulates gradually.
If you have a large floor, work in sections.
A practical sequence is:
- Vacuum.
- Apply cleaner to a manageable area.
- Allow recommended dwell time.
- Scrub.
- Extract or wipe away dirty solution.
- Rinse if required.
- Move to the next section.
This keeps dirty water under control.
Why Does Grout Still Look Dirty After Mopping?
Regular mopping can clean the tile surface without fully cleaning recessed grout lines.
Other possibilities include:
- Dirty mop water settling into joints
- Excess cleaning product
- Residue left behind
- Embedded soil
- Permanent staining
If your grout gradually looks worse despite frequent mopping, review both your cleaning solution and your rinse process.
Using too much cleaner can sometimes contribute to residue.
How to Keep Grout Cleaner After Restoring It
Once you’ve done all that work, prevention becomes much easier than another major restoration.
Vacuum or Sweep Frequently
Remove abrasive soil before it gets ground into the floor.
Clean Spills Quickly
Especially in kitchens and entryways.
Use the Correct Amount of Cleaner
More isn’t necessarily better.
Change Mop Water
Don’t clean the whole floor with increasingly dirty water.
Maintain Bathroom Ventilation
Use bathroom ventilation appropriately to reduce prolonged humidity.
Address Leaks Promptly
Don’t allow ongoing water exposure to become a grout problem.
Follow Sealer Maintenance Requirements
If your grout uses a sealer, follow the manufacturer’s recommendations for inspection and reapplication.
What Not to Do When Cleaning Grout
Some grout-cleaning mistakes can create more problems than they solve.
Avoid:
- Mixing household cleaning chemicals
- Assuming vinegar is safe for every tile
- Using harsh abrasives without testing
- Scrubbing natural stone with inappropriate products
- Covering damaged grout with colorant
- Sealing dirty grout
- Ignoring recurring mold
- Assuming grout sealer waterproofs a shower
- Driving aggressive tools into tile edges
- Using stronger chemical concentrations than directed
Start gently and escalate only when necessary.
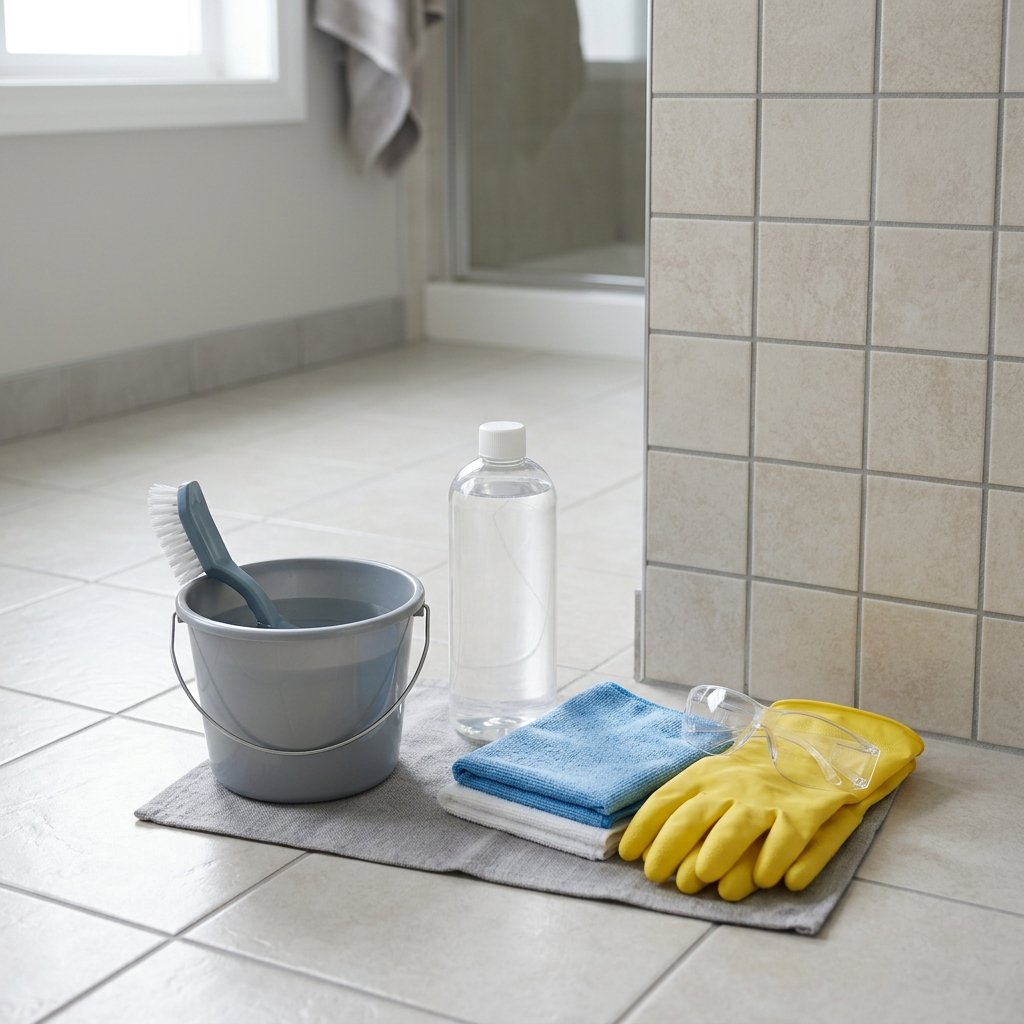
Grout Cleaning Safety
Grout restoration may involve cleaners, sealers, colorants, dust, and sharp tools.
Protect yourself and the room.
- Read product labels before use.
- Wear gloves and eye protection when recommended.
- Maintain adequate ventilation.
- Never mix cleaning products unless the manufacturer explicitly directs it.
- Keep children and pets away from the work area.
- Store chemicals in their original labeled containers.
- Follow all dilution instructions.
- Protect nearby finishes from splashes.
- Use appropriate respiratory protection when product instructions or dust conditions require it.
- Allow products to dry and cure fully before returning the area to normal use.
If a cleaner produces unexpected fumes or causes irritation, stop using it and move to fresh air as appropriate, then follow the product’s safety instructions.
When Cleaning Isn’t Enough
There is a point where scrubbing stops being the right answer.
Consider repair, recoloring, or professional evaluation when:
- Grout remains deeply stained after appropriate cleaning.
- Large areas are crumbling.
- Cracks repeatedly return.
- Tiles are loose.
- Moisture appears beneath or behind tile.
- Mold keeps returning despite proper cleaning and ventilation.
- Shower surfaces remain persistently damp.
- The grout has deteriorated across most of the installation.
Cosmetic restoration works best when the tile installation itself is still sound.
Common Grout Restoration Mistakes
Starting With the Harshest Cleaner
Begin with a compatible mild product.
Mixing Cleaners
This can be dangerous.
Skipping the Dry Vacuuming Step
Loose dirt is easier to remove before it gets wet.
Scrubbing Without Removing Dirty Water
The loosened soil has to go somewhere.
Judging Grout While It’s Wet
Wait until it dries.
Recoloring Damaged Grout
Repair structural deterioration first.
Sealing Before the Grout Is Clean and Dry
You can lock in discoloration or interfere with the sealer.
Ignoring Manufacturer Instructions
Tile, grout, cleaner, colorant, and sealer products vary.
FAQ About Restoring Grout
Can old grout be restored?
Yes. If the grout is structurally sound, deep cleaning may dramatically improve its appearance. Permanently discolored grout may also be a candidate for an appropriate grout colorant.
How do you make old grout look new again?
Start by removing dry dirt, then clean with a product compatible with your tile and grout. Repair damaged areas, treat remaining stains appropriately, and consider a grout colorant if sound grout remains uneven.
Can badly stained grout be cleaned?
Sometimes. Results depend on the cause and depth of the staining. If proper cleaning doesn’t create an even appearance, recoloring may be more practical.
Should I use vinegar to clean grout?
Not universally. Acidic cleaners can damage certain tile materials, especially acid-sensitive natural stone, and may not be appropriate for every grout product. Check manufacturer recommendations.
Can I use bleach on bathroom grout?
Some bleach-containing products may be suitable for specific surfaces and situations, but compatibility and ventilation matter. Follow the product label, and never mix bleach with acids, vinegar, ammonia, or other cleaners.
Can I paint over dirty grout?
Grout colorant generally requires properly cleaned and prepared grout. Applying it over dirt, residues, failing grout, or unresolved moisture can lead to poor results.
Does grout need to be sealed?
Some grout products benefit from sealing while others do not. Follow the grout manufacturer’s recommendations.
Why does my grout keep turning dark?
Possible causes include embedded dirt, residue, frequent moisture, staining, or other moisture-related issues. Grout that stays dark because it’s continually damp should be investigated rather than simply cleaned repeatedly.
Is cracked grout a cosmetic problem?
Sometimes small cracks are localized, but repeated or widespread cracking may indicate movement or another installation issue. Repairing the underlying cause is more important than repeatedly patching the surface.
Final Thoughts
If you want to restore grout to its former glory, don’t start by assuming you need the strongest cleaner—or a complete regrouting job.
Start by figuring out what the grout actually needs.
If it’s simply dirty, a careful deep cleaning may reveal a surprisingly different floor underneath.
If it’s stained but structurally sound, targeted cleaning or grout colorant may provide a more uniform appearance.
If it’s cracked, loose, or crumbling, repair should come before cosmetic improvements.
And if moisture, mold, or recurring deterioration keeps returning, investigate the underlying cause instead of repeatedly covering the symptoms.
The biggest difference often comes from a few basic steps: remove dry debris, use the right cleaner, give it time to work, scrub the grout lines, and thoroughly remove the dirty solution.
Then let everything dry before deciding what to do next.
You may find that the grout you thought needed replacing simply needed a proper cleaning—and that restoring those small lines between the tiles makes the entire room look fresher.

