

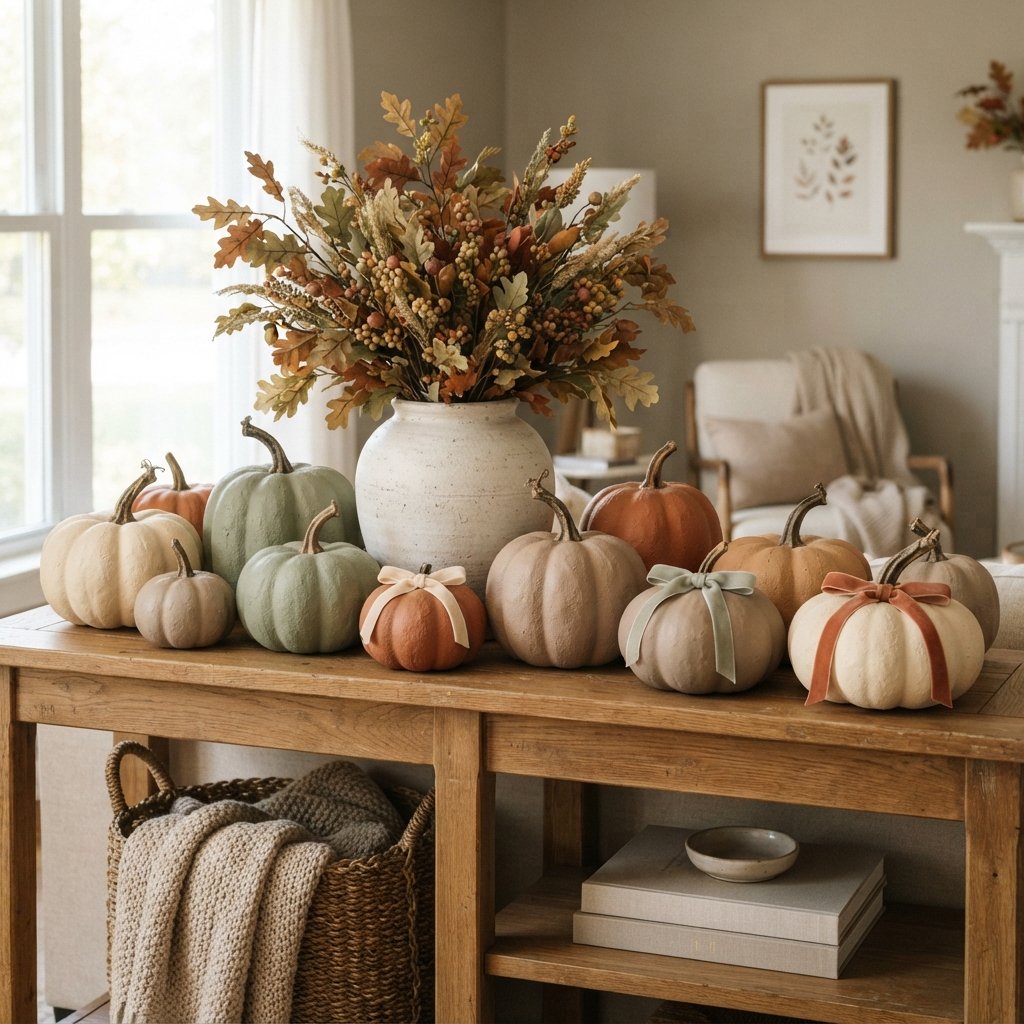
One of the easiest ways to decorate for fall without spending much money is to start with inexpensive faux pumpkins and give them a makeover. A simple dollar store pumpkin decorating craft can turn a basic seasonal decoration into something that looks much more suited to your home’s style.
The best part is that you don’t need advanced craft skills.
Paint can completely change a bright orange plastic or foam pumpkin. A little texture can make the finish more interesting. New stems, ribbon, twine, or simple painted details can make inexpensive pumpkins look surprisingly polished.
And because faux pumpkins can be reused, you can bring them out year after year or repaint them when your decorating style changes.
Below you’ll find an easy painted pumpkin tutorial plus several dollar store pumpkin decorating ideas you can use for mantels, shelves, tablescapes, entryways, and other fall displays.
Why Decorate Dollar Store Pumpkins?
Inexpensive faux pumpkins are a useful blank canvas.
They’re typically:
- Lightweight
- Easy to store
- Reusable
- Simple to customize
- Affordable for larger displays
They also make it possible to create a coordinated group without buying expensive decorative pumpkins individually.
Instead of focusing on what the pumpkin looks like in the store, look at its shape.
If you like the shape and size, you can usually change the color.
Choose Your Fall Color Palette First
Before painting anything, decide how you want the pumpkins to work with the rest of your fall decor.
Warm Neutral
Try:
- Cream
- Taupe
- Beige
- Brown
- Muted terracotta
Earthy Fall
Use:
- Olive
- Rust
- Mustard
- Brown
- Cream
Traditional Fall
Try:
- Orange
- Rust
- Burgundy
- Deep green
Soft and Simple
Use:
- Warm white
- Sage
- Light taupe
- Muted peach
Moody Fall
Try:
- Deep olive
- Charcoal
- Burgundy
- Chocolate brown
- Antique-inspired metallic accents
Keeping the palette limited will help a collection of inexpensive pumpkins look more intentional.
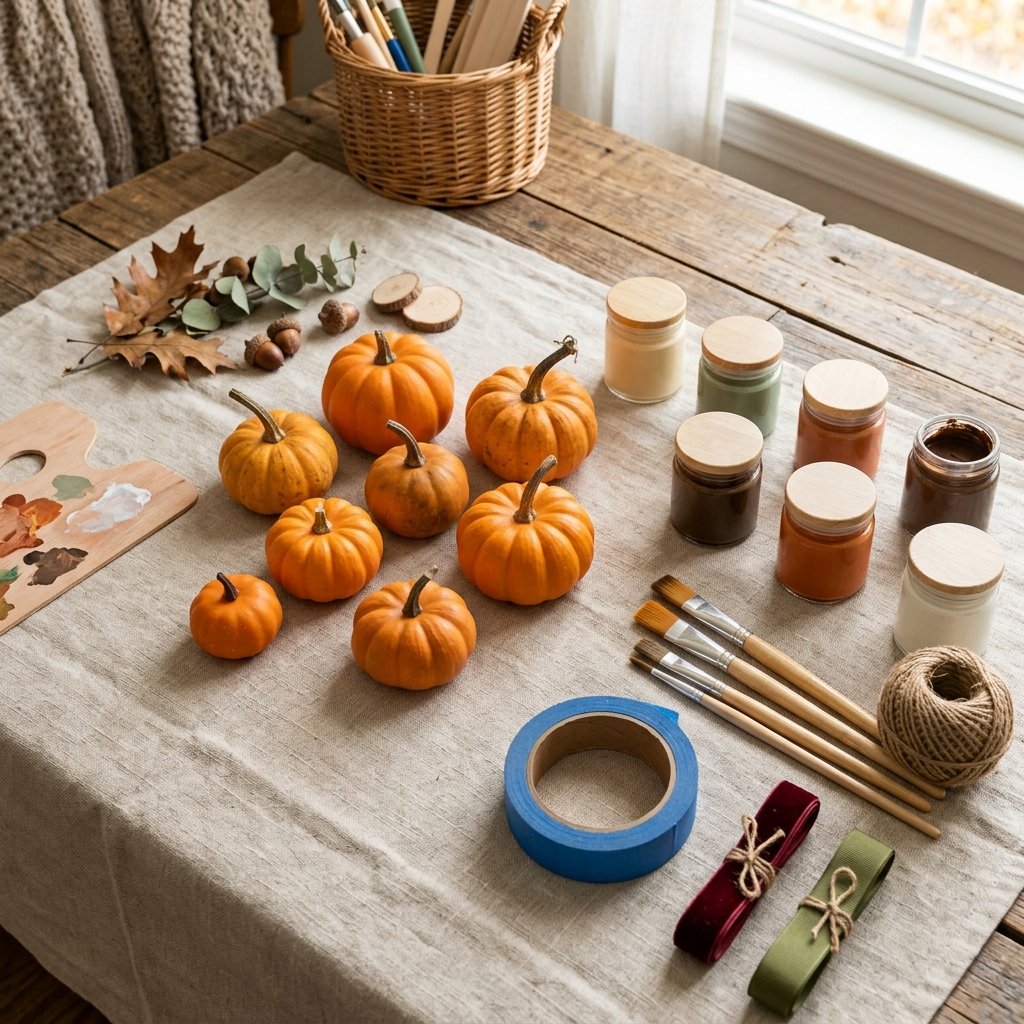
Supplies for an Easy Dollar Store Pumpkin Decorating Craft
For a basic painted pumpkin makeover, gather:
- Faux pumpkins
- Paint appropriate for the pumpkin material
- Primer if recommended for the surface and paint
- Paintbrushes
- Small artist brush
- Drop cloth or protective paper
- Painter’s tape if needed
- Disposable or reusable paint container
- Optional craft paint for details
- Optional ribbon or twine
- Optional replacement stem materials
- Optional clear topcoat if appropriate
Before painting, check what the pumpkin is made from.
Some are foam, some are hollow plastic, and others may have specialty finishes.
Paint adhesion varies by material, so test your chosen coating on an inconspicuous spot and follow the paint manufacturer’s surface-preparation instructions.
Step 1: Remove Tags and Stickers
Start by removing:
- Price stickers
- Labels
- Tags
- Loose decorations
If adhesive residue remains, remove it using a method that won’t damage the pumpkin material.
Be especially careful with foam pumpkins because some solvents and products can damage foam.
Step 2: Clean the Pumpkins
Paint won’t adhere well to dust, oils, or residue.
Wipe each pumpkin according to the needs of the material and allow it to dry completely.
If you’re using a cleaner, make sure it’s compatible with the surface.
Don’t soak foam or porous craft pumpkins unless the manufacturer indicates that’s appropriate.
Step 3: Decide Whether to Keep the Stem
Look at the existing stem.
If it already looks good, cover it with painter’s tape before painting.
If it looks obviously plastic, you have options:
- Paint it
- Wrap it with twine
- Replace it
- Add ribbon around the base
Sometimes simply painting the stem dark brown makes a big difference.
Step 4: Prime If Needed
Not every craft pumpkin needs primer.
Some paints adhere well directly to the surface, while slick plastic may need additional preparation.
Follow the instructions for the paint and primer you’re using.
If primer is required, apply it in thin, even coats and allow the recommended drying time.
For spray products, use them only where and how the manufacturer directs, with appropriate ventilation and protective equipment.
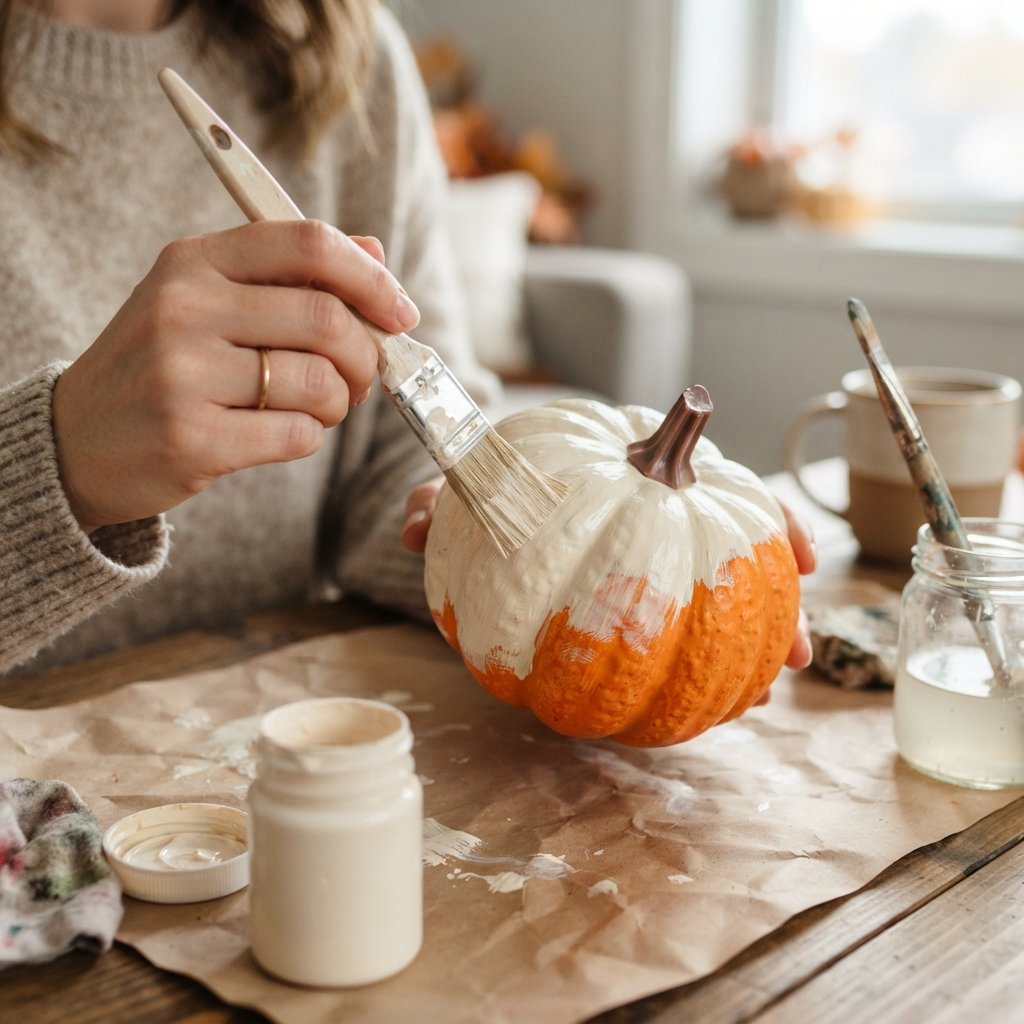
Step 5: Paint the Pumpkin
Apply the first coat using a soft brush.
Follow the pumpkin’s natural grooves rather than brushing straight across them.
Thin coats usually create a cleaner finish than one heavy coat.
Let the first coat dry according to the product instructions before applying another.
Depending on:
- Original pumpkin color
- Paint color
- Surface
- Paint type
you may need additional coverage.
Step 6: Add a Second Color for Dimension
A perfectly flat paint color can sometimes make a faux pumpkin look even more artificial.
Adding subtle variation helps.
Start with your base coat.
Then use a slightly lighter or darker shade to emphasize:
- Grooves
- Raised areas
- Area around the stem
Keep it subtle.
You aren’t trying to paint obvious stripes. You’re creating the impression of natural variation.
Step 7: Try Dry Brushing
Dry brushing is an easy way to add texture.
Dip a brush lightly into paint and remove most of it on a paper towel or scrap surface.
Then lightly brush across raised areas.
For example:
Taupe pumpkin + cream dry brushing
or
Terracotta pumpkin + lighter clay tone
A little goes a long way.
Step 8: Paint the Stem
A brown, taupe, olive, or charcoal stem can look more natural than shiny molded plastic.
Use a small brush.
You can add a second lighter shade with dry brushing to emphasize the stem’s texture.
If you’re working with several pumpkins, vary the stem colors slightly rather than making every one identical.
Step 9: Let the Pumpkins Dry Completely
Don’t rush into styling while the paint is still soft.
Allow all coatings to dry—and cure when required—according to their instructions.
This is particularly important if pumpkins will touch one another in a bowl or storage container.
Paint that hasn’t cured sufficiently may stick to adjacent surfaces.
Step 10: Add Ribbon or Twine
This is optional.
Tie a small piece of:
- Velvet ribbon
- Gingham ribbon
- Frayed fabric ribbon
- Twine
around the stem.
Don’t add ribbon to every pumpkin.
One or two embellished pumpkins among simpler ones can look more balanced.
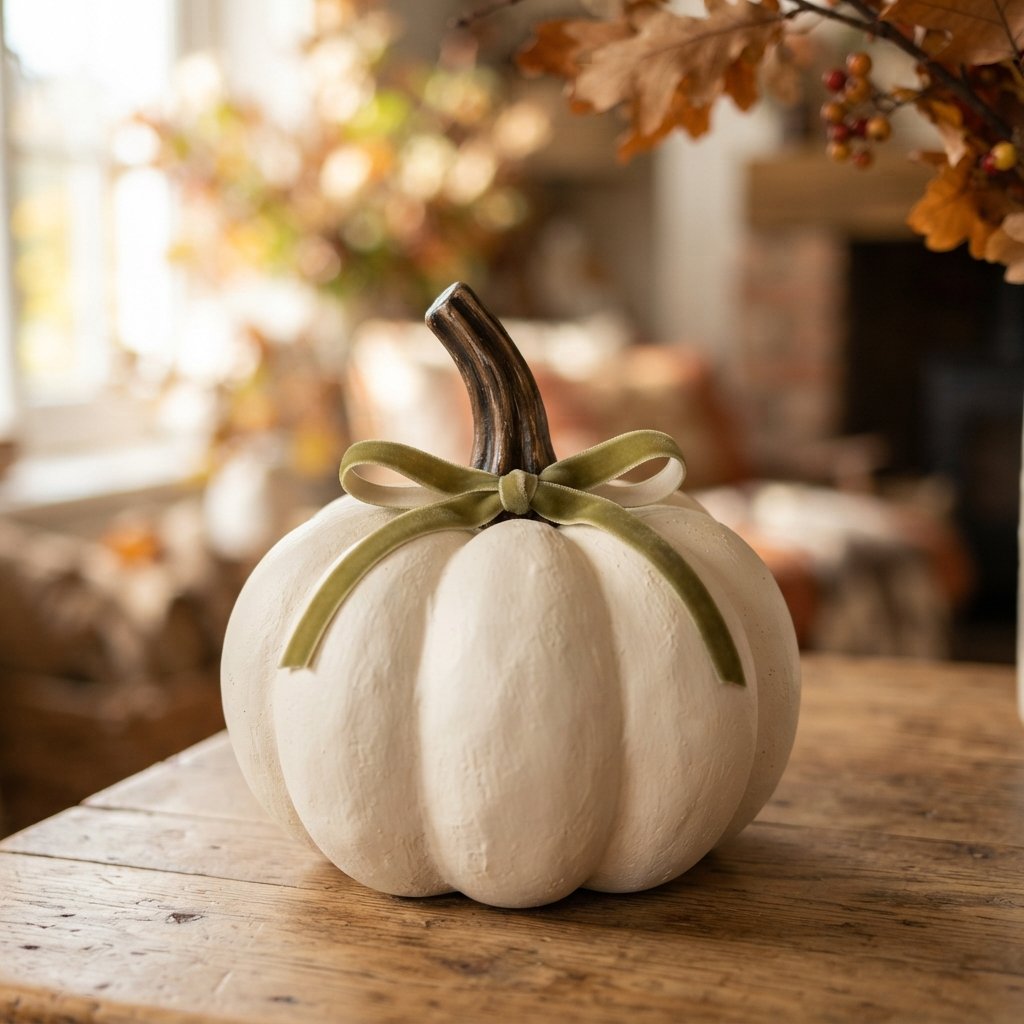
Dollar Store Pumpkin Decorating Idea 1: Cream Painted Pumpkins
Cream pumpkins are incredibly versatile.
They work with:
- Warm wood
- Brass-toned accents
- Greenery
- Terracotta
- Burgundy
- Brown
Avoid a harsh blue-white if your home is filled with warm finishes.
A softer cream or warm white can feel more natural.
Dollar Store Pumpkin Decorating Idea 2: Sage Green Pumpkins
Muted green is a beautiful fall alternative to orange.
Try combining sage pumpkins with:
- Cream
- Wood
- Warm brown
- Terracotta
Use several shades of green rather than one exact color for every pumpkin.
Dollar Store Pumpkin Decorating Idea 3: Terracotta Pumpkins
Terracotta keeps the warmth of traditional orange but can feel softer and earthier.
Pair it with:
- Olive
- Cream
- Brown
- Warm white
A matte finish works particularly well for this look.
Dollar Store Pumpkin Decorating Idea 4: Moody Green Pumpkins
For deeper fall decor, try dark olive or forest green.
Use them alongside:
- Burgundy
- Brown
- Brass
- Cream
Dark pumpkins can create beautiful contrast on a light mantel or console.
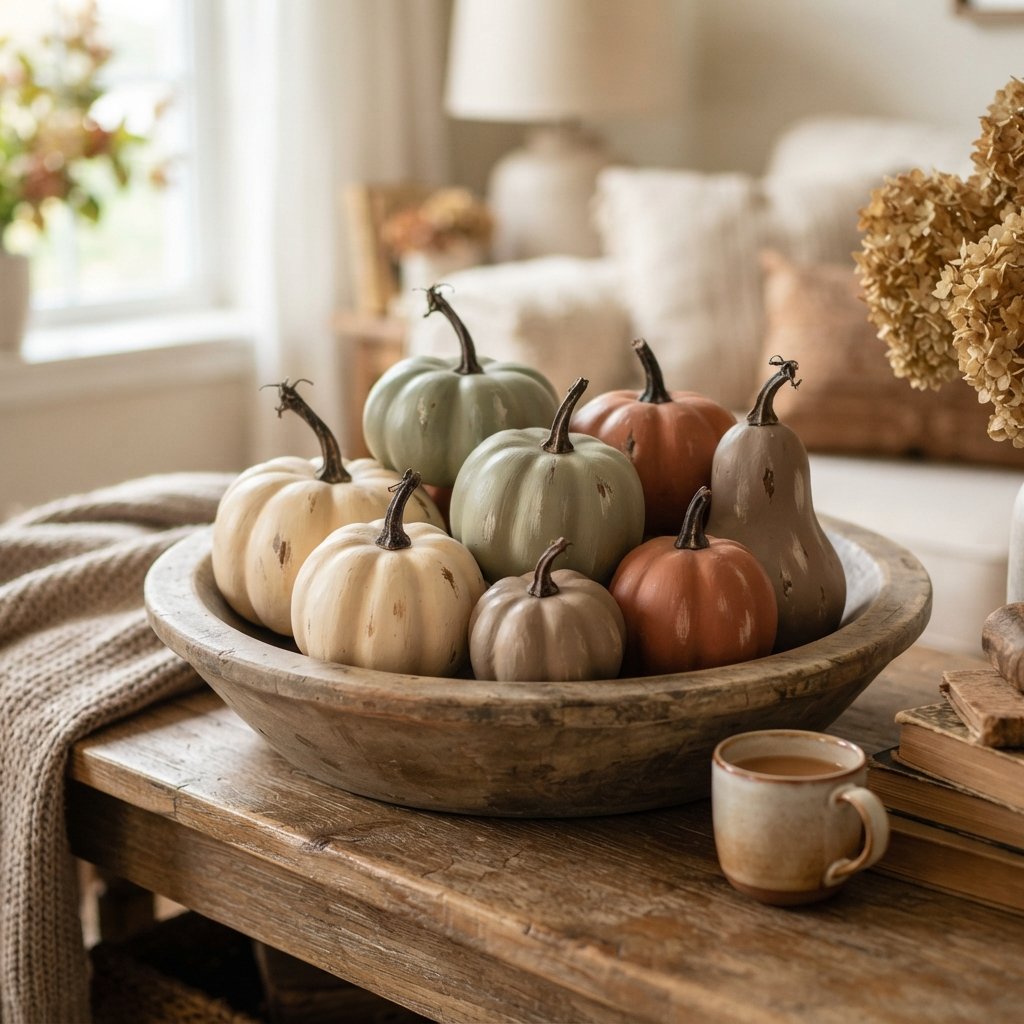
Dollar Store Pumpkin Decorating Idea 5: Chalky Matte Pumpkins
A matte finish can help disguise inexpensive plastic.
Choose a coating suitable for your pumpkin’s material.
Colors such as:
- Cream
- Taupe
- Sage
- Dusty blue
- Terracotta
can create a soft, pottery-inspired look.
Dollar Store Pumpkin Decorating Idea 6: Two-Tone Pumpkins
Use one color for the pumpkin and another for the stem.
For example:
- Cream + brown
- Sage + dark brown
- Terracotta + taupe
- Olive + warm wood tone
Simple contrast can make the details stand out.
Dollar Store Pumpkin Decorating Idea 7: Color-Washed Pumpkins
If you like a less opaque look, experiment with a compatible thinned or translucent coating system designed for the material.
Test first.
The goal is to allow some variation underneath to show through rather than covering the pumpkin with a completely uniform finish.
Don’t arbitrarily thin paints with products not recommended by the manufacturer.
Dollar Store Pumpkin Decorating Idea 8: Speckled Pumpkins
A tiny amount of speckling can create a pottery-inspired effect.
After the base coat is dry, use a contrasting paint color and a controlled technique to create small speckles.
Protect nearby surfaces.
Practice on scrap material first so you don’t end up with giant paint blobs.
Dollar Store Pumpkin Decorating Idea 9: Metallic Accent Pumpkins
Metallic finishes can work beautifully in small amounts.
Try:
- Antique gold tone
- Champagne
- Bronze
- Copper tone
Instead of painting every pumpkin metallic, use one as an accent among matte pumpkins.
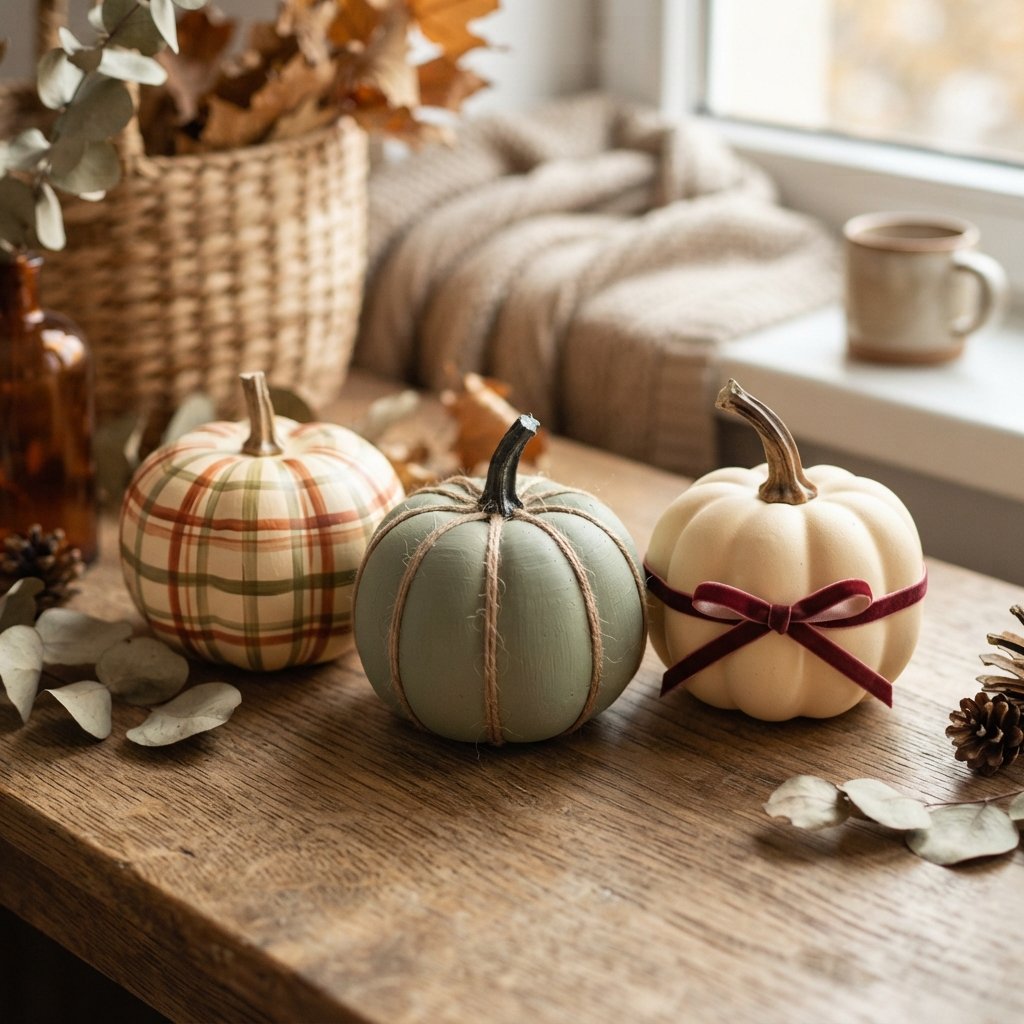
Dollar Store Pumpkin Decorating Idea 10: Plaid Painted Pumpkin
If you enjoy more traditional fall decor, add a simple plaid pattern.
Start with a solid base coat.
Once it’s completely dry, add thin intersecting lines using a small brush or suitable painter’s tape.
Choose a restrained palette such as:
- Cream
- Rust
- Brown
- Olive
The pattern doesn’t need to cover every pumpkin.
One plaid pumpkin can become the focal point of a group.
Dollar Store Pumpkin Decorating Idea 11: Polka Dot Pumpkin
For something playful, paint small dots over a solid base.
Try:
- Cream + black
- Terracotta + cream
- Sage + white
Keep the dots relatively simple.
This can be a fun craft for older children with appropriate supervision and child-suitable materials.
Dollar Store Pumpkin Decorating Idea 12: Gold-Leaf-Inspired Look
You can add small metallic details rather than covering the entire pumpkin.
Use a craft product intended for the effect and follow its application instructions.
Try highlighting:
- Stem
- Several ridges
- Small abstract areas
A little metallic finish usually has more impact than a lot.
Dollar Store Pumpkin Decorating Idea 13: Twine-Wrapped Stem
If the plastic stem still looks artificial after painting, wrap it with twine.
Secure the material with an adhesive suitable for both surfaces.
Be careful with hot glue because it can cause burns and may damage certain foam materials.
Dollar Store Pumpkin Decorating Idea 14: Velvet Ribbon Pumpkin
Tie a narrow velvet ribbon around the stem.
Colors such as:
- Burgundy
- Olive
- Brown
- Mustard
- Rust
can add texture without requiring another painting technique.
Dollar Store Pumpkin Decorating Idea 15: Fabric-Wrapped Pumpkin
Fabric can completely transform a simple faux pumpkin.
Depending on the construction, you may be able to wrap or cover it with:
- Plaid fabric
- Linen-look fabric
- Cotton
- Velvet
Choose an adhesive and technique compatible with the pumpkin material.
Avoid thick layers that hide the pumpkin shape.
How to Style Dollar Store Pumpkins on a Mantel
Use different sizes.
Start with the largest pumpkin.
Then layer smaller pumpkins nearby.
Add:
- Fall branches
- Candlesticks
- Artwork
- Vase
- Greenery
Don’t create a perfectly even row of pumpkins.
Varying the heights and spacing will look more natural.
How to Decorate a Fall Console Table With Pumpkins
Try creating one concentrated group instead of spreading pumpkins across the entire surface.
For example:
Lamp + stacked books + pumpkin group + vase
This allows some empty space and prevents the console from looking cluttered.
How to Use DIY Pumpkins in a Fall Tablescape
Place several small pumpkins along the center of the dining table.
Mix them with:
- Greenery
- Flameless candles
- Fall leaves
- Wood accents
Keep the centerpiece low enough for conversation.
If you’re using painted craft pumpkins around food, keep them away from serving surfaces and dishes unless the materials are specifically appropriate for that use.
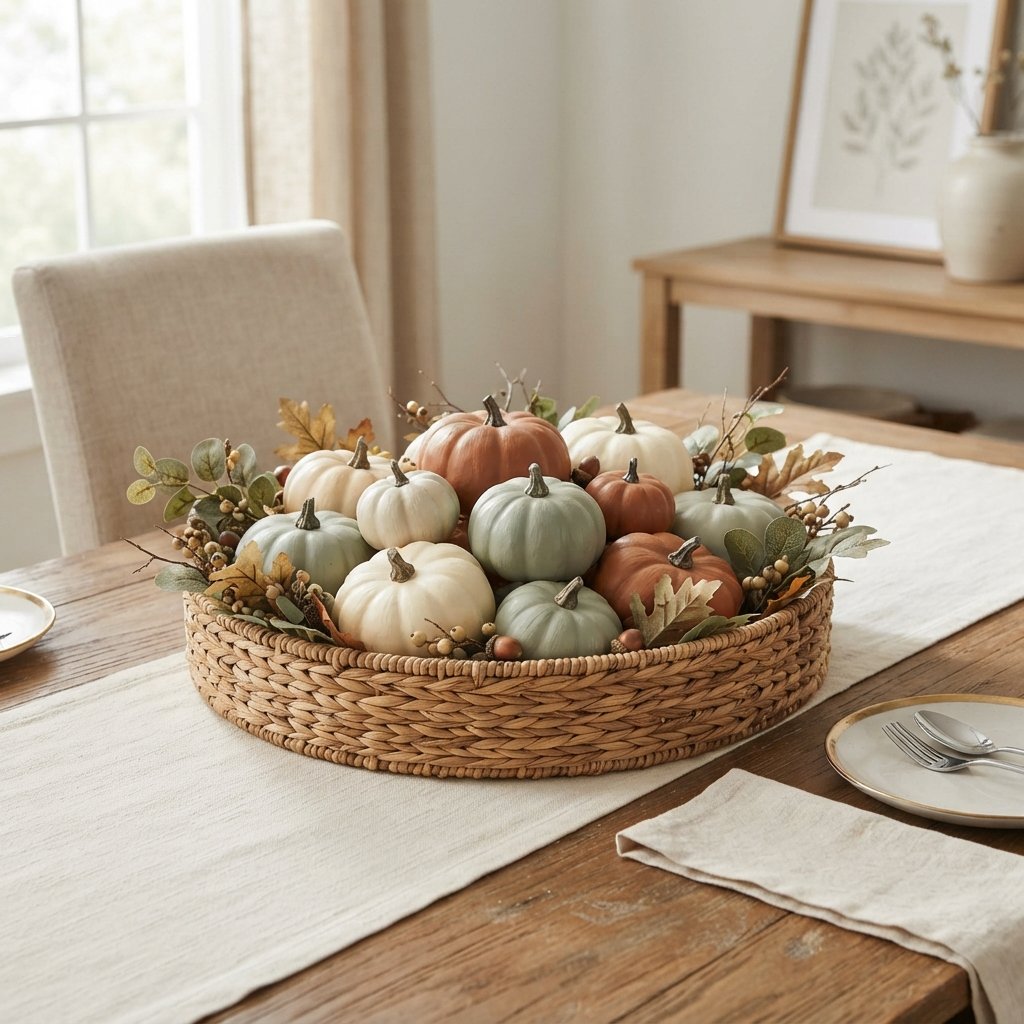
Easy Dollar Store Pumpkin Centerpiece
Grab a shallow bowl or basket.
Fill it with pumpkins in three or four coordinated colors.
Then tuck in a few pieces of faux greenery.
That’s it.
For example:
- 2 cream pumpkins
- 2 sage pumpkins
- 1 terracotta pumpkin
- Faux fall foliage
Vary the sizes if possible.
How to Make Dollar Store Pumpkins Look More Expensive
The secret isn’t adding more embellishments.
It’s usually doing less, more intentionally.
Choose Better Colors
Muted, coordinated shades can make inexpensive materials feel more polished.
Use Matte Finishes
Reducing plastic-looking shine can make a major difference.
Add Subtle Color Variation
Real pumpkins aren’t perfectly uniform.
Improve the Stem
Pay attention to this small detail.
Mix Sizes
Variation creates a collected appearance.
Limit Embellishments
Not every pumpkin needs ribbon, glitter, lettering, and leaves.
Group Them Thoughtfully
A collection usually looks better than isolated pumpkins scattered everywhere.
How Many Pumpkin Colors Should You Use?
Three or four colors are plenty for most displays.
For example:
Palette One
Cream + sage + terracotta
Palette Two
Cream + olive + burgundy
Palette Three
Taupe + brown + warm white
Palette Four
Orange + cream + deep green
Varying shades within the same palette will keep the collection from feeling overly matched.
What Paint Finish Works Best on Faux Pumpkins?
That depends on the pumpkin material and the look you want.
A matte or low-sheen appearance often works well because it reduces the shiny plastic effect.
However, compatibility matters more than appearance.
Check:
- Surface material
- Paint adhesion
- Primer requirements
- Indoor/outdoor suitability
- Manufacturer instructions
Always test first when you’re uncertain.
Can You Spray Paint Dollar Store Pumpkins?
Potentially, but you need to know what the pumpkin is made from.
Some spray products can damage certain foams or plastics.
Read the product label and verify compatibility before applying it.
Use spray coatings only with the ventilation and protective measures specified by the manufacturer.
Don’t spray indoors unless the product explicitly allows it and the required ventilation conditions can be met.
Can You Put Painted Faux Pumpkins Outside?
That depends on the pumpkin and coating.
Many craft pumpkins are intended primarily for indoor use.
Outdoor conditions can expose them to:
- Rain
- Humidity
- Sun
- Wind
- Temperature changes
If you want outdoor decorations, verify that both the pumpkin and coatings are suitable for exterior use.
A covered porch may provide some protection, but it doesn’t make indoor materials weatherproof.
How to Store Painted Pumpkins
At the end of fall, make sure the pumpkins are clean and completely dry.
Then:
- Remove loose ribbons if necessary.
- Wrap delicate finishes loosely.
- Place pumpkins in a sturdy storage bin.
- Avoid packing heavy items on top.
- Store away from extreme heat where possible.
Don’t pack painted pumpkins tightly together if the finish remains prone to sticking.
Dollar Store Pumpkin Craft Safety Tips
This is an easy project, but basic craft safety still matters.
- Protect your work surface before painting.
- Use paints, primers, adhesives, and sealers according to their labels.
- Provide adequate ventilation.
- Wear protective equipment when required by the product.
- Use caution with craft knives and wire tools.
- Supervise children appropriately.
- Use child-appropriate materials for children’s crafts.
- Keep small embellishments away from young children and pets.
- Be careful with hot glue.
- Test solvents and cleaners before using them on foam or plastic.
- Keep finished pumpkins away from open flames and high heat.
- Use flameless candles when styling pumpkins with dry leaves, fabric, or other combustible fall decor.
Common Dollar Store Pumpkin Decorating Mistakes
Skipping Surface Preparation
Paint adheres better to an appropriately prepared surface.
Using One Heavy Coat
Several thin coats often look smoother.
Painting Every Pumpkin Exactly the Same
Variation makes a collection more interesting.
Overdecorating
Paint and a good stem may be all you need.
Using Too Many Colors
A limited palette creates cohesion.
Ignoring the Stem
A shiny plastic stem can undermine an otherwise beautiful makeover.
Rushing the Drying Time
Give paint adequate time before adding details.
Using Incompatible Paint
Always consider the pumpkin material.
Adding Glitter to Everything
Use sparkle selectively if it fits your decorating style.
FAQ About Dollar Store Pumpkin Decorating Crafts
How do you decorate dollar store pumpkins?
You can paint them, add ribbon or twine, update the stems, create simple patterns, apply metallic accents, or cover them with fabric.
What kind of paint should I use on faux pumpkins?
It depends on whether the pumpkin is foam, plastic, or another material. Choose a coating compatible with the surface and follow its preparation instructions.
Do you need to prime plastic pumpkins before painting?
Sometimes. Slick plastic may require primer or other preparation, depending on the paint system. Check the product instructions.
How can I make cheap plastic pumpkins look better?
Try a matte paint finish, use muted colors, add subtle highlights, improve the stem, and style several different sizes together.
What colors can I paint pumpkins for fall?
Cream, sage, olive, terracotta, rust, taupe, burgundy, brown, and muted orange all work beautifully for fall decorating.
Can I repaint old faux pumpkins?
Usually, provided the surface is still in good condition and properly prepared for the new coating.
How do I make painted pumpkins look realistic?
Use several related shades, add subtle color variation around the grooves, and avoid making every pumpkin perfectly identical.
Are dollar store pumpkin crafts good for kids?
They can be, but choose age-appropriate materials and provide suitable supervision. Avoid hot glue, sharp tools, and potentially hazardous coatings for young children.
Final Thoughts
A dollar store pumpkin decorating craft is one of the easiest ways to stretch a fall decorating budget.
You don’t need expensive seasonal decorations or complicated crafting skills.
Start with inexpensive faux pumpkins that have shapes you like.
Clean them.
Choose a color palette.
Then use paint to turn them into something that works with your home.
Cream and sage can create a soft neutral look.
Terracotta and olive feel warm and earthy.
Burgundy and deep green create a richer fall palette.
And traditional orange can still look beautiful when paired with warm neutrals and natural textures.
The biggest difference often comes from restraint.
Instead of adding every embellishment you have, focus on color, finish, texture, and the stem.
Then group your finished pumpkins together on a mantel, console, dining table, shelf, or entryway.
A few inexpensive pumpkins and a little paint can create fall decor you’ll actually want to bring out again next year.

