

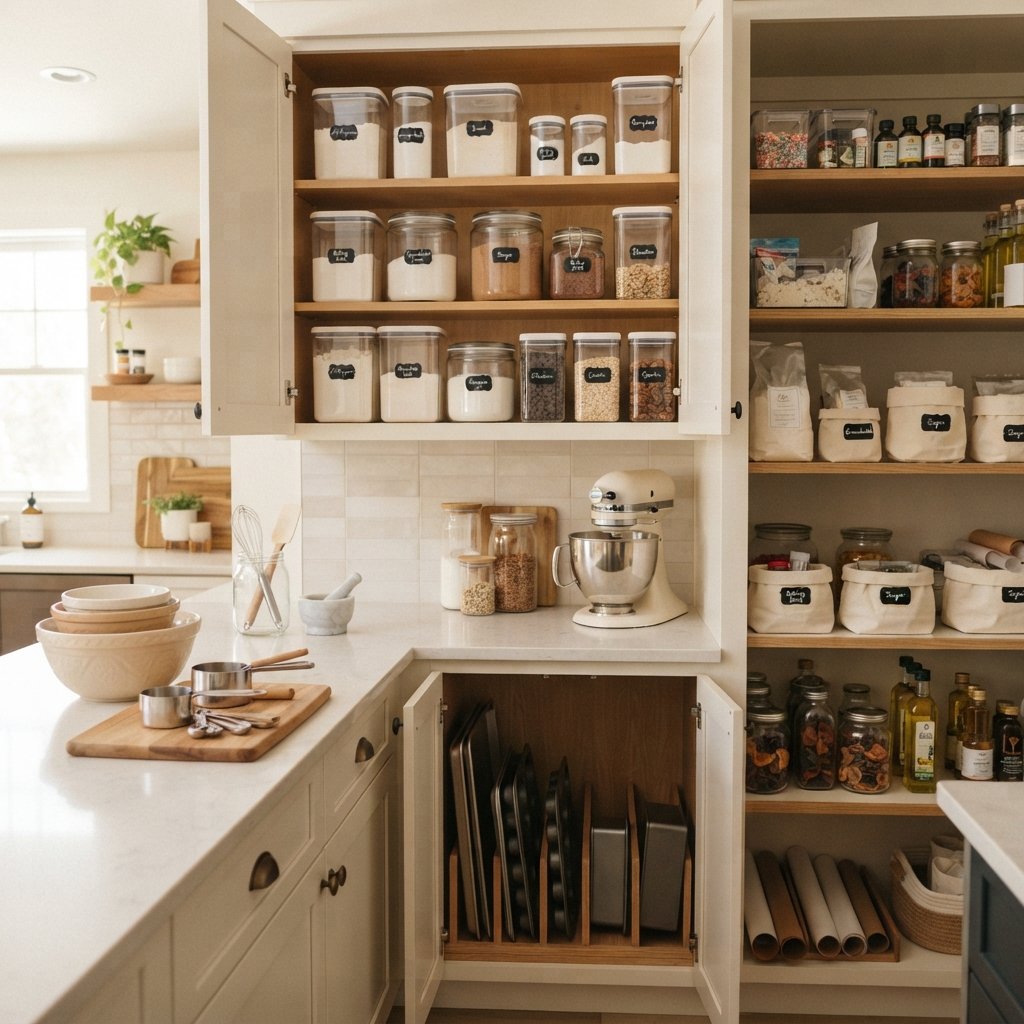
Baking is much more enjoyable when you don’t have to dig through a crowded pantry to find the baking powder or pull five pans out of a cabinet to reach the muffin tin.
The challenge is that baking requires a lot of different things: flour, sugar, chocolate chips, extracts, decorating supplies, measuring cups, mixing bowls, baking sheets, cake pans, and small appliances. Without a system, those supplies can quickly spread across the entire kitchen.
The best baking storage ideas aren’t necessarily complicated or expensive. The goal is to keep related supplies together, make frequently used ingredients easy to reach, and store awkward pans and tools so you can see what you own.
Whether you have an entire baking pantry or a single kitchen cabinet, these 21 practical ideas can help you create a baking zone that’s organized, functional, and easy to maintain.
Start by Gathering All Your Baking Supplies
Before buying containers, pull your baking supplies together.
Check your:
- Pantry
- Kitchen cabinets
- Drawers
- Countertops
- Appliance storage
You may be surprised by how many duplicates you have.
Group everything into categories.
For example:
Dry Ingredients
Flour, sugar, cocoa, baking soda, baking powder, and other frequently used baking ingredients.
Mix-Ins
Chocolate chips, dried fruit, nuts, sprinkles, and similar ingredients.
Decorating
Piping bags, decorating tips, food coloring, cookie cutters, and other decorating tools.
Tools
Measuring cups, measuring spoons, rolling pins, spatulas, and whisks.
Bakeware
Baking sheets, cake pans, muffin tins, cooling racks, and baking dishes.
Appliances
Mixer, food processor, hand mixer, and other equipment.
Once everything is together, you can see how much space each category actually needs.
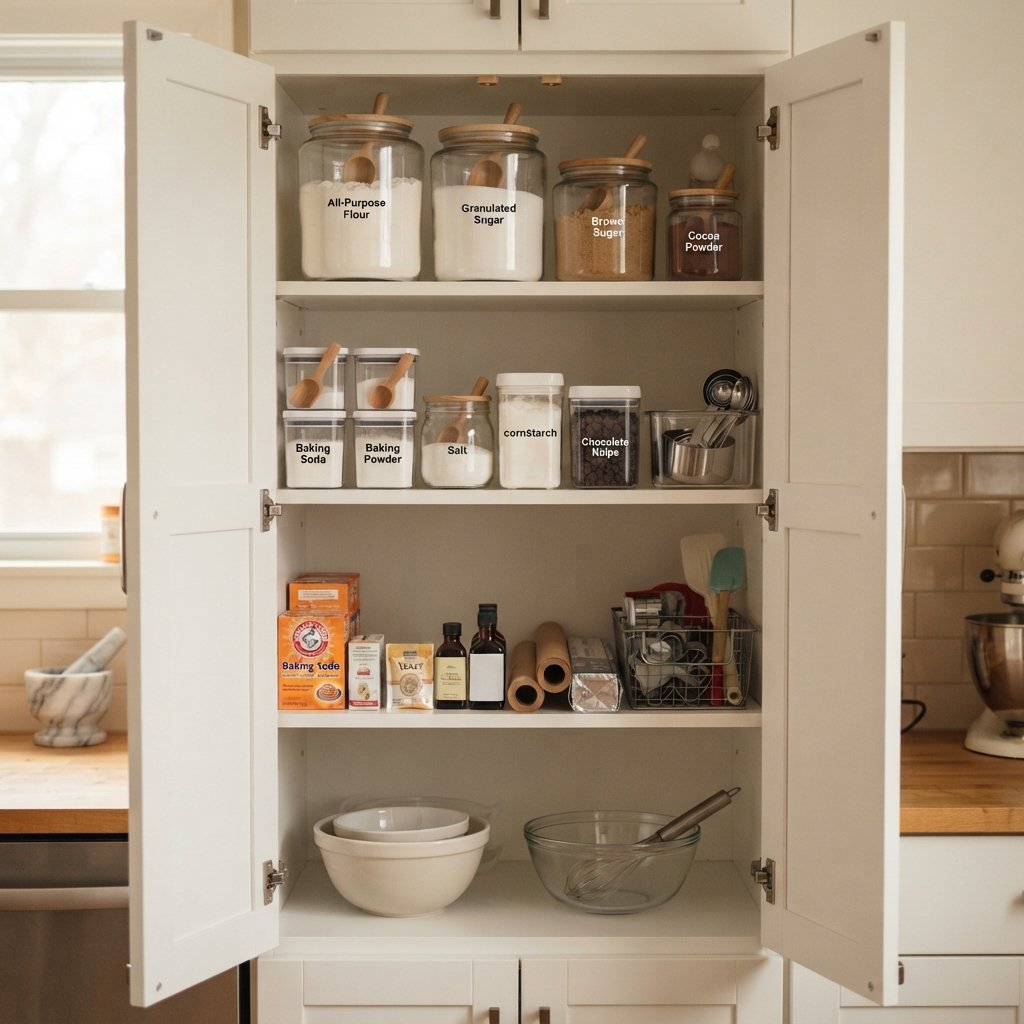
1. Create a Dedicated Baking Cabinet
One of the simplest ways to organize baking supplies is to give them a dedicated cabinet.
Keep your most frequently used items together.
Depending on your space, that might include:
- Flour
- Sugar
- Baking powder
- Baking soda
- Cocoa
- Chocolate chips
- Measuring tools
Keeping everything in one area makes it much easier to start baking.
Choose a cabinet near your main prep space if possible.
2. Create a Baking Zone in the Pantry
Don’t have an entire cabinet?
Give baking supplies one pantry zone.
Use one or two shelves rather than scattering ingredients throughout the pantry.
Keep frequently used ingredients around comfortable reaching height.
Less-used decorating supplies can go higher.
Heavy bulk ingredients should generally be stored on sturdy lower shelves rather than overhead.
3. Use Airtight Containers for Appropriate Dry Ingredients
Decanting certain ingredients into appropriate food-storage containers can make a baking area easier to organize.
Potential candidates include:
- Flour
- Sugar
- Brown sugar
- Oats
- Certain baking mix-ins
Choose food-safe containers appropriate for the ingredient, and follow the ingredient manufacturer’s storage instructions.
Airtight storage can also help protect appropriate dry ingredients from moisture and pests.
But don’t transfer ingredients simply because matching containers look pretty.
The system should make baking easier.
4. Label Your Containers
White flour and powdered sugar can look surprisingly similar from across a pantry.
Labels eliminate guessing.
Include the ingredient name.
For items where freshness or preparation instructions matter, consider retaining useful information from the original packaging, such as dates, ingredient information, allergen warnings, or instructions.
If someone in the household has food allergies, preventing cross-contact and keeping accurate ingredient identification can be especially important.
5. Don’t Over-Decant
Not everything needs a matching container.
Small packages, specialty ingredients, and rarely used items may be easier to keep in their original packaging.
Decant items when it improves:
- Freshness
- Accessibility
- Visibility
- Organization
Not because every pantry photo on Pinterest has matching jars.
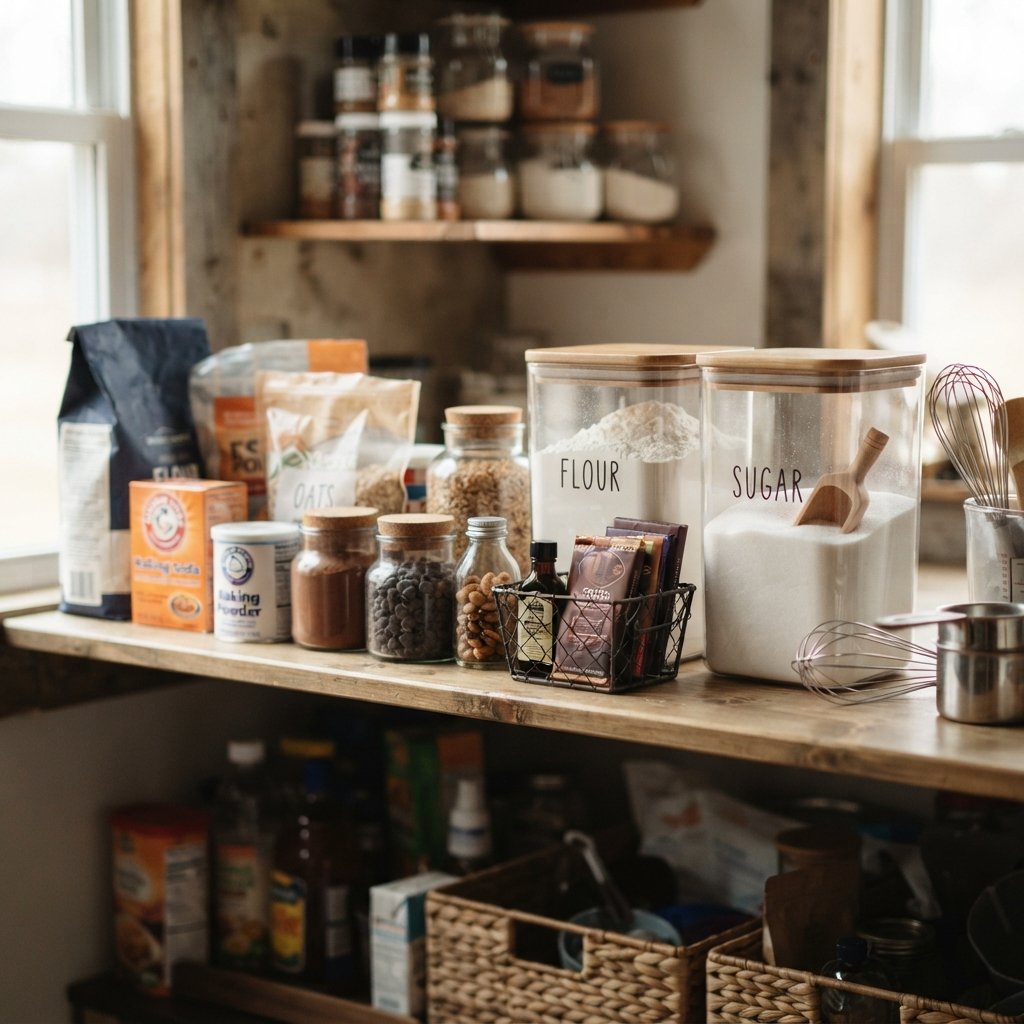
6. Use Bins for Small Baking Ingredients
Small packages are where baking cabinets often fall apart.
Use bins to group things like:
- Chocolate chips
- Baking chocolate
- Sprinkles
- Extracts
- Decorating supplies
Broad categories usually work better than overly specific ones.
For example, one Decorating bin may be easier to maintain than five tiny containers.
7. Create a Baking Essentials Bin
If you don’t bake frequently, consider keeping basic supplies together in one bin.
Depending on what you use, this might hold smaller packaged ingredients and tools that otherwise get lost in the pantry.
Pull the bin out when you’re ready to bake.
Return it when you’re finished.
This is especially useful in small kitchens.
8. Store Measuring Cups and Spoons Together
There’s nothing more frustrating than finding the flour and realizing the measuring spoon you need is somewhere else.
Keep measuring tools near baking ingredients.
Possible storage locations include:
- Drawer
- Small basket
- Hooks where appropriate
- Container inside the baking cabinet
Avoid a complicated system that requires perfectly nesting every measuring cup each time.
Make them easy to put away.
9. Keep Frequently Used Tools Near the Prep Area
Think about where you actually mix and prepare ingredients.
Store everyday baking tools close to that work surface.
This may include:
- Measuring cups
- Measuring spoons
- Whisk
- Spatula
- Bench scraper
- Rolling pin
You shouldn’t need to walk across the kitchen five times to make a batch of cookies.
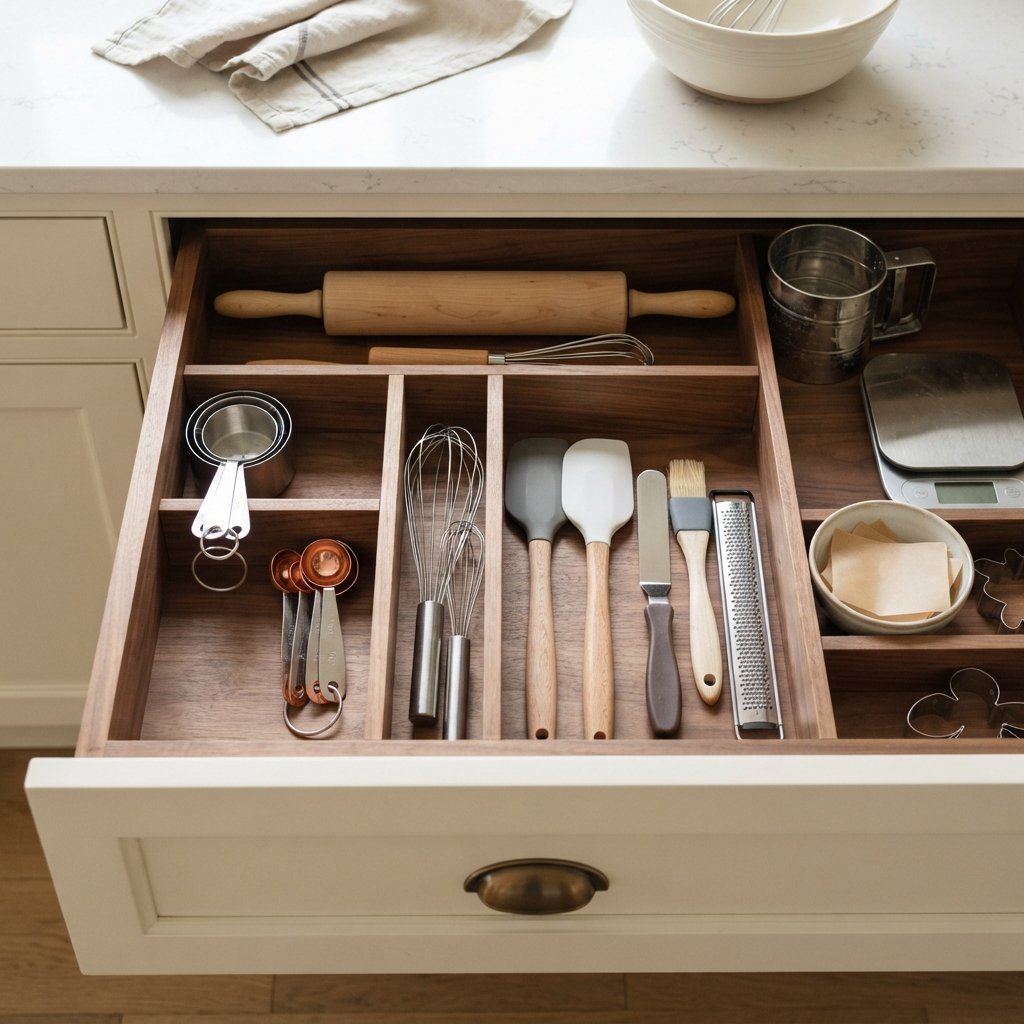
10. Use a Deep Drawer for Baking Tools
A deep drawer can hold bulky baking supplies that don’t fit well in shallow utensil drawers.
Try storing:
- Rolling pin
- Measuring cups
- Silicone baking tools
- Hand mixer
- Mixing accessories
Use dividers or bins if the drawer is large enough for everything to slide around.
Confirm the drawer’s load capacity before filling it with heavy equipment.
11. Nest Mixing Bowls
Mixing bowls can consume an entire cabinet if they’re stored individually.
Nest compatible bowls together by size.
Keep your most-used set in the easiest location.
If you own multiple sets but consistently use the same three bowls, consider whether you need the extras.
Place heavy bowls on sturdy lower shelving or in an appropriate deep drawer.
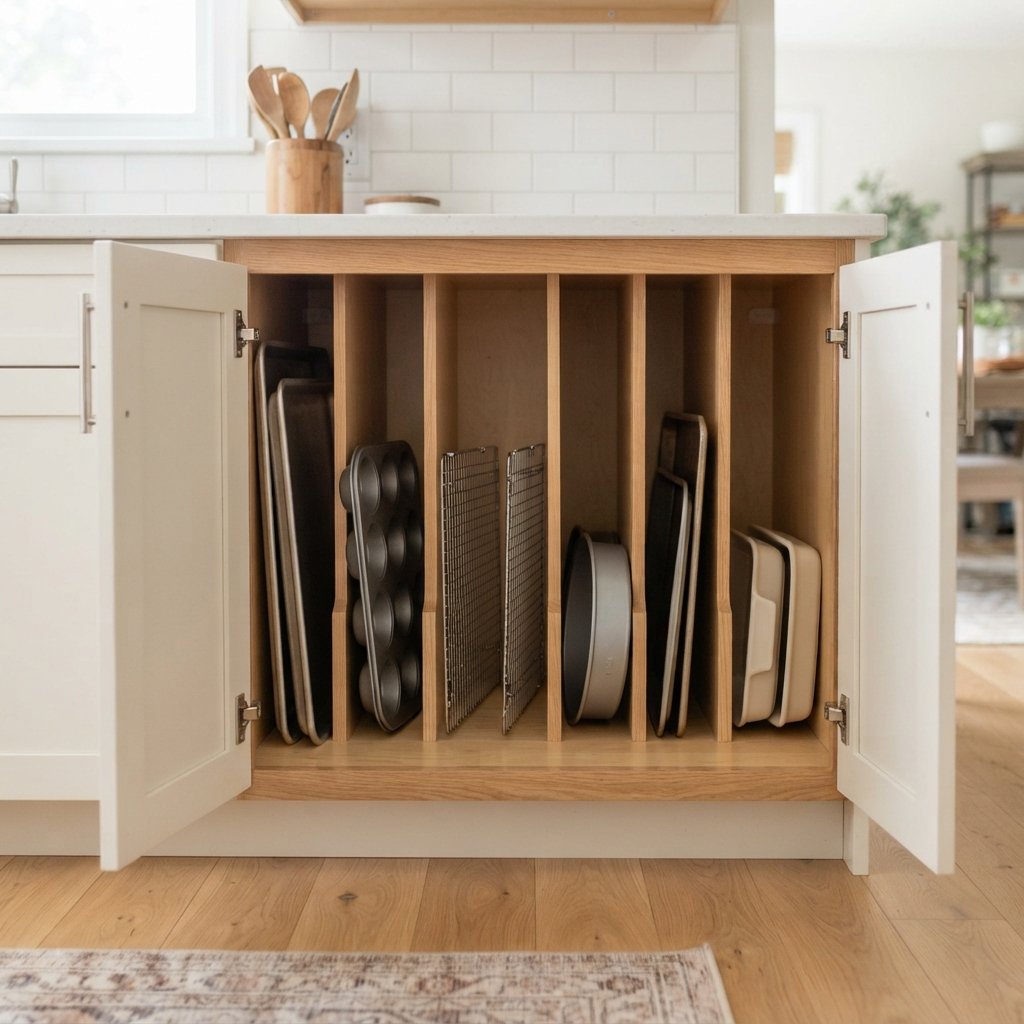
12. Store Baking Sheets Vertically
Baking sheets are often easier to access when stored on edge.
Instead of stacking them, create vertical sections for:
- Baking sheets
- Cooling racks
- Muffin tins
- Cutting boards
- Shallow pans
Use sturdy dividers designed for the space and load.
This eliminates the need to lift an entire stack every time you need the pan at the bottom.
13. Store Cake Pans by Shape and Size
Cake pans can become an awkward tower.
Group similar pans together:
Round pans
Square pans
Loaf pans
Specialty pans
Nest compatible pans when practical.
Keep the pans you use most frequently in front.
Rarely used specialty shapes can go farther back or higher if they’re lightweight.
14. Use Dividers for Bakeware
Cabinet or drawer dividers can transform a messy stack of bakeware into accessible vertical storage.
Before purchasing anything, measure:
- Interior width
- Interior depth
- Usable height
Choose dividers suitable for the weight and dimensions of your pans.
If you’re adding permanent dividers or modifying cabinetry, make sure you understand the cabinet construction before drilling or fastening anything.
15. Create a Cookie-Decorating Bin
Cookie decorating supplies tend to be small and easy to lose.
Put them together.
Depending on your supplies, the bin might contain:
- Cookie cutters
- Piping bags
- Decorating tips
- Sprinkles
- Appropriate food coloring
- Small decorating tools
Keep ingredients sealed and stored according to package instructions.
If decorating tools are used only during the holidays, the entire bin can move to a less accessible shelf during the rest of the year.
16. Organize Cookie Cutters by Season
If you own lots of cookie cutters, don’t dump them into one giant container.
Separate them into broad categories.
For example:
- Everyday
- Christmas
- Fall
- Spring
Store each group in a suitable bin or container.
This keeps you from sorting through snowflakes and gingerbread people when you’re looking for a simple circle cutter.
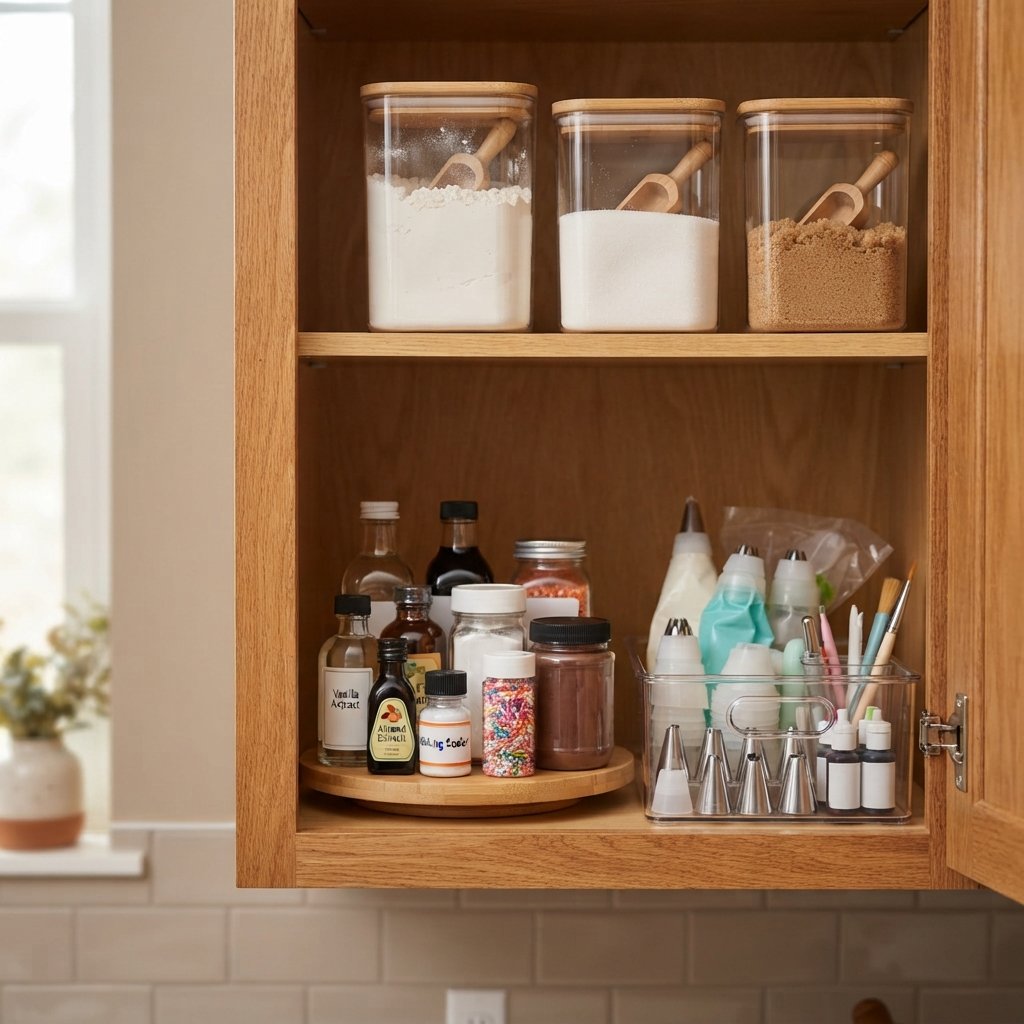
17. Use a Turntable for Small Bottles
A turntable can work well for certain small baking ingredients stored in suitable containers.
It can help make bottles at the back easier to reach.
Use it for items such as appropriate extracts, flavorings, or decorating supplies.
Make sure bottles are stable and don’t crowd the turntable so tightly that they fall when it rotates.
18. Create a Sprinkle and Decorating Drawer
If cake or cookie decorating is a regular hobby, give those supplies a drawer.
Use shallow bins or dividers to separate categories.
Keep frequently used items visible.
Store food products according to manufacturer instructions, and periodically check dates and condition.
Don’t let the drawer become a collection of half-empty decorating supplies you never use.
19. Give Your Mixer a Practical Home
A stand mixer is one of the most awkward baking items to store because it can be heavy.
If you use it constantly, countertop storage may make sense.
If you use it occasionally, consider:
- Sturdy lower cabinet
- Purpose-designed mixer lift
- Appropriate pantry shelf at a comfortable height
Avoid high shelves that require lifting a heavy mixer overhead.
For a mixer lift, follow the cabinet and hardware manufacturers’ load, installation, and clearance requirements.
20. Keep Mixer Attachments Together
Store mixer attachments near the mixer.
A nearby drawer or bin can hold:
- Beaters
- Dough hooks
- Whisks
- Other compatible accessories
Don’t scatter attachments around the kitchen.
Keeping them together makes the mixer much easier to use.
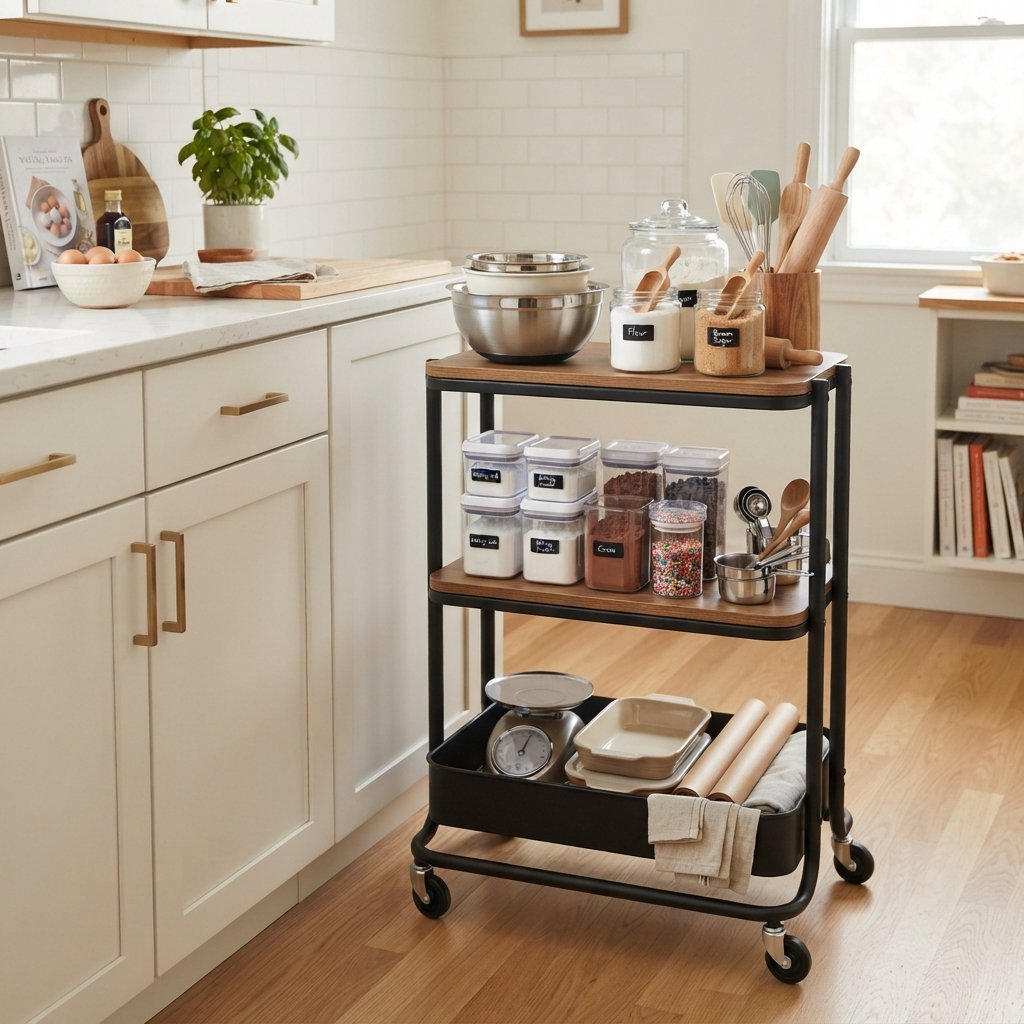
21. Create a Baking Cart When Cabinet Space Is Limited
If your kitchen has very little storage, a sturdy rolling cart can create a small baking station.
Use it for lighter supplies such as:
- Mixing bowls
- Measuring tools
- Baking ingredients
- Decorating supplies
A cart should be stable and appropriate for the load.
Locking wheels can be useful when available.
Avoid top-heavy arrangements, and don’t position a cart where it blocks walkways, doors, or appliance access.
Baking Storage Ideas for Small Kitchens
A small kitchen doesn’t need a dedicated baking pantry.
Concentrate your supplies.
Instead of storing baking ingredients in six different locations, try:
One shelf + one drawer + one bakeware cabinet
For example:
Pantry Shelf
Dry ingredients and mix-ins.
Drawer
Measuring tools and utensils.
Lower Cabinet
Mixing bowls and bakeware.
This keeps the system compact.
Baking Storage Ideas Without a Pantry
No pantry?
Use one upper or lower cabinet for ingredients.
If space is especially limited, use bins to separate categories.
A practical setup might be:
Bin 1: Basic baking ingredients
Bin 2: Chocolate and mix-ins
Bin 3: Decorating supplies
Store bakeware vertically in a separate lower cabinet or deep drawer.
Baking Storage Ideas for Deep Cabinets
Deep cabinets can be difficult because smaller ingredients disappear in the back.
Use zones.
Keep frequently used ingredients toward the front.
Less-used items can go farther back.
For smaller items, bins make it possible to pull the entire category forward.
Pull-out shelving may also improve accessibility when the cabinet and hardware are suitable for it.
Baking Storage Ideas for Deep Drawers
Deep drawers work particularly well for:
- Mixing bowls
- Cake pans
- Measuring tools
- Hand mixer
- Baking sheets
Use the vertical height intentionally.
Flat pans may work better standing upright with suitable dividers rather than stacked horizontally.
Always stay within the drawer manufacturer’s weight limits.
Baking Storage Ideas for Flour and Sugar
Flour and sugar are often the most-used baking ingredients.
Keep them where they’re easy to scoop or measure.
Appropriate food-safe containers can work well, particularly if they’re large enough for the quantity you normally buy.
Consider whether the opening is wide enough for your measuring cup.
Follow storage guidance for each ingredient, and retain important package information as needed.
Baking Storage Ideas for Sprinkles
Sprinkles are small enough to disappear easily.
Group them in:
- Bin
- Drawer
- Small turntable
If you have a large collection, organize by broad type or occasion rather than individual color.
Keeping them visible helps prevent buying duplicates.
Baking Storage Ideas for Cookie Cutters
Cookie cutters can take up a surprising amount of room.
Sort them before organizing.
Keep your everyday shapes together.
Seasonal shapes can be separated into bins.
If you only use Christmas cookie cutters once a year, they don’t need prime kitchen storage all year.
Baking Storage Ideas for Cake Decorating Supplies
Cake decorating supplies work best as a category.
Keep piping bags, tips, appropriate coloring products, and related tools together.
Small divided organizers can work for reusable tips and tools.
Make sure anything used directly with food is stored cleanly and appropriately.
How to Organize Baking Supplies Step by Step
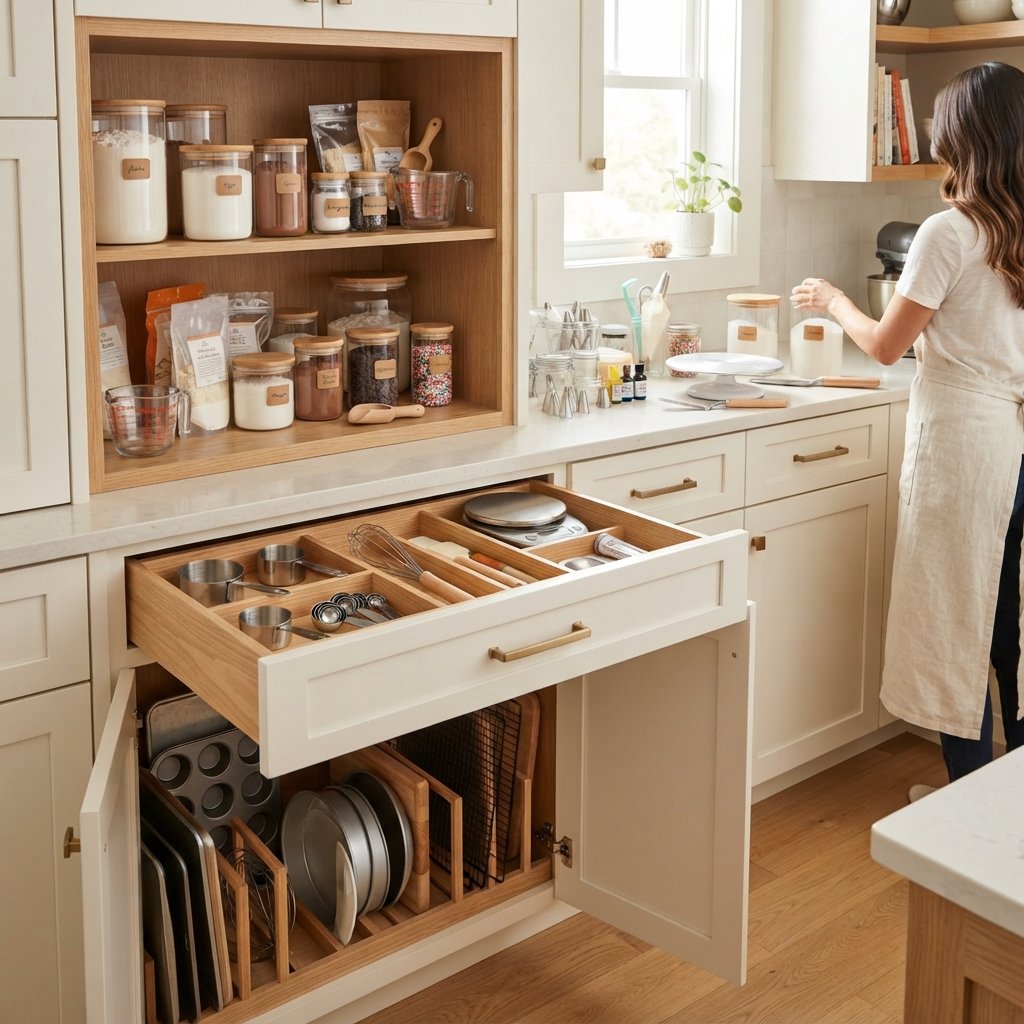
If your baking supplies are currently everywhere, use this process.
Step 1: Gather Everything
Bring baking supplies together.
Step 2: Check Dates and Condition
Review ingredients and packaging.
Dispose of items appropriately when they’re no longer suitable for use.
Step 3: Remove Duplicates You Won’t Use
You probably don’t need several open containers of the same thing.
Step 4: Create Categories
Keep categories broad and easy to maintain.
Step 5: Choose the Storage Location
Put frequently used supplies near your main prep area.
Step 6: Measure
Measure shelves, drawers, and cabinets before buying organizers.
Step 7: Add Containers Only Where They Solve a Problem
Don’t buy storage just to fill shelves.
Step 8: Label Where Helpful
Especially when ingredients look similar.
Step 9: Put Everything Away
Keep frequently used supplies easiest to reach.
Step 10: Adjust the System
After baking a few times, you’ll quickly discover what isn’t working.
How to Keep Baking Supplies Organized
Organization needs to be easy enough to maintain.
Try these habits:
Return Everything After Baking
Don’t leave a “temporary” baking pile.
Keep a Shopping List
Add ingredients when you’re running low.
Check Before Buying
Avoid duplicates.
Clean Up Spills Quickly
Flour and sugar can spread everywhere.
Review Seasonal Supplies
Don’t give holiday-only tools your best storage space all year.
Keep Categories Simple
If putting something away requires too much thought, simplify the system.
Common Baking Storage Mistakes
Buying Containers Before Measuring
Always measure first.
Decanting Everything
Some ingredients are easier to manage in original packaging.
Forgetting Labels
Similar-looking ingredients can be confusing.
Stacking Every Baking Pan
Vertical storage is often easier.
Storing Heavy Appliances Overhead
Keep them at safer lifting heights.
Mixing Baking Supplies With Unrelated Pantry Items
Create a dedicated zone.
Creating Too Many Tiny Categories
Simple organization is easier to maintain.
Ignoring Expiration or Best-Quality Dates
Review baking ingredients periodically according to the product information.
Filling Every Inch
Leave enough room to remove and return items comfortably.
Baking Storage Safety Tips
Because baking storage involves food, electrical appliances, heavy equipment, and sharp tools, keep safety in mind.
- Use food-safe containers suitable for the ingredients being stored.
- Follow manufacturer storage instructions for ingredients.
- Retain important ingredient, allergen, preparation, and date information when decanting.
- Take extra precautions to prevent allergen cross-contact where relevant.
- Keep food storage areas dry and clean.
- Don’t store heavy mixers or bulk ingredients on unstable or overloaded shelves.
- Follow cabinet, drawer, shelf, and organizer weight limits.
- Store sharp blades and tools so cutting edges aren’t exposed.
- Let electrical appliances cool where applicable before storing.
- Don’t use appliances with damaged cords or plugs.
- Keep baking ingredients appropriately separated from household chemicals and cleaning products.
- Secure tall storage furniture where appropriate.
- Use appropriate mounting hardware for shelves and wall organizers.
- Follow local food-safety guidance where applicable.
A Simple Baking Organization System
If you want to keep things easy, use five zones:
Zone 1: Everyday Ingredients
Flour, sugar, and your most-used baking basics.
Zone 2: Mix-Ins
Chocolate, nuts, dried fruit, and similar ingredients.
Zone 3: Decorating
Sprinkles, cutters, piping supplies, and decorating tools.
Zone 4: Tools
Measuring cups, spatulas, whisks, and rolling pin.
Zone 5: Bakeware
Baking sheets, cake pans, muffin tins, and cooling racks.
This system is simple enough to work in a large pantry or a few kitchen cabinets.
FAQ About Baking Storage Ideas
How should I organize my baking supplies?
Group supplies into categories such as ingredients, mix-ins, decorating supplies, tools, bakeware, and appliances. Keep frequently used categories closest to your main prep area.
What is the best way to store flour and sugar?
Store them according to manufacturer guidance. Appropriate food-safe containers can make frequently used dry ingredients easier to access and help protect them from moisture and pests.
How do you organize baking supplies in a small kitchen?
Concentrate supplies into a small number of locations. One pantry shelf or cabinet for ingredients, one drawer for tools, and one cabinet for bakeware can be enough.
How do you store baking sheets?
If your cabinet or drawer allows it, vertical storage with sturdy dividers can make baking sheets easier to access than a large horizontal stack.
Where should I store a heavy stand mixer?
A countertop or sturdy lower cabinet may work well. A purpose-designed mixer lift is another possibility when installed correctly and rated for the appliance.
How should I store cookie cutters?
Sort cookie cutters into broad categories such as everyday and seasonal, then place them in bins or containers.
How do I organize cake decorating supplies?
Keep decorating tools and ingredients together in a drawer, cabinet, or bin. Divided storage can be useful for small reusable pieces such as piping tips.
How can I organize baking supplies without buying containers?
Start by decluttering, grouping similar items, nesting mixing bowls and pans, and dedicating existing shelves and drawers to baking. You may find that you need very few additional organizers.
Final Thoughts
The best baking storage ideas make it easier to actually bake.
Start by gathering everything in one place.
Get rid of ingredients and tools you no longer need.
Then divide what’s left into simple categories.
Keep your everyday ingredients close to your prep area, store measuring tools nearby, nest mixing bowls, and use vertical storage for baking sheets and pans when practical.
Move heavy mixers and bulk ingredients to sturdy, accessible locations.
And don’t feel like you need to transfer every ingredient into matching containers.
A beautiful baking cabinet is nice.
A baking cabinet where you can immediately find the flour, measuring cups, chocolate chips, and correct pan is even better.
Create a system based on the way you actually bake, and keeping those supplies organized becomes much easier.