


Beautiful Christmas gift wrapping does not have to require expensive paper, elaborate bows, or store-bought embellishments.
Sometimes the simplest details make a package feel special.
Christmas cardboard gift tags are an easy way to turn leftover cardboard into charming handmade tags for presents, treat bags, hostess gifts, and holiday packages. They work especially well with kraft paper, twine, velvet ribbon, greenery, and simple Christmas wrapping.
They’re also wonderfully customizable.
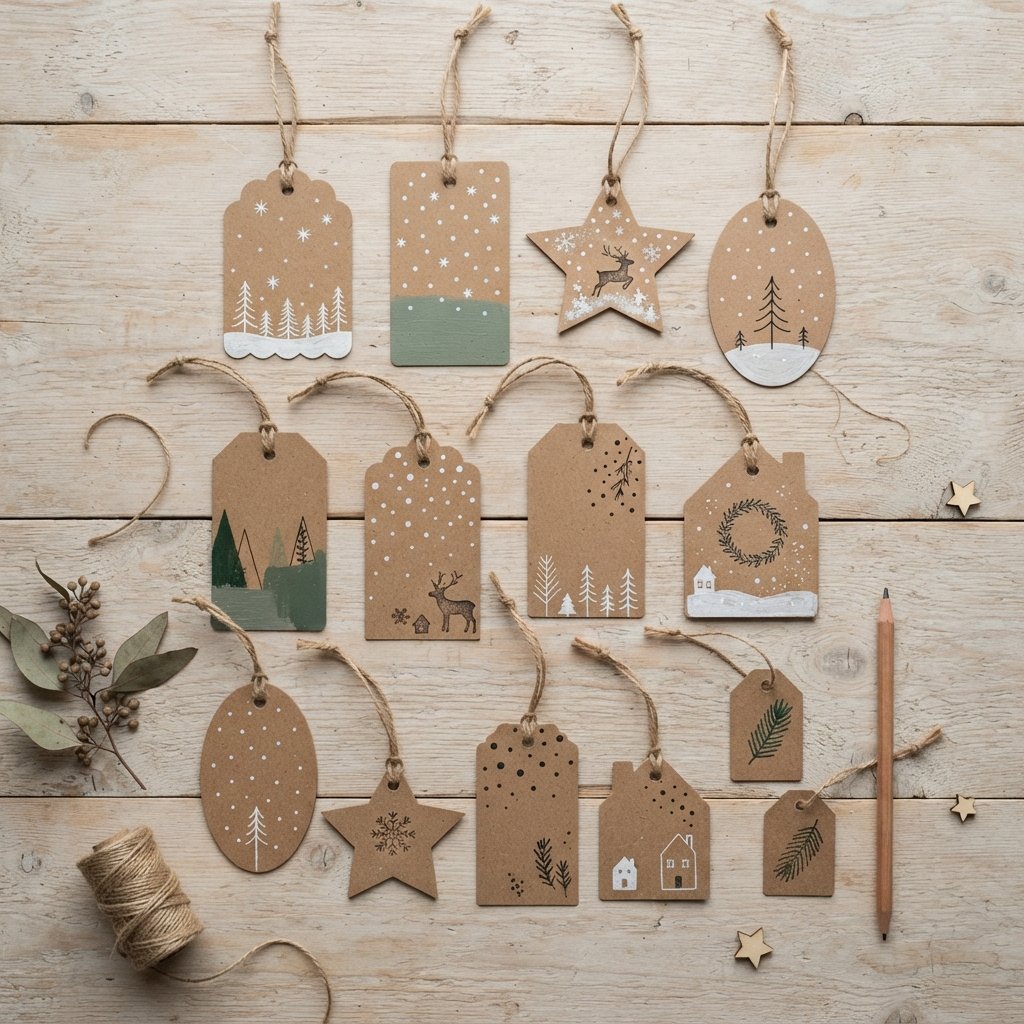
Leave the cardboard natural for a rustic look, paint it white for a Scandinavian-inspired Christmas, add tiny Christmas trees or stars, or personalize each tag with the recipient’s name.
Best of all, you can make an entire batch at once using materials you may already have at home.
This is a simple Christmas craft for adults, older kids with supervision, or anyone looking for an inexpensive way to make holiday gift wrapping feel more thoughtful.
Here’s how to make easy DIY Christmas cardboard gift tags, plus plenty of ideas for decorating and using them.

Why Make Christmas Gift Tags From Cardboard?
Cardboard may not sound like the most exciting craft material.
But once it’s cut into a simple shape and paired with beautiful ribbon or twine, it can look surprisingly charming.
Cardboard gift tags are:
- Inexpensive
- Easy to customize
- Great for using clean packaging scraps
- Simple enough to make in batches
- Easy to coordinate with your wrapping paper
- Perfect for rustic and natural Christmas decor
They’re especially useful when you have a lot of presents to wrap.
Instead of buying several packs of tags, save suitable cardboard throughout the season and turn it into your own.
What Kind of Cardboard Works Best?
Choose cardboard that is clean, dry, flat, and sturdy enough to hold its shape.
Thin cardboard is generally easier to cut than heavy corrugated shipping boxes.
Good possibilities include clean pieces from:
- Packaging
- Gift boxes
- Cereal-style boxes
- Cardstock-backed packages
- Lightweight shipping boxes
Avoid cardboard that has been exposed to food, moisture, grease, strong odors, or unknown substances.
If one side has printing you don’t want visible, you can either use the plain side as the front or cover the printed side with paper or paint if the material is suitable.

Supplies for DIY Christmas Cardboard Gift Tags
You do not need much.
Gather:
- Clean cardboard
- Pencil
- Ruler
- Scissors
- Hole punch
- Twine or ribbon
For decorating, you might also use:
- Paint
- Paint markers
- Craft markers
- Stamps
- Ink
- Small stencils
- Decorative paper
- Glue appropriate for paper crafts
- Washi tape
Optional:
- Craft knife
- Cutting mat
- Shape templates
If using a craft knife, work on a proper cutting surface and always cut away from your body. Adults should handle sharp blades when crafting with children.
Step 1: Choose Your Gift Tag Shapes
Start by deciding what you want the tags to look like.
You can keep things very simple.
Traditional Gift Tag
Cut a rectangle and trim the two top corners at an angle.
Rectangle
Probably the easiest option.
Circle
Trace a small round object or template.
Christmas Tree
Use a simple triangle-based tree silhouette.
Star
Trace a star template.
House
A rectangle with a peaked roof creates a cute little Christmas-house tag.
Ornament
Use a circle or oval with a tiny rectangular top.
For the fastest project, stick with traditional rectangular tags.
If you are making these with children, simple shapes are easier to cut and decorate.
Step 2: Make One Template
Instead of measuring every tag individually, make one template first.
Cut a tag from paper or spare cardboard.
Once you are happy with its size and shape, use it to trace the rest.
This makes a batch of handmade tags look more consistent.
You can also create several templates:
- Small
- Medium
- Large
- Tree
- Star
Then mix the shapes when wrapping gifts.
Step 3: Trace the Tags Onto Cardboard
Place the template on your cardboard.
Trace around it lightly with a pencil.
Arrange the shapes close together to minimize waste.
Straight-sided tags are especially easy to fit efficiently onto a rectangular piece of cardboard.
If your cardboard has a finished or plain side you want to show, think about which side will become the front before tracing.

Step 4: Cut Out the Cardboard Gift Tags
Cut along your pencil lines using sturdy scissors appropriate for the thickness of the cardboard.
For straight edges, a craft knife and ruler can create crisp cuts, but use them only if you can do so safely.
Work on a cutting mat.
Keep fingers away from the blade path.
If you’re making gift tags with young children, let an adult do any cutting that requires a craft knife or heavy-duty scissors.
Step 5: Punch a Hole
Use a standard hole punch near the top of each tag.
Do not place the hole too close to the edge.
Leave enough cardboard around it so the tag does not tear easily when you thread ribbon through.
For a traditional tag, center the hole near the top.
For a Christmas tree, place it near the top of the tree.
For a star, choose one point or another area where the tag will hang nicely.
Step 6: Leave the Cardboard Natural
You can stop right here.
Natural cardboard looks beautiful with simple Christmas wrapping.
Pair it with:
- Kraft paper
- Cream paper
- White paper
- Forest green ribbon
- Burgundy velvet ribbon
- Red-and-white baker’s twine
- Natural jute twine
Write the recipient’s name with a black or white marker, and the tag is finished.
Sometimes the simplest version is the prettiest.

7 Easy Ways to Decorate Christmas Cardboard Gift Tags
If you want to make the tags more decorative, there are plenty of easy options.
1. Draw Tiny Christmas Trees
Use a white, green, or black paint marker to draw a simple tree.
You don’t need artistic skills.
A few stacked lines can create a minimalist evergreen tree.
Add small dots around it for snow if desired.
2. Add White Stars
White looks beautiful against brown cardboard.
Draw several tiny stars or one larger star in the center.
This is an easy way to create a Scandinavian-inspired Christmas look.
3. Paint Half the Tag
Use painter’s tape to create a clean line, then paint part of the tag.
Try:
- White
- Cream
- Forest green
- Burgundy
- Muted red
Once the paint has dried according to its instructions, remove the tape and add the name.
4. Use Christmas Stamps
Stamps make batch-making much faster.
Try designs such as:
- Trees
- Stars
- Snowflakes
- Holly
- Reindeer
- Small houses
Test the stamp on scrap cardboard first because ink appearance can vary depending on the cardboard surface.
5. Add Polka Dots
Use the end of an appropriate small tool or a paint marker to make dots.
White dots can resemble falling snow.
Gold-colored dots can create a more festive look.
6. Draw a Simple Border
Add a thin line around the outside edge.
This small detail can make a plain cardboard tag feel more finished.
7. Add a Paper Layer
Cut a slightly smaller shape from decorative paper and attach it to the cardboard.
This is a great way to use leftover wrapping-paper scraps.
Christmas Tree Cardboard Gift Tags
Tree-shaped tags are one of the easiest Christmas-specific designs.
Cut a simple triangle or slightly more detailed evergreen silhouette.
Then decorate it with:
- White dots
- Tiny ornaments
- Simple lines
- Small stars
Or leave it completely plain.
A natural cardboard tree paired with a burgundy velvet ribbon looks surprisingly elegant.
Cardboard Star Gift Tags
Stars work well if you want the tag itself to become part of the package decoration.
Trace a star template onto the cardboard and cut carefully around the points.
Punch a small hole toward the end of one point.
Tie it to the gift with twine or narrow ribbon.
You could also make several larger cardboard stars to use as Christmas-tree ornaments after the gifts have been opened.
Cardboard Ornament Gift Tags
A round cardboard tag can easily become a Christmas ornament.
Cut a circle.
Add a small rectangular shape at the top if you want it to look more obviously like an ornament.
Decorate it with:
- Stripes
- Stars
- Dots
- Names
- Snowflakes
Add ribbon through the hole.
If you make the tag sturdy enough and decorate both sides, the recipient may be able to reuse it as a simple tree ornament.
Christmas House Gift Tags
Little cardboard houses are especially cute for Christmas.
Start with a rectangle and cut a peaked roof at the top.
Draw:
- Windows
- Door
- Snowy roof
- Tiny wreath
Use a white paint marker for a simple gingerbread-house effect.
These are adorable on gifts wrapped in plain kraft paper.
Snowy Cardboard Gift Tags
One of the easiest techniques is to create a snow effect.
Use white paint or an appropriate paint marker to add tiny dots across the tag.
Keep the pattern irregular.
Then write the name in the center.
Pair it with white string or cream ribbon for a simple winter look.
Rustic Christmas Cardboard Gift Tags
For rustic wrapping, keep the cardboard mostly natural.
Combine it with:
- Kraft wrapping paper
- Jute twine
- Plaid ribbon
- Pinecones
- Natural-looking greenery
You can stamp a small Christmas tree on each tag or simply write the name in black.
The textures do most of the decorating.
Elegant Cardboard Gift Tags
Cardboard can also look surprisingly polished.
The trick is to combine the rustic material with more refined details.
Try:
Natural cardboard + burgundy velvet ribbon + white lettering
or:
Natural cardboard + forest green velvet ribbon + brass-colored cord
or:
Cream-painted cardboard + champagne ribbon + black lettering
Keep the design simple.
One name and one small decorative detail can be enough.
Black and White Cardboard Gift Tags
For modern Christmas wrapping, paint some tags matte black and leave others natural.
Use white lettering on black tags and black lettering on natural cardboard.
Wrap gifts in white, black, or kraft paper.
The result feels graphic and modern without requiring elaborate supplies.
Allow paint to dry and cure as directed before placing painted tags against gift wrap or fabric ribbon.
Neutral Christmas Gift Tags
For a softer palette, use:
- Brown cardboard
- Cream
- Beige
- White
- Soft green
Skip bright red and metallic finishes.
Pair the tags with linen-style ribbon, cotton string, or soft velvet.
This works particularly well with natural or Scandinavian-inspired Christmas decor.
Traditional Red and Green Gift Tags
If you love classic Christmas colors, cardboard provides a great neutral background.
Add:
- Red ribbon
- Green paint
- White stars
- Red-and-white twine
You can also alternate designs.
For example:
Tag 1: green tree
Tag 2: red stars
Tag 3: white snow
Tag 4: natural cardboard
Because the base material is the same, the collection will still feel cohesive.
Use Cardboard Gift Tags With Kraft Paper
Kraft paper and cardboard naturally coordinate.
To keep the package from looking too plain, introduce one contrasting texture.
Try:
- Velvet ribbon
- Plaid ribbon
- Baker’s twine
- Greenery
The tag doesn’t need to be elaborate when the package already has several layers.
Use Greenery as a Gift-Wrapping Accent
A small sprig of greenery can make a simple cardboard tag feel much more festive.
Tuck an artificial greenery sprig beneath the ribbon or twine.
If using real greenery, be aware that it can dry out, shed, transfer moisture or sap, and become brittle.
Avoid adding plant material that may be irritating, toxic, or otherwise inappropriate for households with children or pets.
Artificial greenery is an easy reusable alternative.

Personalize the Tags With Names
Handwritten names make simple tags feel intentional.
You don’t need elaborate calligraphy.
Try:
- Simple uppercase letters
- Lowercase handwriting
- Block lettering
- White lettering
- Black lettering
If you are nervous about writing directly on the finished tag, practice the name on scrap cardboard first.
Another option is to lightly write the name in pencil and trace over it.
Add Short Christmas Messages
If the tag is large enough, use the back for a short message.
Ideas include:
- Merry Christmas
- With love
- For you
- Joy to you
- Merry & bright
Keep the front simple with the recipient’s name.
The back can hold the personal note.
Turn the Gift Tag Into an Ornament
A gift tag that doubles as an ornament gives the recipient something to keep.
Use sturdy cardboard and reinforce the hole if necessary.
Decorate both sides.
Shapes that work especially well include:
- Star
- Tree
- House
- Ornament
- Snowflake
Add a loop of ribbon long enough to hang from a tree branch.
You can write the year on the back.
Make Cardboard Gift Tags With Kids
This can be an easy Christmas craft for children if you adapt the steps to their ages.
Adults can cut and punch the tags ahead of time.
Then children can decorate them using:
- Washable paint
- Child-appropriate markers
- Stickers
- Stamps
- Fingerprint designs
Always supervise craft activities and choose supplies appropriate for the child’s age.
Small decorative items can be choking hazards for young children.
Keep sharp tools and unsuitable craft materials out of reach.
Fingerprint Christmas Tree Tags
For a child-friendly design, an adult can draw a simple tree outline and children can add fingerprint “ornaments” using washable, age-appropriate paint.
Let everything dry fully before attaching the tag to a gift.
These can be especially sweet for gifts to grandparents or other family members.
Use Cardboard Tags as Place Cards
Christmas cardboard gift tags are not limited to presents.
They can also work as place cards.
Write one guest’s name on each tag.
Then place it:
- On a napkin
- Beside a plate
- Around a napkin with ribbon
- On top of a small wrapped favor
This is an easy way to coordinate the Christmas table with your gift wrapping.
Use Them on Christmas Treat Bags
Tie a cardboard tag onto:
- Cookie bags
- Candy bags
- Hostess gifts
- Teacher gifts
- Neighbor gifts
Use food-safe packaging for anything edible and keep craft materials from directly contacting unwrapped food.
Make a Batch at Once
Gift tags are much faster to make assembly-line style.
Try this process:
- Trace all tags.
- Cut all tags.
- Punch all holes.
- Paint or stamp all tags.
- Let them dry.
- Add names.
- Cut ribbon or twine.
- Store finished tags together.
Making 20 tags doesn’t take 20 times as long as making one when you batch the steps.
How to Store Homemade Christmas Gift Tags
If you make extras, save them for next year.
Store the tags flat in:
- Small craft box
- Envelope
- Gift-wrap organizer
- Divided Christmas storage container
Keep them somewhere dry.
Store ribbon or twine separately so it doesn’t become tangled.
If the tags already have names written on them, separate those from blank tags.
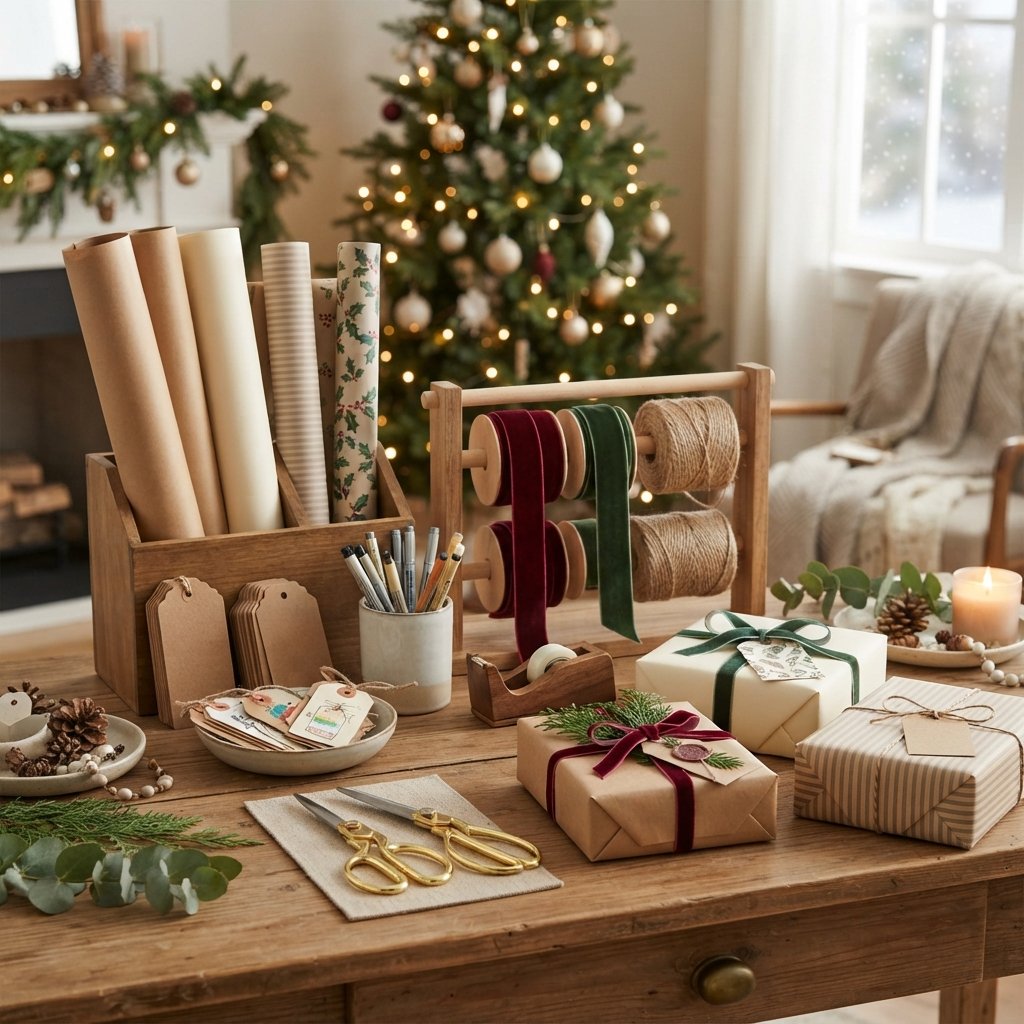
Create a Christmas Gift-Wrapping Kit
Make holiday wrapping easier by keeping everything together.
Include:
- Cardboard tags
- Ribbon
- Twine
- Tape
- Scissors
- Gift bags
- Tissue paper
- Wrapping paper
- Markers
You can even cut a stack of blank cardboard tags before the Christmas season begins.
Then you only need to personalize them while wrapping.
How to Make Homemade Cardboard Gift Tags Look Better
A few small details can make a big difference.
Keep the Shapes Consistent
Templates create a cleaner result.
Use a Limited Color Palette
Choose two or three colors.
Make Clean Cuts
Take your time around corners.
Use Good Ribbon
A beautiful ribbon can elevate even the simplest cardboard.
Leave Empty Space
Don’t cover every inch of the tag.
Coordinate With the Wrapping Paper
Think about the package as a whole.
Repeat One Design Element
For example, put a tiny white star on every tag.
This creates a cohesive collection even when the shapes vary.
Common DIY Cardboard Gift Tag Mistakes
Using Dirty Cardboard
Only use clean, dry material.
Choosing Cardboard That’s Too Thick
Very heavy corrugated cardboard can be difficult to cut neatly.
Punching Too Close to the Edge
The hole may tear.
Making the Tags Too Small
Leave enough room for a readable name.
Adding Too Many Decorations
Simple tags often look more polished.
Using Wet Paint Immediately
Let paint dry fully before stacking or attaching tags.
Forgetting About the Wrapping Paper
The tag should complement the whole gift.
Using Sharp Tools Around Children
Adults should handle cutting tools when necessary.
Adding Loose Tiny Embellishments to Children’s Gifts
Small pieces may create a choking hazard.
FAQ About Christmas Cardboard Gift Tags
Can you make Christmas gift tags from cardboard?
Yes. Clean, flat cardboard can be cut into simple tags and decorated with markers, paint, stamps, ribbon, or paper.
What cardboard is best for gift tags?
Thin, sturdy cardboard is usually easiest to work with. Clean packaging and lightweight boxes can work well if they’re dry, flat, and free from grease or contamination.
How do you cut cardboard gift tags neatly?
Use a template and sharp scissors suitable for the material. For very straight edges, adults comfortable with a craft knife can use one with a ruler and cutting mat.
How do you punch holes in cardboard tags?
A standard hole punch works with many lightweight cardboard materials. Leave enough space between the hole and the edge to reduce tearing.
What can I use to decorate cardboard gift tags?
Try paint markers, stamps, craft paint, stencils, decorative paper, washi tape, or simple handwriting.
What ribbon looks good with cardboard gift tags?
Velvet ribbon, jute twine, baker’s twine, linen-style ribbon, and simple satin ribbon can all work. Choose a material that coordinates with the rest of your wrapping.
Can kids make cardboard Christmas tags?
Yes, with age-appropriate supplies and supervision. Adults should handle sharp cutting tools, and small embellishments should be kept away from young children.
Can cardboard gift tags be reused?
Sturdy tags may be reused if names are written on removable labels or if the back remains blank. Decorative star, tree, or ornament-shaped tags can also be designed as keepsake ornaments.
Final Thoughts
Christmas cardboard gift tags are proof that holiday wrapping doesn’t have to be expensive or complicated to look thoughtful.
Start with clean cardboard.
Cut it into a simple traditional tag, tree, star, house, or ornament shape.
Then decide how much decorating it actually needs.
For rustic gifts, you may only need a handwritten name and piece of twine.
For something more polished, pair natural cardboard with burgundy or forest green velvet ribbon.
For a Scandinavian-inspired look, draw tiny white trees and stars.
And if you’re wrapping with kids, let them add stamps, stickers, or simple painted designs.
The best part is that no two tags need to look exactly alike.
A little variation is part of what makes handmade Christmas wrapping feel special.
Save suitable cardboard as packages arrive, make a batch of tags before wrapping day, and keep the extras with your Christmas supplies for next year.
With a few scraps of cardboard and some ribbon, you can create gift wrapping that feels warm, personal, and beautifully handmade.

