

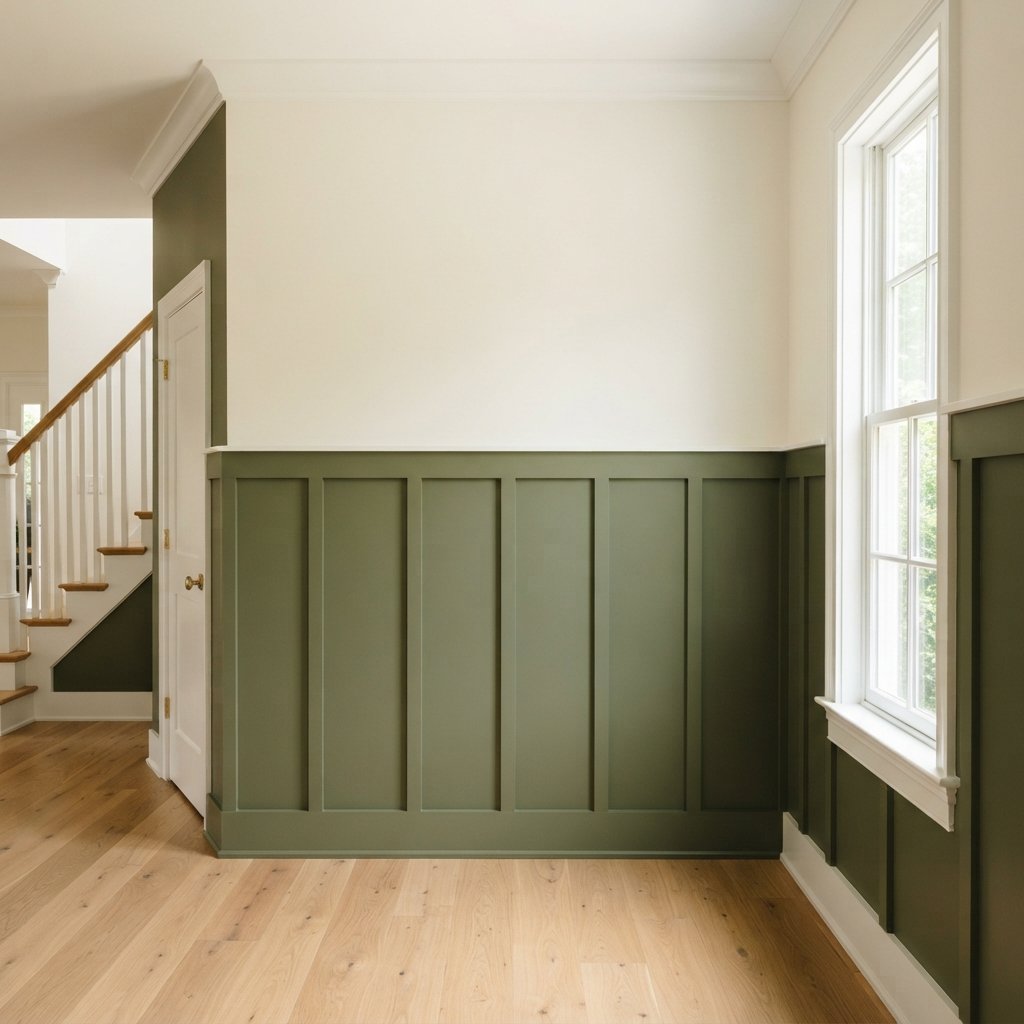
A mudroom has to work hard.
It is often the place where shoes get kicked off, coats pile up, backpacks land, and everyday clutter enters the house. Adding a DIY board and batten mudroom wall can help turn that busy space into something that feels more intentional while also providing a practical place for hooks and storage.
And you do not necessarily need a large dedicated mudroom.
This project can work in a small entryway, garage entrance, hallway, laundry room, or even along one wall beside the back door.
The basic idea is straightforward: create a paneled wall treatment using horizontal and vertical trim, finish it with paint, and add appropriately mounted hooks or storage where useful.
The planning matters, though.
Walls are rarely perfectly square. Existing baseboards can affect the trim layout. Hooks intended to hold loaded backpacks or heavy winter coats need adequate structural support. Electrical outlets and switches need to remain properly accessible. And the dimensions that look good on one wall may not work on another.
Instead of copying someone else’s measurements, design the board and batten around your own wall, ceiling, baseboards, furniture, and storage needs.
Here’s how to create a practical mudroom feature wall that adds both character and organization.
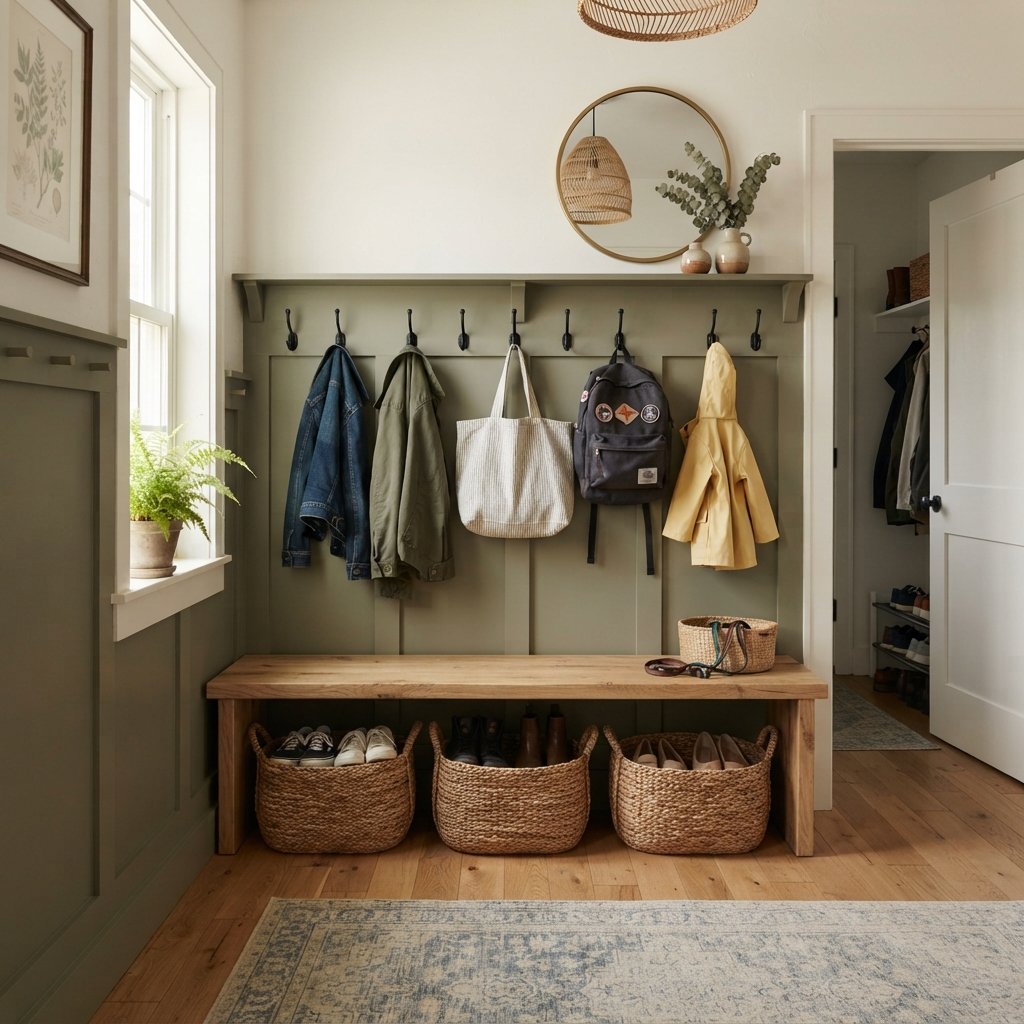
1. Plan How the Mudroom Needs to Function
Before thinking about trim spacing, think about what actually happens in the space.
What gets dropped here every day?
Maybe you need places for:
- Coats
- Backpacks
- Handbags
- Hats
- Dog leash
- Shoes
- Umbrellas
A family entrance may need several individual drop zones.
A small entryway might need only three hooks and a narrow bench.
Planning around the actual clutter is more useful than building a decorative wall first and trying to make it functional afterward.
2. Choose the Board and Batten Wall
You do not have to cover the entire mudroom.
One feature wall may provide enough impact.
A good wall might be:
- Behind a bench
- Beside the entry door
- Opposite a closet
- Along a garage-entry wall
- In a narrow hallway
Look at door swings, outlets, switches, vents, thermostats, windows, and nearby furniture before deciding.
The wall treatment should improve the space without interfering with how it functions.
3. Decide How High the Board and Batten Should Go
There is no universal correct height.
Instead, consider:
- Ceiling height
- Wall proportions
- Bench height
- Hook placement
- Windows
- Light switches
- Existing trim
A taller treatment can create a more substantial mudroom look and provide a natural background for hooks.
A lower treatment can feel more traditional.
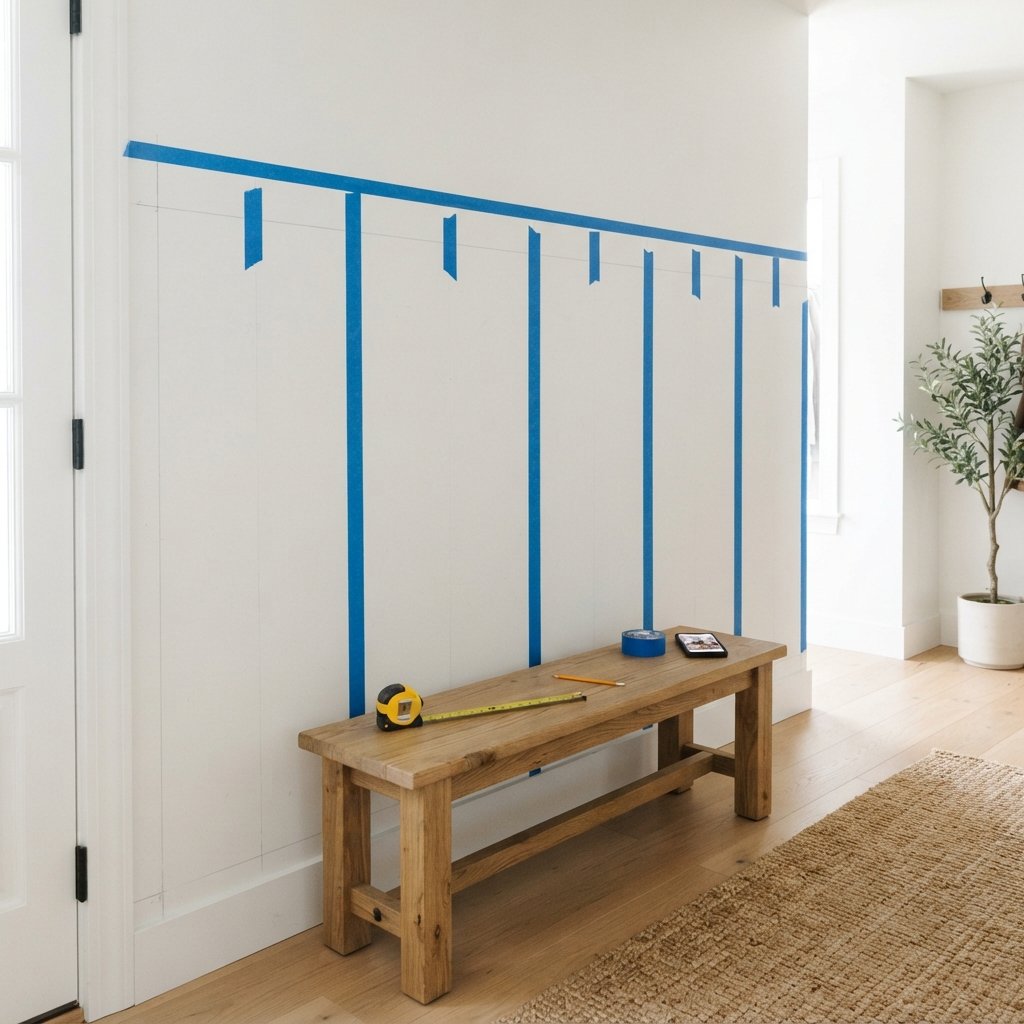
Use painter’s tape to mark the proposed top line on the wall before buying lumber or trim.
Stand back and look at it from the adjoining room.
This simple step can prevent choosing a height that feels awkward once installed.
4. Decide Whether You Need a Backer Panel
“Board and batten” can describe several different wall treatments.
Some projects install battens directly over existing drywall.
Others add a smooth backer panel first.
The right choice depends on:
- Existing wall texture
- Desired appearance
- Trim profile
- Wall condition
If your drywall is smooth and in good shape, you may prefer to use it as the background.
If the wall is heavily textured and you want a smooth paneled appearance, an appropriate backer may be useful.
Remember that adding material changes wall thickness around outlets, switches, door casing, and baseboards.
Electrical devices and boxes must remain properly and safely installed; do not improvise unsafe extensions or bury electrical components behind decorative material.
5. Measure the Wall Carefully
Measure:
- Total wall width
- Desired panel height
- Baseboard
- Door casing
- Windows
- Outlets
- Switches
- Vents
- Other obstacles
Do not assume the wall has identical dimensions from top to bottom.
Older homes in particular may have walls and floors that are slightly out of square.
Measure more than once before cutting.
6. Plan the Batten Spacing
Equal spacing is one of the details that makes a DIY board and batten wall look polished.
But do not simply choose a random distance and start attaching boards from one end.
First determine:
- Number of battens
- Actual batten width
- Total wall width
- Desired relationship to doors, bench, hooks, and corners
Lay out the complete wall before installation.
Painter’s tape is extremely helpful.
It lets you see whether a batten lands awkwardly beside a switch, directly behind a hook, or too close to a doorway.
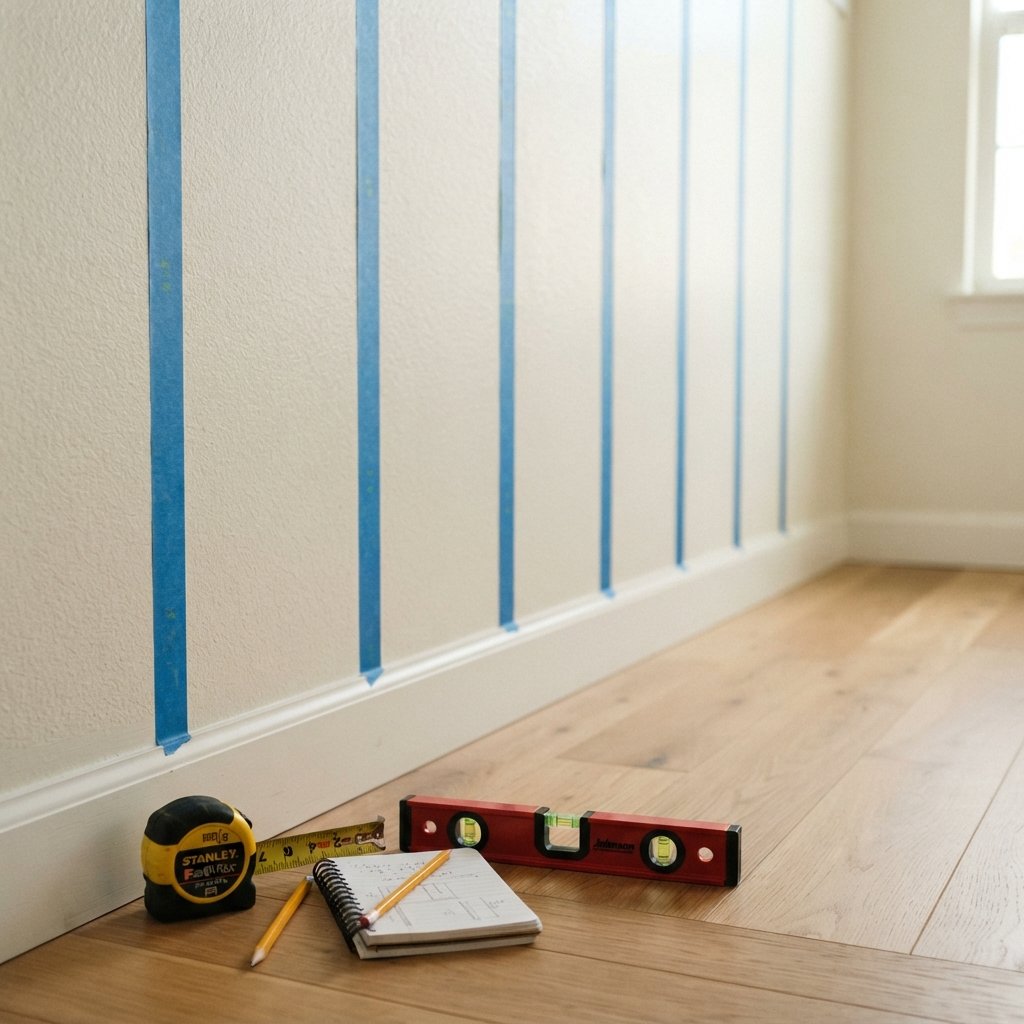
7. Work With the Existing Baseboards
Existing baseboards can create one of the trickier details.
If your battens are thicker than the upper edge of the baseboard, attaching them directly on top can create an awkward projection.
Possible solutions depend on the existing trim and desired design.
You might:
- Replace the baseboard
- Modify the trim layout
- Use a compatible batten thickness
- Create a deliberate transition detail
Avoid automatically cutting into existing trim before understanding how the pieces should meet.
A thoughtful baseboard transition can make the difference between a wall that looks built-in and one that looks added later.
8. Prepare the Wall
Remove items from the work area.
Then:
- Clean the wall
- Remove loose material
- Fill unwanted holes
- Repair obvious damage
- Sand repairs appropriately
- Remove dust
If you plan to paint the entire wall after installation, you do not necessarily need perfect cosmetic repairs where trim will cover the surface.
However, visible sections should be reasonably smooth.
Use appropriate protective equipment and ventilation when sanding, priming, or painting.
If you are working in an older home where existing coatings may contain hazardous materials, use appropriate testing and safe-work procedures before disturbing them.
9. Locate the Wall Studs
Find and mark framing where appropriate before covering your reference points.
This is particularly important in a functional mudroom because the finished wall may eventually hold significant loads.
A decorative batten and a hook holding a heavily loaded backpack have very different support requirements.
Use suitable fastening methods for the wall construction and the expected load.
Do not assume attaching a hook to a decorative trim board alone provides adequate support.
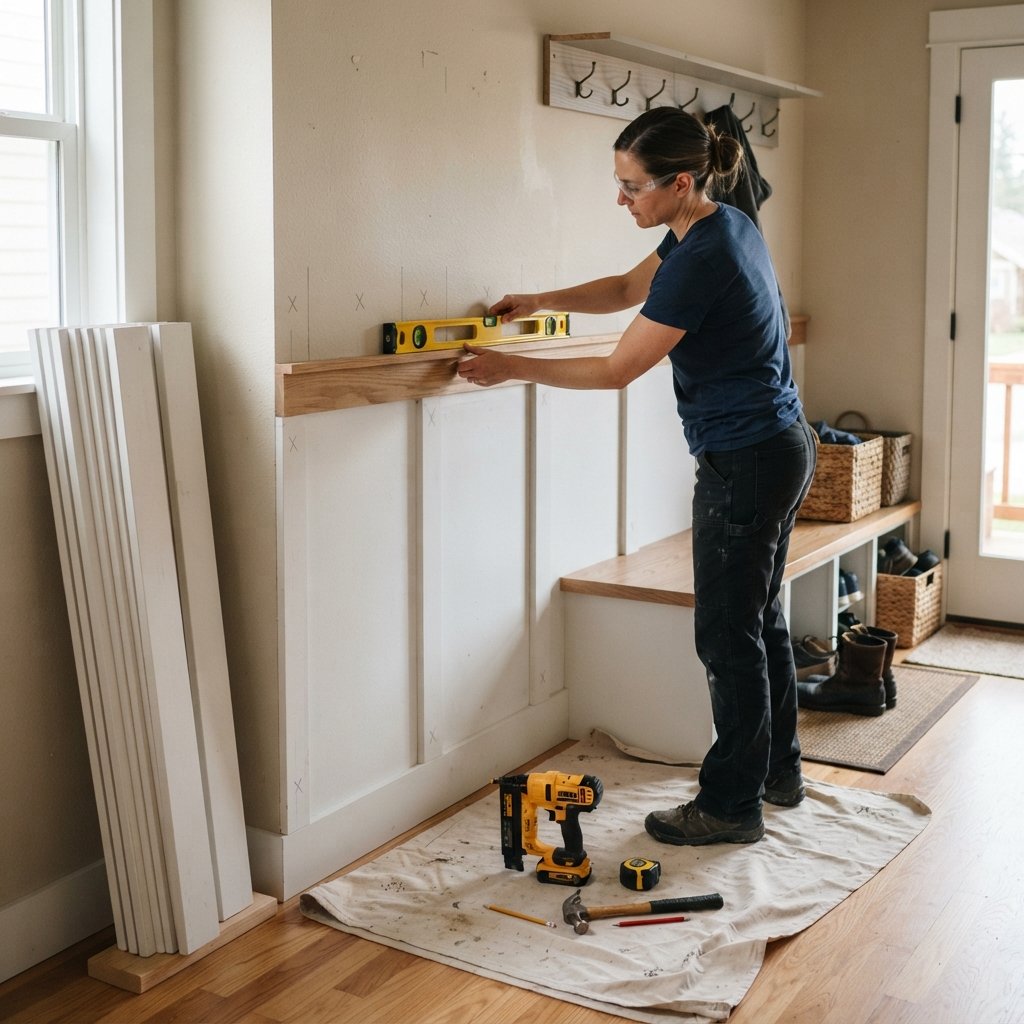
10. Install the Horizontal Top Rail
The top rail creates a strong visual stopping point for the board and batten.
Check it carefully with a level rather than assuming the ceiling or floor provides a perfectly level reference.
Fastening requirements depend on:
- Trim material
- Wall construction
- Whether the rail will support hooks or shelving
- Manufacturer recommendations for adhesives or fasteners
If the rail will become part of a load-bearing hook system, plan the structural attachment accordingly.
Decorative adhesive alone should not be assumed sufficient for heavy everyday storage.
11. Cut and Install the Vertical Battens
Once the layout is confirmed, measure each batten individually.
Do not automatically cut every piece to the same length unless you have verified the wall and floor are consistent.
Cut carefully and dry-fit pieces before fastening.
Check each batten for plumb.
Small alignment errors become much more obvious once several battens are installed side by side.
Continue across the wall while repeatedly checking the overall pattern.
12. Work Carefully Around Outlets and Switches
Do not cover electrical boxes with trim.
Plan batten placement so outlets and switches remain accessible.
If the new wall treatment changes the finished wall thickness, electrical devices may need proper adjustments to remain safely installed and compliant with applicable requirements.
Turn off power before appropriate electrical work and verify safe conditions.
If boxes or wiring require modification, use a qualified electrician rather than improvising around them.
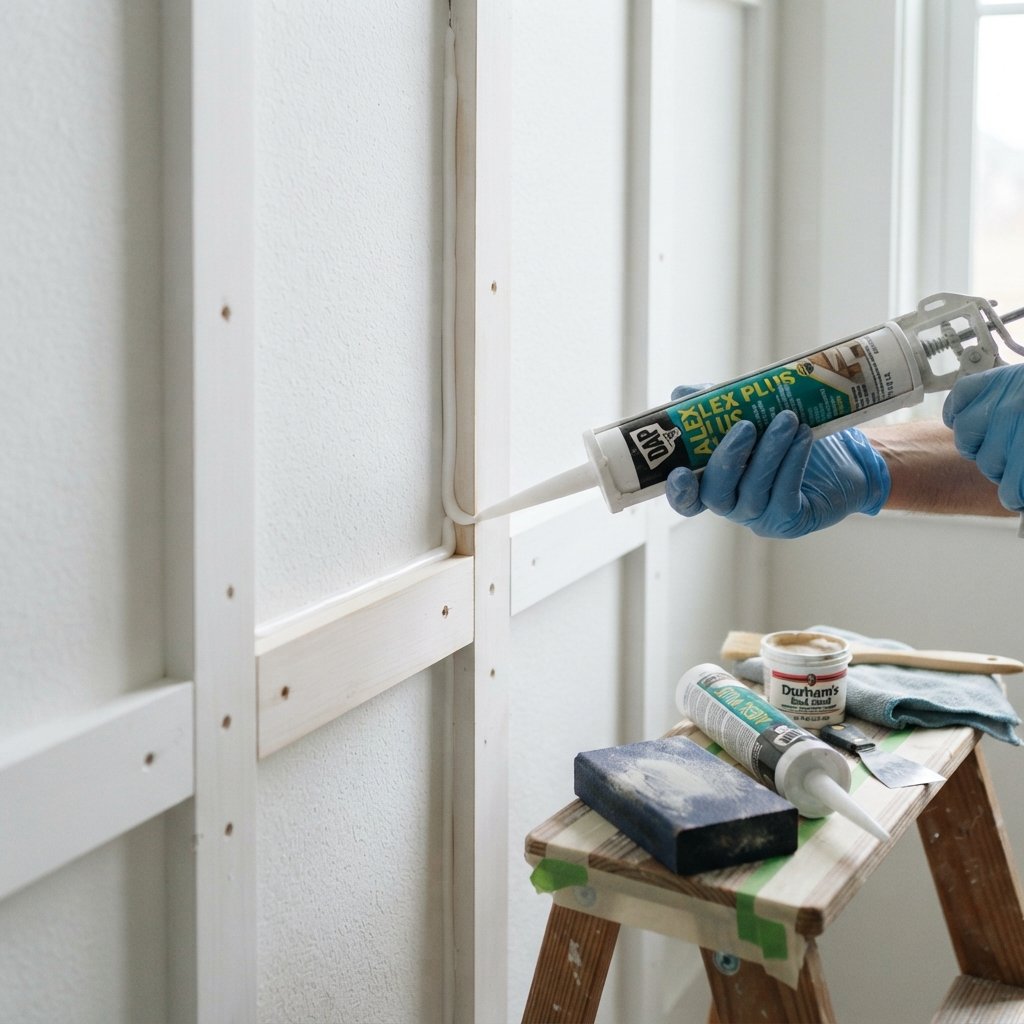
13. Fill, Caulk, and Sand the Trim
The finishing stage is what makes separate trim pieces begin to look like one architectural wall treatment.
Depending on the materials and joints, you may need to:
- Fill fastener holes
- Fill appropriate seams
- Sand repairs
- Caulk suitable trim-to-wall gaps
Caulk and filler are not interchangeable.
Use products appropriate for the specific joint and material.
Avoid filling intentional movement joints or gaps that should remain functional.
Allow products to dry or cure according to manufacturer directions.
14. Prime as Needed
Whether primer is necessary depends on the material and paint system.
Bare wood, MDF, repaired surfaces, existing glossy coatings, or other substrates may have different preparation requirements.
Follow the primer and paint manufacturer’s recommendations.
Pay particular attention to cut edges if using engineered trim products that require sealing.
A mudroom receives frequent contact from shoes, bags, hands, and coats, so good preparation is especially worthwhile.
15. Paint the Board and Batten
Now the wall begins to come together.
Popular mudroom colors include:
- Warm white
- Sage
- Olive
- Deep green
- Muted blue
- Navy
- Greige
- Charcoal
For a classic look, paint the board and batten warm white.
For more personality, use a deeper color on the lower treatment and keep the upper wall lighter.
Choose a paint product and sheen appropriate for trim and high-contact surfaces, following manufacturer recommendations.
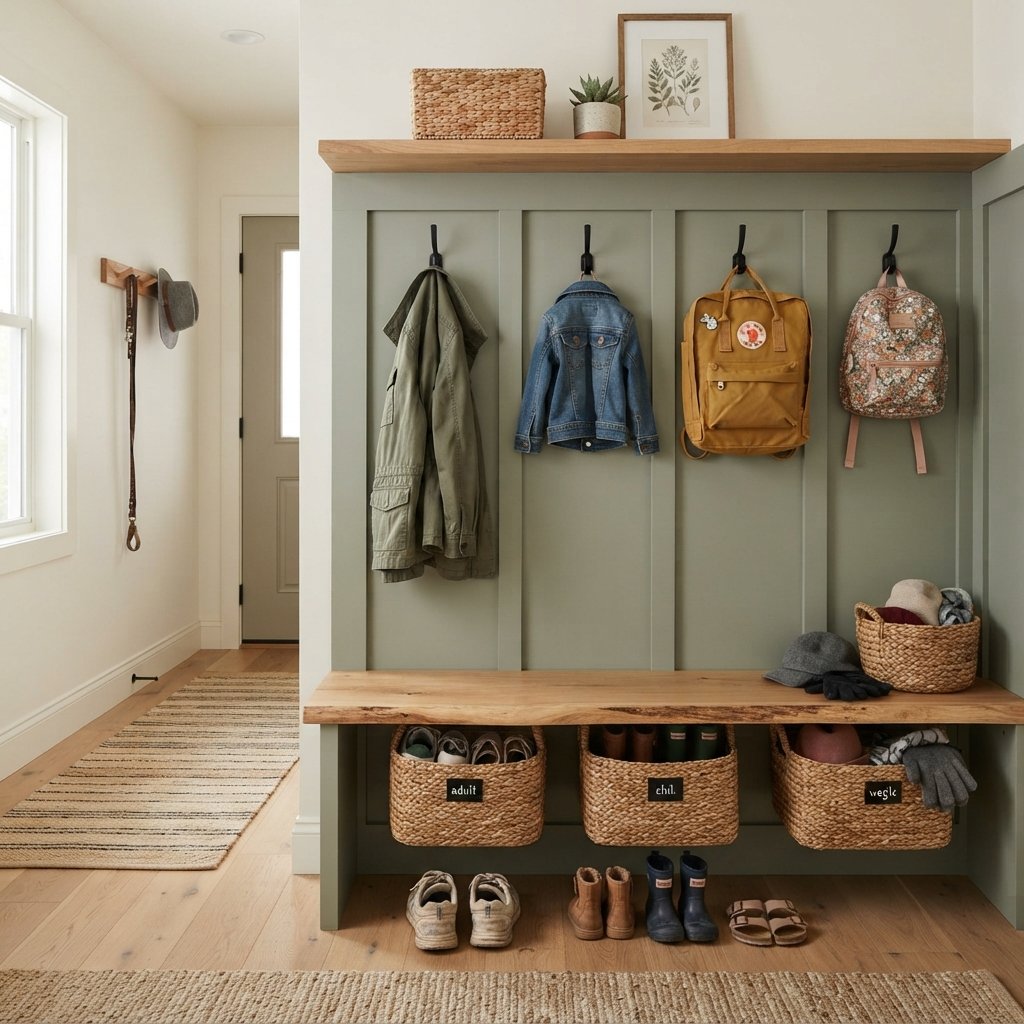
16. Add Properly Supported Hooks
Hooks turn the wall treatment into practical mudroom storage.
Think carefully about what each hook will hold.
A lightweight hat is very different from a backpack filled with books.
For heavier loads, use mounting methods appropriate for the expected weight and wall construction. Structural framing or appropriately rated fastening systems may be necessary.
Follow the hook manufacturer’s installation and load guidance.
If children will use the hooks, position appropriate hooks where they can reach them without climbing on the bench.
Adult coats or less frequently used items can go higher.
17. Finish the Mudroom With a Bench and Storage
The final layer is functional storage.
Add what your household actually needs.
That might include:
- Bench
- Shoe baskets
- Boot tray
- Storage bins
- Small shelf
- Individual family baskets
Avoid filling every available inch.
Leaving some empty space makes the mudroom easier to use and gives everyday belongings somewhere to go.
DIY Board and Batten Mudroom Materials
Your exact materials will depend on the wall, design, and existing trim, but a typical project may involve:
- Appropriate trim boards or battens
- Optional backer panel
- Top rail
- Appropriate fasteners
- Construction adhesive if suitable for the application
- Wood filler or appropriate patching material
- Paintable caulk
- Primer as needed
- Paint
- Sanding supplies
- Painter’s tape
- Drop cloths
Do not buy all trim based only on nominal dimensions.
Check the actual dimensions and thickness because they affect spacing and how the new trim meets the baseboards and casing.
Tools You May Need
Depending on your design:
- Tape measure
- Pencil
- Level
- Stud finder
- Appropriate saw
- Sanding tools
- Caulk gun
- Painting supplies
- Suitable fastening tools
- Appropriate protective equipment
Use cutting and fastening tools according to manufacturer instructions.
Wear suitable eye, hearing, and respiratory protection for the work being performed.
A Simple Board and Batten Mudroom Layout
One of the easiest layouts uses:
Existing baseboard + vertical battens + horizontal top rail + hooks + bench.
The top rail provides a visual line.
Vertical battens add architectural rhythm.
Hooks create practical storage.
The bench gives you somewhere to sit while putting on shoes.
Baskets beneath it can contain footwear or accessories.
It is simple enough for many homes without making a small entry feel overbuilt.
DIY Board and Batten Mudroom With Hooks
If hooks are a priority, plan them before installing the trim.
Do not finish the wall and then decide where hooks should go.
You may want hooks:
- On the horizontal rail
- Between battens
- On a separately installed hook board
The design should allow secure attachment appropriate for the expected load.
For family organization, consider giving each person a hook or small section.
That can help prevent one giant pile of coats and backpacks.
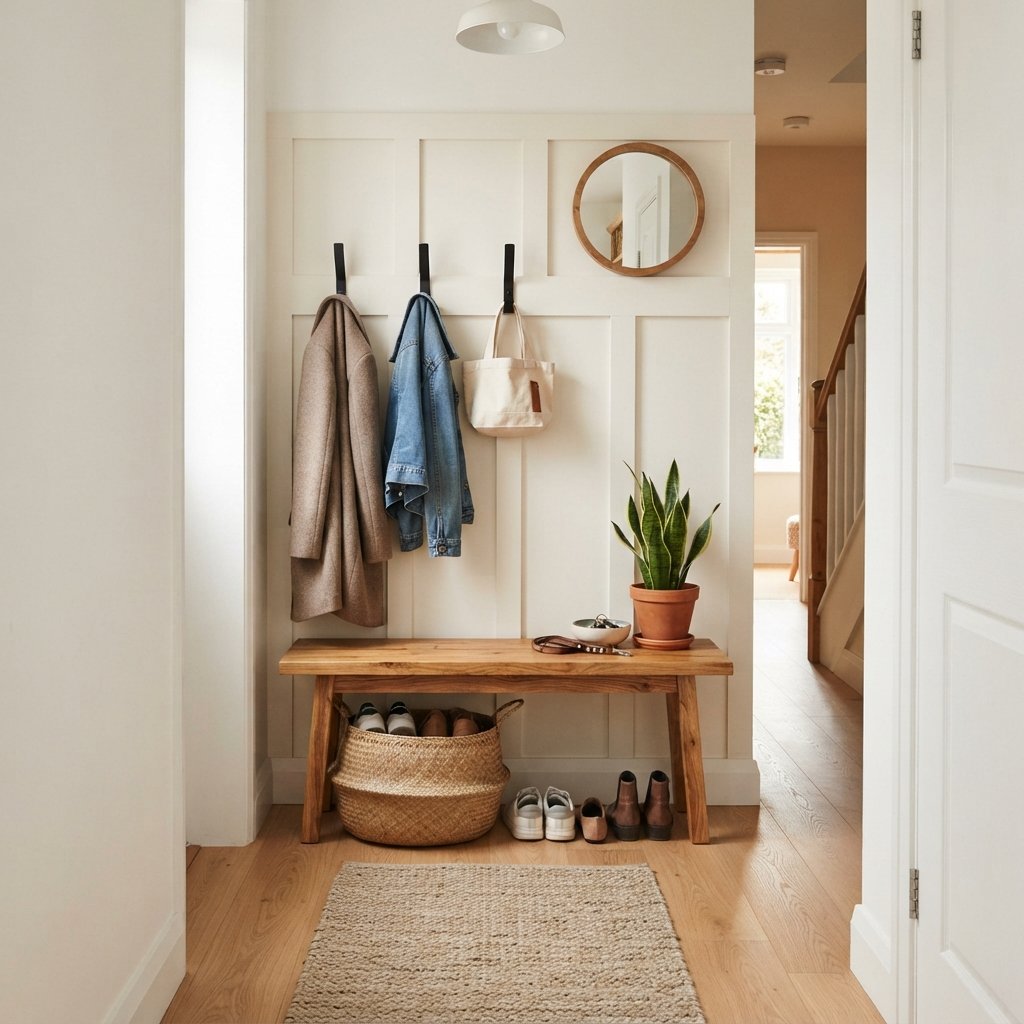
DIY Board and Batten Mudroom With a Bench
A bench adds both function and visual structure.
A freestanding bench is the easiest option because it can be moved or replaced later.
A built-in bench can create a more custom appearance but requires additional planning.
If constructing a built-in, account for:
- Structural support
- Seating load
- Wall attachment
- Flooring
- Baseboards
- Nearby outlets
- Door clearance
A bench should be designed to safely support its intended load rather than being treated as decorative cabinetry.
Small Board and Batten Mudroom
You can create a functional mudroom wall even when you have very little space.
Try:
- Narrow bench
- Three or four hooks
- Vertical battens
- One basket per person
- Small shoe tray
Keep the depth of furniture under control.
A bulky bench can make a narrow passage uncomfortable.
In a tight hallway, you may even skip the bench and use only wall-mounted hooks with shallow shoe storage.
Board and Batten Entryway Without a Mudroom
No dedicated mudroom?
Create one.
A small wall near the front or back door can become a mini drop zone.
Add:
- Board and batten
- Secure hooks
- Narrow bench
- Basket for shoes
The architectural treatment visually defines the area even when it is technically part of another room.
Board and Batten Mudroom Color Ideas
Warm White
Classic and bright.
Works particularly well in a small or dark entry.
Sage Green
Soft, welcoming, and easy to pair with wood.
Olive Green
A little moodier and practical for a high-traffic space.
Muted Blue
Adds color while still feeling calm.
Navy
Creates strong contrast with light floors and walls.
Greige
A subtle choice for a neutral home.
Charcoal
Dramatic and useful for a modern mudroom.
Always test the paint in the actual space because mudrooms often have limited natural light.
Two-Tone Board and Batten Mudroom
A two-tone treatment is one of the easiest ways to emphasize the architecture.
Try:
Olive board and batten + warm white upper wall
or:
Muted blue board and batten + soft cream upper wall
You can also paint everything the same color for a more seamless look.
The best choice depends on how much contrast you want.
Board and Batten Mudroom With Wallpaper
Wallpaper above the board and batten can add even more personality.
This works especially well in a small entry.
Consider:
- Botanical wallpaper
- Small floral
- Subtle stripe
- Neutral geometric
- Vintage-inspired print
Keep the lower paneling relatively simple so the two features do not compete.
Board and Batten Mudroom With Wood Bench
Painted paneling and natural wood are an easy combination.
Wood adds warmth to white, green, blue, charcoal, and greige wall treatments.
You do not need to match the bench exactly to the flooring.
Related wood tones can create a more layered look.
Repeat the bench tone through a frame, basket, shelf, or nearby furniture if you want more visual connection.
How to Make DIY Board and Batten Look Built-In
Plan the Entire Wall First
Consider switches, doors, baseboards, hooks, and furniture.
Keep Spacing Consistent
Small layout errors become noticeable.
Make Clean Transitions
Pay attention to corners and existing trim.
Fill and Sand Carefully
Finish work matters.
Caulk Appropriate Gaps
Clean seams help separate boards read as one feature.
Use a Cohesive Paint Finish
Painting the trim and background together creates a unified look.
Integrate the Hooks
Plan them as part of the design rather than adding them randomly afterward.
Common DIY Board and Batten Mistakes
Copying Someone Else’s Measurements
Design for your wall.
Forgetting Actual Batten Width
The physical width affects spacing calculations.
Assuming the Floor Is Level
Check your references.
Ignoring Existing Baseboards
Plan how the materials meet.
Installing Before Locating Studs
Mark useful framing locations first.
Placing Battens Over Electrical Boxes
Keep electrical components accessible.
Using Decorative Trim as Structural Support
Heavy hooks require appropriate attachment.
Skipping Surface Preparation
Paint cannot hide every imperfection.
Rushing the Finish Work
Filling, sanding, caulking, and painting create the polished result.
Installing Too Many Hooks
Allow enough room for coats and bags to hang without becoming one dense pile.
Board and Batten Mudroom Safety
A functional mudroom wall needs to be more than decorative.
Use appropriate fastening methods for trim, benches, shelves, and hooks based on the wall construction and expected loads.
Do not rely on thin decorative paneling alone to support heavy backpacks, shelving, or other substantial items.
Locate electrical wiring and plumbing risks before drilling or fastening into walls. Use appropriate detection methods and exercise particular caution around outlets, switches, plumbing fixtures, and walls that may contain utilities.
Do not cover electrical boxes, vents, controls, or required access points.
If electrical devices need adjustment because of added wall thickness, use proper methods that comply with applicable requirements; hire a qualified electrician when necessary.
Secure tall storage furniture that could tip according to manufacturer instructions.
Keep benches stable and design built-in seating for the loads it will actually carry.
Maintain clear pathways through entry doors and avoid creating trip hazards with baskets, shoes, rugs, or projecting furniture.
Follow manufacturer instructions for saws, nailers, adhesives, fillers, primers, paints, and other products, and use appropriate ventilation and protective equipment.
FAQ About a DIY Board and Batten Mudroom
Is board and batten good for a mudroom?
Yes. It adds architectural detail and can provide a visually organized backdrop for appropriately mounted hooks, benches, and storage.
Can I install board and batten directly over drywall?
In many decorative installations, battens can be installed over suitable existing drywall. Whether you need a backer depends on the wall texture, desired finish, trim design, and installation method.
How high should board and batten be in a mudroom?
There is no universal height. Choose a proportion based on the ceiling, wall, bench, hooks, windows, switches, and desired appearance. Painter’s tape is an easy way to test the height before installation.
How do I space board and batten?
Plan the complete wall using its actual width and the actual width of your battens. Decide how many spaces you want, calculate the layout, and test it with painter’s tape before cutting.
Can I put hooks directly on board and batten?
Possibly, but the decorative board itself should not automatically be treated as adequate structural support. Use a mounting method appropriate for the hook, wall construction, and expected load.
What color is good for a board and batten mudroom?
Warm white, sage, olive, muted blue, navy, greige, and charcoal are all versatile choices.
Can you add board and batten to a small entryway?
Absolutely. A single wall with a few hooks and a narrow bench can create a useful mini mudroom.
Do I need to remove the baseboards?
Not always. It depends on the existing baseboard profile, batten thickness, and desired transition. Plan that detail before installing the vertical pieces.
Final Thoughts
A DIY board and batten mudroom can turn an ordinary entry wall into one of the most functional areas of the house.
But the best version starts with organization—not trim.
Decide what needs a home first. Determine how many coats, backpacks, shoes, and bags regularly enter through the door. Then design the board and batten, hooks, bench, and baskets around those needs.
Take time with the layout.
Use painter’s tape to test the panel height and batten spacing. Consider the existing baseboards. Locate useful framing. Plan around switches, outlets, doors, and vents before cutting anything.
Then give the finishing work the attention it deserves.
Careful filling, sanding, caulking, priming, and painting can make simple materials look like they have always been part of the house.
Finish with secure hooks, a practical bench if space allows, and just enough storage to contain everyday clutter.
Whether you have a large family mudroom or only a narrow wall beside the back door, board and batten can add character while helping that hardworking space finally feel organized.

