

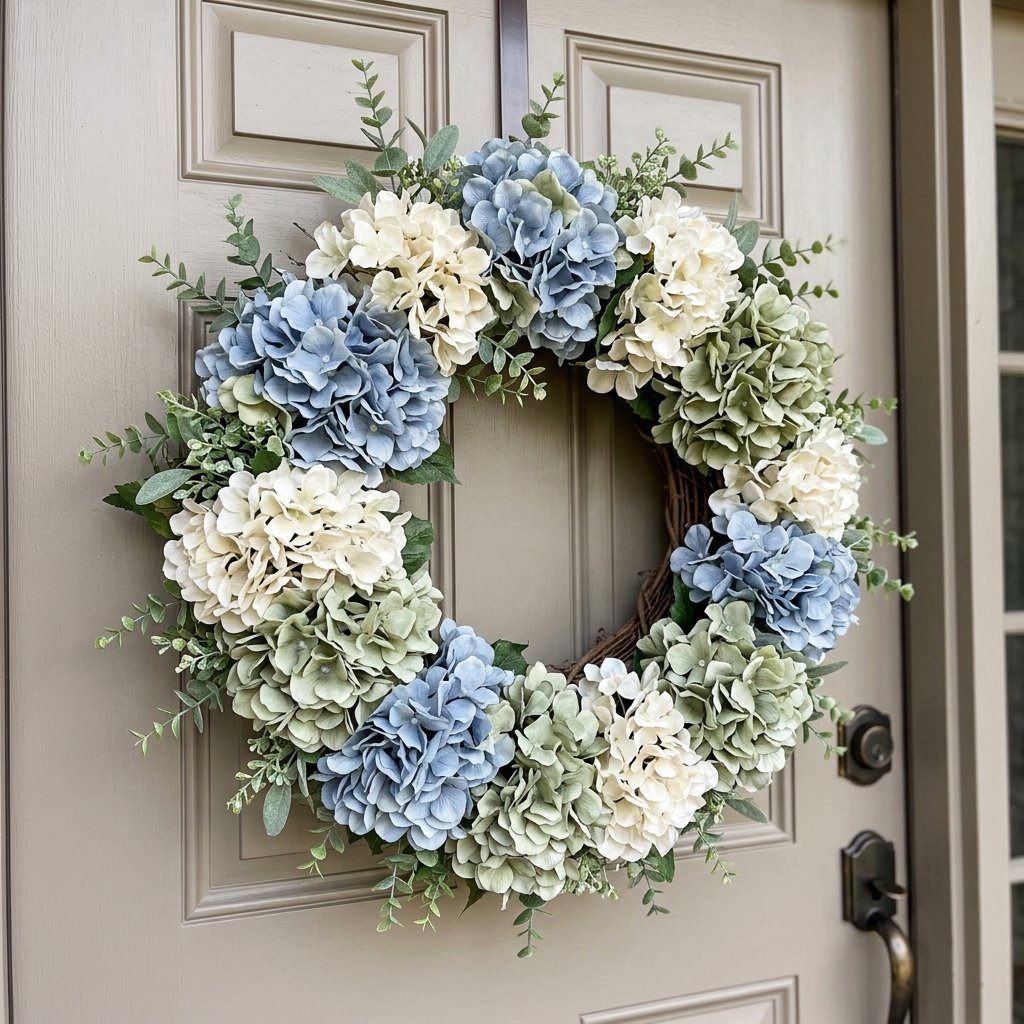
A hydrangea wreath is one of those simple decorating projects that can make a front door feel instantly more welcoming.
The large flower heads do most of the decorating work for you, which makes a DIY hydrangea wreath surprisingly beginner-friendly. You don’t need complicated floral arranging skills or dozens of different supplies to create something beautiful.
A grapevine wreath, several faux hydrangea stems, a little greenery, floral wire, and basic cutting tools are enough for a simple version.
You can make the wreath full and colorful, keep it soft and neutral, or concentrate the flowers along one side for a more modern asymmetrical look. The same basic technique can also be adapted for spring, summer, or early fall simply by changing the colors.
The key is arranging everything before permanently attaching it.
That allows you to adjust the flower placement, balance the colors, and make sure the wreath looks full from several feet away—not just when you’re holding it in your hands.
Here’s how to make an easy hydrangea wreath, along with tips for choosing flowers, attaching stems securely, filling gaps, hanging the finished wreath, and storing it so you can use it again.
Why Hydrangeas Work So Well for DIY Wreaths
Hydrangeas are particularly useful for wreath making because each flower head provides a lot of volume.
That means you can cover a wreath form relatively quickly.
They also come in plenty of decorating-friendly colors, including:
- White
- Cream
- Green
- Blue
- Purple
- Pink
- Dusty rose
Faux hydrangeas are especially convenient because you can reuse the wreath from year to year.
You also aren’t limited to whatever colors happen to be blooming locally.
Faux vs. Dried Hydrangeas
You can make a wreath with faux or dried hydrangeas, but they behave differently.
Faux Hydrangeas
Faux flowers are generally easier for beginners because they’re flexible, reusable, and less fragile.
Look for flowers with:
- Varied petal colors
- Matte rather than overly shiny surfaces
- Realistic leaves
- Natural-looking flower shapes
You don’t need every stem to be identical.
A little variation can make the wreath look more realistic.
Dried Hydrangeas
Real dried hydrangeas can be gorgeous, but they’re much more delicate.
Petals can crumble during construction, storage, and handling.
If you’re using dried flowers, work gently and consider displaying the wreath somewhere protected from moisture, wind, and frequent contact.
Supplies for a DIY Hydrangea Wreath
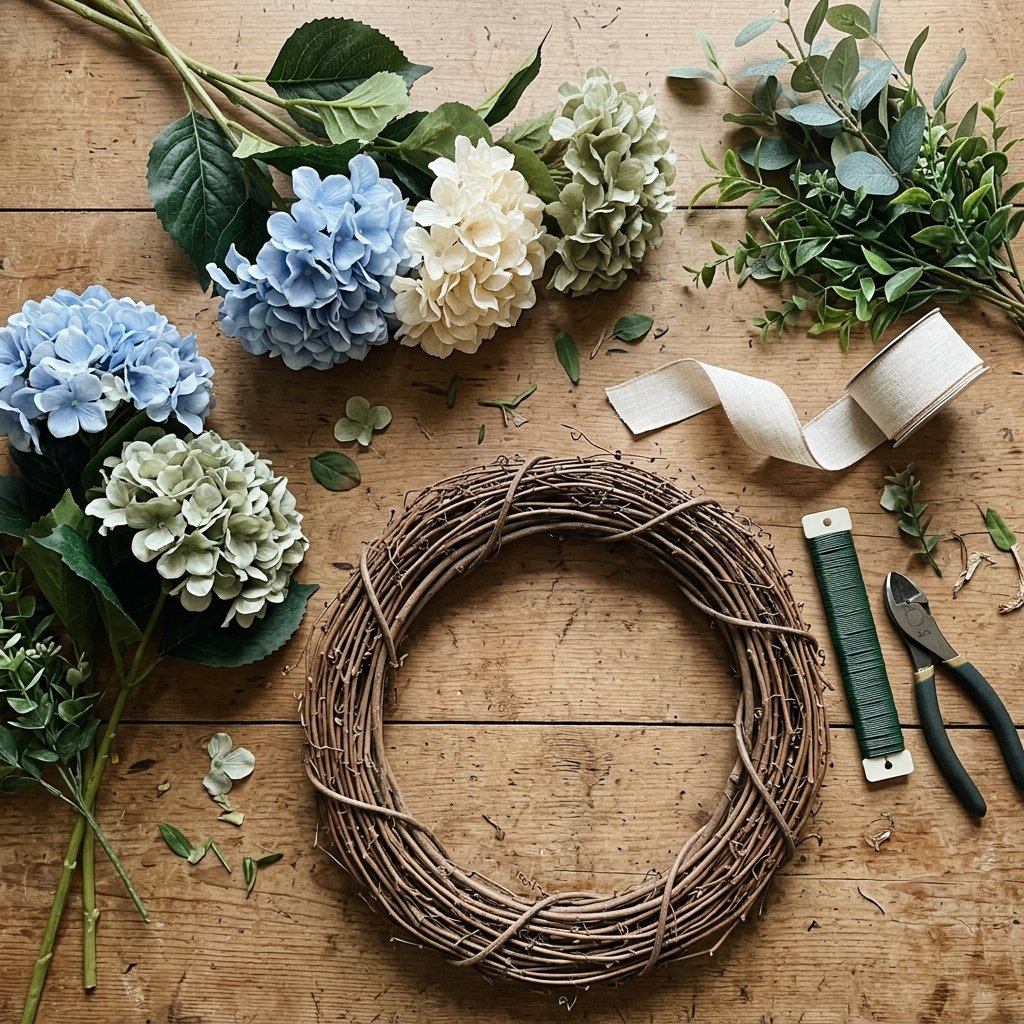
For a simple faux hydrangea wreath, you’ll need:
- Grapevine wreath form
- Faux hydrangea stems
- Faux or preserved greenery, if desired
- Floral wire
- Wire cutters
- Floral snips or suitable cutting tool
- Ribbon, optional
- Wreath hanger or appropriate hanging hardware
You may also choose to use hot glue for additional security, although many hydrangea stems can be attached effectively with the grapevine itself and floral wire.
If you use hot glue, protect your work surface and take care to avoid burns.
How Many Hydrangeas Do You Need for a Wreath?
The number depends on:
- Wreath diameter
- Flower-head size
- Desired fullness
- Whether you’re covering the entire wreath
- Amount of greenery
- Whether you’re creating an asymmetrical design
Instead of relying on one universal number, place the hydrangeas around the wreath form before cutting them.
That will show you whether you have enough.
Large hydrangea heads cover significantly more space than small ones.
If you’re shopping in person, place several stems together to visualize the approximate fullness.
Choosing a Hydrangea Wreath Color Palette
Before assembling the wreath, decide on a simple color palette.
Blue and Green
Soft blue hydrangeas with muted green flowers create a relaxed, garden-inspired look.
White and Green
Cream or white hydrangeas with greenery work beautifully with almost any front door color.
Pink and Cream
Muted pink combined with cream can create a soft spring or summer wreath.
Purple and Blue
Use dusty versions of these colors for a more subtle arrangement.
Green Hydrangeas
Green hydrangeas can create a simple organic wreath that transitions easily between seasons.
For a realistic look, try mixing several related shades rather than using one identical flower repeatedly.
Step 1: Choose Your Wreath Form
A grapevine wreath is one of the easiest bases for this project.
Its woven branches provide natural openings where you can tuck flower stems.
The grapevine can also remain partially visible, which means you don’t necessarily need enough flowers to cover every inch.
Choose a size appropriate for where you’ll display it.
Before purchasing a very large wreath for a front door, measure the available space so it doesn’t interfere with:
- Door frame
- Handle
- Storm or screen door
- Nearby lighting
Step 2: Remove Unnecessary Leaves
Faux hydrangea stems often come with several large leaves.
You can use some of them, but too many may hide the flowers.
Remove leaves you don’t need before arranging the stems.
Save them.
Individual leaves can be useful later for filling small gaps.
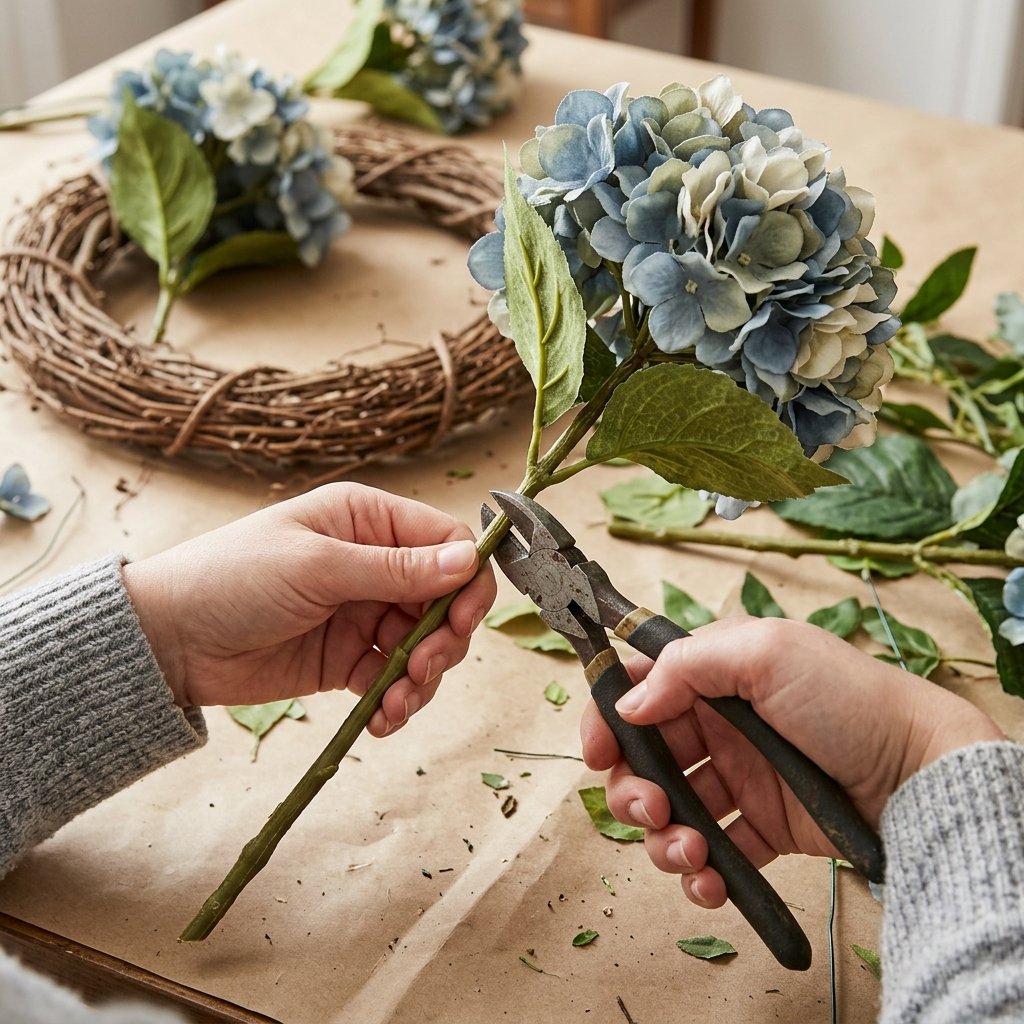
Step 3: Trim the Hydrangea Stems
Long floral stems can be awkward to insert into a wreath.
Trim them to a more manageable length, but don’t cut them extremely short immediately.
Leaving extra stem gives you more flexibility.
You can always shorten a stem later.
Use a tool appropriate for the stem construction. Faux flower stems may contain wire, so don’t use household scissors unless they’re designed to cut it.
Wear eye protection if there’s a risk of clipped wire ends flying during cutting.
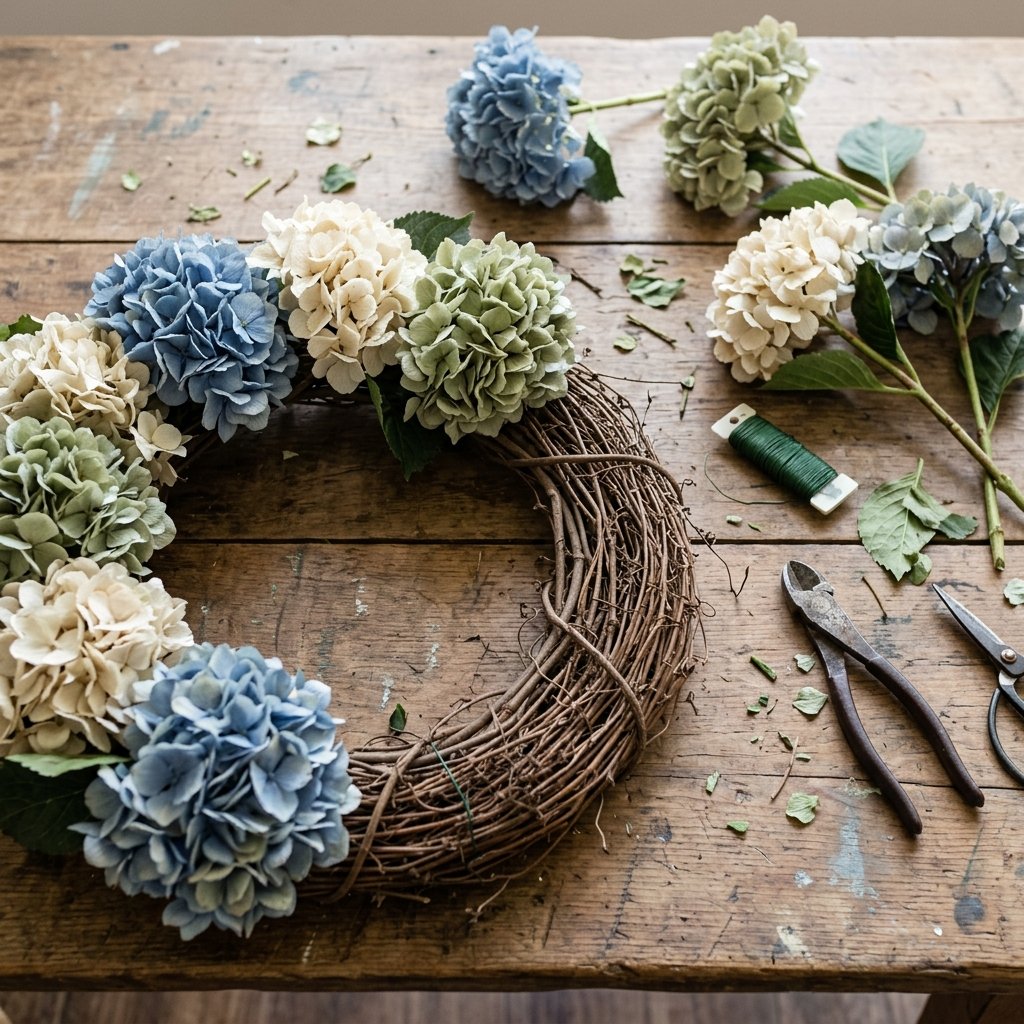
Step 4: Lay Out the Flowers Before Attaching Them
This is one of the most important steps.
Don’t start gluing the first flower you pick up.
Place the wreath flat on your work surface and arrange the hydrangeas loosely around it.
Move them until you’re happy with:
- Color distribution
- Spacing
- Fullness
- Overall shape
Take a quick photo with your phone.
That gives you a reference once you begin removing and attaching individual stems.
Step 5: Start With the Largest Hydrangeas
Use the largest flower heads to establish the basic structure.
Space them around the wreath rather than clustering every large bloom in one location unless you’re intentionally creating an asymmetrical arrangement.
Insert each stem between the grapevine branches.
Angle the flowers slightly rather than pointing every bloom straight forward.
That variation helps create dimension.
Step 6: Add the Remaining Hydrangeas
Fill the spaces between your anchor flowers.
Rotate the wreath occasionally while you work.
It’s surprisingly easy to make the top half full while leaving the bottom looking sparse.
Also stand the wreath upright every few flowers.
Something that looks balanced while lying flat can look different when hanging vertically.
Step 7: Secure Loose Stems With Floral Wire
Grapevine may hold some stems firmly enough on its own, but don’t assume every flower is secure.
Gently test each stem.
Use floral wire to secure anything that moves too easily.
Wrap the wire around a sturdy part of the wreath form and floral stem, keeping it hidden behind leaves or flowers.
Trim excess wire and tuck sharp ends inward so they aren’t exposed.
Step 8: Add Greenery
Greenery is optional.
Hydrangeas already provide plenty of volume, so you may prefer a wreath made almost entirely from flowers.
If you do add greenery, tuck small pieces between blooms.
Possible looks include:
- Soft leafy stems
- Eucalyptus-style foliage
- Fern-like greenery
- Hydrangea leaves
Use greenery to create movement and soften the outside edge.
Don’t add so much that the hydrangeas disappear.
Step 9: Fill Any Gaps
Hang or hold the wreath at eye level.
Then step several feet away.
Look for:
- Empty spaces
- Uneven flower distribution
- Exposed wire
- Awkward stems
- Areas that look too heavy
Fill small gaps with individual leaves or smaller flower pieces.
Sometimes repositioning an existing bloom is better than adding another entire flower.
Step 10: Decide Whether You Need Glue
Hot glue is optional for many faux hydrangea wreaths.
If stems and floral wire hold everything securely, you may not need it.
That’s helpful if you’d like to reuse the wreath form later.
If certain pieces repeatedly move, a small amount of suitable adhesive can provide extra security.
Follow the adhesive manufacturer’s instructions, protect your work surface, and keep hot adhesive away from skin.
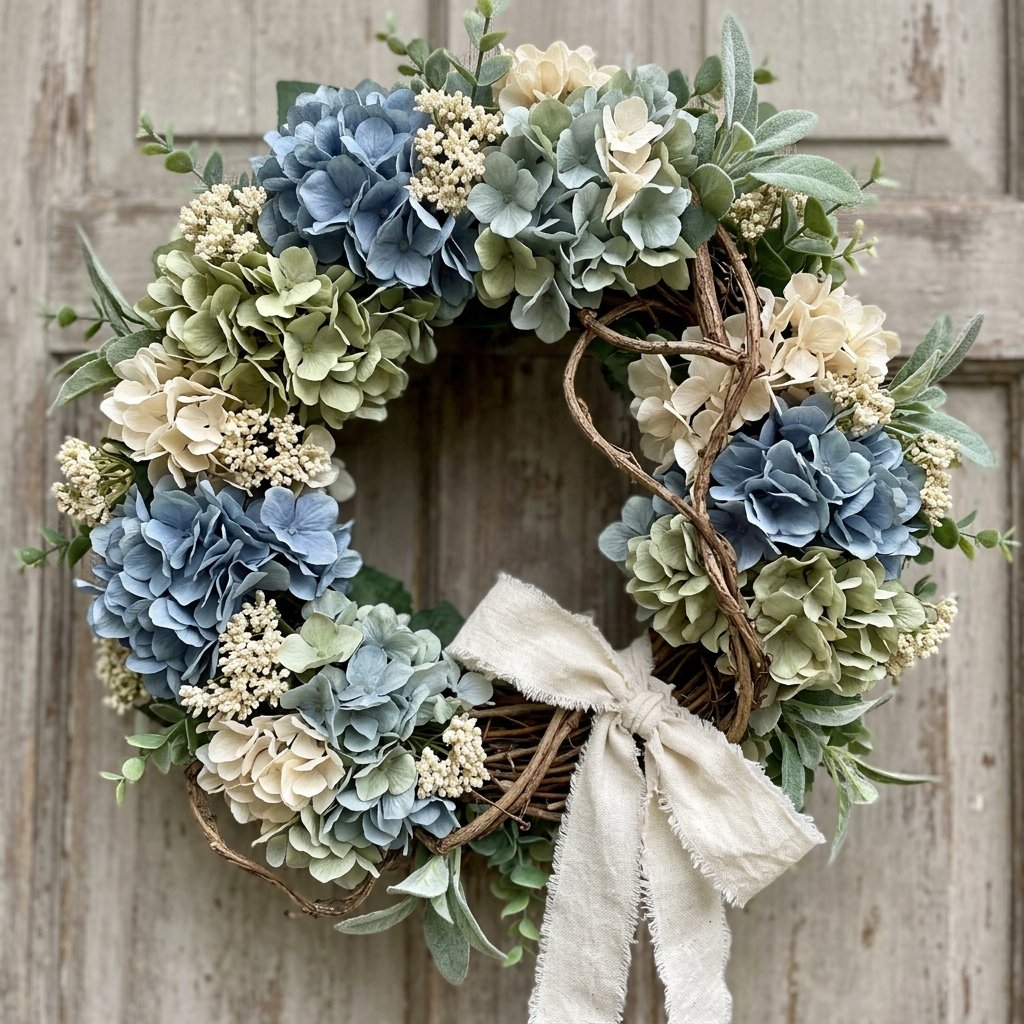
Step 11: Add a Ribbon
Ribbon isn’t required.
A full hydrangea wreath often looks beautiful without one.
But if you’d like to add ribbon, consider:
- Linen
- Velvet
- Grosgrain
- Simple woven ribbon
Choose a color that complements rather than competes with the flowers.
For example, a blue-and-green wreath might look beautiful with cream or muted blue ribbon.
Step 12: Fluff and Shape the Wreath
Faux flowers can become compressed during transportation and construction.
Once everything is secure, gently shape:
- Petals
- Leaves
- Greenery
Turn some flower heads slightly outward and others toward the center.
Avoid creating a perfectly flat ring of flowers.
Depth makes the arrangement look more natural.
Step 13: Check the Back
Before hanging the wreath, turn it over.
Make sure there are no:
- Sharp wire ends
- Loose stems
- Large glue blobs
- Protruding pieces that could scratch the door
Tuck or trim anything necessary.
If the wreath may rub against a delicate door finish, consider an appropriate protective solution that won’t damage the door.
Step 14: Hang Your Hydrangea Wreath
Choose hanging hardware appropriate for:
- Wreath weight
- Door material
- Door thickness
- Indoor or outdoor location
Possible solutions include an over-the-door wreath hanger or appropriately rated removable or permanent hardware.
Always check weight limits and manufacturer instructions.
Make sure the wreath doesn’t interfere with the door’s normal operation.
How to Make an Asymmetrical Hydrangea Wreath
You don’t have to cover the entire wreath form.
An asymmetrical design leaves part of the grapevine visible.
Try concentrating flowers along:
- Lower left
- Lower right
- One side
- Bottom third
Start with greenery to establish the shape.
Then place the largest hydrangea near the visual center of the floral grouping.
Add smaller flowers outward from it.
This style uses fewer flowers and allows the natural grapevine to become part of the design.
How to Make a Full Hydrangea Wreath
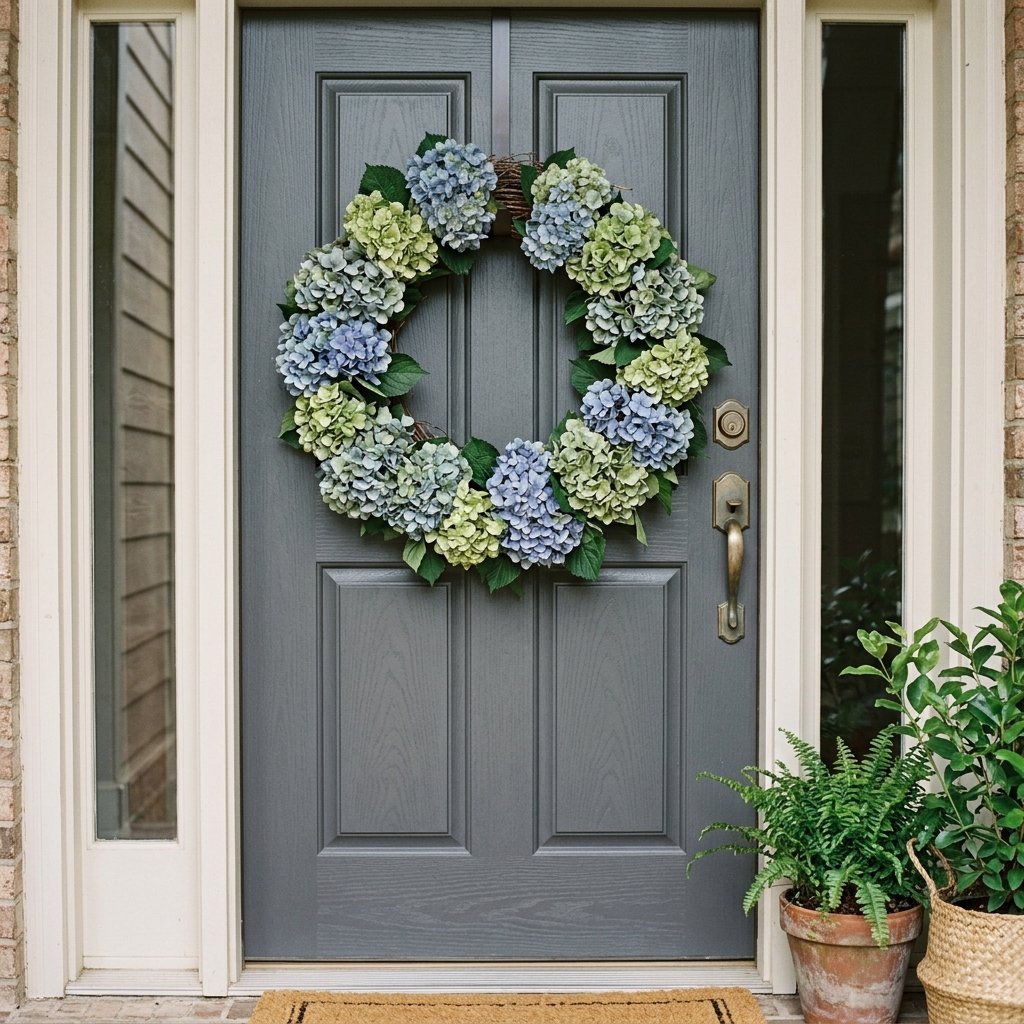
For a traditional full wreath, distribute flower heads around the entire form.
Overlap the edges slightly so the wreath form isn’t visible from the front unless you want it to be.
Use flowers at slightly different angles.
The outside flowers can face outward while the interior blooms angle toward the center opening.
This creates a fuller, more dimensional appearance.
How to Make a Hydrangea Wreath Look Expensive
You don’t necessarily need expensive flowers.
Focus on a few design details.
Mix Related Colors
Instead of twelve identical blue flowers, use several shades of blue, muted green, and cream.
Avoid Perfect Spacing
Nature isn’t perfectly symmetrical.
Use Realistic Greenery
One or two natural-looking foliage varieties can elevate inexpensive flowers.
Hide Construction Materials
Keep wire, cut stems, and glue out of sight.
Add Depth
Angle the flowers rather than creating a flat circle.
Edit
More flowers don’t automatically create a better wreath.
Stop when the arrangement feels balanced.
DIY Hydrangea Wreath for Spring
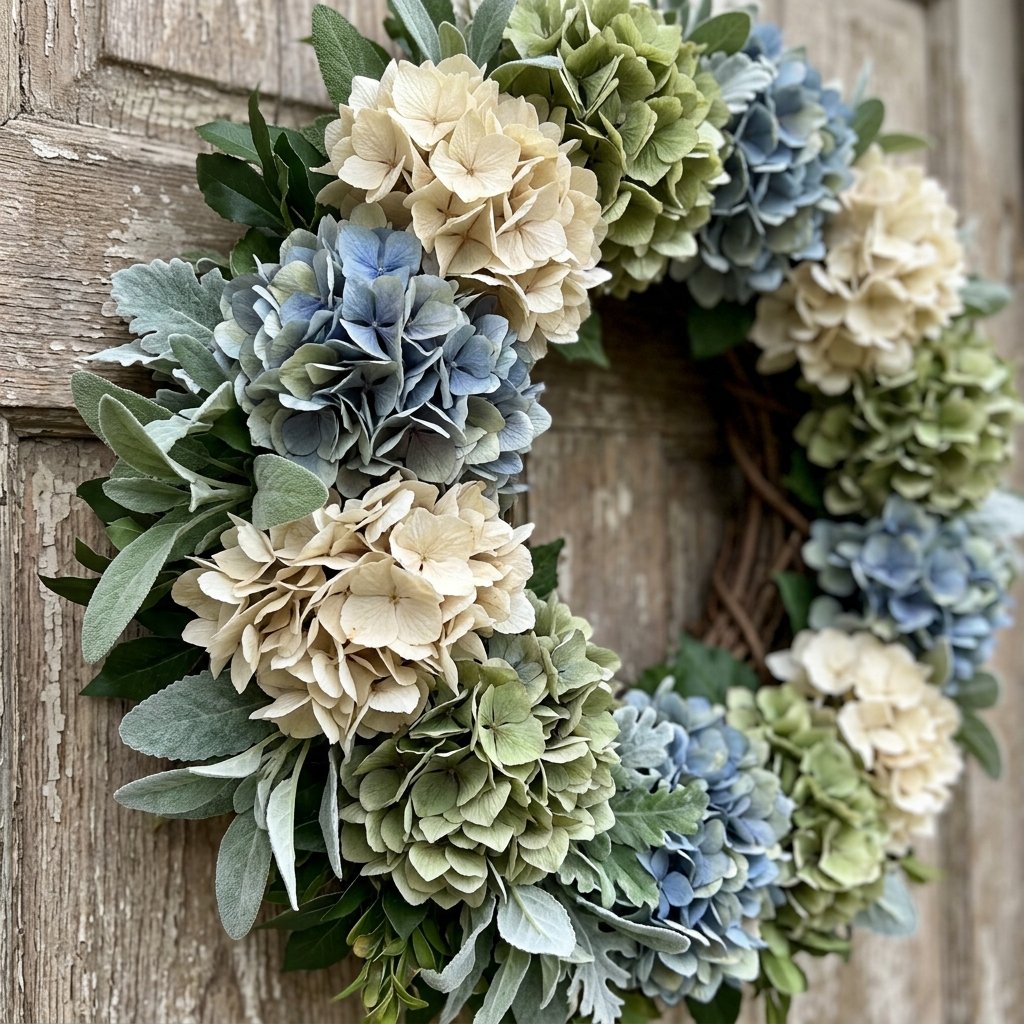
For spring, keep the palette fresh and light.
Try:
- White
- Pale blue
- Soft green
- Blush
Pair the hydrangeas with fresh-looking greenery.
A natural linen ribbon can complete the look.
DIY Hydrangea Wreath for Summer
Summer can handle a little more color.
Consider:
- Blue
- Lavender
- Pink
- Green
- Cream
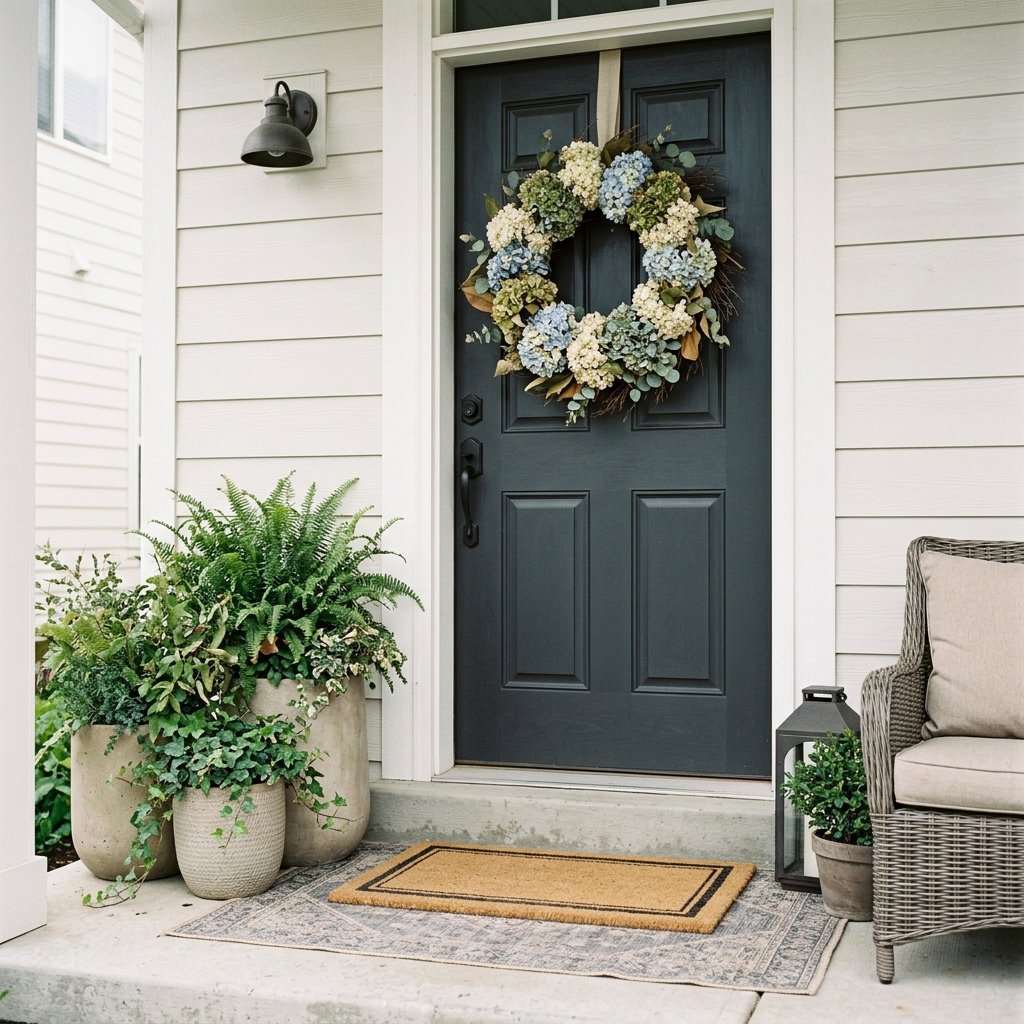
A blue hydrangea wreath looks especially pretty on a white, charcoal, navy, or natural wood door.
Hydrangea Wreath for Early Fall
Hydrangeas can transition beautifully into fall.
Instead of bright spring colors, use:
- Muted green
- Dusty purple
- Faded blue
- Burgundy
- Cream
- Brown
Add a few dried-looking leaves or grasses for more autumn texture.
Can You Use Real Hydrangeas for a Wreath?
Yes, but expect a different result.
Fresh hydrangeas contain significant moisture and may wilt as they dry.
If you want a wreath made from real flowers, dried hydrangeas are generally more practical.
Real dried blooms will be more fragile than faux ones, so handle them gently.
Their changing, imperfect appearance is part of their charm.
How to Make a Dried Hydrangea Wreath
Start with completely dried hydrangeas.
Leave enough stem to attach each flower to the wreath form.
Work carefully because the petals can crumble.
Rather than repeatedly repositioning flowers, decide on the approximate layout before attaching them.
Use floral wire gently around the stems.
Avoid displaying a dried wreath where it will be exposed to rain, high moisture, or strong wind.
Can a Faux Hydrangea Wreath Go Outside?
That depends on the specific materials.
Not every artificial flower is intended for outdoor exposure.
Sunlight, heat, moisture, and weather can fade or damage faux flowers.
Check the manufacturer’s recommendations.
A covered porch or protected entry may help reduce exposure, but outdoor conditions can still affect the wreath over time.
Where Else Can You Hang a Hydrangea Wreath?
Hydrangea wreaths aren’t limited to the front door.
Try one:
- Above a mantel
- On an interior door
- Over a console
- On a decorative hook
- On a pantry door
- In an entryway
Indoors, you also don’t have to worry as much about weather exposure.
How to Store a Hydrangea Wreath
Large flowers can become crushed if they’re packed tightly.
Store the wreath in a container that provides enough room around the flower heads.
Before storing:
- Remove dust.
- Check for loose flowers.
- Make sure everything is dry.
- Gently reshape petals.
- Place it in a wreath storage container or roomy box.
Avoid stacking heavy decorations on top.
How to Refresh an Old Hydrangea Wreath
If you already own a hydrangea wreath that’s looking tired, you may not need to rebuild it.
Try:
- Replacing faded blooms
- Adding fresh greenery
- Removing dated ribbon
- Changing the color palette
- Repositioning flowers
- Adding a few larger blooms
Sometimes removing elements makes an older wreath look more current.
Common DIY Hydrangea Wreath Mistakes
Cutting Stems Too Short Immediately
Leave yourself room to adjust them.
Gluing Before Planning
Arrange the flowers first.
Making the Wreath Completely Flat
Angle the flowers to create dimension.
Using Too Many Identical Flowers
Mixing related shades can look more natural.
Adding Too Much Greenery
Let the hydrangeas remain the focus.
Forgetting to Look at the Wreath Vertically
Stand it up periodically while working.
Leaving Wire Ends Exposed
Trim and tuck them safely.
Using Household Scissors on Wired Stems
Use an appropriate cutting tool.
Hanging the Wreath With Underrated Hardware
Check the finished weight and hardware rating.
Assuming Faux Flowers Are Weatherproof
Confirm whether the materials are appropriate for outdoor use.
FAQ About Making a DIY Hydrangea Wreath
What kind of wreath form is best for hydrangeas?
A grapevine wreath is an easy choice because flower stems can be tucked between the branches and secured with floral wire.
How many hydrangeas do I need for a wreath?
It depends on the wreath size, flower-head size, desired fullness, and whether you’re covering the entire form. Lay the flowers around the wreath before cutting to determine how many you’ll need.
Do I have to use hot glue?
No. Faux flower stems can often be secured using the grapevine structure and floral wire. Glue can be added when extra security is necessary.
What colors look good in a hydrangea wreath?
White, cream, green, blue, purple, and muted pink all work beautifully. Combining several related shades can create a more natural look.
How do you attach hydrangeas to a grapevine wreath?
Trim the stem to a manageable length, tuck it securely between the grapevine branches, and use floral wire where needed to prevent movement.
Can you make a wreath with real hydrangeas?
Yes. Dried hydrangeas are generally easier to use than fresh blooms, although they’re more fragile than faux flowers.
How do you keep a hydrangea wreath from looking fake?
Choose flowers with realistic petal variation, mix related colors, incorporate natural-looking foliage, vary flower angles, and avoid making every bloom perfectly evenly spaced.
Can I put a faux hydrangea wreath on my front door?
Possibly, but check whether the specific artificial flowers and materials are suitable for outdoor use. Protected locations can reduce exposure, but sunlight and weather may still cause fading.
Final Thoughts
A DIY hydrangea wreath is a simple project that can make a surprisingly big impact on a front door, mantel, or entryway.
And you don’t need complicated floral-arranging skills to make one.
Start with a grapevine wreath.
Choose hydrangeas in a simple color palette.
Lay everything out before cutting or attaching the flowers.
Then add the largest blooms first, fill the remaining spaces, secure loose stems with floral wire, and use greenery to soften the edges.
Most importantly, keep stepping back while you work.
A wreath needs to look balanced from several feet away, not just from six inches above your craft table.
You can make it symmetrical and full or leave part of the grapevine exposed for a looser asymmetrical design.
Either way, let the hydrangeas do most of the work.
Their large blooms provide plenty of color, texture, and volume without requiring dozens of different floral stems.
Once you’ve finished, secure every piece, tuck away sharp wire ends, choose hanging hardware appropriate for the wreath’s weight, and display it somewhere you can enjoy it.
It’s an easy seasonal project—and one you can customize again and again simply by changing the flowers and colors.