

A DIY small laundry room makeover can make one of the most practical rooms in the house feel much more organized, efficient, and pleasant to use.
Small laundry spaces often have the same problems: limited storage, cluttered countertops, awkward gaps beside appliances, poor lighting, and nowhere convenient to sort, fold, or hang clothes. The good news is that you do not need a large room or a major renovation to improve it.
A few targeted updates—such as paint, shelving, wall storage, better lighting, baskets, and a simple folding surface—can completely change how the room functions.
The most important part is to work around the washer and dryer safely. Keep appliance clearances, electrical connections, water lines, dryer venting, shutoff valves, and manufacturer instructions in mind throughout the makeover.
Below are 15 practical ideas to help you create a small laundry room that looks better and works harder.
1. Start With a Clear Plan
Before buying decor or storage, measure the room carefully.
Record:
- Wall width
- Ceiling height
- Appliance dimensions
- Space between appliances
- Distance above appliances
- Door swing
- Window placement
- Utility locations
Also note where the washer hoses, drain, electrical outlets, gas connection if applicable, and dryer vent are located.
These details determine what you can safely add.
For example, a shelf that looks perfect on paper may block access to shutoff valves or interfere with a dryer vent.
Sketch the room and mark the main zones you need:
- Washing
- Drying
- Folding
- Hanging
- Storage
A simple plan helps you spend money where it will actually improve the room.
2. Declutter Before the Makeover
Laundry rooms tend to collect unrelated household items.
Before installing anything, remove what does not belong.
Sort through:
- Cleaning products
- Old detergents
- Empty containers
- Lost socks
- Extra hangers
- Random tools
- Household overflow
Keep only what you regularly use in the laundry room.
If you have duplicate cleaning products, consolidate them where appropriate.
Do not mix chemical products together, and keep everything in its original labeled container unless the product specifically allows another storage method.
A smaller room feels much larger when unnecessary clutter is gone.
3. Paint the Walls a Light, Fresh Color
Paint is one of the easiest budget-friendly changes.
Light colors can make a small laundry room feel brighter and cleaner.
Try:
- Warm white
- Soft greige
- Pale beige
- Muted blue
- Gentle green
You can also use a darker color if the room has good lighting and you want a moodier look.
Laundry rooms often experience humidity, so choose a wall paint suitable for the conditions in the space and follow the paint manufacturer’s preparation and drying instructions.
If there is peeling paint, moisture damage, or visible mold, address the underlying problem before repainting.
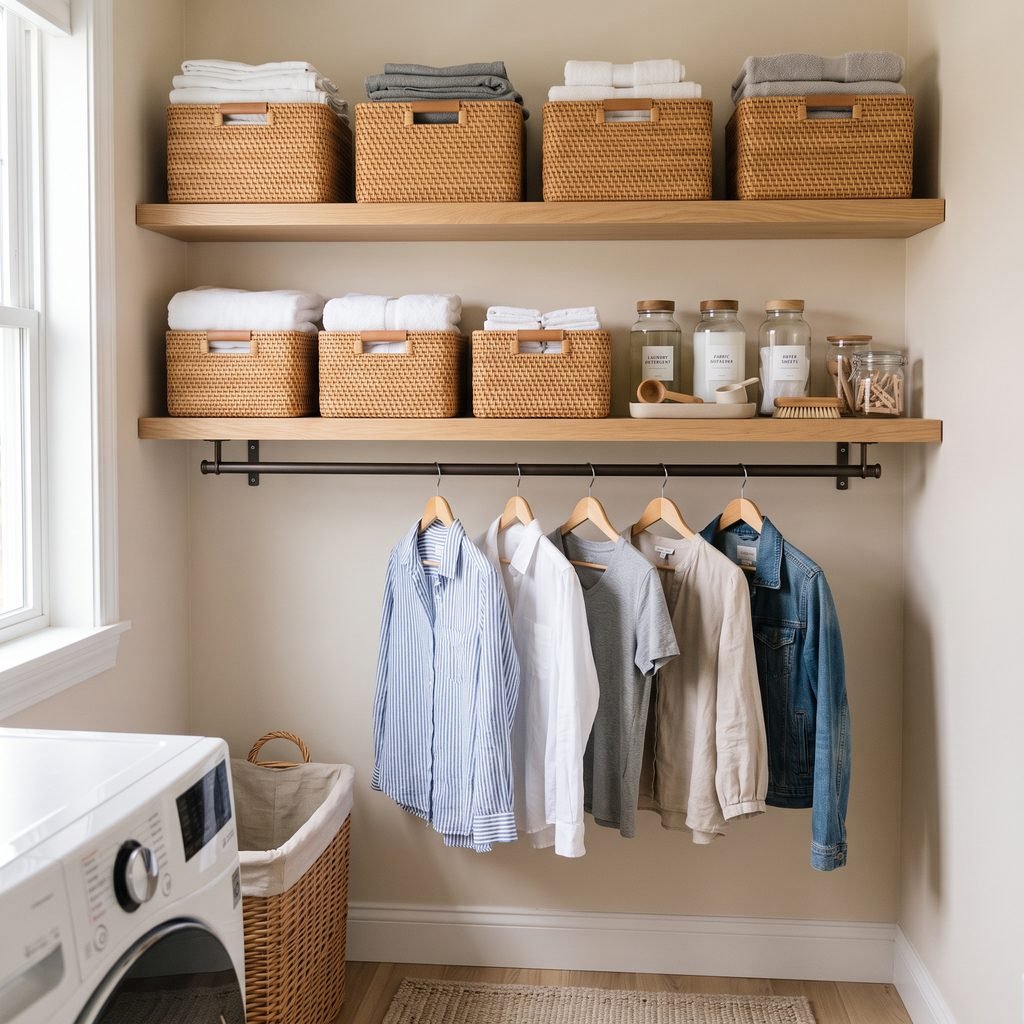
4. Add Shelving Above the Washer and Dryer
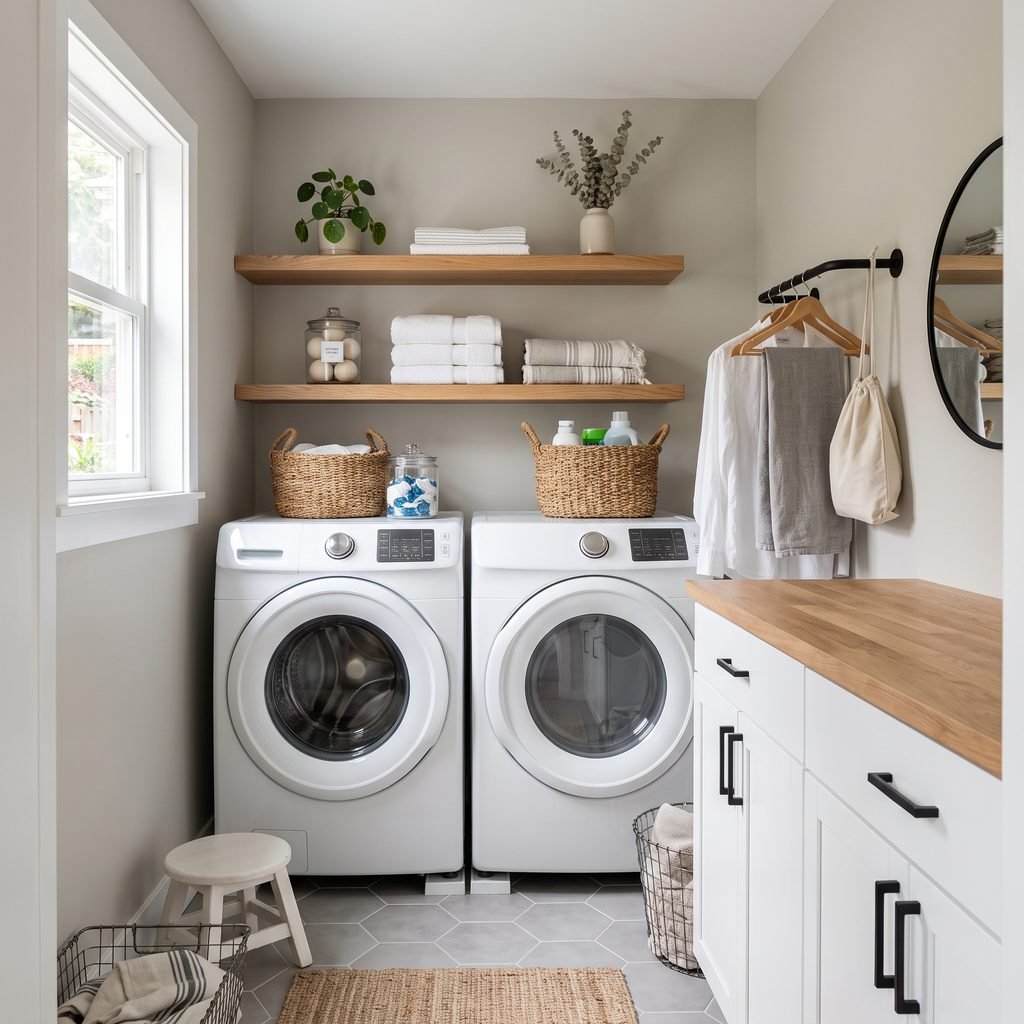
The wall above the appliances is often the best place to gain storage.
Install one or two shelves for:
- Detergent
- Stain removers
- Dryer supplies
- Cleaning cloths
- Baskets
- Extra towels
Keep frequently used products on the lower shelf.
Reserve upper shelves for lighter or less frequently used items.
Use brackets and anchors appropriate for your wall type and the expected load.
If you have a top-loading washer, make sure the lid can open fully before deciding on shelf height.
Also keep enough access around utility connections for inspection and maintenance.
5. Build a Simple Folding Counter
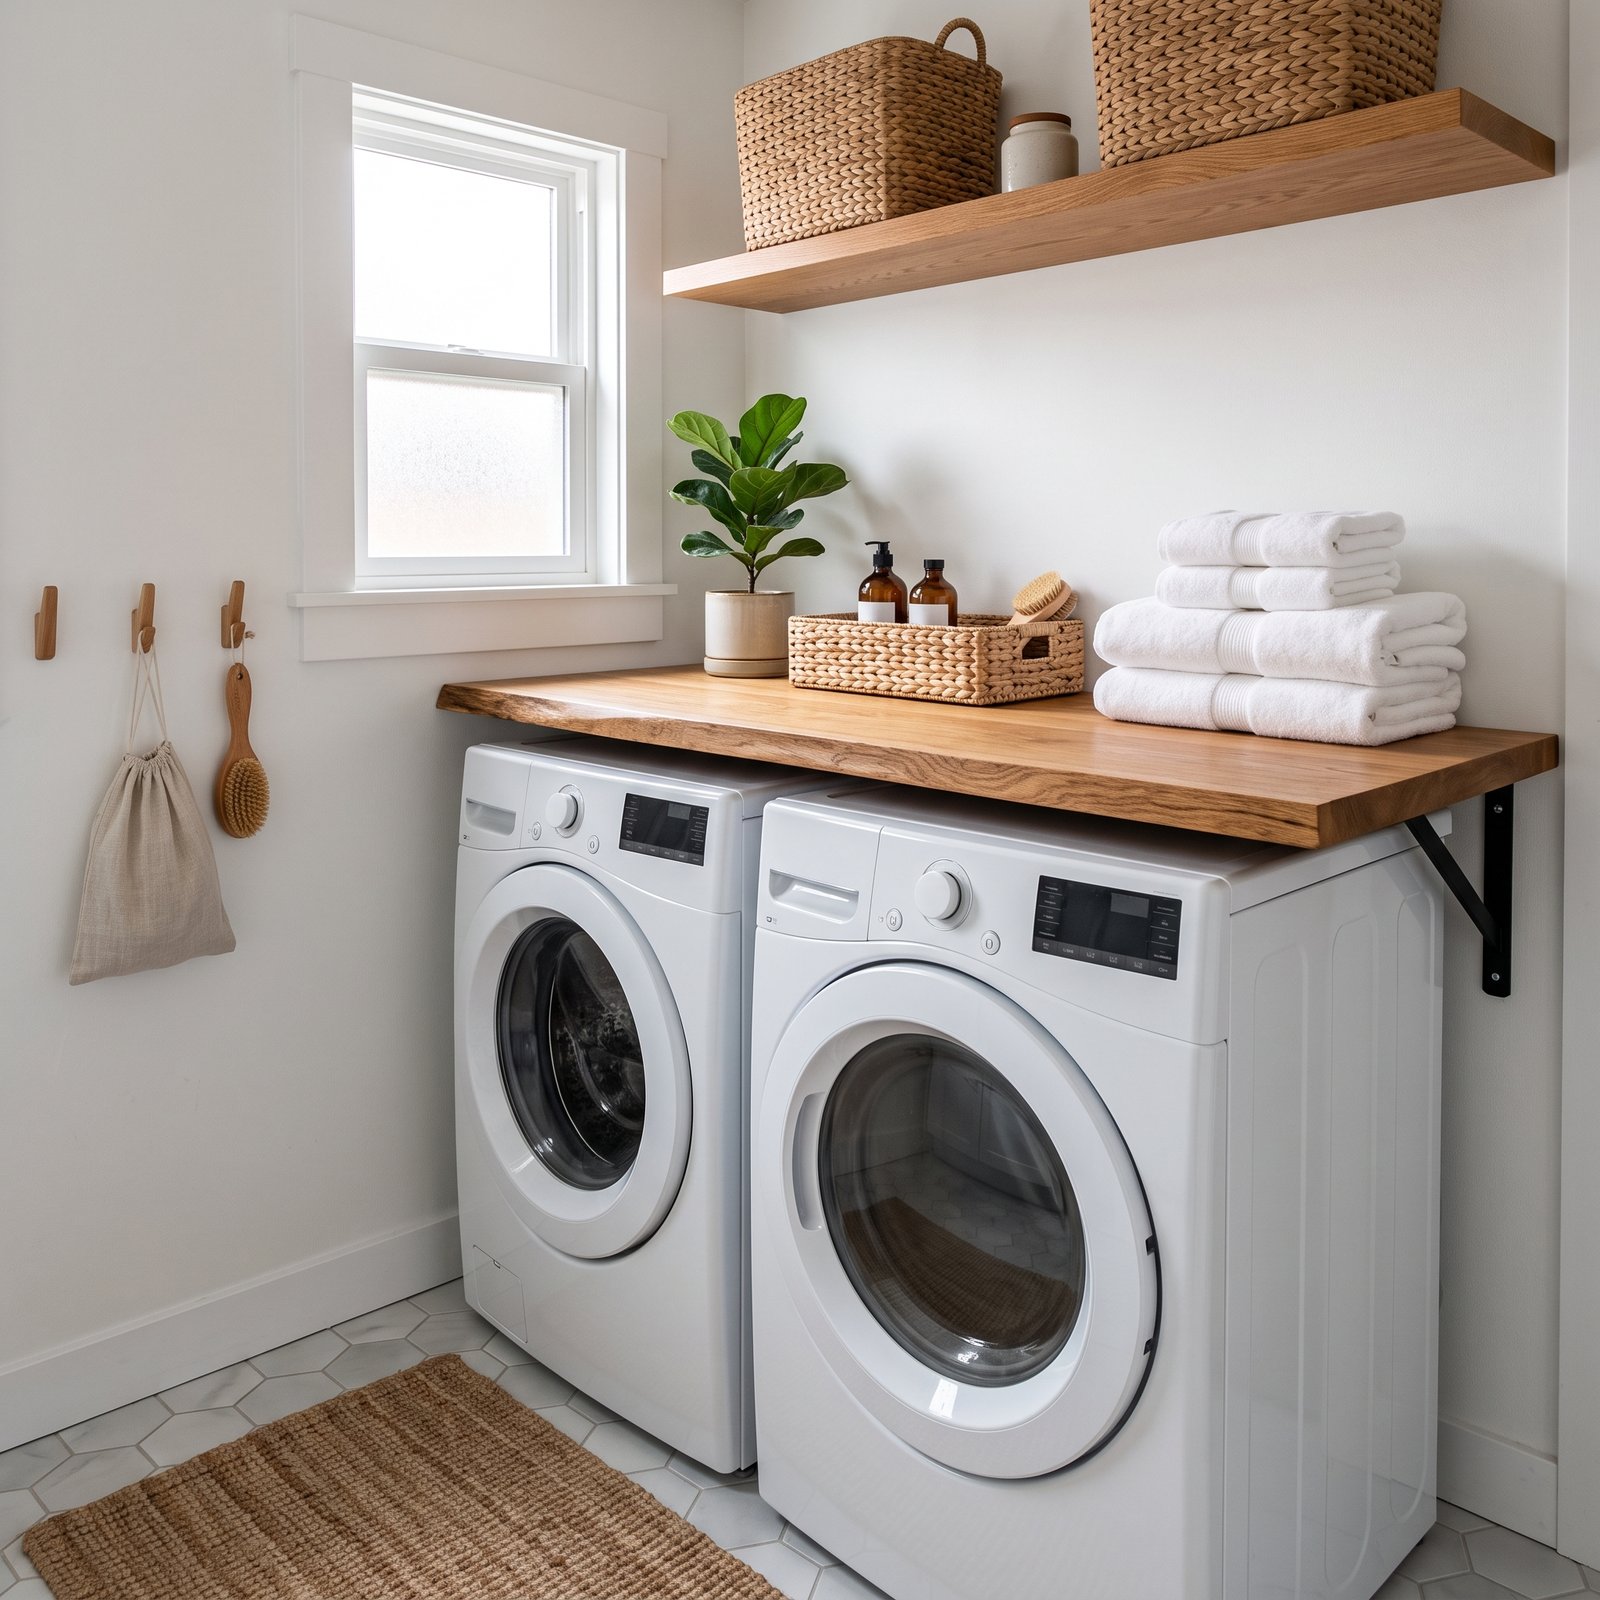
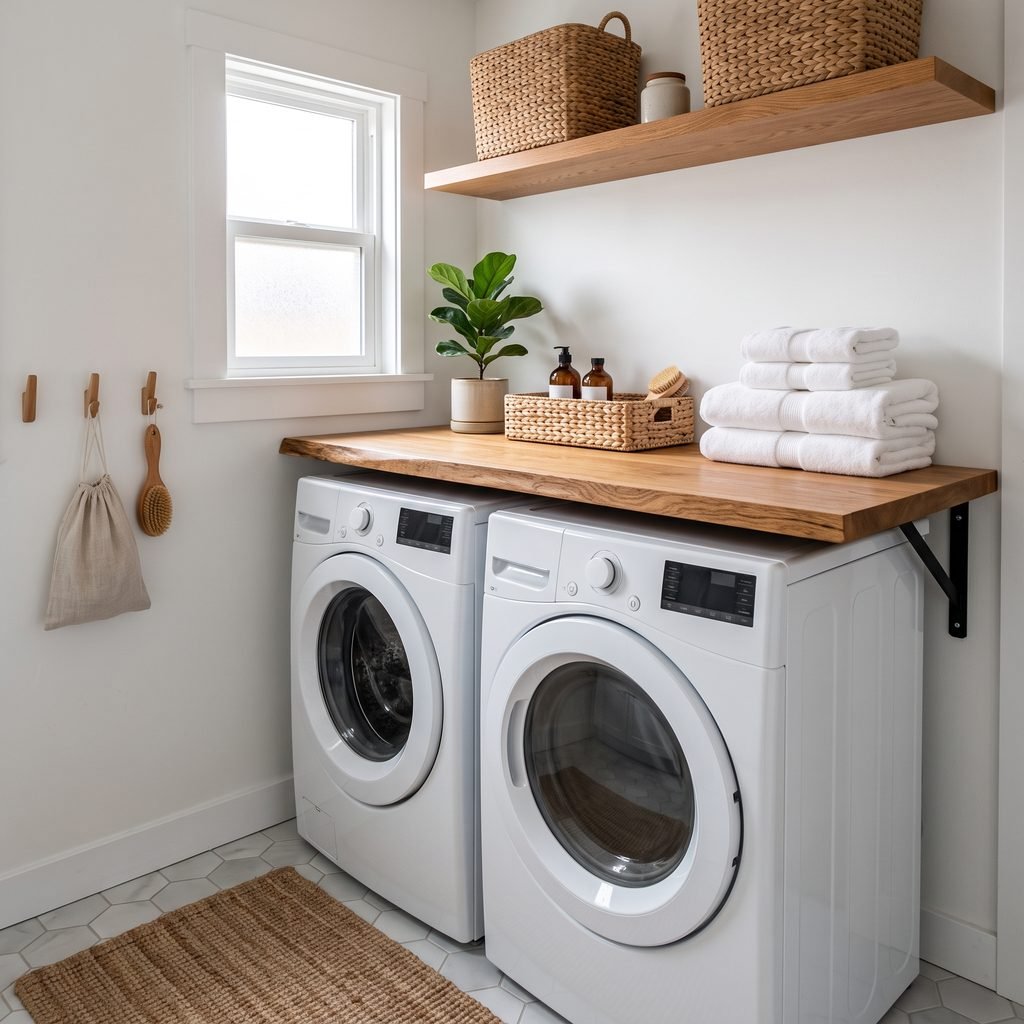
If you have front-loading appliances placed side by side, a countertop above them can create valuable folding space.
A simple surface can be made from a suitable wood panel or countertop material.
However, do not rest heavy materials directly on appliances unless the appliance manufacturer allows it.
In many setups, the counter should be supported independently by side cleats, brackets, or cabinetry.
Leave required clearance around the machines for vibration, airflow, servicing, and movement.
A folding counter can be used for:
- Sorting laundry
- Folding clothes
- Holding baskets
- Setting down supplies
A continuous surface also helps visually unify the appliances.
6. Add a Hanging Rod
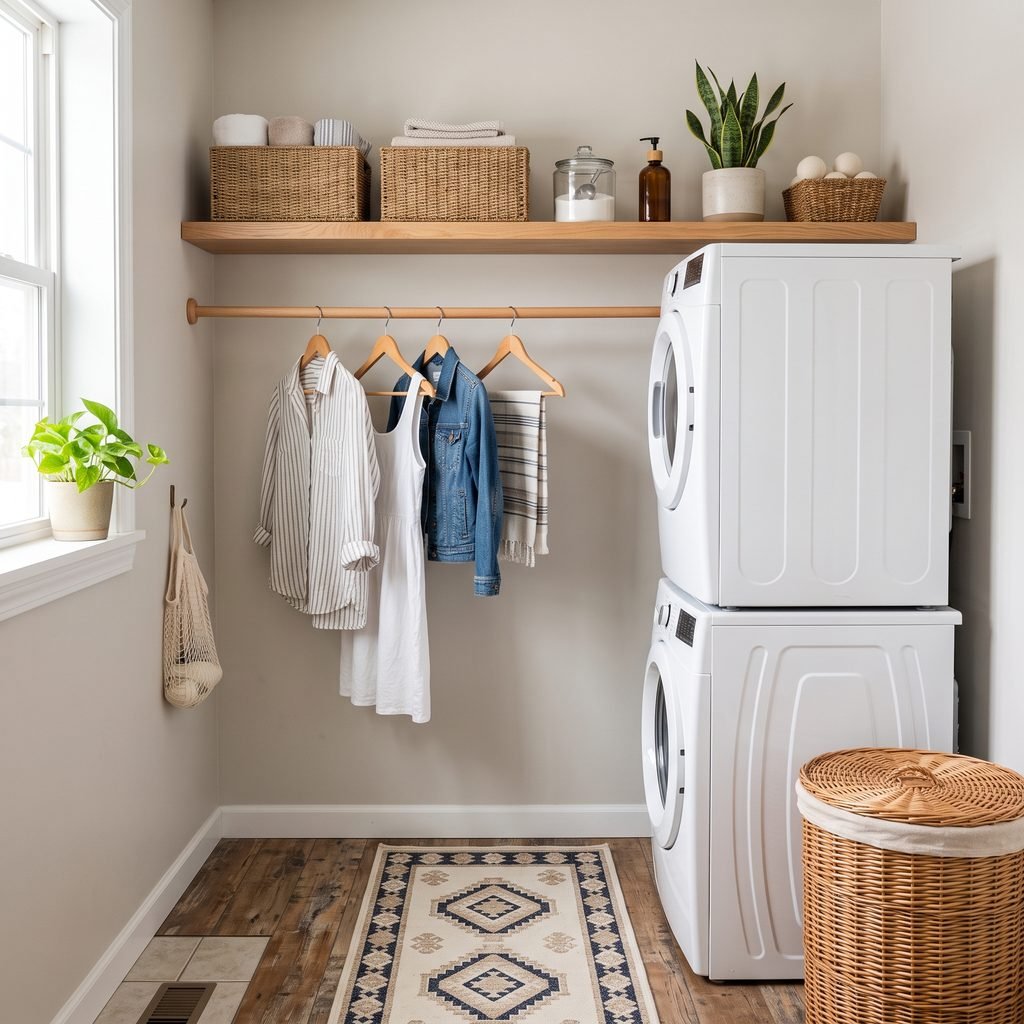
A hanging rod is useful for shirts, dresses, delicates, and clothes that should not go in the dryer.
Install one:
- Between upper cabinets
- Under a shelf
- Across an unused wall
- In a recessed alcove
Use hardware designed for the rod and anticipated weight.
Do not place a hanging rod where wet clothing could drip onto electrical outlets, appliances, or walkways.
A short rod is usually enough for a small room.
You do not need to turn the laundry room into a full closet.
7. Use Baskets to Hide Visual Clutter
Baskets help make open shelving look organized.
Use them for categories such as:
- Cleaning cloths
- Dryer accessories
- Extra supplies
- Lost socks
- Pet laundry
Choose baskets that fit the shelf depth rather than buying them based only on appearance.
Matching baskets can create a calm look, but they do not all need to be identical.
Labels can help if several baskets look the same.
Avoid storing hazardous chemicals in decorative baskets where children might mistake them for ordinary household items.
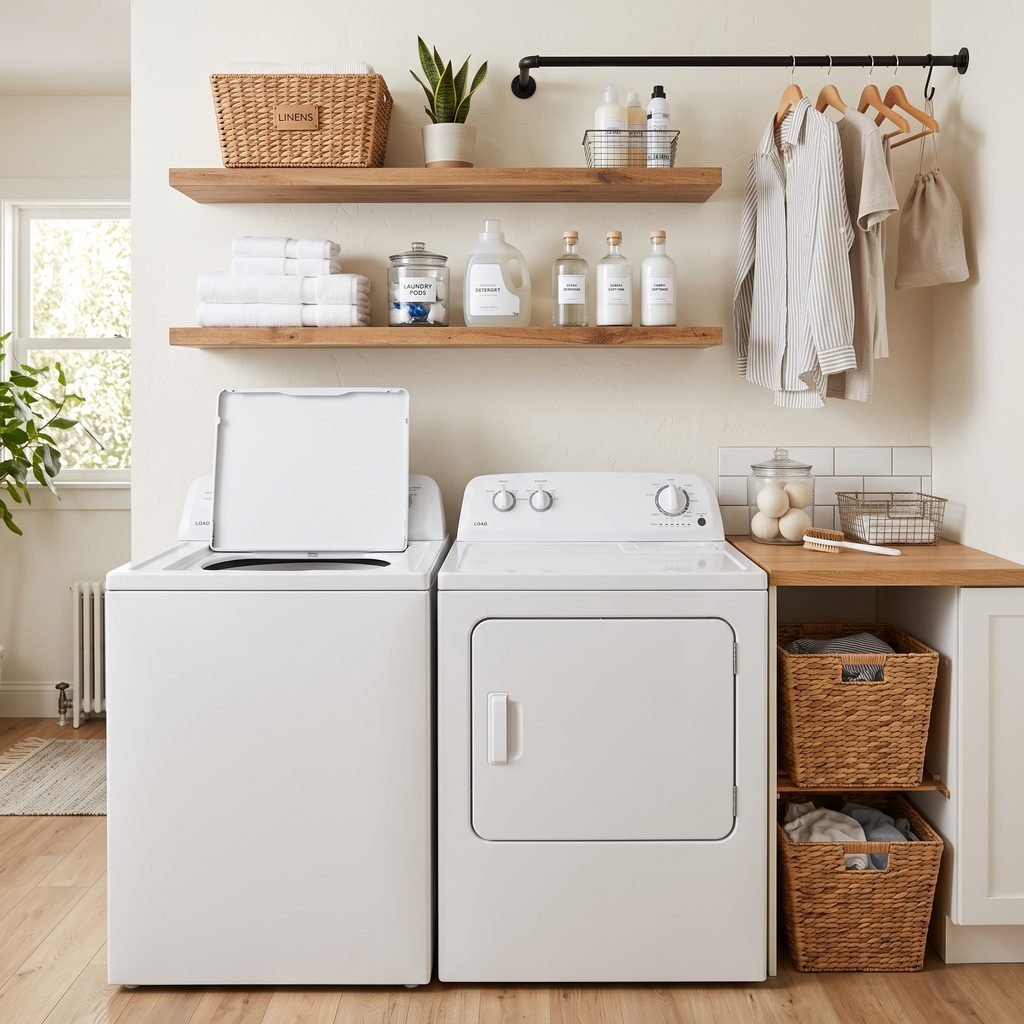
8. Install Cabinets for Closed Storage
If your laundry room looks cluttered even after organizing, closed cabinets may be a better choice than open shelving.
Cabinets can hide:
- Detergent
- Cleaning supplies
- Ironing products
- Household extras
Wall cabinets are especially useful in narrow laundry rooms because they add storage without consuming floor space.
Make sure cabinet doors do not interfere with appliance doors, windows, or the entry door.
Secure cabinets properly into suitable framing or with approved fastening systems.
For households with young children, consider child-resistant storage for laundry products and cleaners.
9. Make Use of Narrow Gaps
Small gaps beside a washer or dryer can sometimes become useful storage.
A slim rolling cart may hold:
- Detergent
- Cleaning sprays
- Cloths
- Dryer sheets
- Small laundry supplies
Measure the space carefully before purchasing or building anything.
Do not force storage into an area needed for appliance ventilation, hoses, gas connections, or servicing.
A narrow cart should roll out easily so you can access the space behind it.
10. Add Wall-Mounted Storage
When floor space is limited, use the walls.
Try:
- Hooks
- Peg rails
- Small baskets
- Ironing board holders
- Broom clips
- Utility racks
Hooks can hold:
- Reusable laundry bags
- Hangers
- Small cleaning tools
- Lint brushes
Do not hang heavy items from weak adhesive hooks.
Use hardware rated for the expected weight and suited to the wall surface.
11. Upgrade the Lighting
Poor lighting can make a small laundry room feel cramped.
A brighter fixture can make the space feel cleaner and help with stain treatment and sorting.
You might choose:
- Simple flush-mount ceiling light
- Semi-flush fixture
- Under-cabinet lighting
- Task lighting near a folding area
Use fixtures suitable for the location.
Hardwired electrical work should be completed safely and according to local requirements.
If you are not experienced with electrical work, hire a qualified electrician.
Lighting is one of those improvements that affects both appearance and function.
12. Add a Simple Backsplash
A backsplash can bring pattern and personality into a small laundry room.
Budget-friendly options may include:
- Paint
- Traditional tile
- Beadboard
- Removable decorative panels
- Peel-and-stick products suitable for the surface and environment
Install the material according to the manufacturer’s directions.
Pay attention to moisture resistance, heat exposure, surface preparation, and adhesive compatibility.
Do not cover electrical boxes, plumbing access, appliance vents, or utility connections.
In a small room, you may only need a backsplash behind the folding counter or utility sink to make an impact.
13. Create a Laundry Sorting System
Laundry piles make small rooms feel cluttered quickly.
Create a simple system before clothes reach the floor.
Depending on your household, use baskets for:
- Whites
- Darks
- Towels
- Delicates
You do not need many categories.
Two or three hampers may be enough.
Stacked or narrow hampers can save floor space.
If the laundry room is too small for hampers, keep them in nearby bedrooms and bring loads in as needed.
14. Give the Utility Sink a Makeover
If your laundry room has a utility sink, it can become part of the room rather than an eyesore.
Depending on the sink and surrounding structure, you might:
- Paint an appropriate cabinet base
- Add a simple skirt
- Upgrade surrounding storage
- Install a shelf above it
- Replace worn hardware
Do not cover plumbing shutoffs or connections that need access.
If changing the faucet or plumbing, turn off the water properly and follow local plumbing requirements.
Call a plumber if you find leaks, corrosion, or connections you are not comfortable working on.
15. Finish With Simple Decor
The laundry room does not need much decoration.
A few details can make it feel finished:
- Small framed art
- Neutral rug
- Basket
- Plant suitable for the light
- Attractive storage containers
- Simple wall hook
Keep decor off appliance controls, vents, and work surfaces.
In a small room, functionality should come first.
One or two decorative pieces are often enough.
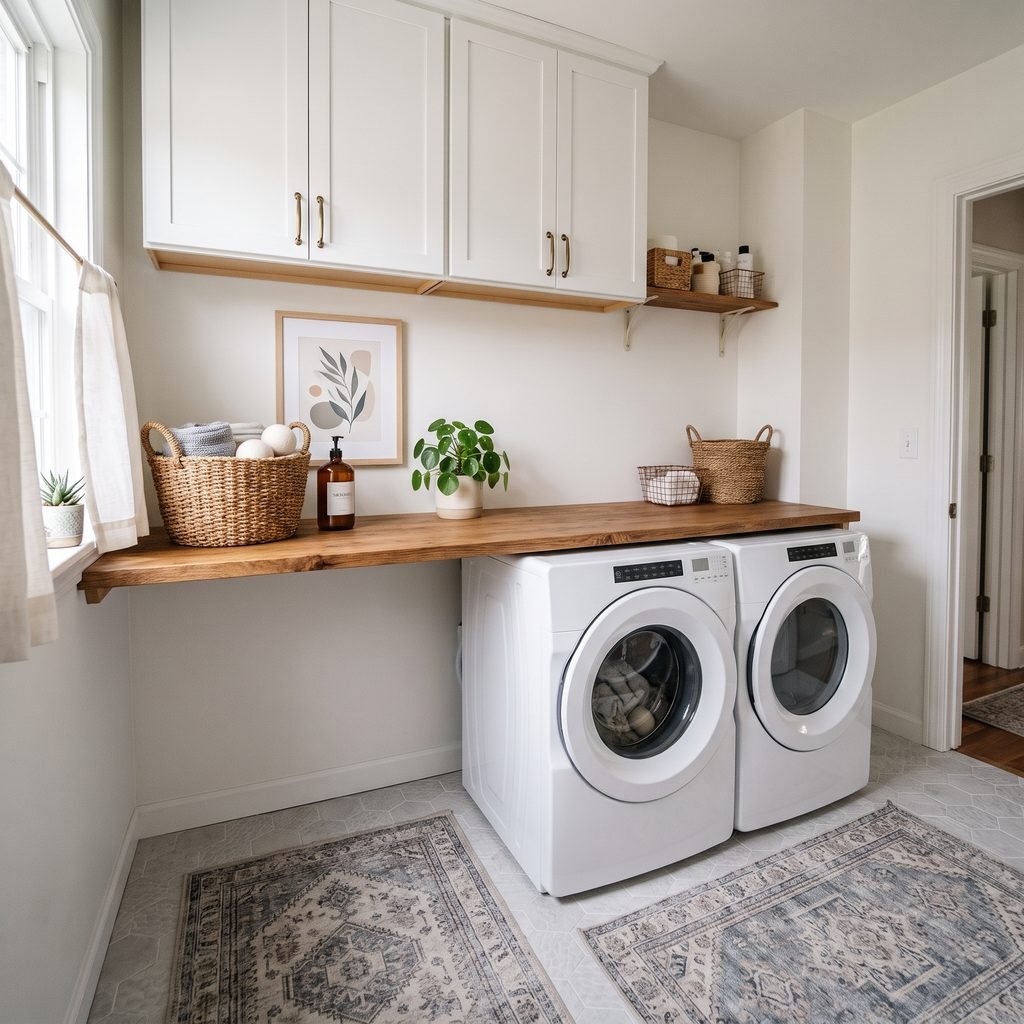
Small Laundry Room Makeover With a Top-Loading Washer
Top-loading washers require different planning because the lid needs vertical clearance.
Instead of adding a low folding counter across the appliances, focus on:
- Higher shelves
- Upper cabinets
- Side counter
- Wall-mounted storage
- Hanging rod
Measure the fully open washer lid before installing shelving.
You may be able to place one shelf high above the washer and another shelf over the dryer if the layout allows.
A narrow side counter can provide folding space without blocking the washer.
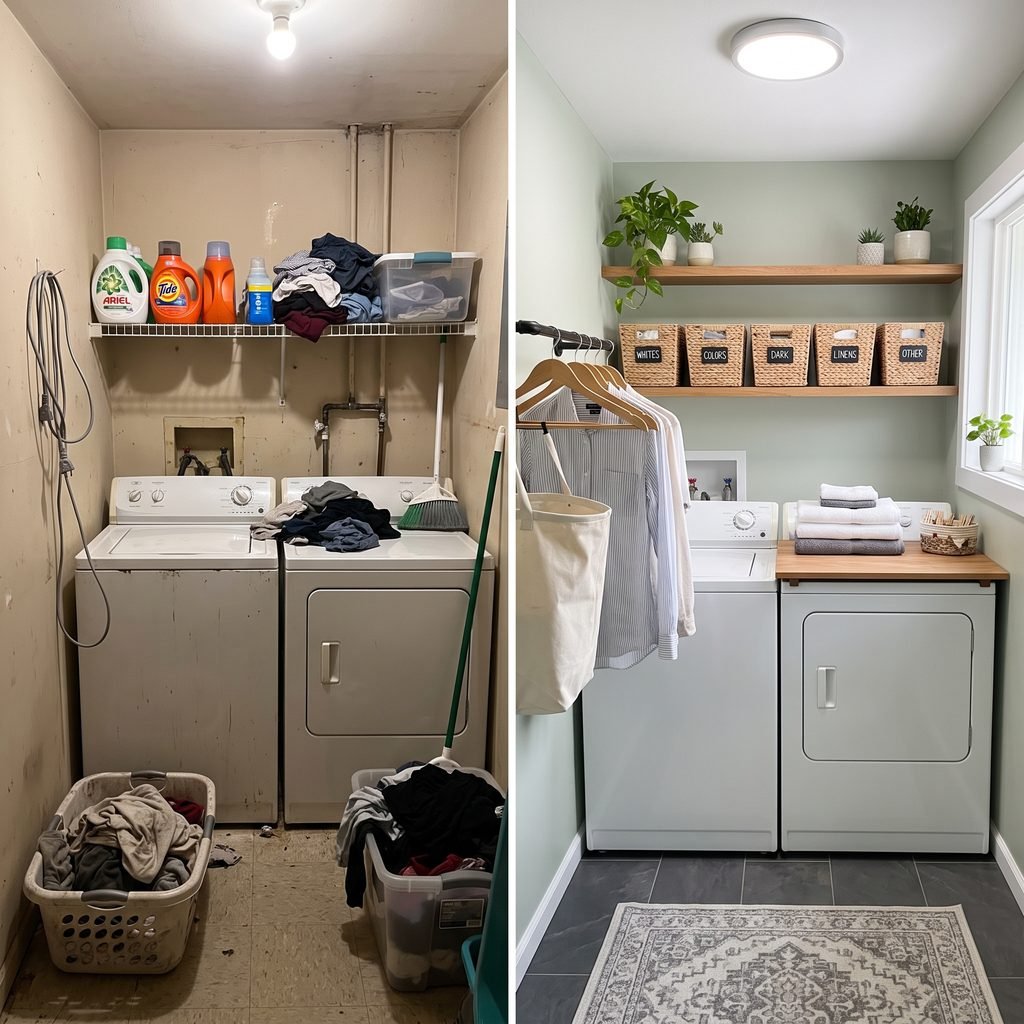
Small Laundry Room Makeover With Front Loaders
Front-loading machines create more opportunities for storage above.
You may be able to add:
- Folding counter
- Shelving
- Upper cabinets
- Hanging rod
Before building around the appliances, confirm required clearances.
Washers and dryers can vibrate and may need room for airflow and servicing.
Make sure the machines can still be moved forward when repairs are needed.
Do not permanently trap hoses, plugs, valves, or vent connections behind built-ins.
DIY Laundry Room Makeover on a Budget
A laundry room can look dramatically different without replacing the appliances.
Focus on affordable high-impact changes.
Try:
- Paint
- One wood shelf
- Baskets
- Hooks
- New light fixture
- Simple counter
- Small rug
You can also reuse storage from other rooms.
An old wall cabinet may work in a laundry room if it is structurally sound and properly mounted.
Simple changes usually look more polished when the colors and materials are coordinated.
For example, repeat one warm wood tone across the shelf and counter, then use white, black, or brass-colored accents consistently.
How to Make a Small Laundry Room Look Bigger
Several design choices can make a compact room feel more open.
Keep the Floor Visible
Wall-mounted storage makes the room feel less crowded.
Use Fewer Colors
A simple palette reduces visual clutter.
Add Good Lighting
Bright rooms generally feel more spacious.
Use Closed Storage Strategically
Hide unattractive supplies behind cabinet doors.
Keep Countertops Clear
Too many bottles and baskets make the room feel smaller.
Use Vertical Lines
Tall cabinets, shelves, or wall paneling can draw the eye upward.
How to Make a Laundry Room Look Expensive on a Budget
An expensive-looking makeover is usually about consistency rather than costly materials.
Try these ideas:
Choose One Main Finish
Repeat the same wood tone or metal finish.
Use Larger Storage Baskets
A few substantial baskets often look cleaner than many tiny containers.
Hide Packaging
Where safe and appropriate, keep products inside cabinets or baskets rather than covering every shelf with colorful packaging.
Upgrade Lighting
A simple well-scaled fixture can make the room feel intentional.
Add Trim
Baseboards, shelf trim, or simple wall molding can give the room more architectural detail.
Keep the Styling Minimal
An uncluttered room tends to look more polished.
Common Small Laundry Room Makeover Mistakes
Building Too Close to Appliances
Washers and dryers need appropriate clearances and service access.
Blocking the Dryer Vent
The dryer exhaust system must remain correctly installed and unobstructed.
Covering Shutoff Valves
Water and gas shutoffs should remain accessible.
Ignoring Top-Loader Clearance
Make sure the washer lid can open fully.
Making Shelves Too Deep
Deep shelves can make a narrow room feel cramped and can be difficult to reach.
Storing Too Many Chemicals Openly
Laundry products and cleaners should be stored according to their labels and safely away from children and pets.
Prioritizing Decor Over Function
A pretty laundry room is not helpful if there is nowhere to fold clothes or reach detergent.
Laundry Room Safety Tips
Laundry rooms combine water, electricity, heat, appliances, and sometimes gas, so DIY changes should be made carefully.
Keep these considerations in mind:
- Follow washer and dryer manufacturer instructions.
- Keep dryer exhaust venting properly connected and unobstructed.
- Clean lint according to appliance guidance.
- Keep water shutoff valves accessible.
- Inspect hoses periodically for visible wear or leaks.
- Keep electrical outlets and plugs accessible.
- Store detergents and cleaning chemicals safely.
- Do not mix cleaning products.
- Keep combustible materials away from heat sources.
- Avoid altering gas connections unless qualified.
- Use suitable wall anchors and mounting hardware.
- Hire a professional when electrical, plumbing, gas, or venting work is beyond your experience.
If you smell gas, notice overheating, discover water damage, or find damaged wiring, stop the makeover and address the safety issue first.
A Simple Weekend Laundry Room Makeover Plan
If you want a manageable DIY project, break the makeover into stages.
Day 1: Prep
Declutter, clean, measure, patch holes, and prepare walls.
Day 2: Paint and Install
Paint the room and install shelves, hooks, or storage after the finish has dried sufficiently according to product instructions.
Final Styling
Add baskets, hampers, a rug, and a few practical decorative details.
More involved work—such as cabinetry, plumbing, electrical changes, or building a counter—may require additional planning.
Do not rush drying, curing, or installation times simply to finish the makeover in one weekend.
FAQ About DIY Small Laundry Room Makeovers
What is the cheapest way to update a small laundry room?
Paint, basic shelving, hooks, baskets, and improved organization can create a noticeable makeover without replacing appliances or cabinetry.
What should I put above my washer and dryer?
Shelves, cabinets, or a hanging rod can work well, depending on whether you have front-loading or top-loading machines and the required appliance clearances.
Can I put a counter over my washer and dryer?
Often, yes, especially with front-loading appliances, but the counter should be designed so it does not interfere with appliance movement, ventilation, connections, or service access. Follow appliance manufacturer guidance.
How do I organize a very small laundry room?
Use vertical storage, wall hooks, narrow rolling carts, shelves, compact hampers, and closed cabinets. Keep only laundry-related essentials in the space.
What colors make a small laundry room look bigger?
Warm white, soft greige, pale beige, muted blue, and other light colors can help a small room feel brighter, although lighting and surrounding finishes also affect the result.
How can I hide laundry room clutter?
Use closed cabinets, baskets, drawer storage, and a simple category system. Keep frequently used items accessible while hiding backups and less attractive supplies.
Is peel-and-stick backsplash good for a laundry room?
It can be, provided the product is suitable for the surface, moisture level, temperature, and location. Follow the manufacturer’s installation instructions.
Final Thoughts
A DIY small laundry room makeover does not need to involve expensive cabinets, new appliances, or a complete renovation.
Start with the basics: declutter, measure, paint, and identify the areas where storage or work space would make the biggest difference.
Then add practical improvements such as shelves, a folding counter, a hanging rod, baskets, hooks, better lighting, or compact cabinetry.
In a small laundry room, every addition should have a purpose.
Keep appliance connections accessible, respect required clearances, and avoid building anything that interferes with dryer venting, water lines, electrical connections, or maintenance.
With a thoughtful layout and a few budget-friendly DIY updates, even a tiny laundry room can become easier to use, easier to keep organized, and much more enjoyable to look at.

