

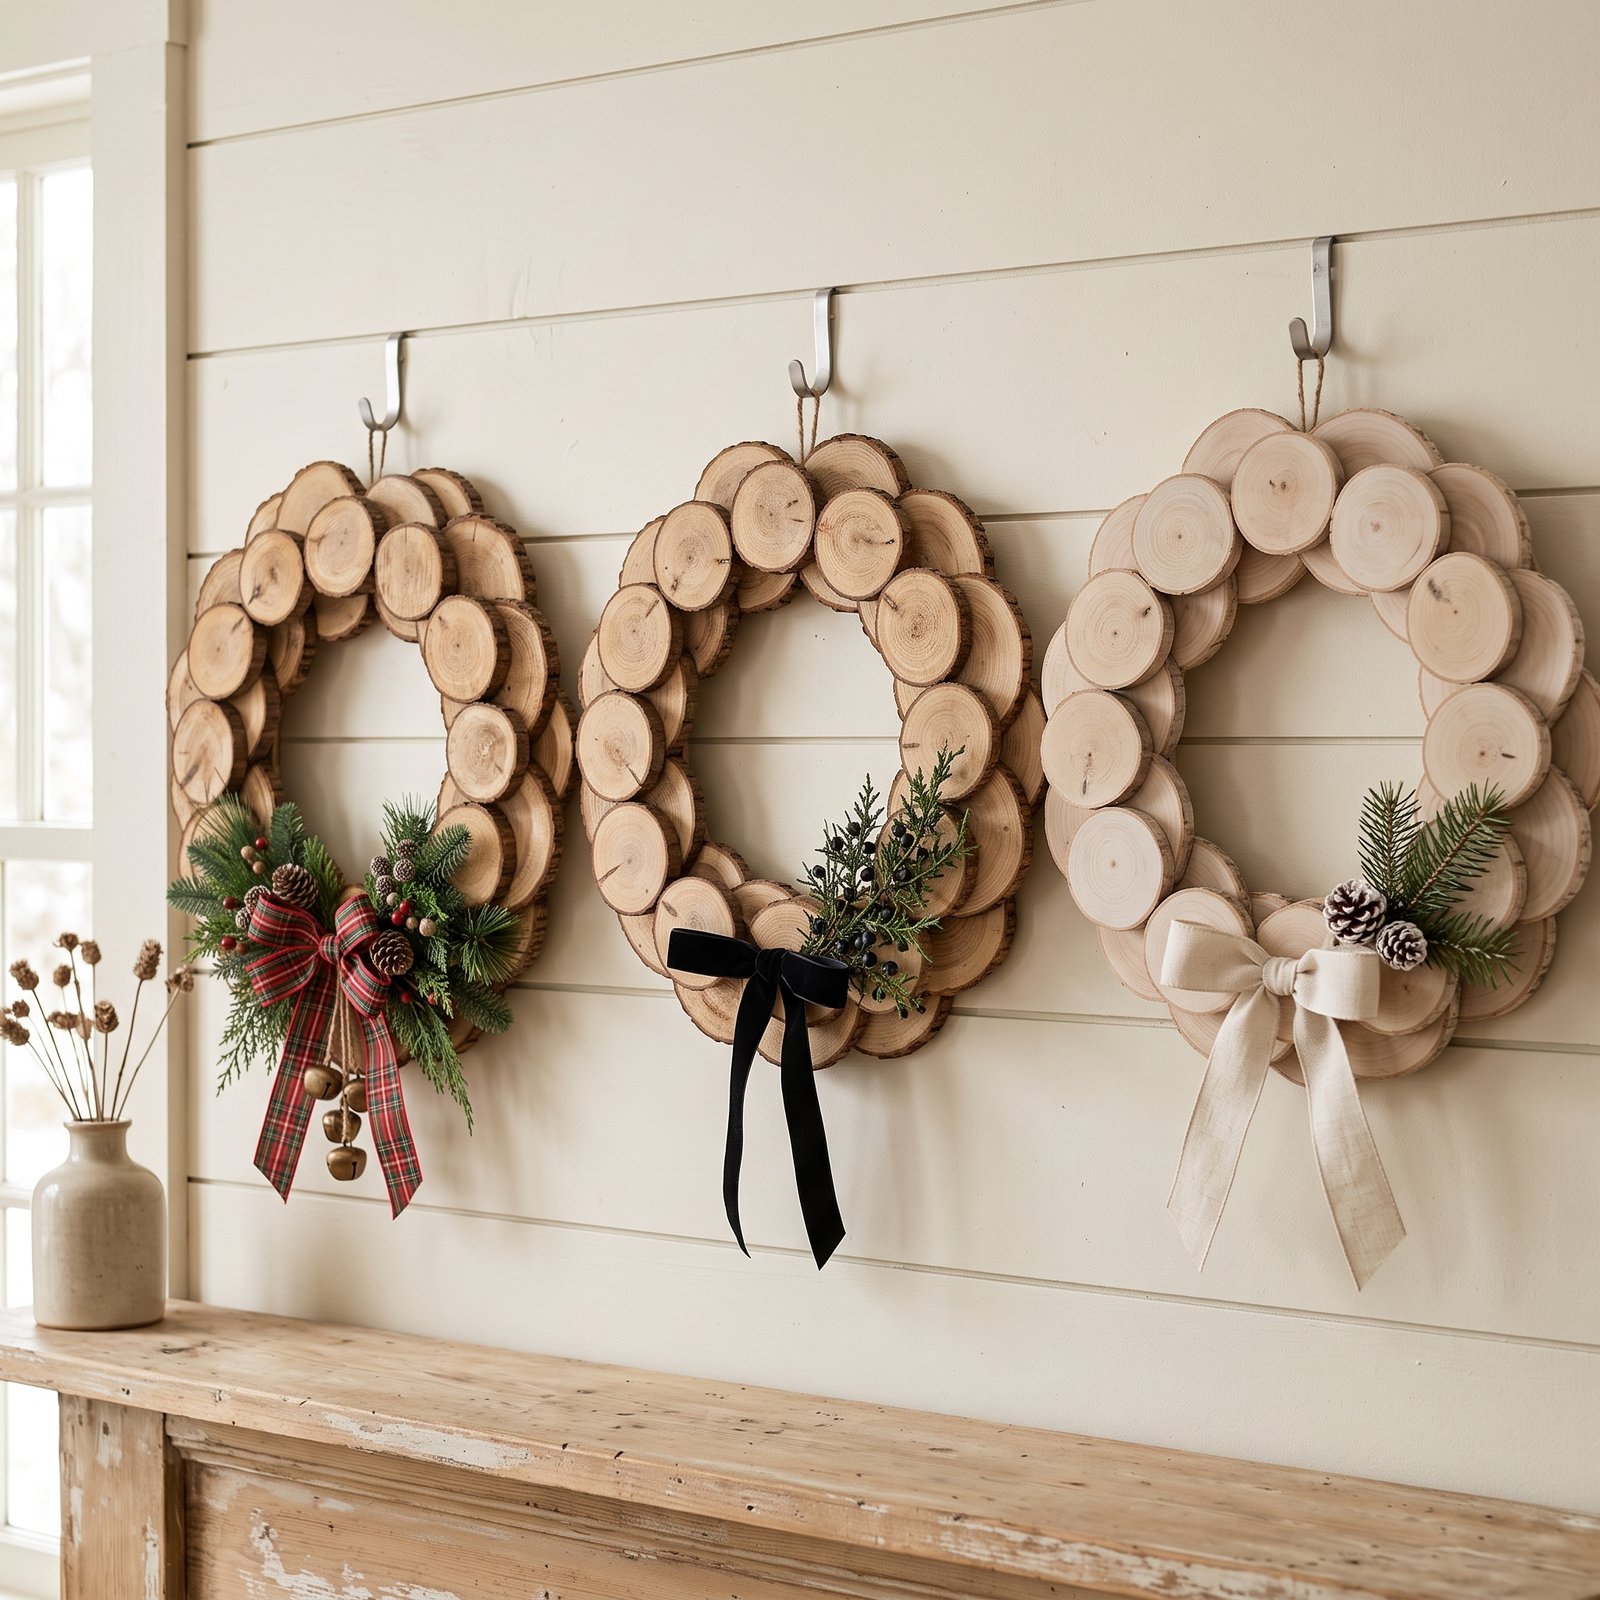
A DIY wood slice holiday wreath is an easy way to bring natural texture and rustic charm into your seasonal decorating. Instead of using a traditional evergreen base, this wreath gets its character from simple round wood slices arranged into a decorative ring.
The finished look can lean farmhouse, woodland, Scandinavian, rustic, or even modern depending on how you style it. Leave the wood natural for a simple organic feel, add greenery and ribbon for a classic Christmas look, or paint a few slices for a more personalized design.
This project is especially appealing because it does not require complicated woodworking. The main challenge is creating a wreath that feels balanced, holds together securely, and is light enough to hang safely.
Below, you’ll find a beginner-friendly method, styling ideas, common mistakes to avoid, and tips for making your wreath look polished rather than overly crafty.

Why Make a Wood Slice Holiday Wreath?
A wood slice wreath works well when you want Christmas decor that feels warm and handmade without being overly elaborate.
It also offers a nice contrast to the softer textures you usually see during the holidays. Evergreen branches, ribbon, knit stockings, and velvet ornaments all feel richer when paired with the natural grain and rough edges of wood.
Another advantage is flexibility.
You can keep the wreath very simple or decorate it more heavily depending on your style.
A minimal version might use only wood slices and a narrow ribbon.
A more traditional Christmas version could include:
- Faux evergreen
- Pinecones
- Berries
- Bells
- Ribbon
- Small ornaments
Because the wood already has strong visual texture, you do not need many embellishments to make the wreath feel finished.
Materials for a DIY Wood Slice Holiday Wreath
The exact quantity of wood slices will depend on their diameter and the final size of your wreath, so it is better to buy a little extra rather than rely on an exact count.
You will need:
- Small wood slices in relatively similar thicknesses
- A sturdy wreath base, such as a flat wood or metal wreath form
- Strong adhesive appropriate for the materials
- Optional hot glue for lightweight decorative elements
- Ribbon for hanging or decorating
- Faux evergreen sprigs
- Optional pinecones, berries, bells, or small ornaments
- Scissors
- Protective work surface
- Measuring tape
- Pencil
- Optional fine-grit sandpaper
If you are cutting the wood slices yourself, you will also need the appropriate saw, clamps, eye protection, and other safety equipment for the tool you are using.
For most beginners, buying pre-cut craft wood slices is much easier.

Choosing the Right Wood Slices
The wood slices are the main visual feature, so a little selection makes a big difference.
Look for pieces that are:
- Fairly flat
- Similar in thickness
- Free from major splits
- Dry
- Large enough to create visual impact
- Small enough to arrange into a wreath shape
Natural variation is part of the appeal.
You do not need every slice to match perfectly. In fact, slightly different diameters can make the wreath feel more organic.
What you want to avoid is an extreme mix of very thick and very thin slices because the finished wreath may sit unevenly.
If the surfaces feel rough, lightly sand them before assembly.
Be careful not to remove all the character from the bark edges unless you prefer a cleaner look.
Step 1: Decide on the Finished Wreath Size
Before gluing anything, decide how large you want the wreath to be.
A smaller wreath works well on:
- Interior doors
- Cabinet doors
- Small walls
- Shelves
- Windows
A larger wreath makes more sense for a front door or fireplace display.
If you already have a wreath form, use that as your guide.
If you are creating your own flat base, make sure it is strong enough to support the total weight of the wood slices.
This matters because wood can become surprisingly heavy once many pieces are layered together.
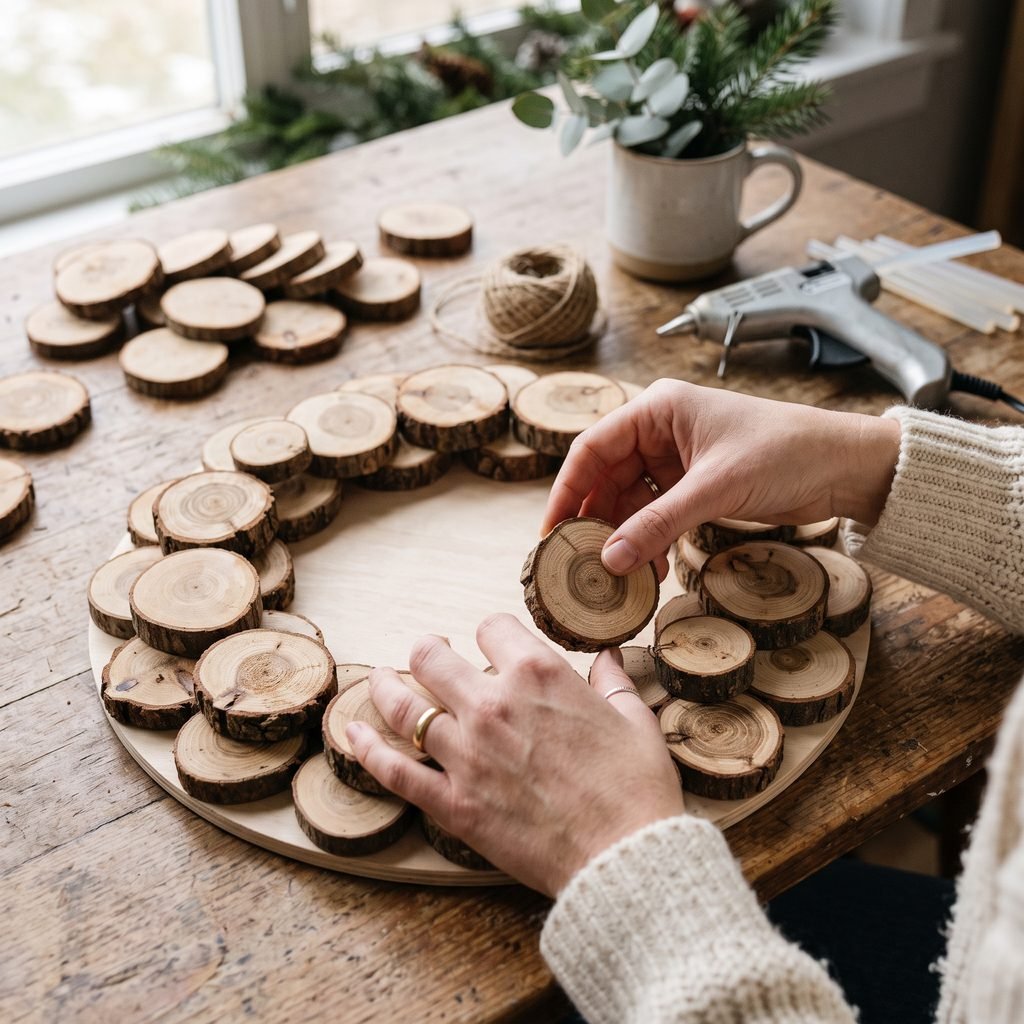
Step 2: Lay Out the First Ring of Wood Slices
Place your wreath base flat on the work surface.
Arrange the wood slices around the outer edge before applying any adhesive.
The goal is to create a complete ring with fairly even spacing.
Do not worry if tiny gaps remain between slices. A second overlapping layer can help cover them later.
Rotate individual pieces until the bark edges and wood grain look balanced.
A few slightly larger slices can be spaced around the wreath to prevent one area from feeling visually heavy.
Take a quick photo once you like the arrangement. This gives you a reference if the pieces get moved during assembly.
Step 3: Attach the First Layer
Once the layout looks good, begin attaching the wood slices one at a time.
Use an adhesive suitable for the wreath base and wood.
Apply enough to create a secure bond without allowing large amounts of glue to squeeze out around the edges.
Work around the wreath gradually rather than removing every piece at once.
This makes it easier to maintain the arrangement you planned.
If the adhesive requires clamping, pressure, or a particular curing time, follow the manufacturer’s instructions.
Do not rely on hot glue as the only structural adhesive for a heavy wreath unless the specific materials and use case make it appropriate. Hot glue can be useful for lightweight decorations, but a stronger adhesive may be needed for the main wood construction.
Step 4: Add a Second Layer
A second layer creates more depth and helps hide spaces between the first row of wood slices.
Place the next set of slices so they overlap the joints below.
You do not necessarily need to cover the entire first layer.
Instead, think of the second row as a way to reinforce the wreath visually and structurally.
Try to stagger the sizes so the wreath feels natural.
Avoid creating one bulky section with several large pieces while leaving another side thin.
Step back occasionally and view the wreath from a distance.
This is often easier than judging balance from directly above.
Step 5: Let the Wreath Cure Completely
This is one of the easiest steps to rush.
Do not hang the wreath immediately after gluing it.
Leave it lying flat until the adhesive has fully cured according to the product instructions.
Moving it too early can shift the wood slices or weaken the bonds.
Once cured, carefully lift the wreath and gently check that all pieces feel secure.
If any slice moves, repair it before decorating.
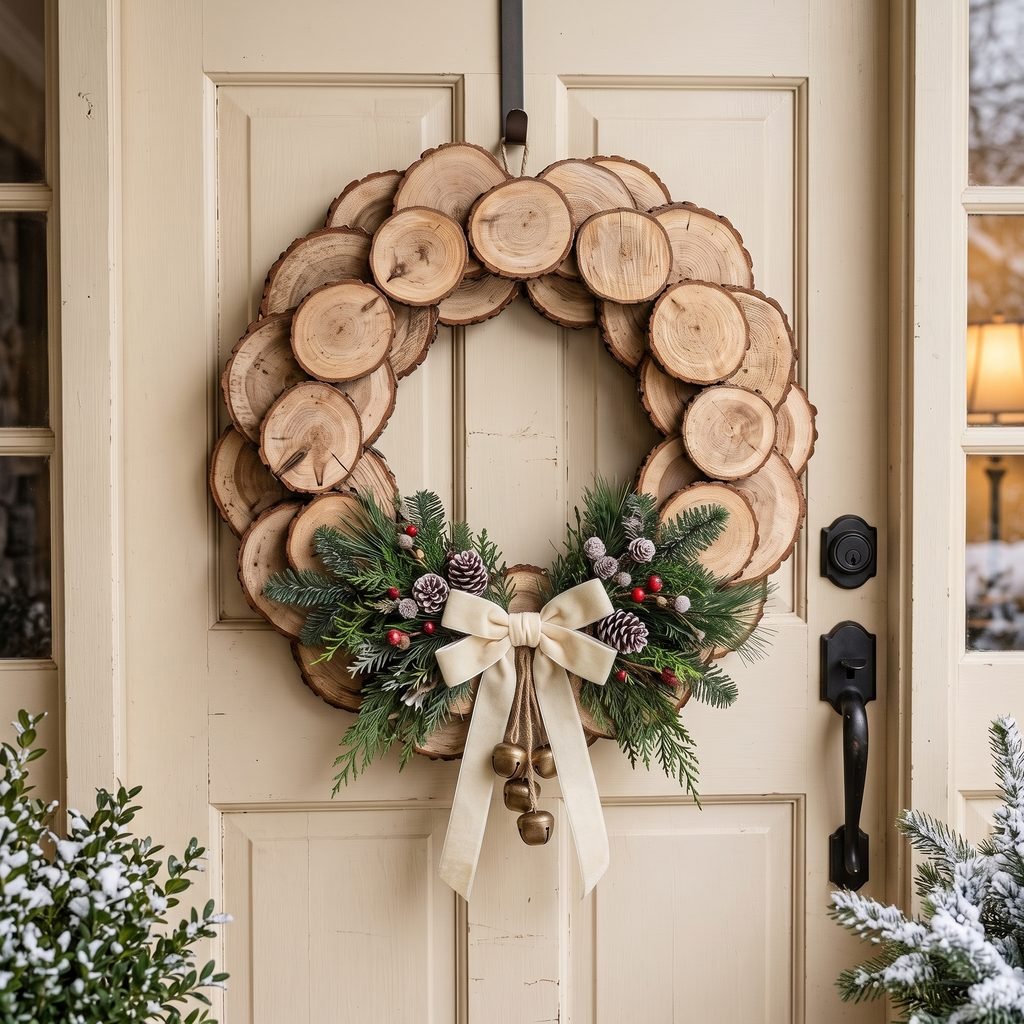
Step 6: Add Greenery
Once the wooden base is solid, you can begin decorating.
A small cluster of greenery is often enough.
Try placing it:
- At the bottom center
- On the lower left
- On the lower right
- Across one upper corner
An asymmetrical arrangement can give the wreath a more relaxed and modern appearance.
Combine a few different textures if you want more dimension.
For example, use:
- Faux pine
- Cedar-style greenery
- Eucalyptus
- Juniper-style stems
Keep the scale proportional to the wreath.
Large, heavy branches can hide too much of the wood, which defeats the purpose of using wood slices as the main feature.

Step 7: Add Ribbon
Ribbon can immediately shift the style of the wreath.
For a rustic look, consider:
- Linen-look ribbon
- Burlap-style ribbon
- Plaid
- Velvet
- Cotton ribbon
For something more understated, use a simple solid color.
Deep green, burgundy, cream, brown, and black can all work beautifully with natural wood.
You can tie a traditional bow or use a long loose knot for a simpler look.
If the greenery is already full, avoid adding an enormous bow that covers most of the wood slices.
Step 8: Add Optional Holiday Details
Once the greenery and ribbon are in place, decide whether the wreath actually needs anything else.
Possible additions include:
- Small pinecones
- Red berries
- Mini brass-toned bells
- Tiny wood stars
- Dried orange slices
- Small ornaments
Use restraint.
The wood grain should still be visible after decorating.
Three or four well-placed embellishments will usually look more polished than a large collection of unrelated decorations.
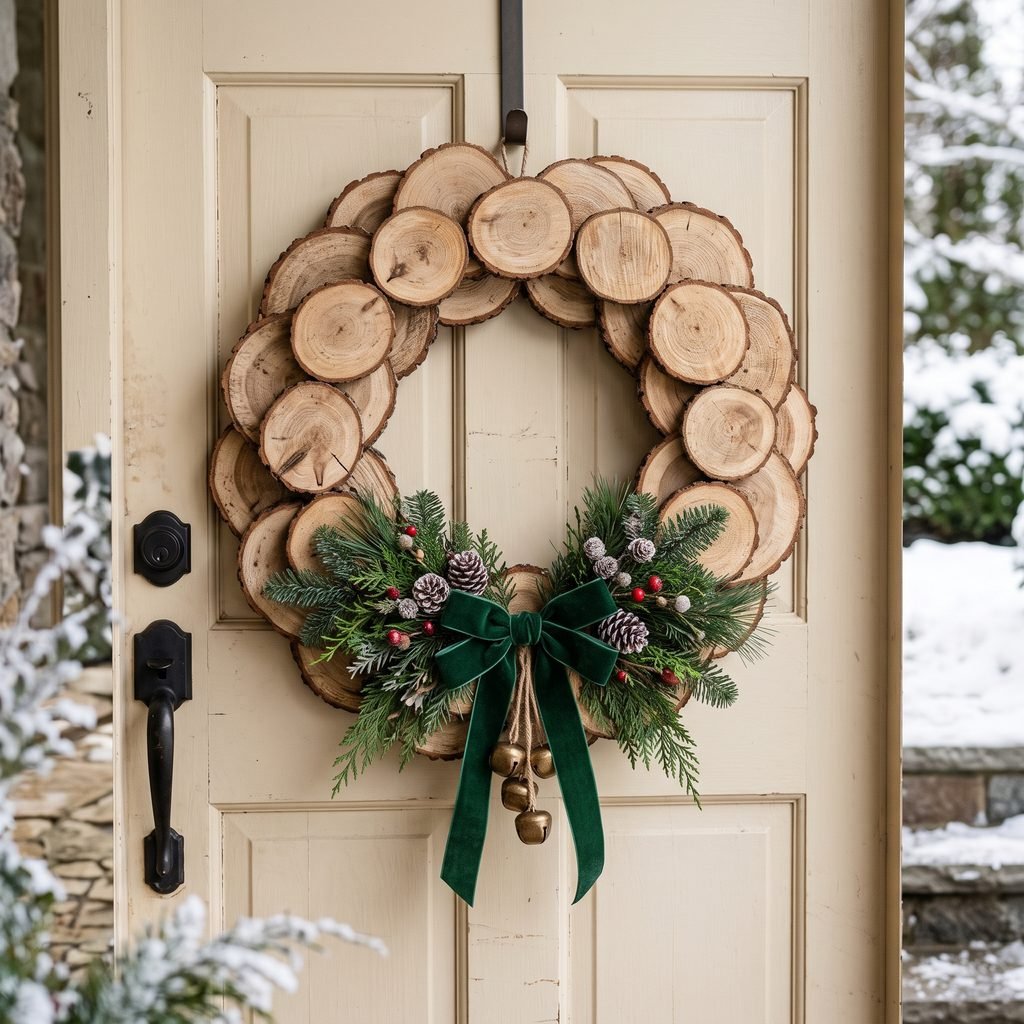
Step 9: Add a Secure Hanger
A wood slice wreath may weigh more than a typical faux greenery wreath.
The hanging method should account for that.
If your wreath base includes an integrated hanger, check that it is secure.
Otherwise, attach a suitable loop or hanging hardware to the structural base rather than relying on a decorative piece of wood slice alone.
Then use wall or door hardware rated for the weight and the surface where the wreath will hang.
Do not assume lightweight adhesive hooks will safely support a heavier wooden wreath.
If you are hanging the wreath on glass, masonry, or another unusual surface, use a mounting method appropriate for that material.
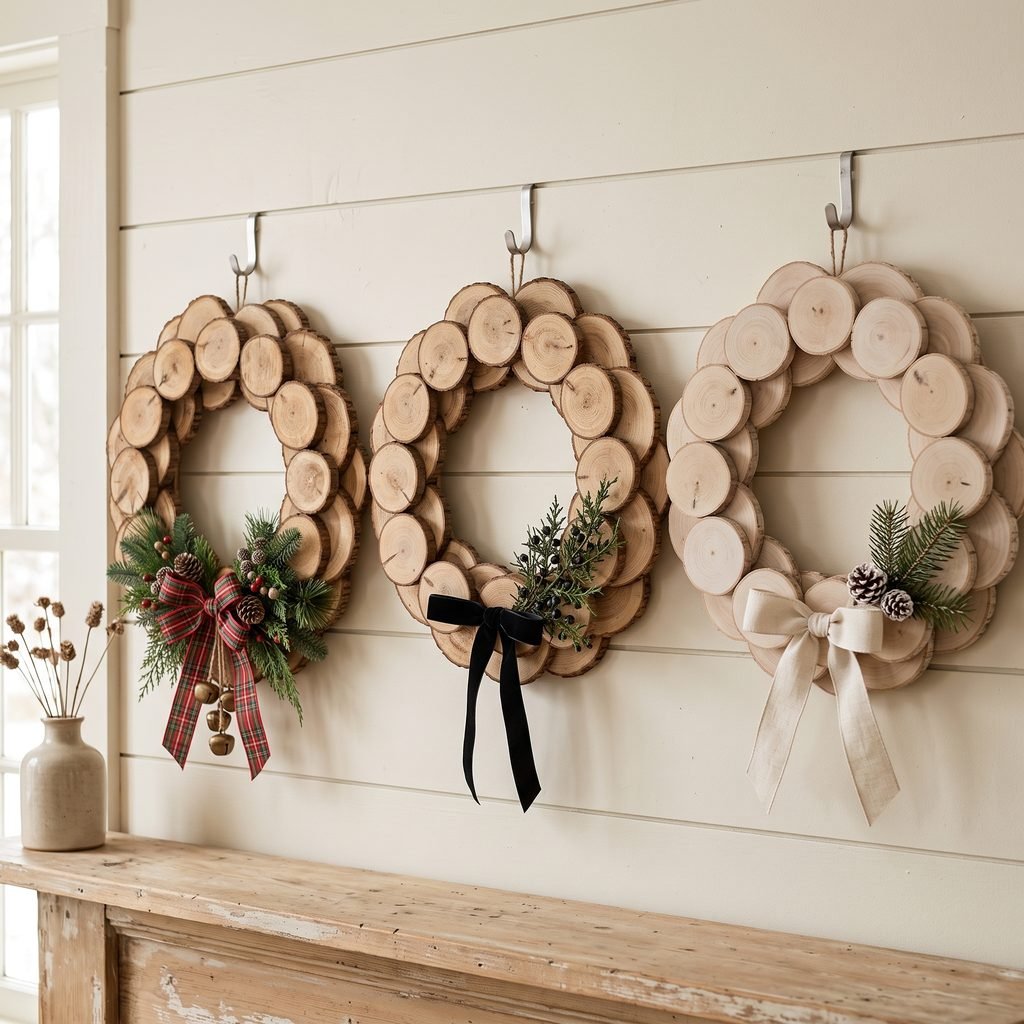
Rustic Wood Slice Wreath Ideas
Once you understand the basic construction, there are several ways to personalize the design.
Natural Woodland Wreath
Keep the wood unfinished.
Add cedar-style greenery, pinecones, and a simple brown or cream ribbon.
This version feels especially appropriate in rustic, cabin, and woodland-inspired homes.
Modern Minimal Wreath
Use cleaner wood slices with less bark.
Add one small asymmetrical greenery cluster and a narrow black or deep green ribbon.
Skip berries and ornaments.
The negative space keeps the wreath feeling contemporary.
Farmhouse Christmas Wreath
Use natural wood slices, plaid ribbon, pine greenery, and a few red berries.
Keep the colors limited so the result feels cozy rather than busy.
Scandinavian-Inspired Wreath
Pair pale natural wood with simple evergreen and cream ribbon.
Avoid shiny ornaments and use restrained styling.
This works especially well with neutral holiday decor.
Vintage-Inspired Holiday Wreath
Combine darker wood slices with velvet ribbon, small bells, and slightly muted greenery.
A deep burgundy or olive ribbon can create a richer traditional look.
How to Make a Wood Slice Wreath Look More Expensive
The easiest way to make a handmade wreath look polished is to simplify it.
Start with the wood slices.
Choose pieces that look intentional together rather than using every piece in the bag regardless of size or condition.
Then limit your decorative palette.
For example:
- Natural wood
- Evergreen
- Cream ribbon
- Brass-toned bells
That is enough.
Another option is:
- Natural wood
- Burgundy ribbon
- Pinecones
- Dark green foliage
Repeating a few materials usually creates a more cohesive result than adding lots of different Christmas elements.
Also pay attention to scale.
One generous ribbon and a few larger greenery sprigs often look better than dozens of tiny decorations.
Finally, hide adhesive wherever possible.
Visible blobs of glue can make even a beautiful wreath feel unfinished.
Can You Paint the Wood Slices?
Yes, if you want a different look.
You could paint:
- Every slice
- Every other slice
- Only the inner ring
- Only a few accent slices
Whitewashing can soften the wood without completely hiding the grain.
You could also paint a handful of slices in muted holiday colors such as cream, forest green, or charcoal.
If you are using paint or stain, check that the product is suitable for wood and the environment where the wreath will be displayed.
Let the finish cure completely before assembly.
For exterior doors, remember that a covered entry is still exposed to temperature changes and humidity. Not every craft paint or adhesive is suitable for outdoor conditions.
Can You Use Real Greenery?
You can, but real greenery changes the maintenance needs of the wreath.
Fresh evergreen may dry out over time, shed needles, and require replacement.
It can also introduce additional moisture against the wood.
If you want a reusable wreath, faux greenery is the easier option.
If you prefer real greenery for a seasonal display, attach it in a way that allows you to replace it without dismantling the entire wreath.
How to Store the Wreath After the Holidays
Do not simply toss a wood slice wreath into a crowded decoration bin.
The layered slices and embellishments can be damaged by pressure.
Instead:
- Remove any detachable delicate decorations.
- Make sure the wreath is completely dry.
- Place it in a rigid wreath container or sturdy box.
- Add lightweight padding around it.
- Store it flat or upright without heavy objects on top.
- Keep it in a dry location.
Excess moisture can damage natural wood and some adhesives, so avoid damp storage areas when possible.
Common DIY Wood Slice Wreath Mistakes
Skipping the Dry Layout
Do not start gluing immediately.
Arrange the full first layer before attaching anything so you can correct awkward gaps and uneven spacing.
Using Too Much Glue
More adhesive is not always better.
Large amounts may squeeze out between wood slices and become visible.
Use enough for a secure bond and follow the adhesive instructions.
Making the Wreath Too Heavy
Several layers of thick wood slices can add substantial weight.
Use only as much material as the wreath actually needs.
Covering All the Wood With Decorations
The wood slices are the main feature.
If almost all of them disappear behind greenery and ribbon, the design loses its purpose.
Hanging Before the Adhesive Cures
Allow the full recommended cure time before lifting or hanging the wreath.
Using an Inadequate Hanger
A wood wreath can be heavier than it appears.
Use hanging hardware that is securely attached and appropriate for the actual weight.
DIY Safety Tips
Even a simple craft project deserves basic safety precautions.
If you are sanding, wear appropriate eye and respiratory protection where needed and work in a well-ventilated area.
If you are cutting your own wood slices, use the proper saw and follow all manufacturer instructions. Secure the wood appropriately, keep hands away from the blade path, and use eye and hearing protection as required.
Do not attempt to cut small round branches freehand in an unstable position.
Adhesives can also have different ventilation and handling requirements.
Read the product label and follow instructions for safe application, curing, and cleanup.
Keep hot glue tools away from children and avoid touching freshly applied glue.
FAQ About DIY Wood Slice Holiday Wreaths
What size wood slices work best for a wreath?
There is no single required size. Small to medium craft slices are easier to arrange into overlapping rings, while very large slices can make the wreath bulky and heavy. Mixing a few nearby sizes can create a more natural look.
Do I need a wreath form?
A sturdy base makes assembly easier and helps support the weight of the wood slices. A flat wood or metal form can work, depending on the adhesive and construction method.
Can I make a wood slice wreath without bark?
Yes. Bark-edge slices create a rustic look, while cleaner slices without bark can feel more modern or Scandinavian.
Can a wood slice wreath go outside?
Possibly, depending on the materials, adhesives, finishes, and level of weather exposure. A protected covered door is easier on the wreath than an exposed exterior wall. Check whether every material you use is suitable for the expected conditions.
How do I keep the wood slices from falling off?
Use a strong adhesive appropriate for both the wood and the wreath base, follow the application instructions, and allow the full cure time before hanging. Overlapping some of the slices can also help create a more integrated structure.
What can I decorate a wood slice Christmas wreath with?
Evergreen, pinecones, ribbon, berries, bells, dried citrus, small ornaments, and simple wood accents all work well. Choose a limited combination so the wreath does not become overcrowded.
Final Thoughts
A DIY wood slice holiday wreath is a simple way to create Christmas decor that feels natural, warm, and handmade.
The key is to build the wreath carefully before decorating it.
Start with dry, fairly even wood slices and arrange them into a balanced ring. Attach them to a sturdy base with an adhesive suitable for the materials, let everything cure fully, and then add just enough greenery and ribbon to complement the wood.
From there, you can take the design in almost any direction.
Keep it minimal with pale wood and greenery, make it cozy with plaid ribbon and pinecones, or create a more traditional Christmas version with berries and bells.
Whichever style you choose, let the wood remain the star of the project. A few thoughtful details will usually create a more beautiful result than covering every inch.

