

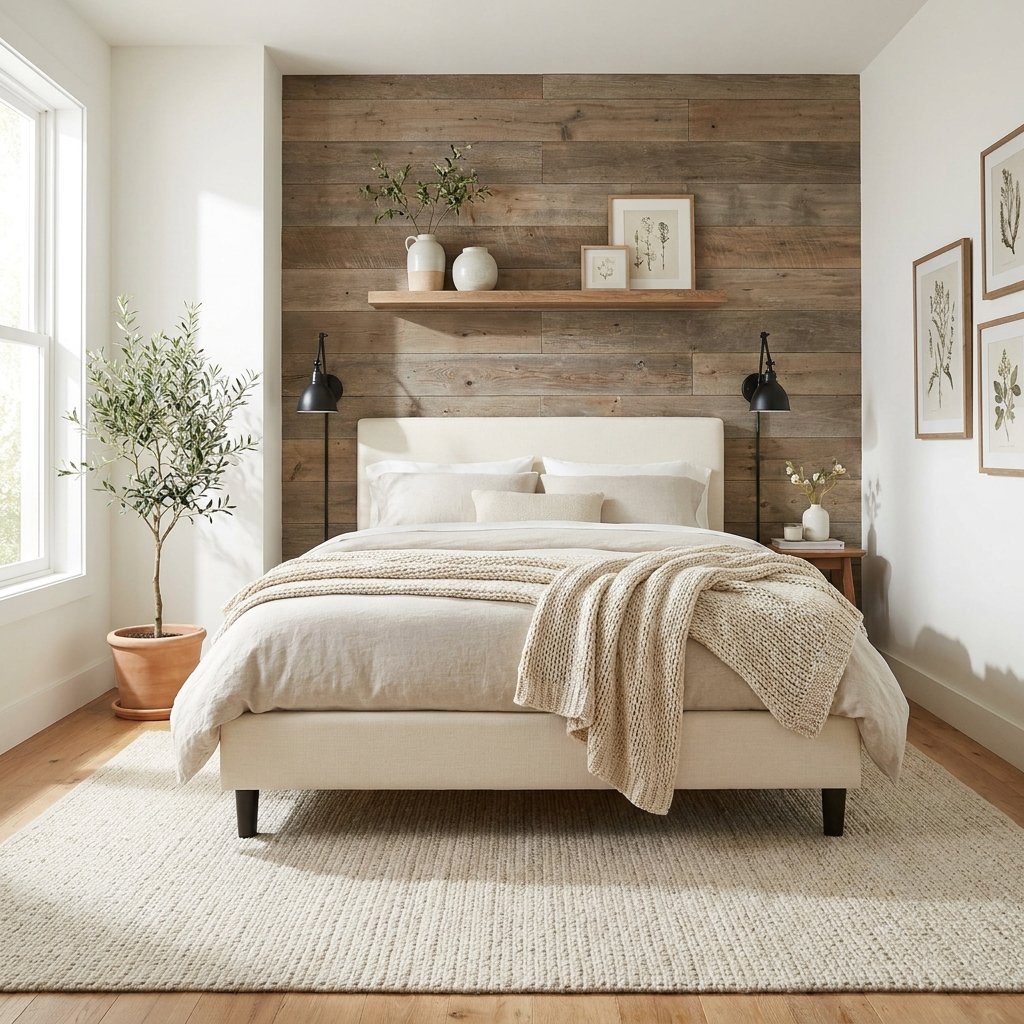
An easy reclaimed wood wall can add warmth, texture, and character to a room without requiring a full renovation.
It works especially well in bedrooms, living rooms, entryways, offices, dining rooms, and behind a fireplace or TV when the installation is appropriate for the location. The natural variation in old wood gives the wall a layered, collected look that is difficult to recreate with flat paint alone.
The project can also be surprisingly approachable.
The basic process is to choose safe, suitable reclaimed boards, clean and prepare them, plan the layout, locate wall framing, cut the boards to fit, and fasten them securely while keeping the rows visually balanced.
The biggest challenge is not usually the installation itself. It is making sure the reclaimed wood is clean, dry, structurally sound, and appropriate for indoor use before it ever reaches the wall.
This guide walks through the process step by step, including layout tips, finishing ideas, common mistakes, and important safety considerations.
Why Choose a Reclaimed Wood Accent Wall?
Reclaimed wood adds instant texture.
Depending on the boards you choose, the finished wall can feel:
- Rustic
- Modern farmhouse
- Industrial
- Cottage-inspired
- Organic modern
- Traditional
You can keep the effect subtle by using similar wood tones, or create more contrast with varied boards.
A reclaimed wood wall can also become a strong focal point without needing much additional decor.
That makes it especially useful in rooms where you want character but do not want to fill the walls with artwork.
Where Does a Reclaimed Wood Wall Work Best?
Good locations include:
- Behind a bed
- Living room feature wall
- Entryway
- Home office
- Dining room
- Stair landing
- Mudroom
Avoid installing reclaimed wood in locations where persistent moisture, high heat, or other conditions make ordinary wood inappropriate.
Bathrooms, fireplace surrounds, and other specialized areas may require additional planning and materials suitable for those conditions.
Choosing Reclaimed Wood
Not all old wood is automatically suitable for interior walls.
Look for boards that are:
- Dry
- Stable
- Free of active insects
- Free of significant rot
- Structurally sound
- Appropriate for indoor use
Be cautious with unknown salvaged wood.
Older boards can contain:
- Nails
- Staples
- Screws
- Dirt
- Insect damage
- Mold
- Unknown paint or coatings
If you do not know the history of the wood, treat it carefully.
Painted or coated older wood may involve lead or other hazardous materials, so do not aggressively sand unknown finishes without determining what you are dealing with first.
For a simpler project, reclaimed-look boards sold for interior decorative use can provide a similar appearance with less preparation.
Materials and Tools
You may need:
- Reclaimed wood boards
- Tape measure
- Pencil
- Level
- Stud finder
- Pry bar, optional
- Hammer
- Nail set
- Finish nailer or drill and screws
- Appropriate fasteners
- Miter saw or circular saw
- Straightedge
- Construction adhesive, optional and only where appropriate
- Sandpaper
- Vacuum
- Eye protection
- Hearing protection
- Dust mask or suitable respiratory protection
- Work gloves
The exact tools depend on the board thickness, wall construction, and installation method.
Always use fasteners and attachment methods appropriate for the materials involved.
Step 1: Inspect the Wall
Before installing anything, check the wall.
Look for:
- Moisture problems
- Cracks
- Loose drywall
- Uneven areas
- Electrical outlets
- Switches
- Vents
- Baseboards
- Trim
Fix moisture problems before covering the wall.
A wood accent wall should never be used to hide leaks, mold, or damaged surfaces.
Make sure electrical boxes, vents, and access points remain usable.
Step 2: Measure the Wall
Measure the full width and height.
Calculate the approximate area and then allow for some extra material because reclaimed boards may have defects or need trimming.
Also measure around:
- Doors
- Windows
- Outlets
- Switches
- Built-ins
Sketching the wall can help you estimate board placement before cutting.
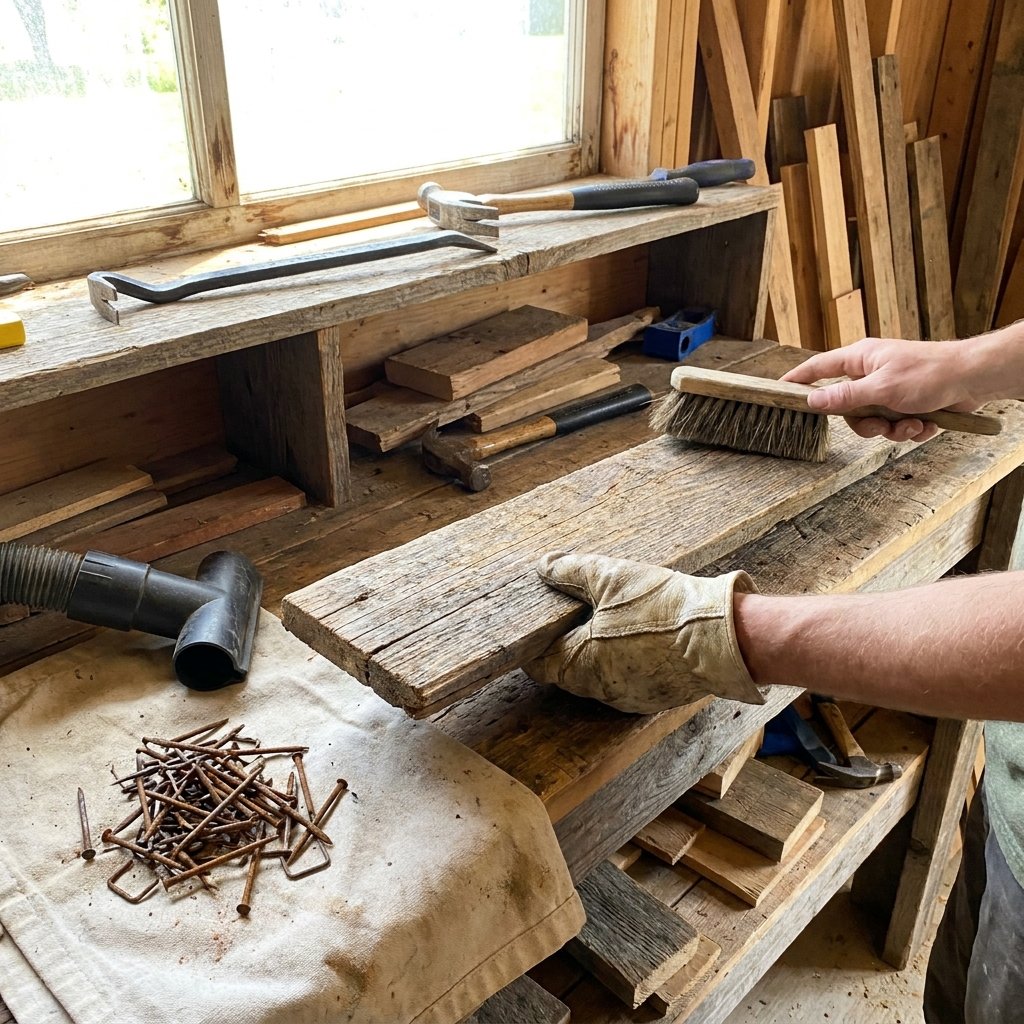
Step 3: Clean the Reclaimed Wood
Old wood needs a thorough inspection and cleaning.
Depending on condition, you may need to:
- Brush away dirt
- Vacuum dust
- Remove loose debris
- Pull nails
- Remove staples
- Lightly clean surfaces
- Allow boards to dry fully
Do not soak wood unnecessarily.
Check both sides of every board.
Metal hidden in reclaimed lumber can damage saw blades and create a safety hazard.
Use a suitable metal detector if you are working with heavily salvaged material and are unsure whether fasteners remain inside.
Step 4: Sand Only as Much as Needed
The goal is usually to preserve texture, not make old boards look brand new.
Light sanding can remove:
- Sharp splinters
- Rough edges
- Loose fibers
Avoid over-sanding if you want to keep the weathered appearance.
Wear suitable protection and control dust.
If the wood has unknown old paint or finish, do not sand it until you understand whether the coating may be hazardous.
Step 5: Let the Wood Acclimate
Wood expands and contracts as moisture conditions change.
If practical, bring the prepared boards into the room before installation so they can adjust to indoor conditions.
Follow any guidance provided by the wood supplier.
Keep boards dry and supported so they do not warp.
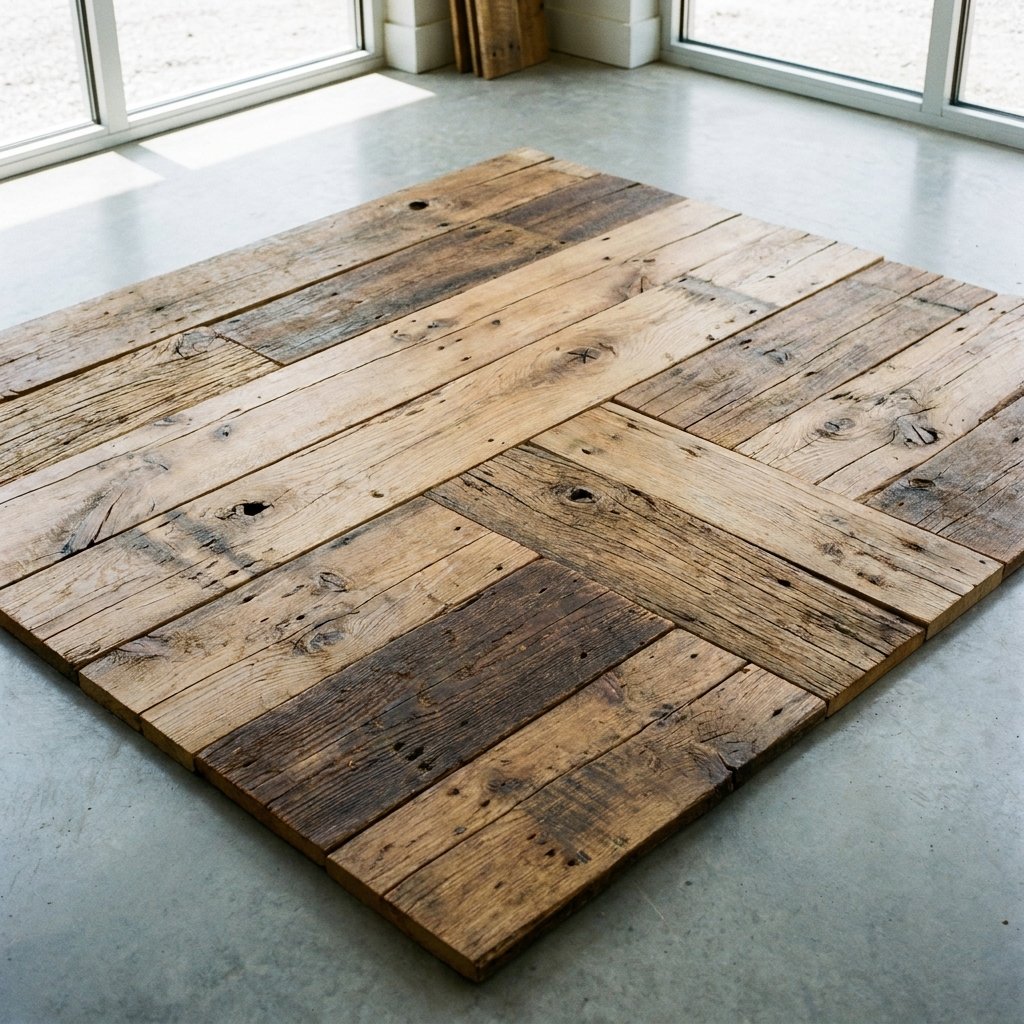
Step 6: Sort the Boards by Color and Width
Lay the boards out on the floor before installing.
Separate them by:
- Light tone
- Medium tone
- Dark tone
- Width
- Length
This makes it easier to distribute the variation evenly.
If all the dark boards end up in one corner, the finished wall may look unbalanced.
Mix the tones intentionally.
Step 7: Decide Where to Start
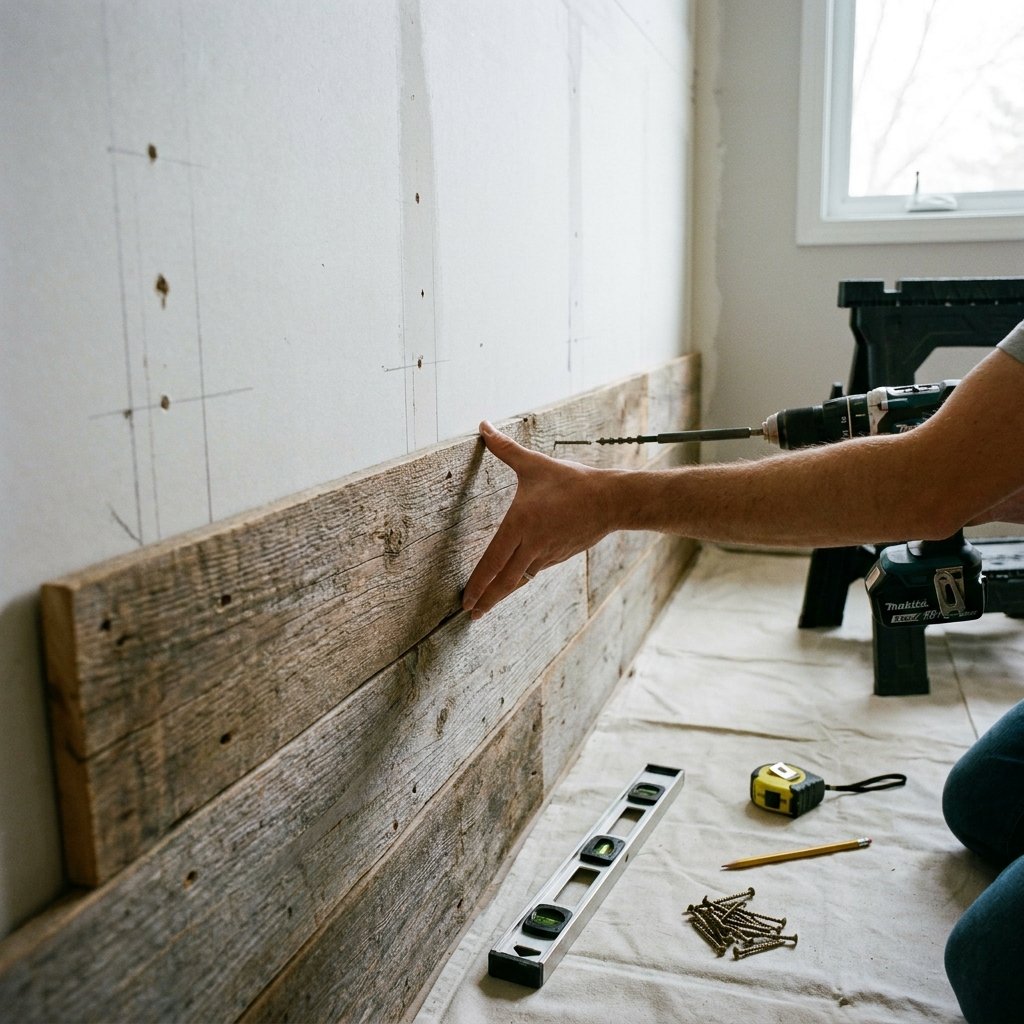
You can install reclaimed wood from the bottom up or top down depending on the room and design.
Bottom-up installation can make it easier to keep rows supported and level.
Starting near the most visible area may also help you control where cut boards land.
Before fastening anything, use a level to establish a straight reference line.
Do not assume the floor, ceiling, or baseboard is perfectly level.
Step 8: Locate Wall Studs
Use a stud finder to identify framing behind the wall.
Mark those locations lightly.
Fastening into studs can provide a strong attachment point, especially for thicker or heavier boards.
Do not drill or nail blindly.
Walls may contain:
- Electrical wiring
- Plumbing
- Gas lines
- Other utilities
Be especially cautious around outlets, switches, kitchens, bathrooms, and shared utility walls.
If you are unsure what is behind the wall, stop and investigate before fastening.
Step 9: Cut the First Board
Measure the first space carefully.
Cut the board to fit.
Use eye and hearing protection, follow saw instructions, and support the lumber securely while cutting.
After cutting, lightly smooth any sharp edge.
Dry-fit the piece before fastening.
This reduces the chance of having to remove a board later.
Step 10: Fasten the Board Securely
The exact fastening method depends on:
- Board thickness
- Wall surface
- Framing
- Board weight
- Desired removability
Finish nails into appropriate framing may work for some lightweight decorative installations.
Screws may be preferable in other situations.
Construction adhesive can sometimes be used as part of an installation system, but it may damage drywall during future removal and should not replace proper mechanical fastening where required.
Use an attachment method appropriate for the wall and board type.
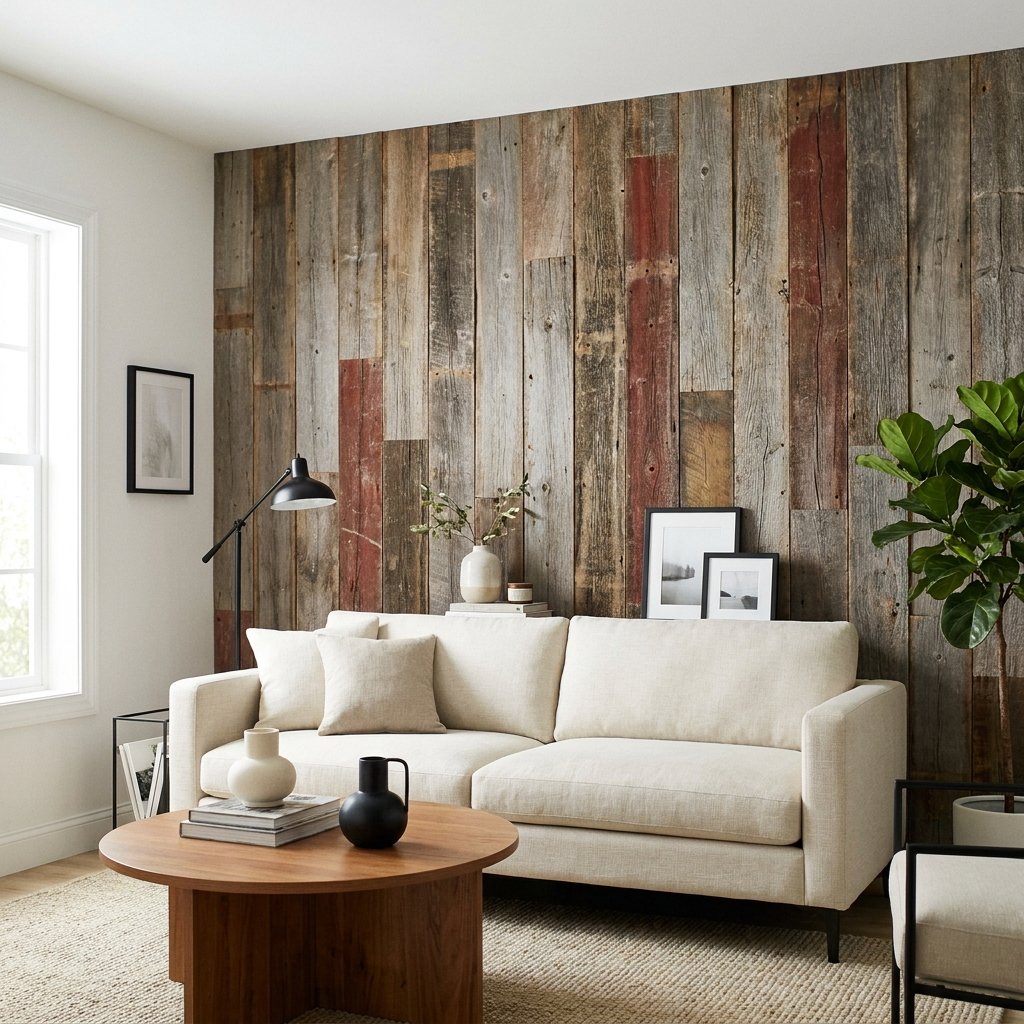
Step 11: Stagger the Seams
Avoid creating vertical lines where multiple board ends meet.
Instead, stagger joints from row to row.
This makes the wall feel more natural.
Try to avoid repeating the same board lengths in a predictable pattern.
Reclaimed wood usually looks best when the layout feels varied but balanced.
Step 12: Mix Colors as You Go
Step back every few rows.
Look at the wall from across the room.
If one section looks too dark or too light, adjust the next few boards.
Do not wait until the entire wall is finished to evaluate the pattern.
A few minutes of editing during installation can make the final result much more cohesive.
Step 13: Work Around Outlets and Switches Carefully
Electrical areas require extra care.
Do not bury or obstruct electrical boxes behind the wood.
Wall coverings can change the finished surface depth, which may affect how outlets and switches sit.
Electrical work and box adjustments should be handled according to applicable requirements.
If you are not comfortable working around electrical components, use qualified help.
Turn off power when appropriate before working near wiring or devices.
Step 14: Fit the Final Row
The final row may need to be ripped narrower to fit.
Measure in several locations because ceilings and floors are not always perfectly parallel.
Cut carefully.
A small trim piece may help hide minor unevenness depending on the design.
Do not force oversized boards into place.
Step 15: Finish the Edges
Depending on the wall, exposed edges may need attention.
Options include:
- Simple wood trim
- Matching reclaimed strip
- Painted trim
- Clean exposed board edge
The best choice depends on the style of the room.
Modern farmhouse and rustic rooms can often handle a more natural edge, while cleaner interiors may benefit from a defined border.
Step 16: Decide Whether to Seal the Wood
Some reclaimed wood can remain unfinished.
Other wood may benefit from a clear compatible finish to reduce dust, splinters, or shedding.
If you choose a finish:
- Test it first
- Make sure it is suitable for the wood
- Follow ventilation and curing instructions
Clear finishes can darken wood or change its color, so always test on a scrap.
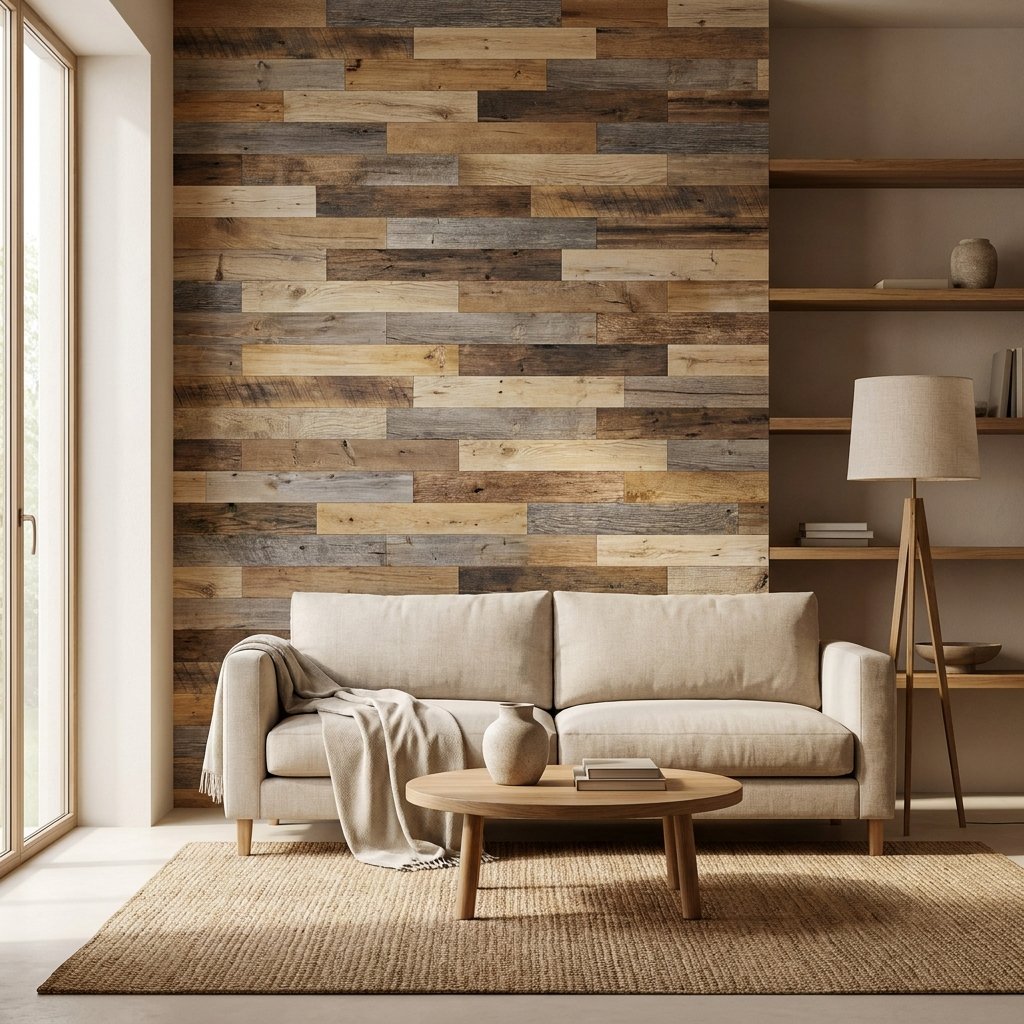
Step 17: Keep the Styling Simple
Once the wall is finished, it already provides a lot of visual texture.
You may not need much decor.
Try:
- One large piece of artwork
- Simple sconces
- Minimal headboard
- Small console
- Neutral bedding
- One mirror
Avoid covering the entire wood wall with small decorations.
Let the material remain the focal point.
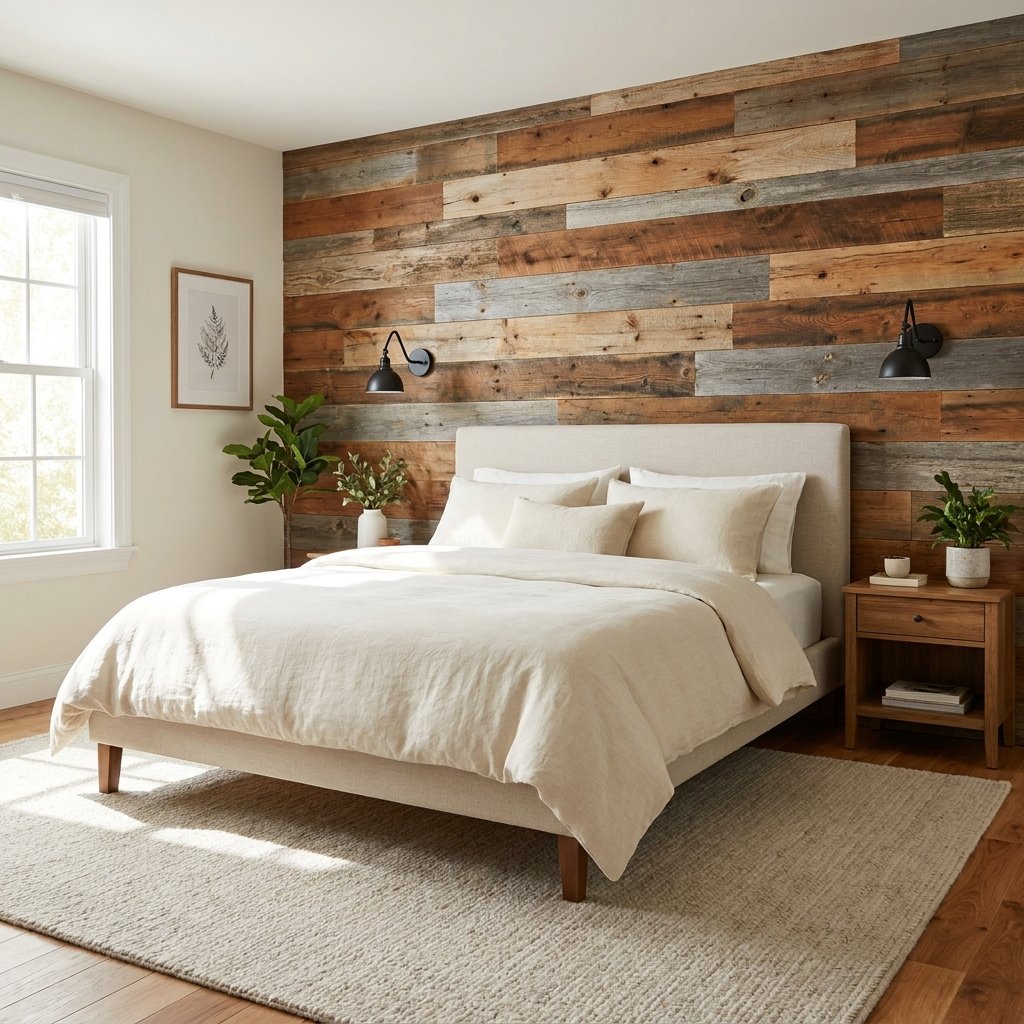
Easy Reclaimed Wood Wall Behind a Bed
A bedroom is one of the easiest places to use reclaimed wood.
The wall behind the bed already acts as a natural focal point.
Pair the wood with:
- White or cream bedding
- Simple nightstands
- Black sconces
- Soft rug
- Minimal artwork
If the wood is highly varied, keep the bedding relatively simple.
If the wood is more uniform, you can add a little more pattern through textiles.
Reclaimed Wood Wall in a Living Room
In a living room, use reclaimed wood on one main wall rather than every surface.
Good focal points include:
- Behind sofa
- Behind media console
- Around built-ins where appropriate
If mounting a television or heavy object over the wall, plan the mounting before installation so the load is supported by appropriate framing rather than decorative boards alone.
Do not rely on reclaimed wood cladding as structural support.
Reclaimed Wood Wall in an Entryway
An entryway is a great place to use reclaimed wood because the wall can create character without requiring much furniture.
Add:
- Narrow console
- Mirror
- Small lamp
- Basket
Keep the styling simple.
The wood itself provides plenty of texture.
Easy Reclaimed Wood Wall for a Home Office
A reclaimed wood wall can make a home office feel warmer.
Try it behind the desk.
Pair with:
- Black metal
- Warm white walls
- Simple shelves
- Neutral rug
- Task lighting
If mounting shelves, secure them into appropriate framing or use suitable hardware for the expected load.
Modern Farmhouse Reclaimed Wood Wall
For a more modern farmhouse look, choose boards with controlled variation.
Avoid wood that looks excessively distressed if you want a cleaner result.
Use:
- Warm medium wood
- Soft gray-brown
- Natural oak tones
- A few darker accents
Pair with white, black, cream, and simple furniture.
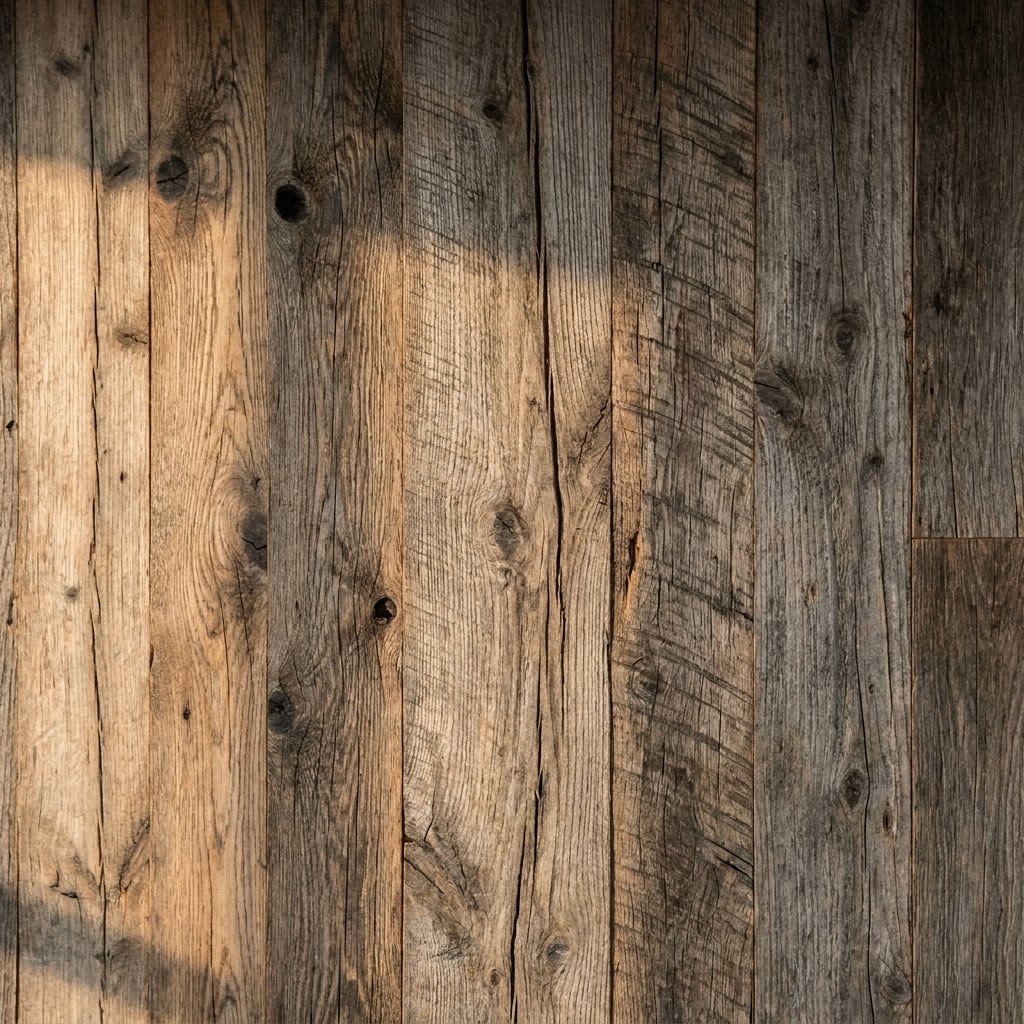
Rustic Reclaimed Wood Wall
For a more rustic look, embrace:
- Knots
- Saw marks
- Weathering
- Uneven color
- Wider variation
Just make sure the boards are still clean, safe, and stable.
Rustic should not mean deteriorated.
Avoid using wood that is rotten, actively infested, damp, or structurally unsound.
Reclaimed Wood Wall Without Removing Baseboards
In some rooms, you can install the wood above the existing baseboard.
This often creates a cleaner transition than removing trim.
Check how the thickness of the boards will relate to the baseboard profile.
If the reclaimed wood projects farther than the trim, you may need a different detail.
Dry-fit a few pieces before committing to the entire wall.
Reclaimed Wood Wall Over Drywall
Yes, decorative wood boards can often be installed over drywall when attached appropriately.
The drywall should be:
- Dry
- Stable
- Secure
- Free of serious damage
Locate framing and choose fasteners suitable for the wall assembly.
Do not simply glue heavy boards to weak or damaged drywall.
Reclaimed Wood Wall Around a Fireplace
This requires additional caution.
Combustible wood cannot simply be installed wherever you want around a fireplace.
Clearance requirements depend on the fireplace type, appliance, mantel projection, surrounding materials, and local requirements.
Before using reclaimed wood near a fireplace:
- Identify the exact fireplace type
- Find the manufacturer’s installation instructions
- Confirm required clearances
- Keep vents and openings unobstructed
- Use noncombustible materials where required
If you cannot verify the requirements, get qualified professional guidance.
How to Make Reclaimed Wood Look Less Rustic
If you like wood texture but want a cleaner style:
- Use similar board widths
- Limit color variation
- Avoid extremely distressed boards
- Keep seams neat
- Use simple trim
- Pair with modern furniture
You can also use reclaimed-look wood in a lighter natural tone for a softer effect.
How to Make a Reclaimed Wood Wall Look Expensive
A polished result comes from restraint.
Sort the Boards First
Control the distribution of color.
Keep Rows Level
Rustic wood does not excuse crooked installation.
Stagger Seams Naturally
Avoid repetitive patterns.
Choose One Focal Wall
Too much reclaimed wood can overwhelm a room.
Finish the Edges
Small trim details can make the project feel complete.
Keep Decor Minimal
Let the wood remain the feature.
Budget Tips for a Reclaimed Wood Wall
A reclaimed wood feature does not have to be expensive.
Ways to reduce cost include:
- Use reclaimed wood only on one wall
- Check local salvage sources
- Use leftover boards from another project if safe
- Mix shorter boards into the layout
- Use reclaimed-look planks when true reclaimed lumber is impractical
Do not sacrifice safety just to save money.
Unknown wood may require more inspection and preparation than inexpensive new boards.
Common Reclaimed Wood Wall Mistakes
Skipping Wood Inspection
Old lumber can contain nails, insects, or damage.
Covering Moisture Problems
Fix leaks first.
Installing Boards Without Sorting Them
Random installation can create awkward color clusters.
Assuming the Floor Is Level
Use a level and reference line.
Forgetting Wall Utilities
Never nail or drill blindly.
Over-Sanding
You can accidentally remove the character you wanted.
Using Too Much Adhesive
Future removal can become difficult and may damage the wall.
Ignoring Outlets and Switches
They need to remain properly accessible.
Installing Wood Too Close to Heat
Fireplaces and other heat sources require specific clearance considerations.
Reclaimed Wood Wall Safety Tips
Reclaimed wood projects require a little more caution than projects using new lumber.
- Wear gloves when handling rough boards.
- Inspect for hidden metal before cutting.
- Use eye and hearing protection with power tools.
- Control sanding and cutting dust.
- Avoid sanding unknown old painted coatings until hazards have been evaluated.
- Do not use damp, rotten, moldy, or actively infested wood.
- Check walls for plumbing and electrical risks before fastening.
- Follow tool manufacturer instructions.
- Secure boards appropriately for their size and weight.
- Keep heavy decorative items independently anchored to structural framing.
- Use safe ladder practices.
- Follow finish and adhesive ventilation and curing instructions.
- Confirm fireplace and heat-source clearances before installing combustible wood nearby.
FAQ About an Easy Reclaimed Wood Wall
Is a reclaimed wood wall easy to install?
It can be a beginner-friendly project if the wall is straightforward and the wood has already been cleaned and prepared. Careful measuring and a level layout matter more than speed.
Can I install reclaimed wood directly over drywall?
Often, yes, provided the drywall is in good condition and the boards are attached using an appropriate method.
Do I need to seal reclaimed wood?
Not always. A compatible clear finish can reduce shedding or splinters, but it may change the color. Test first.
How do I clean reclaimed wood before putting it on a wall?
Brush and vacuum loose dirt, remove metal fasteners, inspect for insects or damage, and clean only as appropriate for the material. Let the boards dry fully before installation.
Should I sand reclaimed wood?
Light sanding may be useful for splinters and rough edges. Avoid over-sanding or sanding unknown old finishes without checking for potential hazards.
Can I use pallet wood for an accent wall?
Use caution. Pallet history can be difficult to verify, and some may have been exposed to chemicals, contamination, moisture, or pests. Use only material you can reasonably confirm is suitable for indoor use.
How do I keep a reclaimed wood wall from looking too rustic?
Use boards with similar tones, control the color variation, keep the installation straight, and pair the wall with simple modern furniture.
Final Thoughts
An easy reclaimed wood wall can transform a plain room with relatively few materials.
The key is preparation.
Choose wood that is dry, clean, stable, and suitable for indoor use. Inspect it carefully, remove hidden metal, lightly smooth sharp areas, and sort the boards before you begin.
Then take your time with the installation.
Establish a level starting line, locate wall framing, stagger the seams, distribute the colors evenly, and step back often to evaluate the wall as it develops.
Once complete, keep the rest of the room simple.
The natural grain, knots, color variation, and texture of the wood already provide plenty of character.
Done thoughtfully, a reclaimed wood wall can feel warm and distinctive without making the entire room feel overly rustic.

