

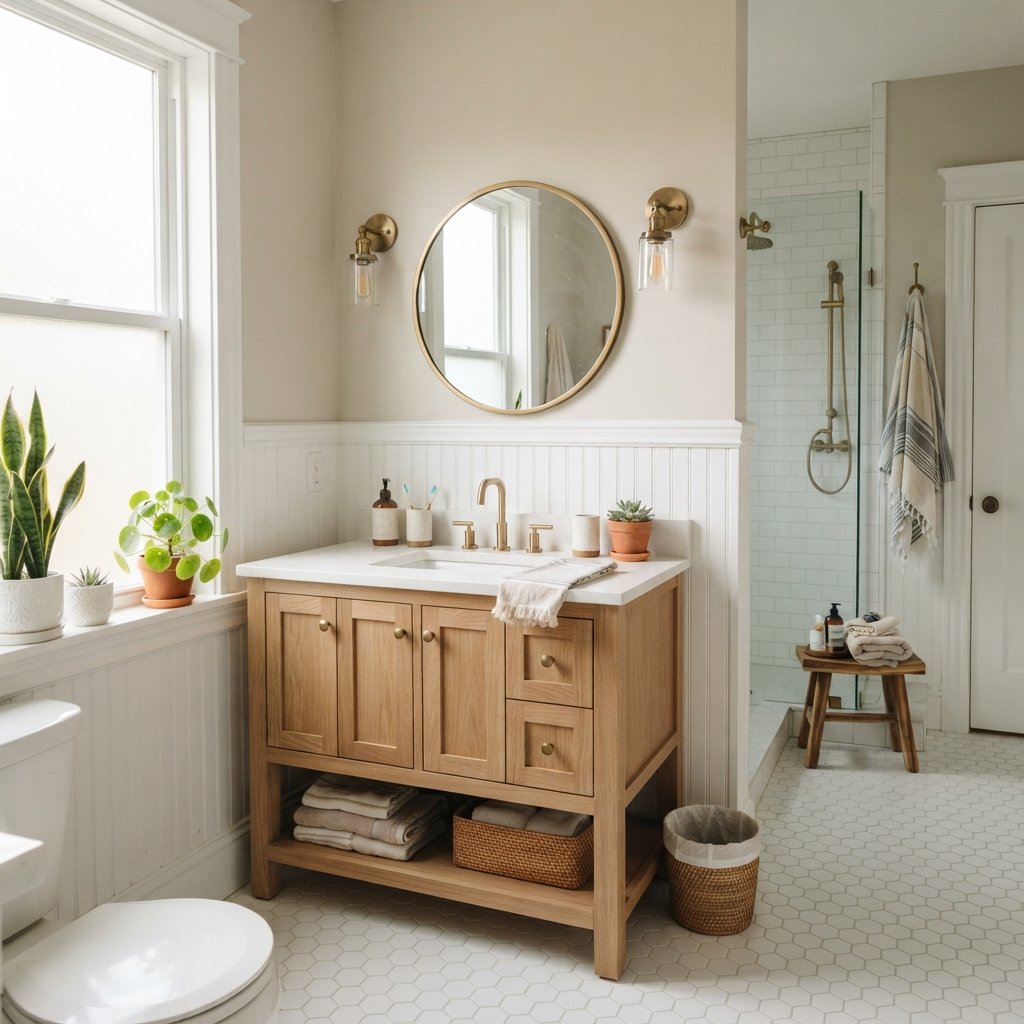
Installing beadboard is one of those bathroom projects that can make a surprisingly big difference without requiring a complete renovation.
The vertical lines add architectural detail to plain walls, the lower portion of the room gains more visual interest, and painted beadboard works with everything from traditional and cottage bathrooms to coastal and transitional spaces.
It can also be a relatively approachable DIY project if you’re comfortable measuring, cutting trim, locating studs, and working carefully around outlets, plumbing, and bathroom fixtures.
But bathrooms introduce one important complication: moisture.
The right material, proper wall preparation, careful installation, caulking, priming, and a bathroom-appropriate paint system all matter. And beadboard that works perfectly well on a dry powder-room wall may not be appropriate inside a shower or another area exposed to direct, repeated water.
This tutorial on how to install beadboard in a bathroom walks through the process from planning the height and choosing materials to cutting panels, working around obstacles, installing top trim, caulking, and painting.
What Is Beadboard?
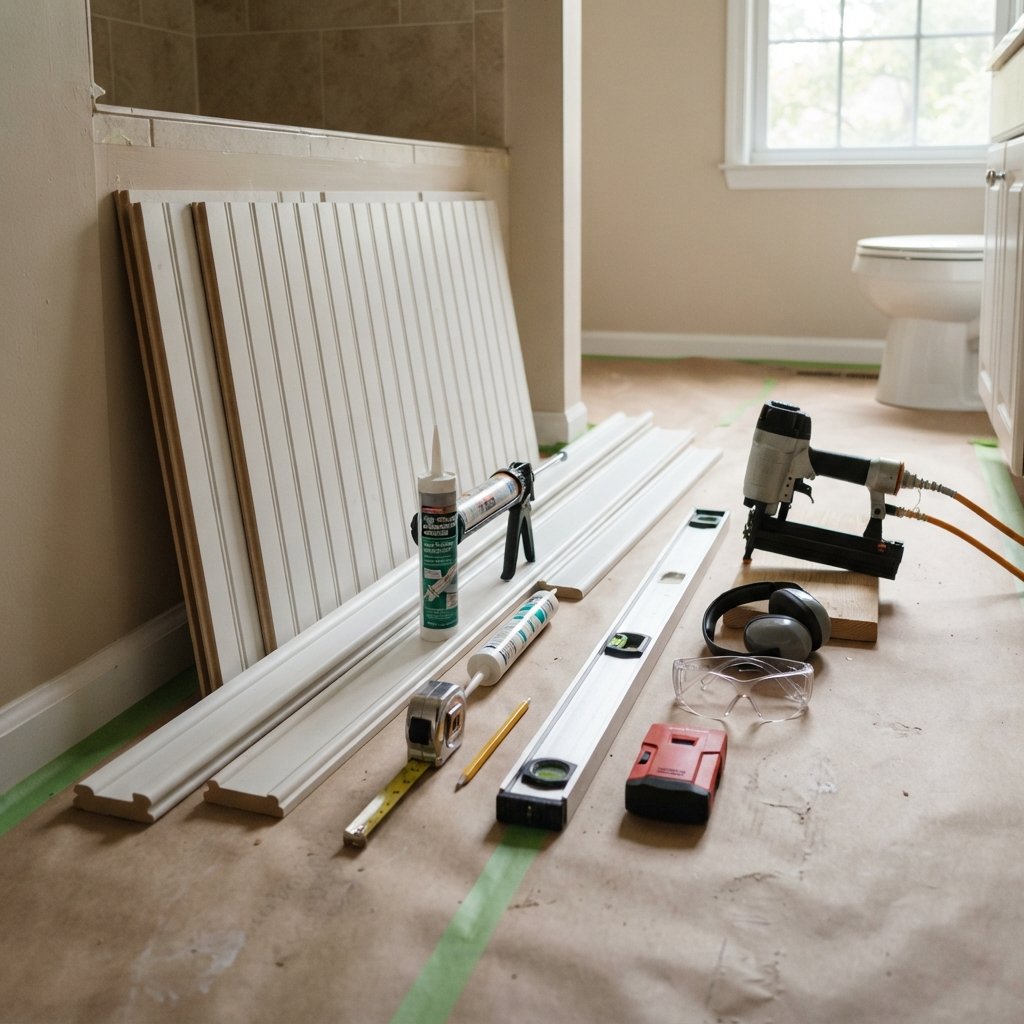
Beadboard is a decorative wall treatment made up of narrow vertical grooves or “beads.”
Traditional beadboard was constructed from individual tongue-and-groove boards.
Today, you can also find larger beadboard-style panels and other manufactured products that reproduce the same look.
Depending on the product, beadboard may be made from:
- Wood
- Plywood
- MDF or engineered wood
- PVC or other synthetic materials
The best choice depends on where you’re installing it.
Bathrooms can have higher humidity and occasional splashes, so always check whether the specific product is approved by its manufacturer for your intended bathroom location.
Can You Put Beadboard in a Bathroom?
Yes, beadboard can work beautifully in bathrooms when the material and finishing system are appropriate for the environment.
The key distinction is between humid or occasionally splashed walls and direct-wet areas.
Beadboard may work well around:
- Vanity walls
- Toilet areas
- Powder rooms
- Lower bathroom walls outside the shower
- Other locations permitted by the product manufacturer
Do not assume standard wood or MDF beadboard is appropriate:
- Inside a shower
- Immediately surrounding a tub where it receives repeated direct water
- In another continuously wet location
For direct-wet areas, use a wall system specifically designed and approved for that application.
Also address ventilation before adding decorative wall treatments. Persistent condensation or moisture problems should be corrected rather than simply covered.
Beadboard Panels vs. Individual Boards
There are two common ways to create the look.
Beadboard Panels
Large panels cover more wall area at once.
Advantages can include:
- Faster installation
- Fewer individual pieces
- Consistent spacing
- Easier installation across long walls
The challenge is maneuvering large panels in a small bathroom and making accurate cutouts.
Individual Beadboard Planks
Individual boards take longer but can be easier to maneuver around complicated spaces.
They may be useful around:
- Corners
- Vanities
- Narrow walls
- Toilets
- Plumbing obstacles
The exact installation method varies by product, so always follow the manufacturer’s instructions.
Tools and Materials
Your exact list will depend on the beadboard product and room, but a typical project may require:
Materials
- Beadboard panels or planks appropriate for the location
- Baseboard or bottom trim if needed
- Top cap or chair-rail-style trim
- Construction adhesive compatible with the wall and beadboard
- Appropriate finish nails or fasteners
- Paintable caulk
- Suitable patching/filling material
- Primer appropriate for the beadboard
- Bathroom-appropriate interior paint
Tools
- Tape measure
- Pencil
- Level
- Stud finder
- Straightedge
- Saw appropriate for the material
- Jigsaw or other suitable tool for cutouts
- Nail gun or hammer, depending on the fastening system
- Caulk gun
- Sanding supplies
- Safety glasses
- Hearing protection when using power tools
- Dust protection appropriate for the material being cut
You may also need tools for removing and reinstalling trim.
Always check the beadboard, adhesive, primer, paint, and fastener manufacturers’ instructions before beginning.
Step 1: Decide How High the Beadboard Should Go
Before buying material, decide on the finished height.
There isn’t one universal correct beadboard height.
The right proportion depends on:
- Ceiling height
- Vanity height
- Windows
- Mirrors
- Electrical outlets
- Existing trim
- Other architectural details
A common approach is to treat beadboard as wainscoting covering roughly the lower third of the wall.
But don’t choose a height just because it’s conventional.
Look around the bathroom.
Sometimes aligning the top trim with another strong horizontal feature creates a cleaner result.
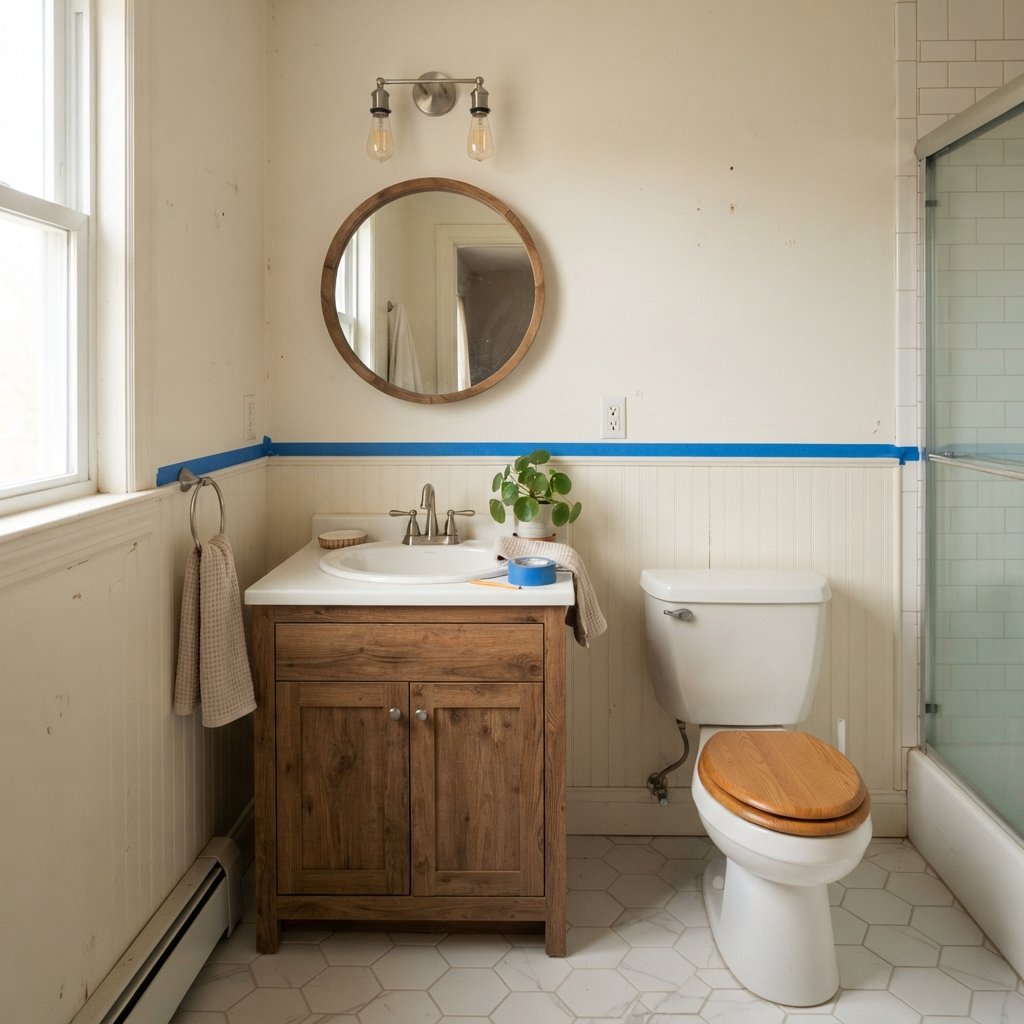
Use painter’s tape to mark a potential height around the room.
Then step back and look at it from the doorway.
Step 2: Measure the Bathroom Carefully
Measure every wall receiving beadboard.
Record:
- Wall widths
- Planned beadboard height
- Door openings
- Window openings
- Vanity areas
- Plumbing obstacles
- Electrical boxes
- Corners
Don’t assume opposite walls are identical.
Older rooms in particular may be slightly out of square or out of plumb.
Sketching the room on paper and writing measurements directly onto the drawing can make planning much easier.
Purchase enough material for the project plus a reasonable allowance for cuts and mistakes based on your layout and the manufacturer’s guidance.
Step 3: Plan the Layout Before Cutting
This is one of the most important steps.
You don’t want to reach the final corner and discover that you’re left with an awkward sliver.
If using panels, plan where the seams will fall.
If using individual planks, calculate approximately how the pattern will finish at each corner.
Also consider how the bead pattern meets:
- Door casing
- Vanity sides
- Inside corners
- Outside corners
A little planning can make the finished installation look much more intentional.
Step 4: Remove Necessary Trim and Fixtures
Depending on the room and installation method, you may need to remove:
- Existing baseboards
- Small trim pieces
- Towel bars
- Toilet-paper holder
- Wall hooks
- Other wall-mounted accessories
Whether you remove a vanity or toilet depends on the scope of the project and where the beadboard needs to run.
Do not disconnect plumbing unless you know how to do so safely and appropriately.
If electrical devices or covers interfere with the work, turn off the correct circuit at the electrical panel before working near electrical boxes. Verify the power is off with an appropriate tester. Electrical box depth and device positioning may need adjustment when wall thickness changes; this work should comply with applicable electrical requirements.
When in doubt, hire a qualified electrician.
Step 5: Prepare the Walls
Beadboard should not be used to hide an unresolved wall problem.
Inspect the walls for:
- Water damage
- Mold
- Peeling paint
- Loose drywall
- Significant holes
- Active leaks
Repair the source of moisture before installing anything.
Clean dirty walls and allow them to dry.
Remove loose material.
Repair major surface defects that could prevent the beadboard from sitting flat.
You don’t necessarily need perfectly smooth drywall because the beadboard will cover it, but the substrate needs to be sound.
Step 6: Find and Mark the Studs
Use a stud finder to locate framing where appropriate.
Mark stud locations above the planned beadboard line so you can still see the marks once the panels are in position.
Fastening requirements vary.
Some products may use adhesive plus mechanical fasteners, while others have different installation systems.
Follow the instructions for your specific material rather than relying on a generic fastening pattern.
Step 7: Establish a Level Reference Line
Floors and baseboards aren’t always perfectly level.
Instead of blindly measuring upward from the floor at multiple points, establish a level reference line around the room.
Use a reliable level or laser level.
This reference helps keep the top of the beadboard and cap trim visually straight.
If the floor varies slightly, you can account for those differences at the bottom where trim may conceal them.
Step 8: Cut the First Beadboard Panel
Measure the first section carefully.
Transfer the measurement to the panel.
Double-check:
- Width
- Height
- Which side faces outward
- Pattern orientation
- Which edge meets the corner
Then make the cut using a saw appropriate for the product.
Different materials require different blades and cutting methods.
Follow the product manufacturer’s recommendations.
Wear appropriate eye, hearing, and dust protection.
Cutting MDF and other manufactured wood products can generate significant fine dust, so control dust appropriately and avoid breathing it.
Step 9: Dry-Fit Before Applying Adhesive
Never make an important cut and immediately cover the back with adhesive.
Dry-fit it first.
Hold the panel in position and check:
- Height
- Corner fit
- Alignment
- Pattern direction
- Top line
- Bottom fit
Make adjustments before installation.
This simple habit can prevent a lot of wasted material.
Step 10: Cut Around Electrical Outlets
Electrical boxes require careful measuring.
Turn off the appropriate circuit and verify it is de-energized before working around an electrical device or box.
Measure the box location relative to known edges.
Transfer those measurements to the beadboard.
Drill a starter hole if appropriate for the material and use a suitable cutting tool to create the opening.
The cut should accommodate the electrical box and installation requirements without leaving an unnecessarily large visible gap.
Adding beadboard changes the finished wall thickness. Depending on the installation, listed electrical box extenders or other approved methods may be necessary so devices and boxes remain properly positioned.
Do not improvise electrical modifications.
Consult a qualified electrician if you’re uncertain.
Step 11: Cut Around Plumbing Carefully
Bathroom walls may have:
- Supply lines
- Drain lines
- Shutoff valves
- Toilet connections
Measure carefully before making openings.
Where appropriate, round holes can be made with a hole saw sized for the required clearance.
Remember that decorative escutcheons may conceal small gaps around pipes, but they should not be used to hide sloppy oversized holes.
Avoid cutting, drilling, or fastening where hidden plumbing may be present.
If you’re unsure what’s behind the wall, proceed cautiously and use appropriate detection methods.
Step 12: Apply Construction Adhesive
If the beadboard manufacturer’s instructions call for adhesive, use a product compatible with both:
- The beadboard material
- The wall substrate
Follow the adhesive manufacturer’s instructions for:
- Application pattern
- Working time
- Ventilation
- Surface preparation
- Cure time
More adhesive is not necessarily better.
Excess can squeeze from joints and create cleanup problems.
Maintain good ventilation, particularly in a small bathroom.
Step 13: Position the Panel
Place the panel carefully against the wall.
Align it with:
- Your level line
- The previous panel
- The corner
- Base trim or planned bottom edge
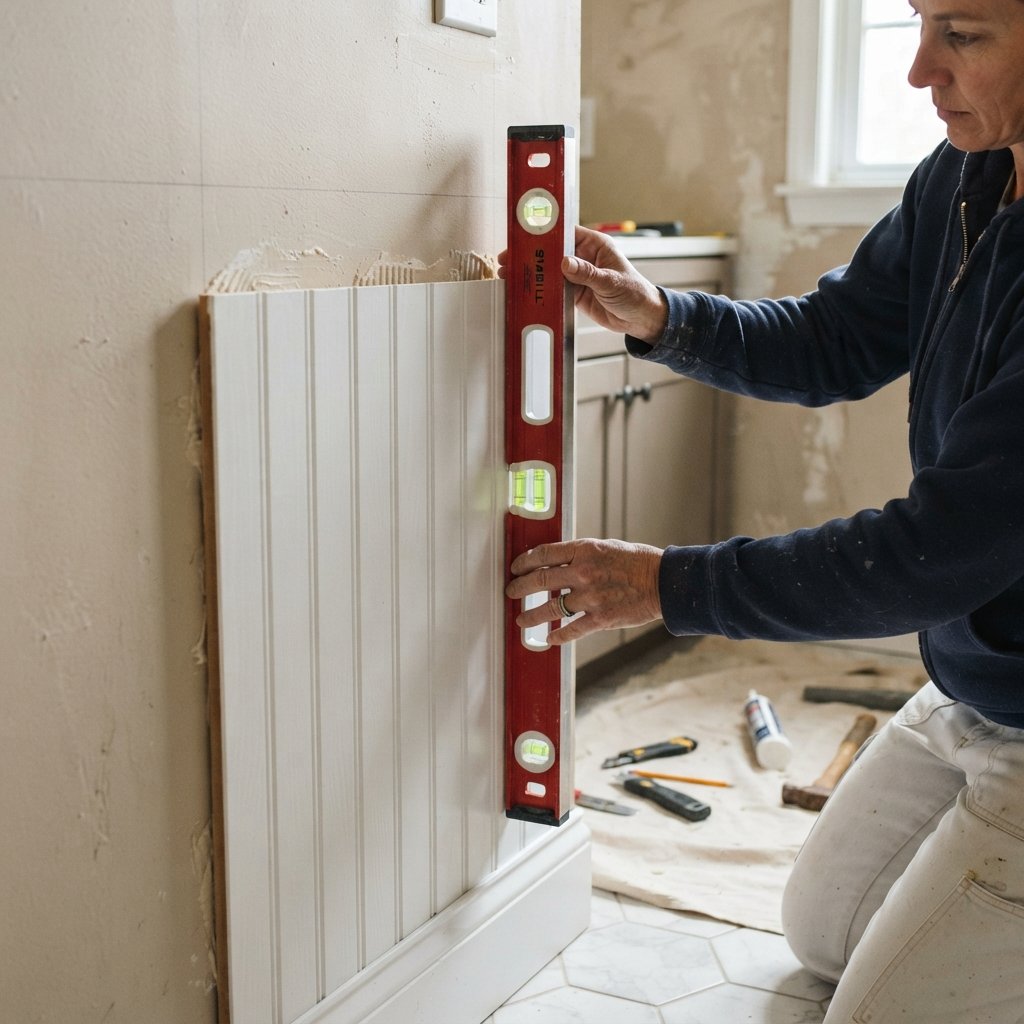
Check it with a level before fastening.
Take your time with the first panel.
If the first piece is noticeably out of plumb, the error can carry through the rest of the wall.
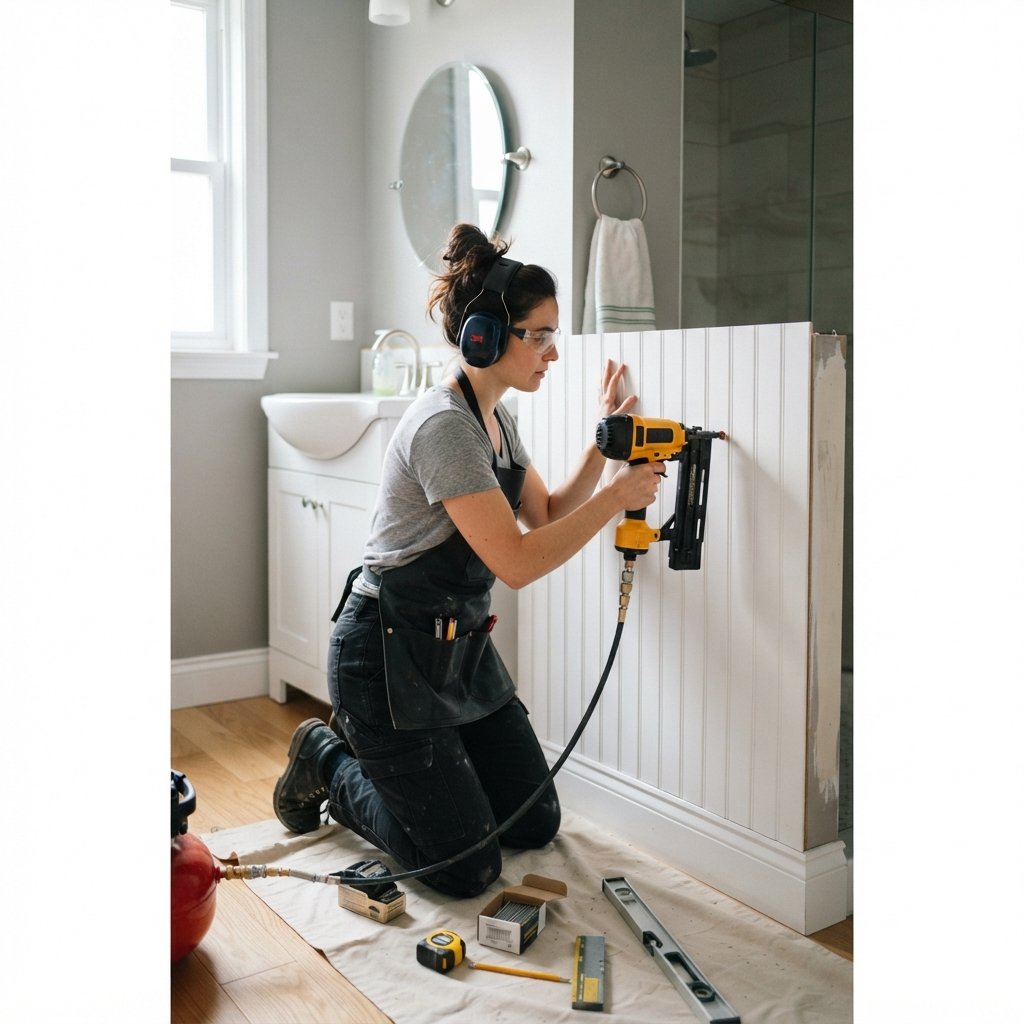
Step 14: Fasten the Beadboard
Fasten the panel according to the manufacturer’s instructions.
If using finish nails, position them where they’ll hold the panel securely and can be filled discreetly.
Where the installation requires fastening into framing, use the stud locations you marked earlier.
Be especially careful when fastening walls containing plumbing or electrical wiring.
Use appropriate fastener lengths and never blindly drive long fasteners into a wall.
Step 15: Continue Around the Bathroom
Work methodically from one section to the next.
For each panel:
- Measure.
- Mark.
- Cut.
- Dry-fit.
- Adjust.
- Apply adhesive if required.
- Position.
- Check level/plumb.
- Fasten.
Don’t assume every panel can be cut to exactly the same height if the room is irregular.
Measure as you go.
Step 16: Handle Inside Corners
Inside corners rarely require absolute perfection because they can often be finished with appropriate trim or a small paintable caulk joint, depending on the beadboard system.
Still, keep gaps as small and consistent as practical.
If you’re installing individual planks, plan the corner carefully so the final board isn’t extremely narrow.
The appropriate joint treatment depends on the product and whether dimensional movement needs to be accommodated.
Follow manufacturer guidance.
Step 17: Handle Outside Corners
Outside corners are more visible and usually need a deliberate finish.
Depending on the beadboard system, you might use:
- Manufacturer-recommended corner trim
- Wood corner molding
- Another compatible trim detail
Choose the corner solution before installing the adjoining panels so you know how much space to leave.
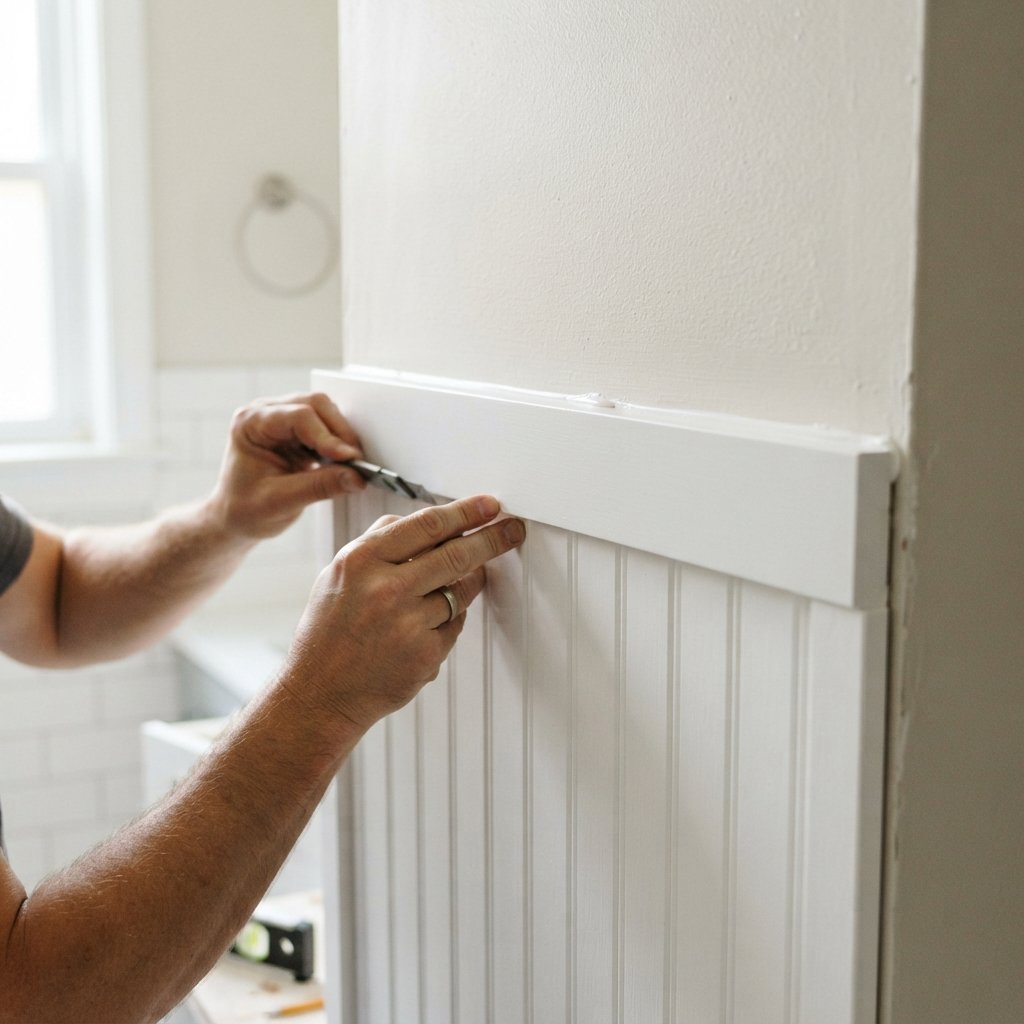
Step 18: Install the Top Trim
Once the beadboard is installed, add the top cap.
This is what turns a wall of vertical paneling into finished wainscoting.
Options include:
- Simple flat trim
- Chair rail
- Small cap molding
- Layered trim combination
For a clean transitional look, a simple cap often works beautifully.
Measure each wall carefully.
Make appropriate miter or cope cuts where required by the trim design.
Fasten the trim securely using an installation method appropriate for the material and wall.
Step 19: Install or Reinstall Baseboard
Your beadboard may terminate at an existing baseboard, sit behind new baseboard, or integrate with another bottom trim detail.
The exact approach depends on:
- Beadboard thickness
- Existing trim
- Desired profile
- Manufacturer instructions
Pay attention to how the beadboard and baseboard interact with door casing.
A clean transition makes the project look professionally planned rather than added as an afterthought.
Step 20: Fill Nail Holes
Use a filler appropriate for the trim and beadboard material.
Fill visible fastener holes.
Allow the filler to dry as directed.
Then sand lightly where the product permits.
Avoid overfilling bead grooves or decorative details.
Step 21: Caulk the Appropriate Seams
Paintable caulk can help create a finished appearance at appropriate stationary joints, such as where trim meets a wall.
Potential areas include:
- Top trim against the wall
- Trim joints
- Certain corner transitions
- Baseboard transitions
However, don’t automatically caulk every seam in every beadboard product.
Some materials require expansion space.
Follow the manufacturer’s instructions regarding joints, movement, and sealants.
Use a caulk suitable for the bathroom environment and the surfaces involved.
Step 22: Prime the Beadboard
Whether primer is needed depends on the product.
Pre-primed beadboard may still require spot priming where you’ve cut, filled, or exposed raw material.
Unprimed wood or engineered wood generally requires a suitable primer.
Pay particular attention to cut edges where the manufacturer calls for sealing.
Moisture-sensitive products can absorb humidity through exposed material.
Follow the beadboard and coating manufacturers’ instructions.
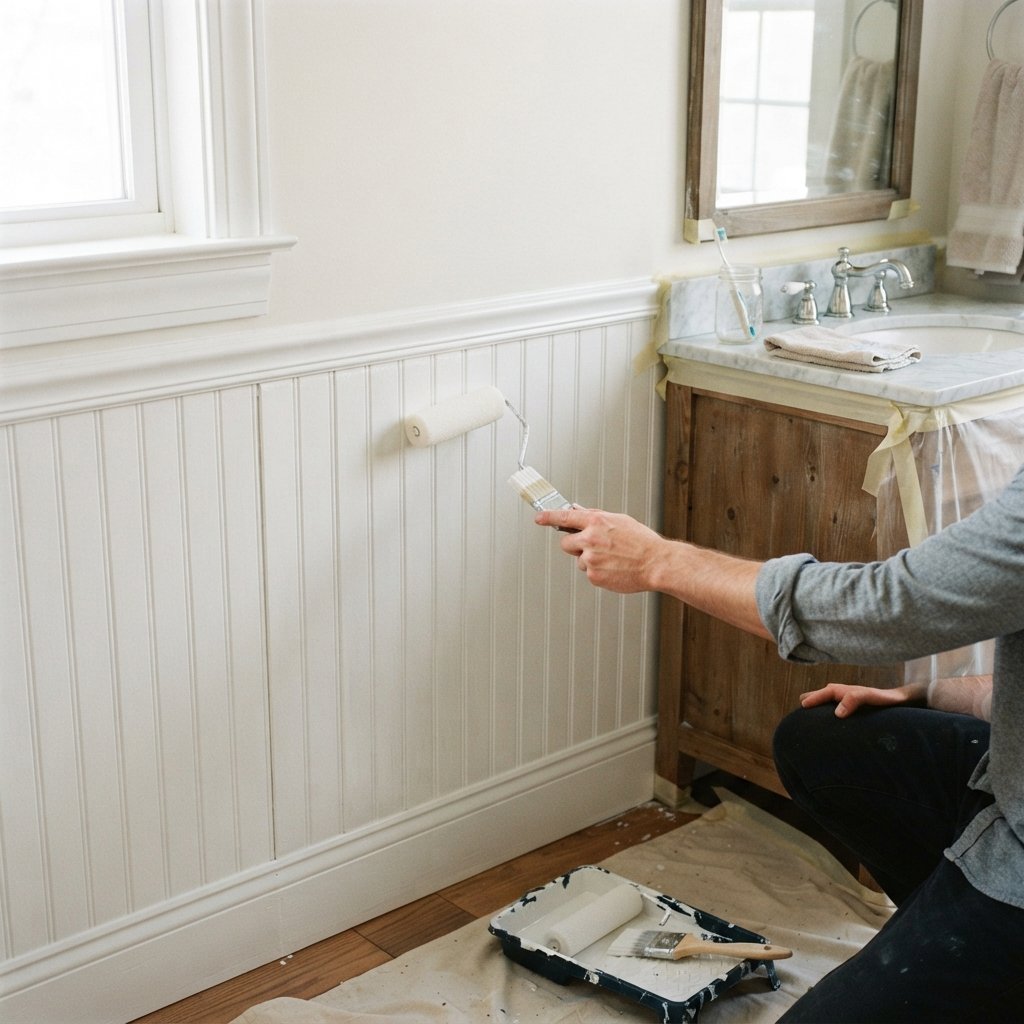
Step 23: Paint With Bathroom-Appropriate Paint
Choose an interior coating suitable for bathrooms and compatible with your primer and beadboard.
Bathroom paint should be able to handle the room’s humidity and cleaning requirements.
Follow the paint manufacturer’s recommendations for:
- Surface preparation
- Primer
- Number of coats
- Dry time
- Recoat time
- Ventilation
- Full cure
Don’t assume “dry to the touch” means fully cured.
Avoid exposing fresh paint to heavy moisture or aggressive cleaning until it has cured as directed.
What Paint Finish Is Best for Bathroom Beadboard?
There isn’t one universal sheen that’s right for every project.
Many homeowners prefer a washable finish with some sheen for bathroom trim and beadboard because it is easier to wipe than a very flat coating.
But modern paint formulations vary considerably.
Instead of choosing based on sheen alone, look for a coating specifically recommended by its manufacturer for bathroom conditions and the substrate you’re painting.
You can also create subtle contrast by using:
- A slightly more washable sheen on beadboard and trim
- A softer wall finish above
Keep the color consistent for a subtle look or use different colors for more contrast.
What Color Should You Paint Bathroom Beadboard?
White is classic, but it isn’t the only choice.
White Beadboard
Bright and timeless.
Works with almost every decorating style.
Warm White
Softer than a crisp white and beautiful with warm wood.
Cream
Ideal for traditional or cottage bathrooms.
Sage Green
Creates a relaxed, earthy feel.
Blue-Gray
Works beautifully in coastal bathrooms.
Dark Green
A bold option for a small powder room.
Black or Charcoal
Can create dramatic contrast, particularly with lighter walls.
Consider how the beadboard color relates to the vanity, flooring, countertop, and wall paint.
Should Beadboard Match the Trim?
It can.
Painting the beadboard, top cap, baseboard, and door trim the same color creates a cohesive architectural look.
You can also create subtle contrast by changing the sheen.
For example, the walls above could have a softer finish while the trim and beadboard use a more washable finish where appropriate.
If you’re using two different whites, compare them carefully in the room’s lighting. Similar whites with conflicting undertones can look accidental.
How High Should Beadboard Be Behind a Vanity?
There is no fixed rule.
Consider:
- Vanity height
- Faucet
- Mirror
- Backsplash
- Outlets
- Wall lights
Sometimes it’s cleaner for the beadboard top to sit below the mirror.
In other layouts, a taller treatment can work.
Tape the proposed line onto the wall before committing.
This is much easier than deciding after you’ve already cut the panels.
Can You Install Beadboard Behind a Toilet?
In many bathroom layouts, yes, assuming the material is appropriate for the location.
The question is whether you want to remove the toilet or work around it.
Removing a toilet can provide a cleaner continuous installation, but it involves plumbing work and requires proper reinstallation and sealing.
If you aren’t comfortable removing and reinstalling a toilet correctly, hire a plumber.
Don’t create unnecessary plumbing risk purely for aesthetics.
Can You Put Beadboard Behind a Bathroom Vanity?
You can install beadboard behind a vanity in suitable locations, but whether you should depends on the renovation sequence and design.
If the vanity is staying in place, it may make more sense to install around it.
If the vanity is already being removed as part of a larger remodel, continuing the wall treatment behind it may provide flexibility for future changes.
Consider plumbing, wall attachment, backsplash details, and future accessibility.
Can You Install Beadboard Over Tile?
Potentially, but this is much more project-specific than installing over painted drywall.
You need to consider:
- Tile condition
- Adhesion
- Added wall thickness
- Trim transitions
- Electrical box depth
- Moisture exposure
- Manufacturer approval
Removing tile may be the better option in some situations.
Don’t assume an adhesive that works on drywall will bond correctly to glazed tile.
Check both the beadboard and adhesive manufacturers’ requirements.
Can You Install Beadboard Over Drywall?
Many beadboard products can be installed over sound drywall using the manufacturer’s specified method.
The wall should be:
- Structurally sound
- Clean
- Dry
- Free from unresolved moisture problems
Use compatible adhesive and fasteners where specified.
How to Finish Beadboard Around a Vanity Backsplash
This transition deserves planning before installation.
Possible approaches include terminating the beadboard neatly at:
- The backsplash
- Vanity edge
- Side splash
- Trim line
Avoid creating tiny awkward strips of material.
Draw the wall elevation first and decide which element visually terminates into which.
If water regularly splashes around the sink, use materials and finishes appropriate for that exposure.
Beadboard in a Small Bathroom
Beadboard can actually work very well in a small bathroom.
The repeated vertical lines can draw the eye upward and give plain walls more architectural character.
To prevent the room from feeling busy:
- Use simple trim
- Limit decorative accessories
- Choose a restrained color palette
- Keep the top line consistent
- Avoid combining too many wall treatments
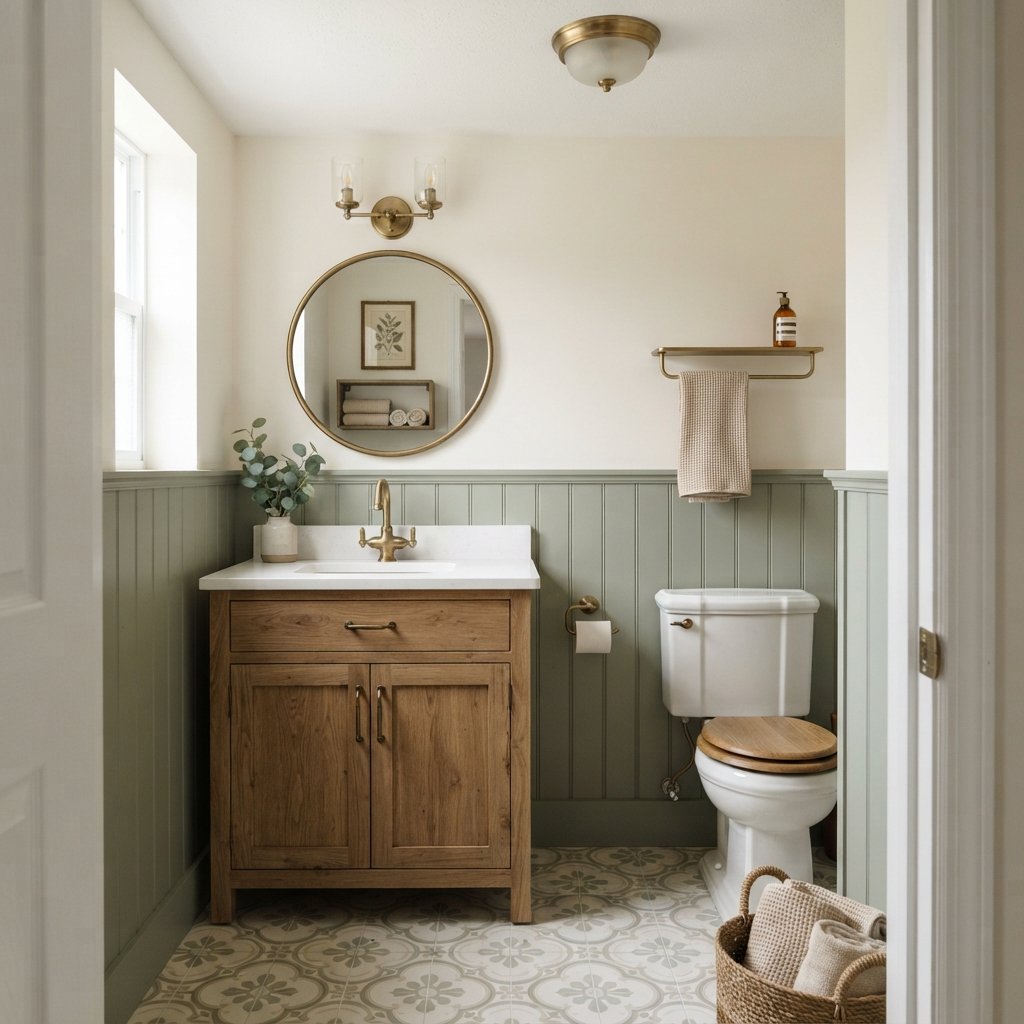
A small powder room can also be a fun place to use colored beadboard.
Bathroom Beadboard Ideas
Once you understand the installation, there are several ways to customize the look.
White Beadboard + Warm White Walls
Simple and timeless.
Sage Beadboard + Cream Walls
Warm, earthy, and relaxed.
Blue Beadboard + White Walls
Great for coastal-inspired bathrooms.
Dark Beadboard + Light Walls
Adds drama without making every wall dark.
Beadboard + Wallpaper
One of the prettiest powder-room combinations.
Install beadboard on the lower portion and wallpaper above.
Make sure all materials are suitable for the room’s moisture conditions.
Beadboard + Wood Vanity
The painted paneling gives the room architectural detail while wood adds warmth.
How to Make DIY Beadboard Look Professionally Installed
The difference is usually in the details.
Plan the Layout
Avoid awkward slivers at corners.
Keep the Top Perfectly Level
The eye notices a crooked horizontal line immediately.
Keep Panels Plumb
Vertical grooves make misalignment obvious.
Make Clean Cutouts
Especially around electrical boxes.
Plan Trim Before Panels
Know how corners and transitions will be finished.
Fill Fastener Holes Carefully
Don’t leave visible divots.
Use Caulk Strategically
Clean joints matter, but don’t interfere with required material movement.
Paint Carefully
Watch for paint pooling inside the grooves.
Don’t Rush Drying Times
Allow fillers, caulk, primer, and paint to dry or cure according to their instructions.
Common Beadboard Installation Mistakes
Choosing the Wrong Material for a Bathroom
Check moisture suitability before purchasing.
Installing Over Moisture Damage
Fix the underlying problem first.
Assuming the Floor Is Level
Use a level reference line.
Skipping the Layout
Plan seams and corners before cutting.
Cutting Without Dry-Fitting
Test every complicated piece first.
Forgetting About Added Wall Thickness
Beadboard affects electrical boxes and trim transitions.
Using Incompatible Adhesive
Check both materials.
Driving Fasteners Without Considering Hidden Utilities
Know where plumbing and electrical wiring may be located.
Caulking Expansion Joints
Some products require movement space.
Painting Too Soon
Follow cure and recoat instructions.
Using Standard Beadboard in Direct-Wet Areas
Use a system specifically designed for those conditions.
Bathroom Beadboard Safety Tips
This project combines power tools, electricity, potentially hidden plumbing, adhesives, and coatings.
Keep these basics in mind:
- Wear appropriate eye and hearing protection.
- Use suitable dust protection when cutting materials that generate fine dust.
- Provide adequate ventilation when using adhesives, primers, caulks, and paint.
- Follow all product safety instructions.
- Turn off electrical circuits before working around electrical boxes and verify they’re de-energized.
- Use caution when fastening walls containing wiring or plumbing.
- Keep tools and cords away from wet surfaces.
- Don’t perform plumbing or electrical modifications beyond your knowledge and local requirements.
- Use stable work platforms rather than balancing on bathroom fixtures.
- Follow local building and electrical requirements where applicable.
When electrical, plumbing, structural, mold, or significant moisture problems are involved, professional help may be the appropriate choice.
FAQ: How to Install Beadboard in a Bathroom
Is beadboard good for bathrooms?
It can be an excellent decorative wall treatment in bathrooms when the product is suitable for the moisture conditions and is installed and finished according to manufacturer instructions.
Is MDF beadboard okay in a bathroom?
Some engineered products may be approved for certain bathroom locations, while others may not tolerate elevated moisture well. Check the specific manufacturer’s instructions. Avoid assuming standard MDF is suitable for direct-wet areas.
Does bathroom beadboard need to be waterproof?
That depends on its location. Walls outside direct-wet areas generally have different requirements from shower walls. Anything exposed to regular direct water should use an appropriate water-resistant or waterproof wall system designed for that application.
Do you glue or nail beadboard?
Many installations use adhesive, fasteners, or both. Follow the instructions for your specific beadboard product and substrate.
Do you need drywall behind beadboard?
Beadboard is commonly installed over existing drywall, but exact substrate requirements vary by product.
Do you need to prime beadboard before painting?
That depends on whether the product is unfinished or pre-primed and whether cuts expose raw material. Follow the beadboard and coating manufacturers’ recommendations.
Should you caulk beadboard seams?
Some stationary trim transitions can be caulked for a finished appearance, but certain beadboard materials require expansion gaps. Don’t seal movement joints unless the manufacturer permits it.
Can beadboard go around a bathtub?
Possibly in areas that receive only incidental moisture if the product is approved for that location. Areas receiving regular direct water need a wall system specifically intended for wet conditions.
Can a beginner install bathroom beadboard?
A straightforward room can be a manageable DIY project for someone comfortable with accurate measuring, cutting, fastening, trim work, and painting. Complicated plumbing, electrical modifications, wet-area detailing, or serious moisture issues may require professional help.
Final Thoughts
Learning how to install beadboard in a bathroom is mostly about careful planning and finishing.
The actual wall treatment is relatively straightforward:
Plan the height.
Measure the room.
Lay out the panels.
Establish a level reference.
Cut and dry-fit each section.
Install the beadboard according to the manufacturer’s instructions.
Add trim.
Fill, caulk where appropriate, prime, and paint.
But don’t overlook the bathroom-specific details.
Choose a material suitable for the moisture exposure, fix leaks or condensation problems before covering walls, protect exposed edges as directed, maintain proper ventilation, and use a paint system intended for the environment.
Take extra care around electrical boxes and plumbing, and never treat decorative beadboard as a substitute for a properly designed waterproof wall system in a shower or other direct-wet location.
Once those practical details are handled, beadboard is a beautiful way to give an ordinary bathroom more architectural character.
Whether you paint it classic white, muted sage, blue-gray, or a dramatic dark color, those simple vertical lines can make a builder-basic bathroom feel much more finished—without requiring a complete renovation.

